Maximizing functional space through efficient garage storage shelving systems transforms disorganized workspaces into streamlined, safe, and highly productive environments. Garages frequently collect an overwhelming assortment of automotive supplies, home improvement tools, sports gear, and seasonal bins, causing severe floor clutter and restricted vehicle clearance. Implementing targeted shelving layouts restores structural order by shifting heavy equipment onto secure wall frameworks, overhead ceiling channels, and mobile floor carts. In this detailed garage organization tutorial, you will explore ten comprehensive shelving strategies engineered for maximum utility, ranging from heavy-duty ceiling-mounted racks and 2×4 lumber wall systems to modular French cleat setups and sliding tote storage towers. Readers will gain structured, actionable instructions on load-bearing mechanics, stud wall fastening, structural lumber joining, and moisture-resistant finishing techniques. Mastering these diverse shelving concepts enables homeowners to recover valuable square footage, safeguard valuable power tools, eliminate tripping hazards, and optimize vertical storage volume with modern design precision. By following the clear procedures outlined in this guide, you will acquire the technical skills required to evaluate wall load capacities, execute clean pocket-hole joints, secure masonry fasteners, and establish a permanent, organized utility setup.
The strong popularity of DIY garage shelving concepts across curated Pinterest ideas and home organization platforms stems from a universal need for practical utility, spatial efficiency, and clean aesthetic lines. Contemporary homeowners seek practical storage solutions that eliminate ground clutter without demanding high-cost contractor fees or flimsy commercial assemblies. The design relevance centers on structural versatility; customizable shelving frameworks permit tailored shelf heights, modular accessories, and expandable drop-down storage suited for evolving equipment inventories. For beginners building their first utility setup, these woodworking and mounting projects offer a beginner friendly DIY approach that develops core carpentry skills using basic materials and hand tools. Furthermore, customized shelving systems accommodate heavy bulk totes, oversized tool cases, and awkward garden tools that standard cabinets cannot fit. By converting empty vertical walls and ceiling space into functional storage zones, these systems preserve crucial floor clearance for parked vehicles and workshop benches. This synergy of accessible carpentry, robust weight handling, and disciplined visual organization makes custom garage shelving a timeless, high-impact home improvement project.
Constructing durable, load-bearing garage shelving requires careful workspace preparation, proper lumber selection, and essential safety measures before cutting starts. Standard framing materials include kiln-dried 2×4 and 2×6 construction lumber, structural three-quarter-inch CDX plywood or sanded OSB panels, heavy-gauge steel angle brackets, and three-inch structural framing screws. Key assembly tools include a laser level, a digital stud finder, a sliding compound miter saw, a cordless impact driver with drill bits, a pocket-hole jig, a tape measure, and a chalk line. Preparation begins by clearing the garage floor perimeter, wiping down drywall surfaces, and marking vertical wall stud centers with a carpenter pencil across the target installation area. Examine the garage floor slope and foundation stem walls to accommodate uneven concrete baselines before locking in vertical upright dimensions. Prioritize personal safety by wearing high-grade protective eye goggles, a dust respirator, and supportive steel-toe footwear throughout the build. Organizing fasteners into partitioned hardware trays and staging cut lumber by dimension ensures a streamlined, professional build workflow.
Heavy-Duty 2×4 Lumber Wall-Mounted Storage Unit
Step-by-Step Guide
The heavy-duty 2×4 lumber wall-mounted storage unit provides an exceptionally sturdy, multi-tiered shelving framework engineered to handle hundreds of pounds of boxed gear and power tools. This design relies on structural wall-mounted rear ledger boards paired with rigid front vertical posts and cross-bracing struts, transferring load forces securely into wall studs and concrete floors. By running horizontal support stringers every twenty-four inches, the structure prevents plywood decking from sagging under dense equipment loads. The open-frame architecture ensures rapid visibility and air circulation, preventing moisture buildup behind storage containers while allowing custom shelf spacing for large plastic bins.
Begin by locating and marking all wall studs along your target garage wall using a reliable digital stud finder. Fasten horizontal 2×4 ledger boards to the wall studs at your selected shelf heights using two structural wood screws per stud intersection, verifying level alignment with a four-foot spirit level. Construct the matching front ladder frames on the floor by joining vertical 2×4 posts to horizontal stretchers using pocket-hole joinery and wood glue. Stand the front frame upright, attaching horizontal cross-beams between the wall ledger and the front frame to lock in a twenty-four-inch shelf depth. Cut three-quarter-inch CDX plywood sheets to size, resting them flush inside the frame bays, and secure the decking with two-inch wood screws every eight inches along the structural perimeter.
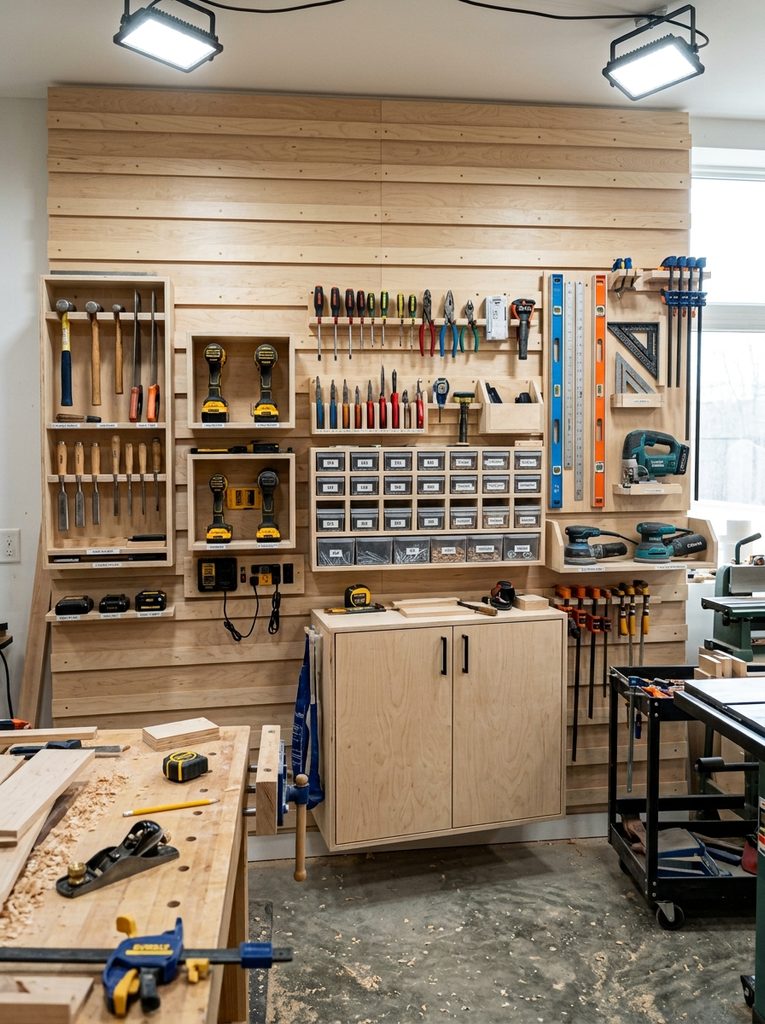
Overhead Ceiling-Mounted Heavy Totes Storage Rack
How to Create
The overhead ceiling-mounted heavy totes storage rack utilizes underused upper ceiling volume above garage doors and parking spaces, freeing up essential lower wall and floor space. This suspended framework uses vertical drop brackets fastened directly into ceiling joists, supporting a reinforced horizontal frame fitted with strong metal wire decking or plywood panels. It is engineered specifically for long-term storage of holiday decorations, seasonal camping gear, and archive boxes that require infrequent access. Elevating bulky items near the ceiling keeps valuable floor space clear for vehicle access, bicycle storage, and daily work activities.
Use a stud finder to locate the direction and spacing of the overhead ceiling joists, snapping chalk lines across the installation perimeter. Secure vertical 2×4 or slotted angle steel drop posts to the joists using lag screws, ensuring fasteners bite deeply into solid wood framing. Assemble the horizontal perimeter frame using 2×4 lumber joined at the corners with heavy-duty structural corner brackets. Fasten the horizontal frame to the bottom of the vertical ceiling drop posts, verifying uniform height and level alignment across all four corners. Lay pre-cut half-inch plywood sheets or welded wire grids across the frame base, screwing them down firmly to create a stable, suspended platform for storage totes.
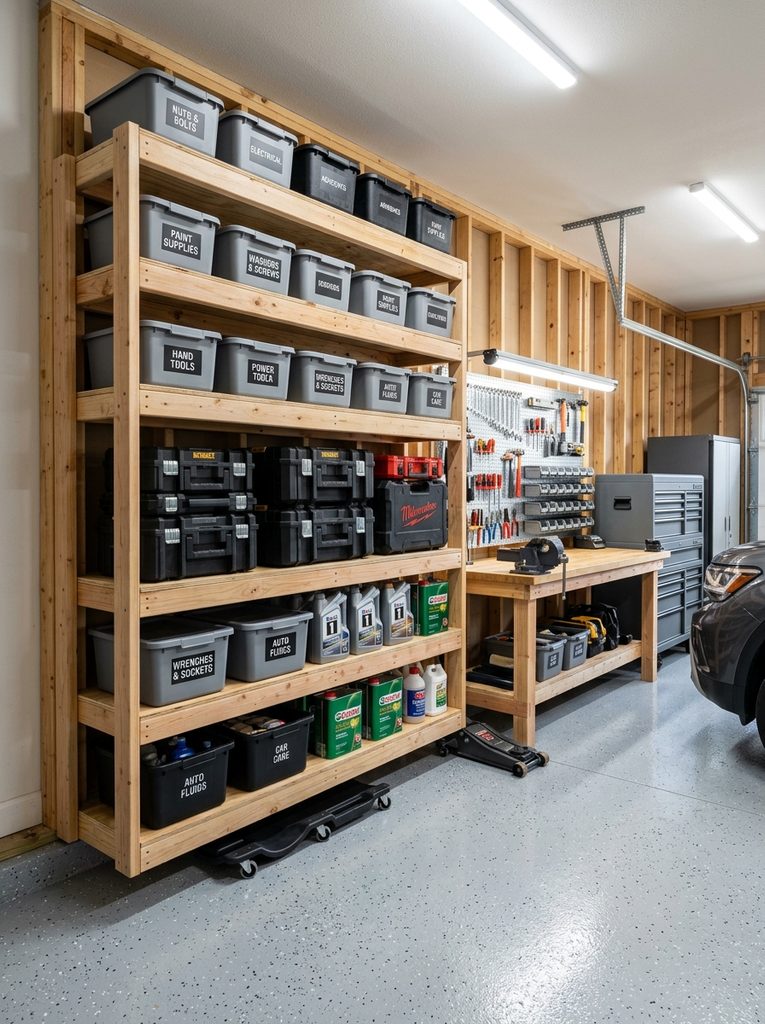
Modular French Cleat Tool and Cabinet Wall System
Execution Process
The modular French cleat tool and cabinet wall system provides a fully adaptable, interlocking storage layout that allows shelves, tool holsters, and small storage cabinets to be rearranged without tools. This system uses horizontal 1×4 or three-quarter-inch plywood strips ripped at a precise forty-five-degree bevel along their top edges and anchored to wall studs. Matching beveled cleats attached to the rear of custom-built shelves lock securely over the wall strips via gravity and friction. This design allows custom configuration of power tool docks, drill charging stations, screw organizers, and deep utility shelves across a clean, unified workshop wall.
Rip eight-foot sheets of three-quarter-inch Baltic birch or cabinet-grade plywood into four-inch-wide strips using a table saw set to a forty-five-degree blade angle. Mount the beveled cleat rails horizontally across the garage wall studs with the angled edge pointing upward and facing inward, spacing the rails eight inches apart vertically. Verify that each cleat is level before securing with three-inch wood screws driven through the drywall into every underlying wall stud. Build individual utility shelves and storage boxes, attaching a matching downward-facing forty-five-degree cleat across the top back edge of each module. Hang the finished storage shelves by slotting the rear cleats directly over the wall rails, testing weight distribution and repositioning modules to suit your workflow.
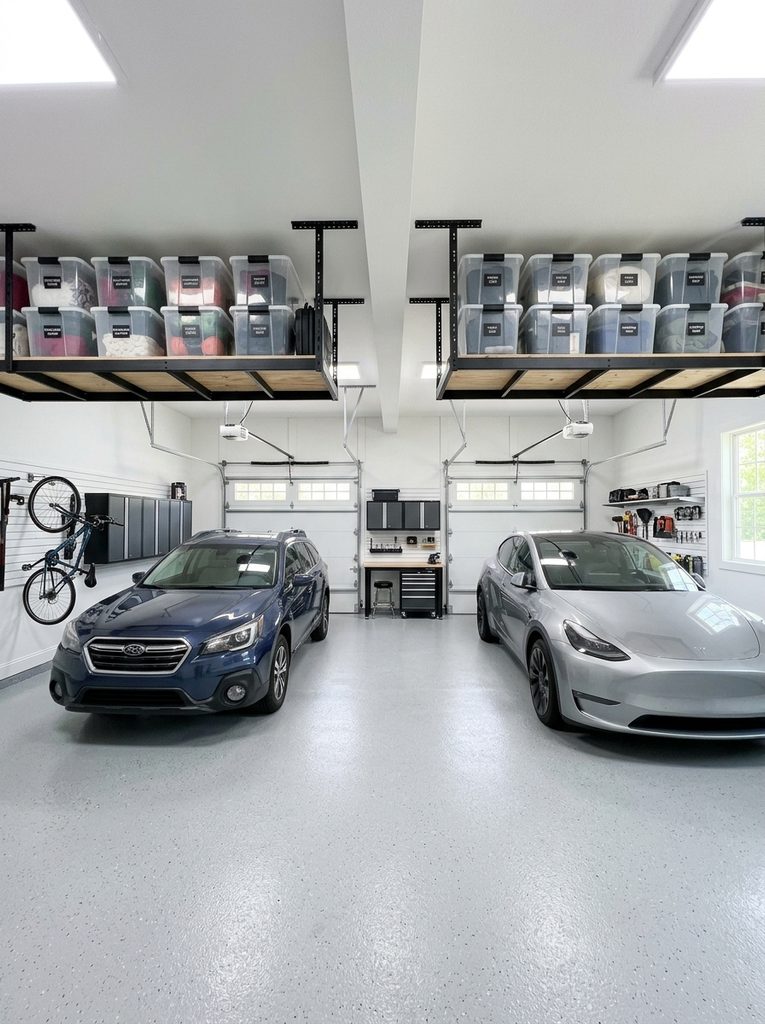
Sliding Tote Storage Tower with Dedicated Channel Rails
Setup Method
The sliding tote storage tower with dedicated channel rails eliminates the frustration of unstacking heavy plastic bins to access bottom boxes. This vertical tower design features individual wood or angle-iron guide rails that support the structural lips of standard plastic storage totes. Each bin slides horizontally in and out like a cabinet drawer along its dedicated runner channel, providing instant individual access without disturbing surrounding containers. The compact vertical design concentrates significant storage capacity into a narrow footprint, making it an excellent solution for high-density storage of hardware, sporting goods, and crafting supplies.
Determine the exact dimensions of your standard plastic storage totes, measuring the width directly beneath the exterior structural top lip. Build two identical side ladder panels using 2×4 vertical corner uprights connected by horizontal 2×2 wood runners, spacing the runners vertically to provide three inches of clearance above each tote. Stand the side ladders upright, joining them across the top, middle, and bottom with horizontal 2×4 cross-stretchers cut to match the tote width plus one-quarter inch of operating tolerance. Attach diagonal corner braces to the rear of the tower to eliminate lateral racking forces. Slide plastic storage bins into each rail set, labeling bin fronts with bold identification tags to maintain organized category sorting.
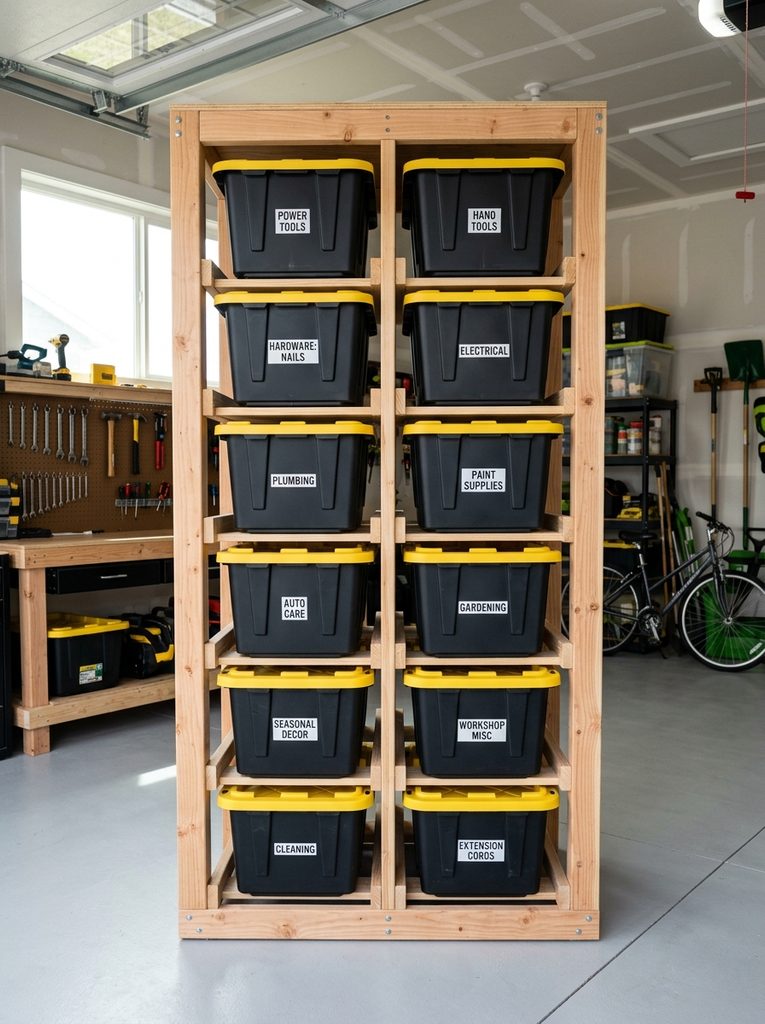
Mobile Locking-Caster Plywood Utility Cart Shelving
Step-by-Step Guide
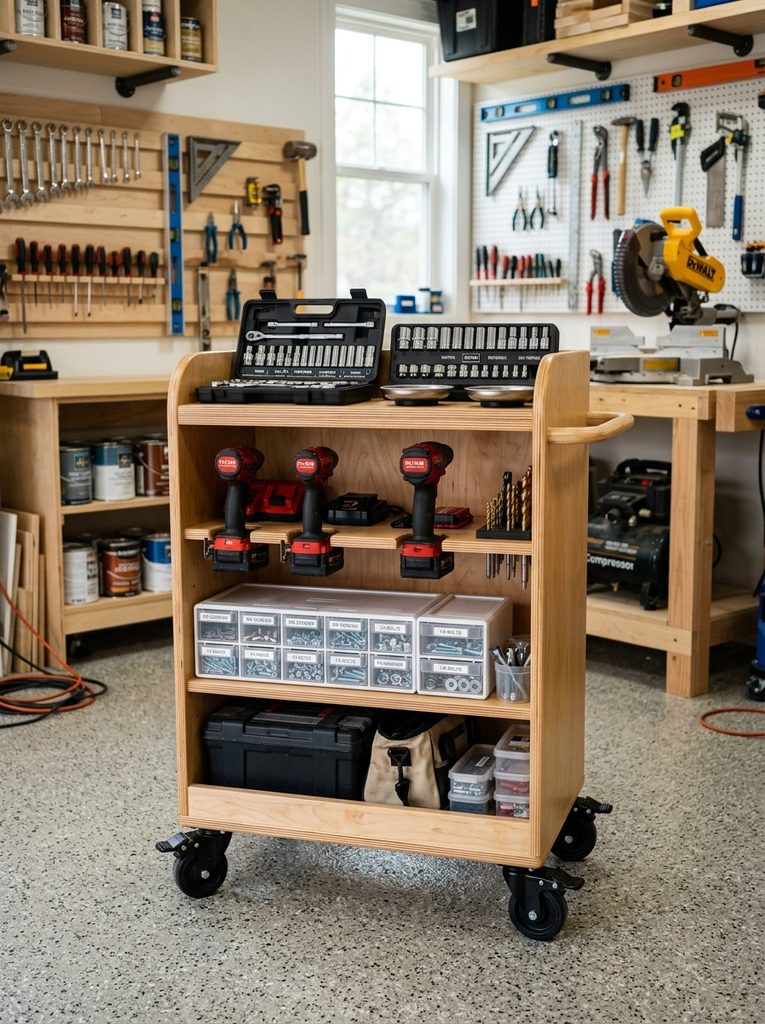
The mobile locking-caster plywood utility cart shelving combines multi-tier vertical storage with portable mobility, allowing heavy tools and materials to roll directly to your workspace. Constructed from sturdy three-quarter-inch plywood panels, this cart features reinforced shelf bays and high-capacity ball-bearing caster wheels that handle heavy loads effortlessly. The perimeter lip around each shelf tier prevents tools and hardware containers from sliding off during transport across uneven concrete garage floors. This mobile system is particularly useful for workshops with limited space, as the entire unit can be tucked into tight wall alcoves or rolled out of the way for vehicle parking.
Cut three identical shelf platforms and two structural side panels from three-quarter-inch cabinet-grade plywood using a circular saw and straightedge guide. Mill shallow half-inch dados along the interior face of the side panels to receive the shelf edges, or secure two-inch pocket-hole screws from the underside of each shelf into the sides. Apply wood glue along all joints, clamping the structure square until the adhesive cures completely. Secure a heavy-duty three-quarter-inch plywood base plate underneath the lower shelf, bolting four four-inch locking swivel casters through the base using carriage bolts and nylon lock nuts. Sand all edges smooth to prevent splinters, and apply two coats of clear polyurethane to seal the wood from shop spills.
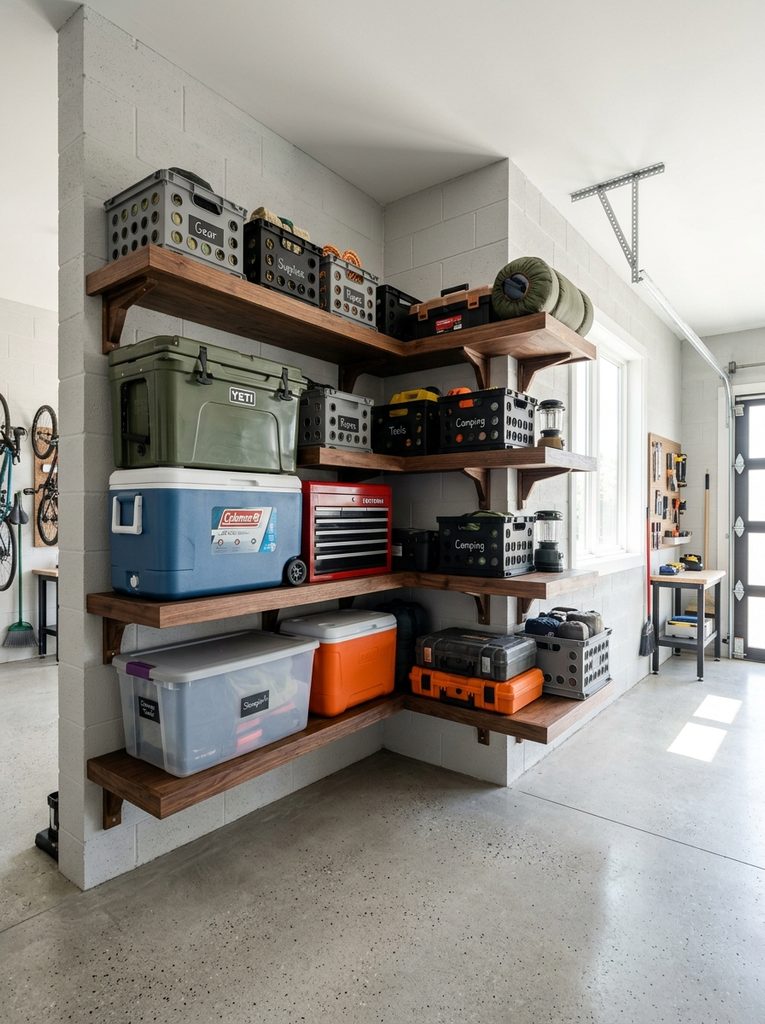
Corner-Optimized L-Shaped Wrap-Around Wall Shelves
How to Make
The corner-optimized L-shaped wrap-around wall shelves convert dead corner zones into smooth, continuous storage platforms that maximize usable garage perimeter space. Standard rectangular shelving units placed side-by-side create blocked corners and inaccessible dead zones, whereas a continuous L-shaped design maintains open access throughout the corner bend. By anchoring internal structural supports to intersecting corner studs without center vertical posts, the design preserves unobstructed shelf spans for bulky items like coolers, spare tires, and camping tents. This layout is an exceptional choice for small single-car garages where every foot of usable wall space is critical.
Mark the height lines for your shelves continuously around the intersection of two adjoining garage walls using a laser level. Fasten continuous 2×4 ledger boards into the wall studs along both walls using three-inch structural framing screws. Construct the outer front L-frame using 2×4 rails joined at the corner with an overlapping lap joint, supporting the outer corner with a diagonal brace anchored back to the lower wall stud. Cut three-quarter-inch plywood decking to match the L-profile, notching the rear corner cleanly to wrap around wall drywall profiles. Secure the plywood decking into the perimeter framing with two-inch countersunk screws, sanding the intersecting wood seams flush to provide a continuous, snag-free surface.
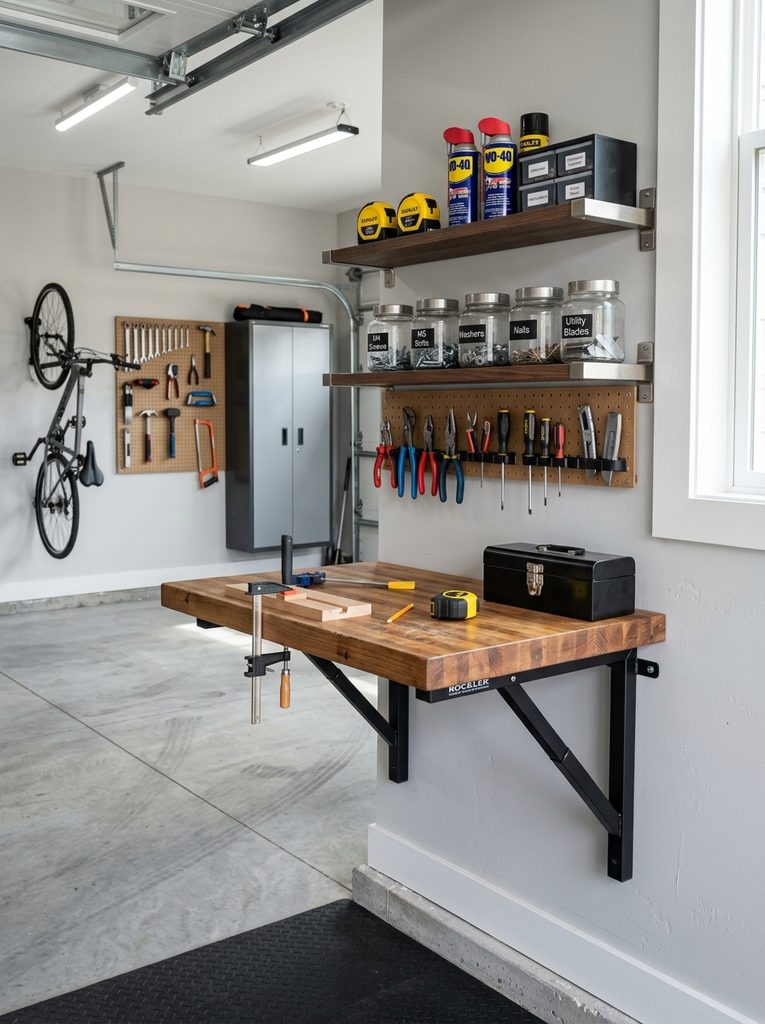
Fold-Away Wall-Mounted Drop-Leaf Workbench Shelving
Execution Process
The fold-away wall-mounted drop-leaf workbench shelving combines compact utility shelving with a heavy-duty folding work surface that collapses flat against the wall when not in use. The top upper fixed shelves store daily maintenance fluids, hand tools, and hardware bins, while the lower folding work surface provides a stable platform for home improvement projects. Heavy-duty locking folding brackets or hinge-and-chain supports allow the lower work table to swing down in seconds, instantly clearing space for vehicle parking. This dual-purpose design provides an efficient solution for small spaces, transforming cramped single-car garages into functional workspaces.
Mount two horizontal 2×4 mounting cleats securely across three wall studs at your chosen workbench height using three-inch structural screws. Build a fixed twelve-inch-deep utility shelf frame above the workbench area, securing it to upper wall studs to hold charging stations and hardware cases. Construct the folding work surface using double-layered three-quarter-inch plywood edged with hardwood banding to create an inch-and-a-half-thick butcher block style surface. Attach two heavy-duty steel folding shelf brackets rated for five hundred pounds to the lower wall cleat, bolting them securely to the underside of the folding tabletop. Test the folding mechanism to ensure smooth latching, applying paste wax to the tabletop surface for a durable finish.
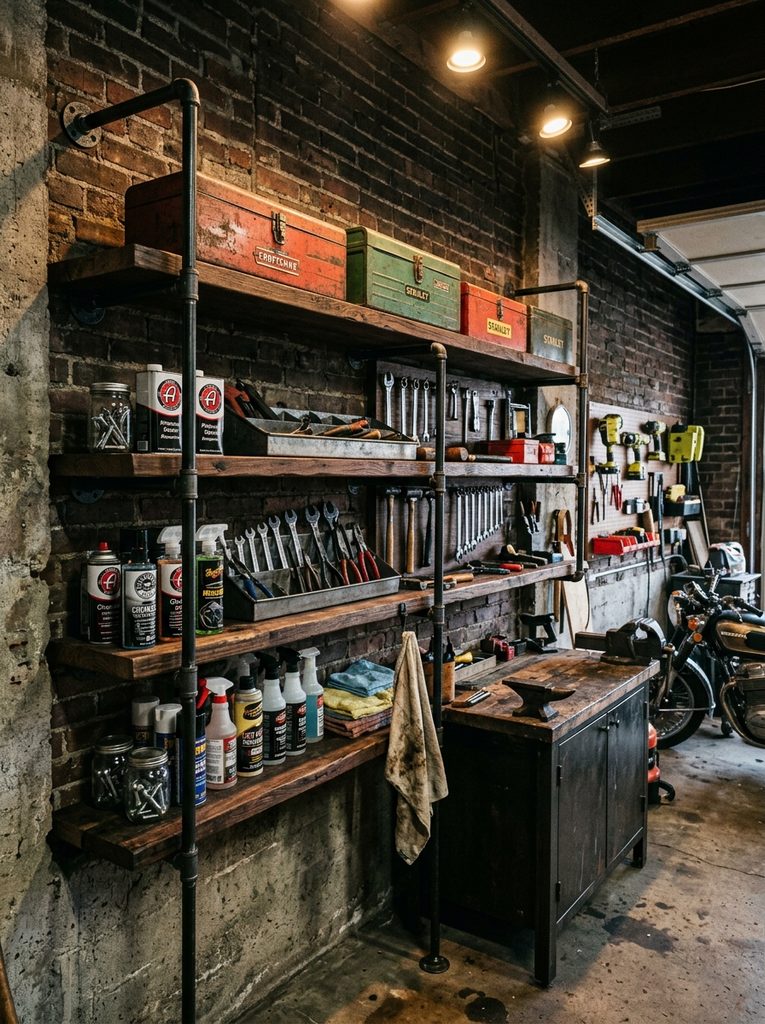
Galvanized Steel Pipe and Reclaimed Timber Industrial Shelves
Setup Method
The galvanized steel pipe and reclaimed timber industrial shelves combine heavy-duty load capacity with rugged aesthetic appeal. This system uses threaded one-inch galvanized iron plumbing pipes, floor flanges, and tees as structural uprights, supporting thick solid timber boards or construction-grade planks. The pipe flanges anchor directly into wall studs, providing high shear strength that resists sagging under heavy automotive parts and cast iron tools. The open pipe framework provides an industrial modern design that resists ambient garage humidity and temperature swings without warping or rusting.
Locate your wall studs and mark horizontal alignment lines for your pipe mounting flanges using a spirit level. Fasten one-inch galvanized floor flanges to the wall studs using three-inch lag bolts driven directly into the center of the wood framing. Thread twelve-inch horizontal pipe nipples into each wall flange, attaching ninety-degree elbows or structural tees to support vertical pipe connectors that link multiple shelf levels. Sand rough-sawn two-inch-thick solid wood planks, smoothing the surface while preserving natural saw marks, and finish with a walnut penetrating stain. Drill matching holes through the rear of the wood planks or secure the wood atop the horizontal pipes using metal pipe conduit clamps screwed into the underside.
Slotted Metal Angle-Iron Adjustable Commercial-Style Racks
Step-by-Step Guide
The slotted metal angle-iron adjustable commercial-style racks utilize pre-punched steel structural angles to create a customizable, fire-resistant, and high-capacity garage storage station. The evenly spaced slots running along the steel posts allow individual shelf tiers to be raised, lowered, or expanded as storage needs evolve. This modular steel construction eliminates the need for complex woodworking machinery, requiring only a metal-cutting saw and basic socket wrenches for rapid assembly. This system provides a practical, low-maintenance storage solution that handles heavy toolboxes, machine accessories, and chemical containers without deteriorating from oil leaks or solvents.
Measure the height, width, and depth of your available wall space, marking the steel upright cutting lines with a wax pencil. Cut slotted steel angle-iron posts to length using a metal-cutting chopsaw or angle grinder fitted with an abrasive cutoff wheel, deburring rough metal edges with a metal file. Assemble the two side rectangular ladder frames by joining horizontal angle-iron crossbars to the vertical posts using grade-five zinc-plated bolts, lock washers, and nuts. Connect the two side frames with front and rear horizontal angle stretchers to establish the shelving depth, tightening all structural bolts securely with a ratcheting socket wrench. Drop pre-cut half-inch exterior plywood or galvanized steel mesh panels into each shelf bay to complete the rack assembly.
Shallow Depth Stud-Bay In-Wall Recessed Shelves
How to Make
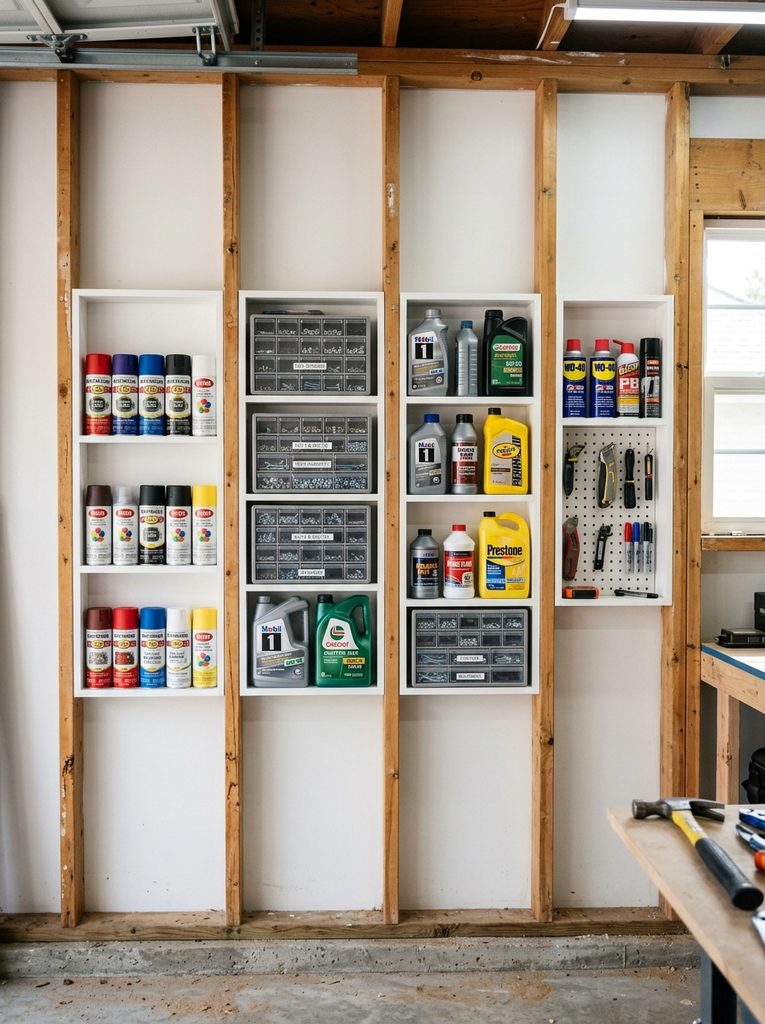
The shallow depth stud-bay in-wall recessed shelves maximize storage utility by turning the empty structural cavities between wall studs into functional, organized storage bays. Standard garage walls built with 2×4 framing contain three-and-a-half inches of hollow interior depth behind the drywall that typically goes unused. By framing small horizontal shelves directly inside these exposed wall stud bays, you create dedicated storage compartments for spray paint cans, oil bottles, screw cases, and small hand tools. This recessed approach keeps small containers organized and visible while keeping the outer wall flush, preserving vehicle door clearance in narrow garages.
Identify an uninsulated, interior partition garage wall free of hidden plumbing pipes, electrical conduit, and HVAC ducts using an electronic multi-sensor scanner. Cut out the drywall between two adjacent vertical studs using a sharp drywall saw, cleaning out any debris from the interior stud bay. Cut three-quarter-inch pine or plywood boards to match the three-and-a-half-inch depth and the fourteen-and-a-half-inch standard width of the cavity. Fasten the horizontal shelf cleats directly into the sides of the exposed wall studs using countersunk two-inch wood screws spaced at your preferred container heights. Line the back of the stud bay with quarter-inch hardboard or pegboard, painting the interior white with semi-gloss latex paint to maximize visibility and light reflection.
Common Beginner Mistakes and How to Avoid Them
A frequent mistake made when installing garage storage shelves is mounting heavy frameworks directly into drywall using plastic hollow-wall anchors instead of securing structural screws into solid wall studs. Drywall anchors lack the shear strength needed for heavy toolboxes and storage totes, which often causes shelves to pull away from the wall and collapse. Always use an electronic stud finder to locate stud centers, driving minimum three-inch structural screws deep into framing members. Another common error is failing to account for the concrete slope built into garage floors for drainage; building rigid vertical uprights without leveling adjustments causes shelves to lean forward awkwardly. Level your horizontal ledger boards first, trimming front upright posts individually to match floor contours. Additionally, using thin, unbraced plywood decking across wide spans leads to severe sagging under weight; install intermediate 2×4 cross-braces every twenty-four inches beneath shelf panels to keep storage decks flat and stable.
Practical Tips for Better Results
Achieving professional, long-lasting results with DIY garage shelving requires systematic lumber selection, precise alignment, and proper surface sealing. Always inspect construction lumber at the yard before purchasing, choosing straight, kiln-dried boards free of extreme crowns, twists, and deep bark edges that can misalign framing. When joining 2×4 framework, use self-drilling structural wood screws rather than standard drywall screws, as brittle drywall screws snap easily under shifting loads. Apply two coats of durable exterior-grade latex paint or clear polyurethane sealers to all bare plywood and framing lumber before assembly; garage environments experience high humidity and seasonal temperature swings that cause raw wood to warp or develop surface mildew. Label the front lip of each shelf using magnetic tape or adhesive vinyl tags to establish dedicated storage categories, ensuring tools, sporting equipment, and hardware stay organized over time.
Styling, Presentation, or Organization Ideas
Coordinating your garage storage shelving with consistent storage bins, uniform color palettes, and smart lighting creates a clean, professional utility space. Use matching solid-color or clear plastic storage totes with snap-on lids to create a uniform, cohesive look across open shelving. Install slim, linkable LED shop lights directly beneath the underside of upper shelves to illuminate lower working surfaces and prevent dark shadows in lower storage bays. Organize equipment systematically by frequency of use: place heavy, rarely used seasonal containers on high top shelves, locate daily tools and automotive fluids at chest level, and reserve low floor-level bays for heavy power tools and bulky gear. Adding a strip of magnetic tool bars or metal hanging hooks along the outer wooden uprights provides accessible storage for hammers, wrenches, and extension cords, maximizing space efficiency.
Budget or Time Planning
Constructing custom garage shelving is an economical home improvement project that delivers superior storage capacity at a fraction of the cost of commercial cabinetry. A standard eight-foot-wide, multi-tiered 2×4 and plywood wall shelf build can be completed for a modest budget in lumber and fasteners, providing a durable system that lasts for years. Sourcing construction-grade dimensional lumber and utility-grade CDX plywood from local lumberyards keeps material costs low while providing ample strength for heavy storage. In terms of scheduling, a standard wall-mounted or overhead shelving project takes approximately four to six hours from initial stud layout to final decking installation. Completing all lumber cuts in batches and pre-drilling pocket holes during the initial phase significantly speeds up assembly, allowing you to finish the build in a single weekend.
Creative Expansion and Advanced Inspiration
Once you have mastered the foundational construction of garage wall shelving, you can expand your system with advanced custom add-ons and workshop integrations. Consider building dedicated pull-out drawer slides and vertical drop-down ladder storage to make use of the open spaces beneath lower shelves. You can also integrate a continuous dust collection pipe network along the rear shelf supports to keep power tool stations clean and free of sawdust. For advanced tool storage, mount metal pegboard sheets or magnetic tool strips onto the sides of vertical 2×4 posts to create accessible storage zones for clamps, levels, and cords. As your storage needs evolve, you can add lockable plywood cabinet doors across lower bays to keep expensive power tools out of sight, maintaining an organized, professional garage workspace year-round.
Leave a Reply