Wedding tablescape design defines the visual atmosphere of a reception, setting a celebratory and romantic environment for guests. A whimsical design aesthetic merges natural elements, soft pastel tones, unexpected textures, and fairy-tale accents to create an imaginative dining experience. Many couples struggle to find reception styling that balances personal charm with affordability, often encountering uniform floral arrangements that strain event budgets. This tutorial breaks down ten original DIY wedding centerpiece concepts that incorporate organic botanicals, repurposed glassware, ambient light sources, and sculptural accessories. Readers will learn how to balance table scale, construct stable mechanics without commercial floral foam, handle delicate fresh stems, and layer varied surface heights. Mastering these creative ideas allows couples, event planners, and DIY enthusiasts to translate imaginative mood boards into safe, sturdy, and striking decorative displays. From budget ideas using seasonal foliage to elaborate arrangements blending vintage heirlooms with modern design concepts, these projects provide clear, step-by-step guidance. Learning how to organize materials, prepare botanical stems, and execute balanced arrangements ensures that every reception table looks professionally finished while reflecting unique artistic flair.
Why This Idea Is Trending or Useful
Whimsical wedding decor concepts continue to dominate modern Pinterest inspiration because couples increasingly prioritize relaxed, personalized, and organic designs over rigid, formal reception aesthetics. Contemporary couples want dining spaces to feel welcoming and magical rather than stiff or overly corporate. These handcrafted centerpiece concepts provide immense practical value by significantly lowering overall floral expenses through the creative use of dried foliage, clustered glass vessels, and ambient candlelight. The design relevance stems from their adaptability; whimsical styling coordinates seamlessly with garden venues, rustic barn halls, historic estates, and minimalist style loft spaces. Because these concepts prioritize asymmetric flow, gentle natural movement, and playful decorative accents, they remain exceptionally beginner friendly. Crafters do not need commercial floristry certification to cluster mismatched bud vases, arrange moss under cloches, or intertwine dried grasses with warm micro fairy lights. This accessibility allows wedding parties and families to participate directly in the decorative process, transforming wedding preparation into a memorable collaborative milestone. The resulting handmade decor provides memorable visual warmth, giving dinner tables a bespoke aesthetic that photographs beautifully in both natural daylight and dim reception lighting.
Materials and Preparation
Executing flawless DIY centerpieces requires systematic materials gathering, floral conditioning, and proper mechanical preparation before wedding day setup begins. Essential materials include clean glass vessels, cloches, vintage brass candleholders, natural preserved sheet moss, floral frogs, biodegradable binding wire, clear floral tape, and sharp bypass pruning shears. Collect fresh and dried botanicals, ensuring you source a balance of structural greenery, focal flowers, textural secondary blooms, and delicate airy filler stems. Proper preparation begins forty-eight hours before the event with stem conditioning: trim every flower stem at a sharp forty-five-degree angle underwater, strip away all foliage below the expected water line to prevent bacterial growth, and place the blooms into clean buckets filled with lukewarm water and floral nutrient packets. Store all botanical elements in a cool, dark room away from direct airflow, heat vents, and ripening fruit to preserve freshness. Pre-assemble all non-perishable structural bases, such as cleaning glass jars, placing floral frogs into shallow dishes with floral putty, and checking battery-operated light elements ahead of time. This careful planning ensures that wedding-morning assembly flows smoothly without unexpected delays.
1. Enchanted Moss and Cloche Woodland Terrarium
Step-by-Step Guide
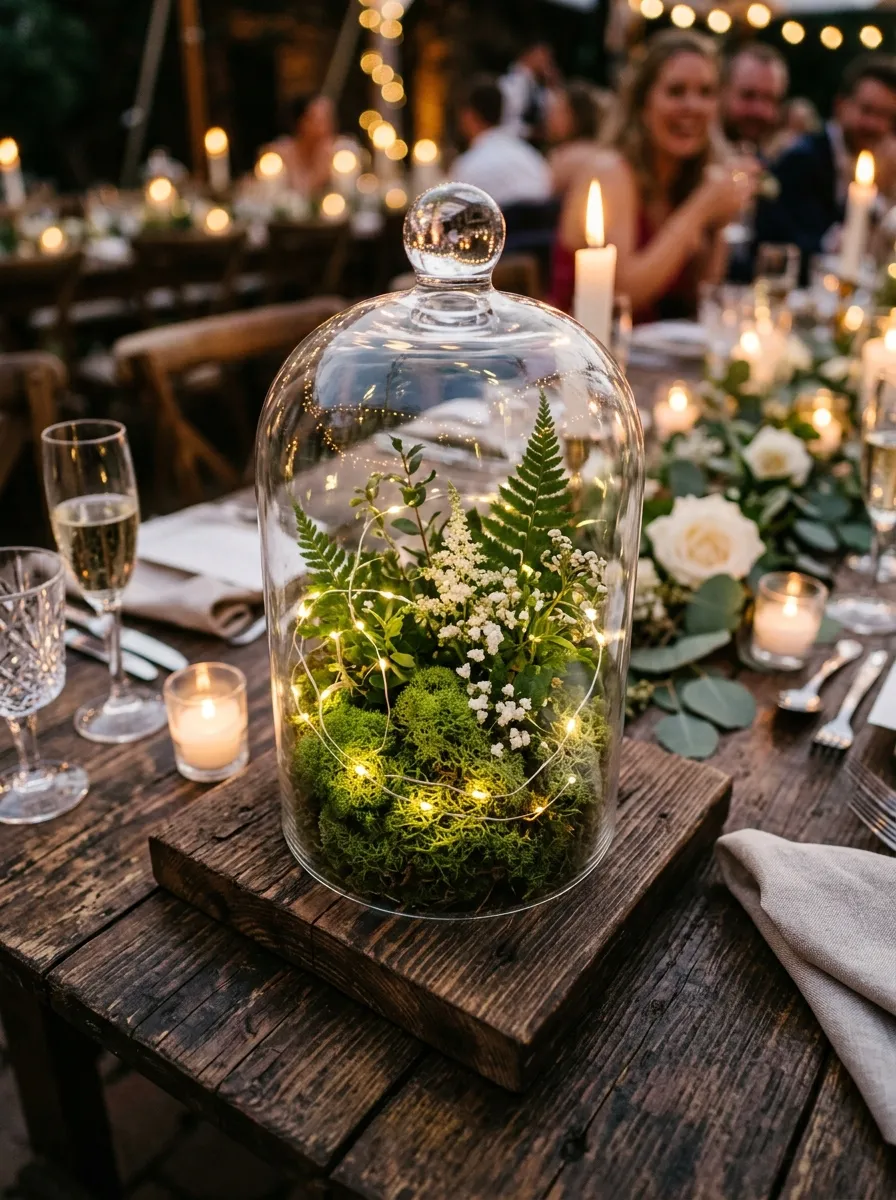
The enchanted moss and cloche woodland terrarium captures the quiet mystery of a forest floor, making it an ideal focal point for whimsical evening receptions. This concept centers on a clear glass bell jar resting over an assortment of preserved living textures, including reindeer moss, miniature ferns, tree bark, and subtle woodland florals. Instead of relying on tall, cut-flower arrangements that wilt quickly in warm rooms, this enclosed design creates an enduring, self-contained scene that stays pristine throughout long events. The transparent dome magnifies fine textural details while keeping ambient air movements from disturbing delicate organic placement. Soft botanical tones pair with deep wood textures to anchor dining tables with grounded, organic elegance. By introducing subtle LED micro-lights hidden under the moss base, the entire dome glows softly once ambient room lighting drops. This approach suits long wooden farmhouse tables or round banquet setups, offering a low-profile centerpiece that allows guests to converse easily across the table without obstructed view lines.
Begin by securing a beveled wooden or slate circular base measuring approximately eight to ten inches in diameter. Cut a small circle of parchment or wax paper to protect the wood surface from moisture before applying a thin layer of non-toxic floral adhesive across the perimeter. Press varied clumps of preserved sheet moss, chartreuse reindeer moss, and dried cushion moss onto the base to form an undulating, miniature woodland landscape. Tuck miniature sprigs of fresh maidenhair fern, star-flowered astilbe, and tiny dried mushroom caps into the moss crevices, securing them with miniature U-shaped greening pins. Carefully weave a delicate strand of warm-white copper-wire fairy lights through the moss layers, concealing the battery pack neatly beneath the hollowed base or behind a piece of decorative wood bark. Clean the interior of the glass cloche using a microfiber cloth and glass cleaner to remove all fingerprints, then lower the bell jar over the finished terrarium landscape.
2. Floating Wildflower and Hanging Bubble Clusters
How to Make
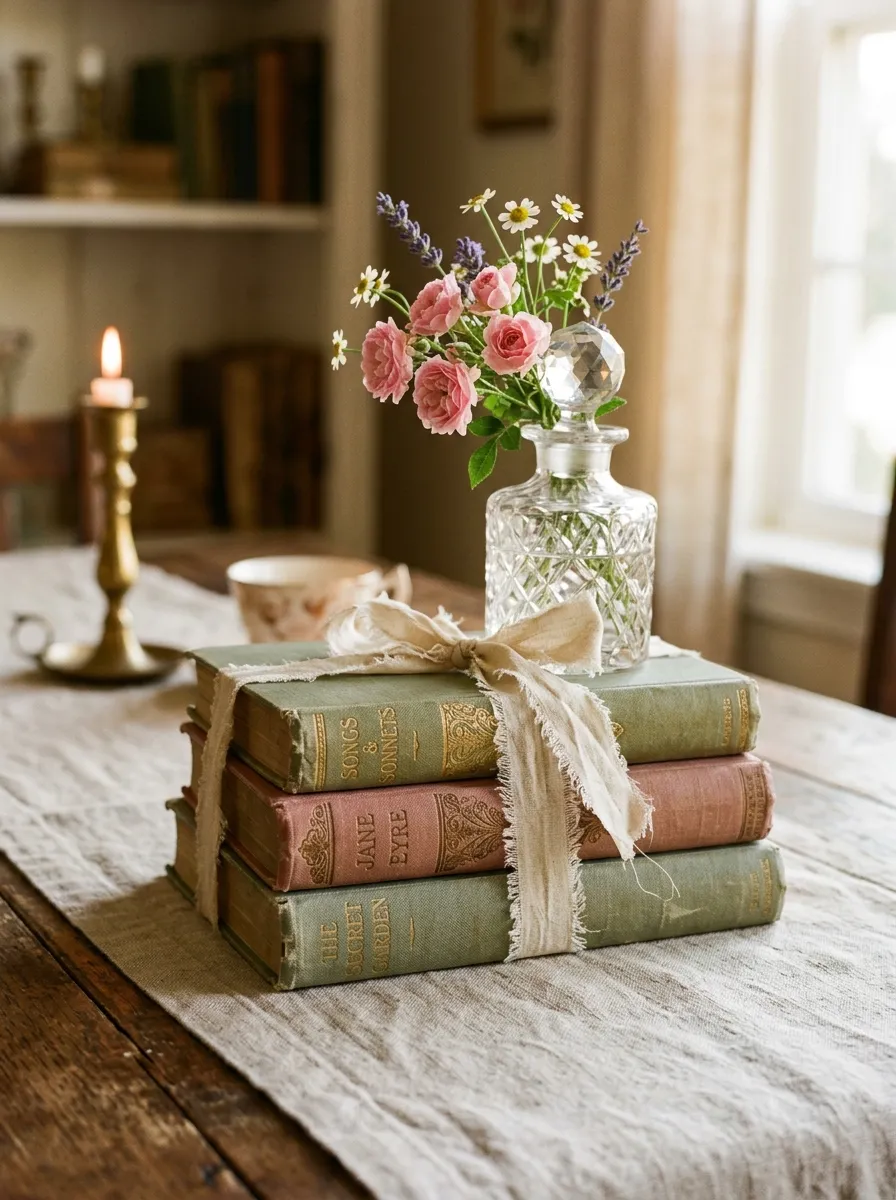
The floating wildflower and hanging bubble cluster design reimagines traditional floral arrangements by lifting delicate blooms into the vertical space above the tablescape. This installation utilizes clear spherical glass bubbles and suspended test-tube vessels hung at staggered elevations, each holding individual stems of floating wildflowers, cascading greenery, and delicate water droplets. Drawing the eye upward creates a light, airy atmosphere, making reception spaces with high ceilings or outdoor tent rafters feel intimate and ethereal. Translucent glass spheres catch daylight and reception lighting, mimicking the appearance of shimmering floating dew drops suspended mid-air. Beneath this suspended canopy, the tabletop remains clean, open, and spacious, accommodating shared family-style food platters while keeping decor light and uncrowded. The delicate movement of suspended blossoms in natural air currents adds an interactive, kinetic dimension to dining spaces that static tabletop vases cannot achieve.
To build this installation, prepare clear glass orb vessels equipped with top hanging loops, alongside clear monofilament fishing line rated for at least fifteen pounds of weight. Tie lengths of fishing line securely to the glass loops using double barrel knots, cutting the lines to varied lengths between eighteen and thirty-six inches to achieve an organic, tiered drop. Secure overhead attachment points along tent ribs, wooden ceiling beams, or sturdy freestanding tabletop arch stands using heavy-duty C-clamps or zip ties. Fill each glass orb with two tablespoons of fresh water using a curved plastic wash bottle to avoid exterior splashes and water spots. Insert two to three hardy stems into each sphere, such as white ranunculus, delicate cosmos, sweet pea vines, and fluttering sprigs of gypsophila. Ensure the weight distribution remains plumb so each vessel hangs straight down, then place simple white pillar candles on the table below to illuminate the floating blossoms from underneath.
3. Antiqued Books and Pressed Glass Floral Stacks
Execution Process
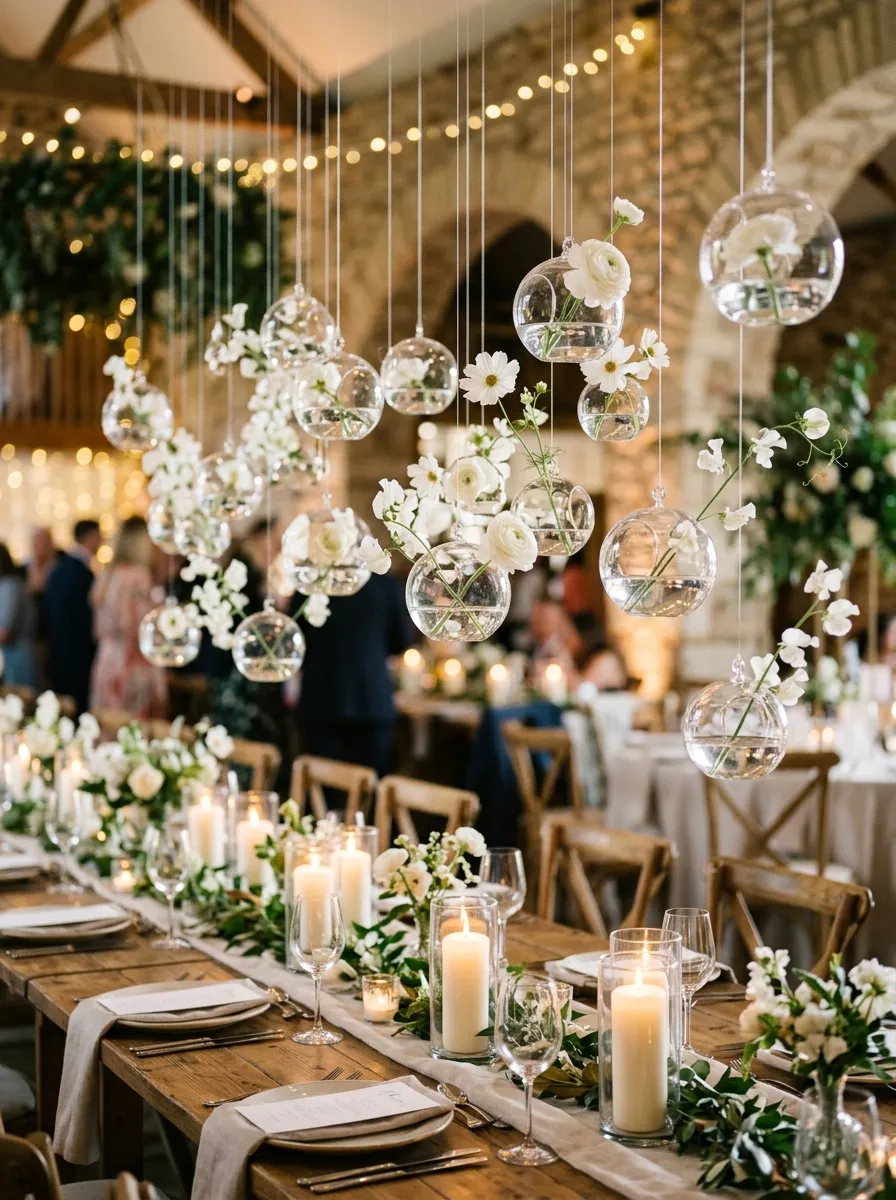
The antiqued books and pressed glass floral stack concept blends literary romance with vintage garden charm, making it a wonderful choice for historic or vintage-inspired venues. The foundation relies on stacks of genuine vintage hardcover books chosen for their weathered cloth spines, muted pastel colors, and gold-embossed details. Resting atop and beside these tiered literary bases are varied pressed-glass bottles, cut-crystal inkwells, and vintage apothecary jars filled with romantic garden flowers. This layered arrangement naturally creates multiple visual levels, guiding the eye up through varied shapes and historical textures. The soft, faded paper tones contrast against fresh garden roses, spires of lavender, and trailing ivy vines. This design carries a warm nostalgic aesthetic, evoking the feeling of a sunlit conservatory or old library study. It also serves as an exceptional budget project, as charming vintage books and vintage glass can be gathered over time from flea markets and community sales.
Select three vintage hardcover books of decreasing sizes, choosing volumes with covers in muted sage green, faded dusty rose, oat linen, or deep navy blue. Tie the trio together using a length of frayed-edge silk ribbon or natural jute twine, securing the knot in a loose bow across the top volume. Place the bundled stack at the center of the reception table, angling it slightly off-center for an organic look. Position a small cut-crystal perfume decanter or vintage medicine bottle directly atop the book stack, securing its base with clear museum putty to prevent slipping. Surround the main stack with two smaller glass bottles resting on the table surface to create a triangular grouping. Fill the bottles with fresh water and arrange individual stems of garden roses, chamomile daisies, soft feverfew, and stems of textured eucalyptus. Scatter a few loose, press-dried flower petals around the table surface to complete the setting.
4. Vintage Brass Candlestick Meadow
Setup Method
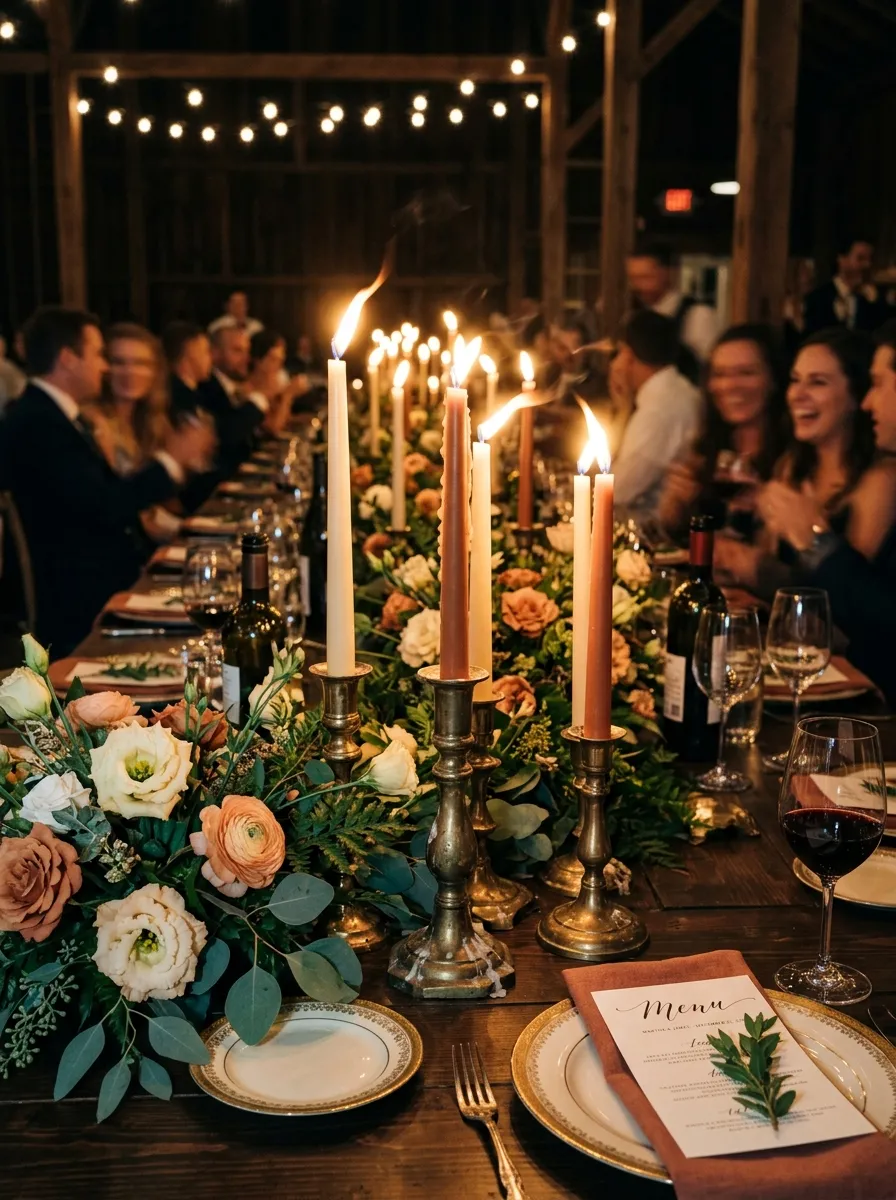
The vintage brass candlestick meadow balances refined metallic shine with the loose, untamed beauty of an overgrown flower meadow. This setup uses mismatched solid-brass taper holders of varying heights, interspersed among low-lying floral frogs that anchor loose blooms directly along the table runner line. Instead of boxing flowers into formal vases, blossoms emerge organically around the warm, reflective brass bases, mimicking flowers blooming along a garden path. Tall, slender taper candles in muted shades like beeswax cream, dusty terracotta, or pale moss green provide vertical structure without blocking eye contact between seated guests. The warm glow of authentic candlelight reflected across polished brass metal surfaces creates a classic, intimate evening environment. This arrangement works particularly well on long banquet tables, creating a continuous, rhythmic ribbon of botanical color and dancing flame down the center of the room.
Begin by arranging five to seven solid-brass taper candleholders down the center of the table, spacing them six to eight inches apart and varying their heights between four and twelve inches. Insert high-quality dripless taper candles into each socket, using candle adhesive wax dots at the base to ensure every candle stands straight. In the open table spaces between the candleholders, place heavy lead-free metal pin floral frogs, securing each frog to the tabletop with waterproof sticky putty. Press stems of Italian ruscus, plumosa fern, and silver dollar eucalyptus directly onto the metal pins at outward-reaching angles to conceal the mechanics beneath a greenery base. Cut stems of lisianthus, butterfly ranunculus, campanula, and delphinium down to varying lengths between three and eight inches, inserting them into the frogs to create an undulating, natural meadow line. Pour a shallow splash of water into small ceramic dishes beneath the frogs to keep stems hydrated.
5. Driftwood and Delicate Silk-Wrapped Floral Arch
How to Create
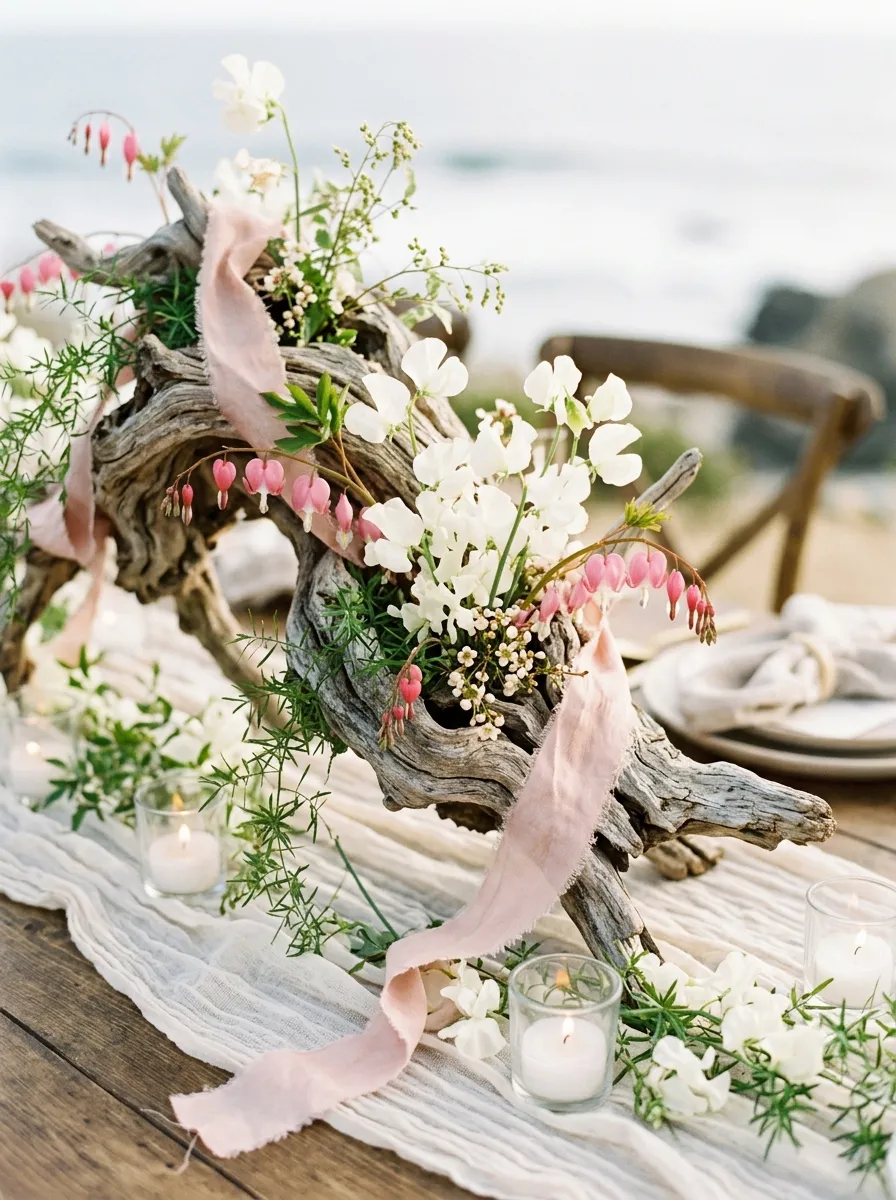
The driftwood and delicate silk-wrapped floral arch introduces soft coastal textures, organic lines, and airy movement to contemporary reception tablescapes. This concept utilizes weathered, salt-bleached branches of natural ocean driftwood or twisted grape wood vines, which form an elevated rustic bridge over the dining space. Instead of dense floral coverage, this minimalist style design relies on deliberate negative space, allowing the twisting forms of the wood grain to remain visible. Trailing botanical vines, delicate garden florals, and fluttering hand-dyed raw-silk ribbons wrap loosely around the wood, creating a visual balance between rustic weathered timber and delicate, flowing textiles. The organic curvature of natural wood prevents the table from looking stiff or geometric, giving the tablescape an easy, windswept character. This styling complements coastal celebrations, modern outdoor garden venues, and rustic modern dining spaces, offering an expressive centerpiece that stays structurally light and visually captivating.
Source a sturdy, thoroughly dried piece of sand-blasted grapevine or ocean driftwood measuring two to three feet in length, verifying that its bottom rests flat on the table without wobbling. Wrap lengths of hand-dyed raw silk ribbon in soft tones of blush, oyster, or pale mist around the branch, leaving flowing ribbon tails trailing across the table runner. Attach miniature water tubes along the backside and crevices of the wood using brown waterproof floral tape to keep mechanics hidden from view. Insert fresh blooms with natural curves—such as sweet peas, bleeding hearts, Japanese anemones, and white chocolate cosmos—into the concealed water vials, directing stems along the natural flow of the branch. Weave delicate strands of asparagus fern and jasmine vine around the central wood spine, letting foliage touch the table surface at both ends. Place small clear glass tea lights around the wood base to illuminate the textured grain and flowing ribbons from below.
6. Whimsical Watercolor Bud Vase Gallery
Step-by-Step Guide
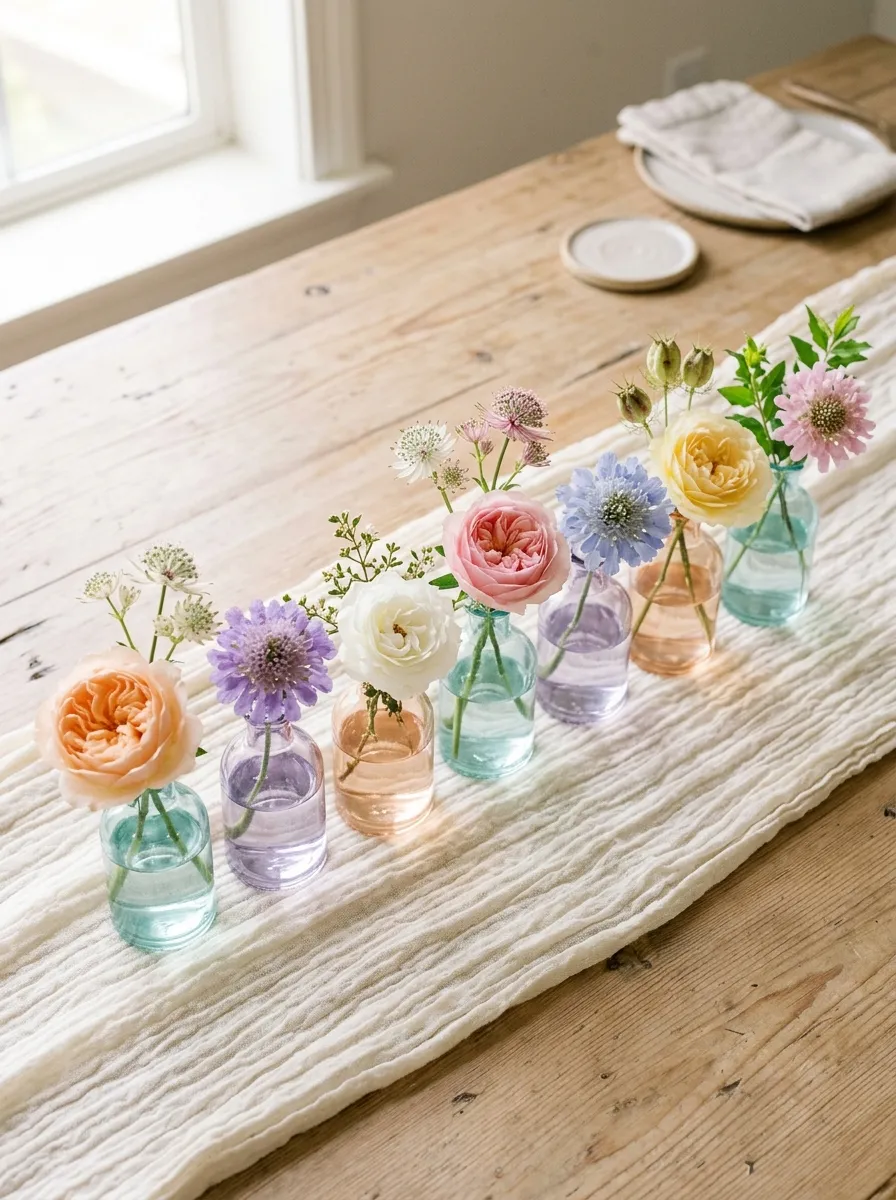
The whimsical watercolor bud vase gallery uses multiple small vessels to create a flowing, scattered tablescape that is versatile and simple to assemble. This design features an assortment of miniature glass bud vases tinted in translucent pastel shades, such as sea glass aqua, soft peach, pale lavender, and buttercup yellow. Scattering seven to nine varied vases down the table spine distributes color evenly, rather than concentrating all visual weight into a single heavy centerpiece. Each vase holds only one to three stems, highlighting the unique silhouette, petal texture, and natural line of each individual flower. This scattered layout is functional for narrow tables, leaving plenty of room for glassware, place settings, and family-style serving platters. The translucent colored glass catches both natural daylight and ambient candlelight, casting soft watercolor reflections across light-colored table linens.
Gather seven to nine assorted bud vases per table, selecting shapes that range from spherical globes to slender fluted bottles with heights between three and seven inches. Clean each vessel thoroughly, fill them two-thirds full with fresh water mixed with flower food, and place them along the center of the table in a gentle zig-zag pattern. Cut fresh botanical stems to varying heights so blooms hover at different levels, trimming stems between four and ten inches long. Place a single focal flower—such as a ruffled garden rose, a dinnerplate dahlia, or a double-petaled tulip—into the larger vases. Fill the smaller companion bottles with single stems of airy filler flowers, such as textured scabiosa, delicate astrantia, waxflower sprigs, and small stems of wild oats. Weave a light cheesecloth runner beneath the clustered vessels, gathering the fabric into soft folds around each base to unify the scattered gallery into a cohesive arrangement.
7. Gilded Geometric Lantern with Cascading Ivy
How to Make
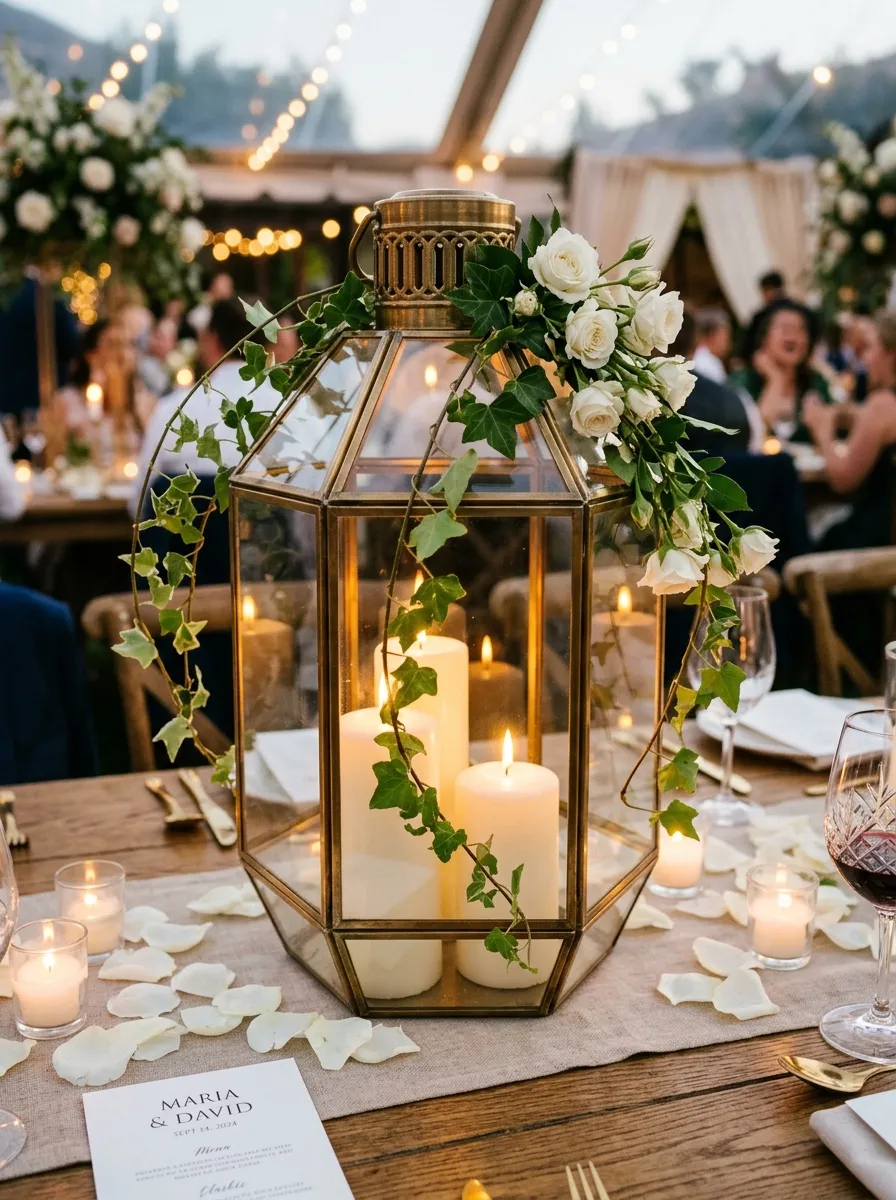
The gilded geometric lantern with cascading ivy brings together modern architectural lines and cascading, fairy-tale garden greenery. The focal element is a multifaceted geometric brass or gold lantern with clear glass panels, housing a cluster of glowing pillar candles. Rather than keeping all greenery inside, lush trailing vines and garden blossoms are arranged to spill out from the top vents and through the open door, breaking the rigid geometric structure. The warm metallic framework provides clean modern structure, while the trailing plants soften the corners and bring natural flow to the table. This juxtaposition of clean metal and organic greenery gives the tablescape a timeless garden-conservatory feel. These sturdy lantern arrangements are especially useful for outdoor or breezy reception spaces, where enclosed glass panels shield candle flames from wind gusts to ensure consistent, safe illumination all evening.
Select a contemporary gold or brass hexagonal metal lantern standing twelve to sixteen inches high with a functional hinged glass access door. Place three ivory pillar candles of staggered heights (three, five, and seven inches) inside the lantern, anchoring their bases with sticky wax dots to prevent movement. Cut a block of soaked floral foam to three inches square, wrap it securely in floral foil to prevent leaks, and use waterproof tape to attach it to the exterior top shoulder of the lantern. Insert trailing stems of English ivy, variegated vinca vine, and jasmine into the foam block, training the vines to drape down across the glass sides and trail onto the table. Accent the greenery cluster with short-stemmed focal flowers, including white spray roses, soft pink ranunculus, and delicate waxflower blooms. Light the pillar candles just before guests arrive, leaving the glass door slightly ajar to ensure proper oxygen flow for an even burn.
8. Citrus and Olive Branch Garden Tablescape
Execution Process
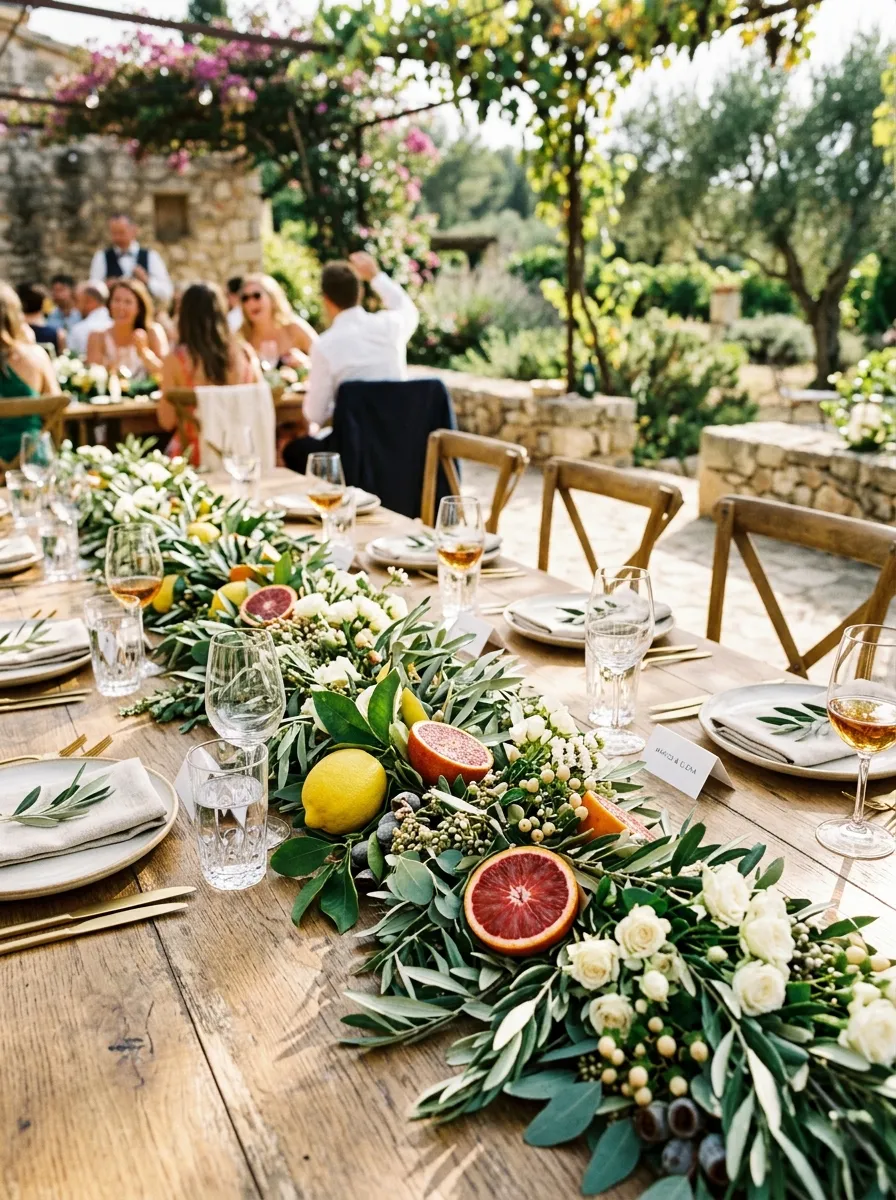
The citrus and olive branch garden tablescape embraces Mediterranean warmth and cheerful garden motifs, combining fresh, whole fruit with silvery-green foliage. This design features whole fresh fruits—such as ripe lemons, blood oranges, clementines, and small green figs—nestled along a lush runner of silver-toned olive branches, seeded eucalyptus, and bay leaves. Slicing select fruits in half exposes their juicy interior patterns, adding vibrant color, natural moisture, and a subtle, refreshing citrus scent to the dining room. Soft ivory spray roses, pale peach carnations, and white nerine lilies nestled among the fruit clusters provide floral elegance without stealing focus from the natural produce. This colorful design brings vibrant life to daytime receptions, outdoor garden luncheons, and warm summer evening celebrations. Utilizing fresh produce alongside hearty foliage makes this concept an economical, eco-friendly option that avoids floral foam while maintaining volume down the center of the table.
Begin by laying a generous bed of fresh olive branches down the center of the table, overlapping the woody stem ends to form a full, continuous green runner roughly twelve inches wide. Weave secondary stems of seeded eucalyptus, rosemary sprigs, and fragrant bay leaves into the olive foundation to build volume and varied foliage texture. Place whole lemons, oranges, and clementines along the leafy runner in natural clusters of three and five, allowing the fruit to rest organically among the branches. Use a sharp paring knife to slice several lemons and blood oranges in half, resting the cut fruit upright on small plastic disks or leaves to protect table linens from citrus juices. Tuck short water-tubed stems of white spray roses, chamomile, and yellow ranunculus into shaded pockets beneath the fruit and foliage, hiding all water vials from sight. Finish the runner by interspersing simple ribbed-glass votive candles along the length of the garland.
9. Submerged Botanical Cylinder Floating Light Display
Setup Method
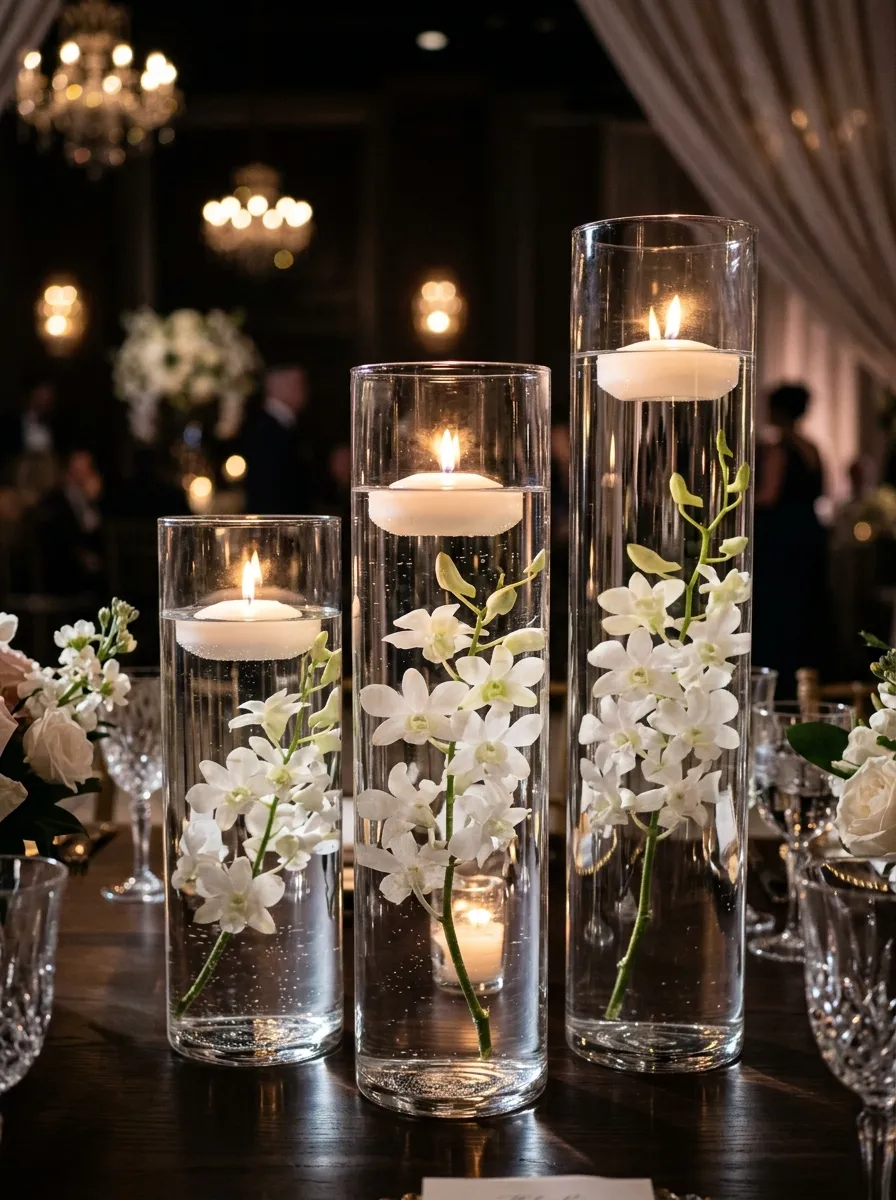
The submerged botanical cylinder floating light display uses water refraction to create a clean, luminous tablescape with a modern minimalist style. This setup consists of three straight-sided clear glass cylinder vases of varied heights, filled completely with water to submerge delicate floral stems, and topped with gently glowing floating candles. Submerging botanicals under water magnifies delicate petals, stem structures, and small bubbles, creating an ethereal aquatic display that remains pristine for hours. The water keeps the blooms fresh while providing weight that stabilizes the tall glass cylinders, preventing accidental tipping on busy banquet tables. Floating white wax candles cast dancing light across the water surface, projecting bright, shimmering reflections across nearby glassware and linens. This concept offers exceptional durability and temperature resistance, making it an excellent choice for air-conditioned indoor ballrooms or warm summer outdoor marquees alike.
Select a set of three heavy-based clear glass cylinder vases measuring six, nine, and twelve inches in height, cleaning both interior and exterior glass surfaces thoroughly. Anchor a heavy metal fishing sinker or floral weight to the bottom of long, architectural botanical stems—such as white dendrobium orchids, calla lilies, or flowering cherry branches—using clear elastic floral tape. Lower the weighted stem into the cylinder so it stands upright along the bottom center of the glass container. Slowly pour distilled water down the interior side of the glass until the water level rests approximately one inch below the top rim, using distilled water to prevent cloudiness and excessive air bubbles. Allow any tiny air bubbles to settle along the petals for ten minutes, then gently place a standard white disc-shaped floating candle on the water surface. Arrange the three cylinders in a tight cluster at the center of the table, lighting the floating wicks just before guest arrival.
10. Whimsical Birdcage Wildflower Haven
How to Create
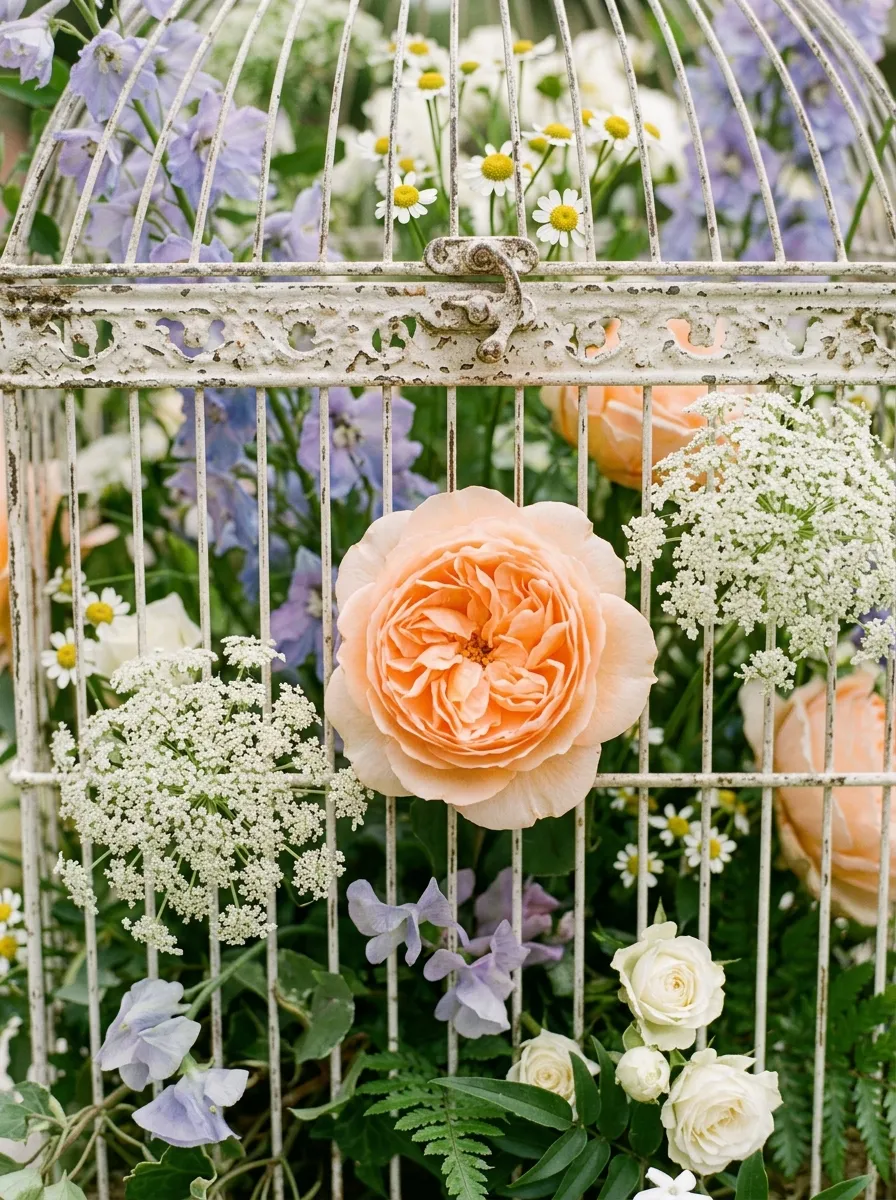
The whimsical birdcage wildflower haven combines vintage architectural ironwork with loose, overflowing florals to evoke a vintage English garden. This design features an antique-style domed metal or wire birdcage, painted in distressed white, soft verdigris, or brushed bronze, filled with blooming garden flowers. Instead of keeping the blooms strictly inside the wire bars, blossoms and winding greenery push outward through the slats, creating a lush, overflowing look that softens the rigid iron frame. Larkspur, snapdragons, and Queen Anne’s lace provide vertical height inside the cage, while wide-faced garden roses and hydrangeas anchor the base. This romantic centerpiece design works well for garden weddings, afternoon tea parties, and rustic barn venues, serving as an eye-catching focal piece that draws the eye upward while infusing historic charm into the reception room.
Acquire a vintage-style decorative metal birdcage with a latching domed top, ensuring the interior base provides a flat, stable surface for mechanics. Line the bottom tray with heavy-duty clear florist plastic, securing it with waterproof tape to catch any dripping water. Place a thoroughly soaked block of floral foam inside a low plastic bowl, trim the edges with a utility knife, and position the dish securely inside the open birdcage. Close and latch the birdcage door, then insert tall spires of larkspur, snapdragons, and lisianthus through the wire bars directly into the floral foam base. Fill the lower open spaces with ruffled garden roses, clustered hydrangea blooms, and airy sprays of Queen Anne’s lace, positioning blooms so they push outward through the wire bars. Thread strands of trailing smilax or passionflower vine through the upper dome slats, letting the greenery wrap around the top finial before draping down toward the tabletop.
Common Beginner Mistakes and How to Avoid Them
A common mistake made by DIY couples is assembling centerpiece arrangements that exceed comfortable line-of-sight levels for seated guests. Centerpieces that stand between twelve and eighteen inches tall often create an awkward visual barrier that prevents conversation across the table. To avoid this, keep arrangements either low-profile—under eleven inches—or elevate them above twenty inches using slender pedestals or suspended hanging mechanics. Another frequent issue is neglecting hydration mechanics for fresh flowers, causing delicate petals to wilt before the reception dinner even begins. Avoid relying on bare tape or dry placements; always use water tubes, floral frogs set in water wells, or properly pre-soaked floral foam. In addition, beginners often crowd tables with too many small decorative items, creating visual clutter that interferes with dining comfort, glassware, and place settings. Leave at least fifteen inches of clear space between centerpiece elements and the edge of place settings to accommodate dinnerware, flatware, and wine glasses comfortably. Finally, test all taper candles in advance to confirm they are truly dripless, as sudden drafts from open venue doors or cooling vents can cause wax to run across linens.
Practical Tips for Better Results
Achieving professional, long-lasting results with DIY centerpieces requires disciplined flower conditioning, precise tool selection, and careful timing. Always use sharp floral shears or clean pruning knives rather than household paper scissors, which crush plant capillaries and limit water intake. When conditioning your blooms, trim stems under clean water and let them rehydrate in cool, conditioned rooms for at least twenty-four hours before arranging them into final vessels. Incorporate quick-acting commercial floral preservative drops into all vase water to inhibit bacterial growth, keep water crystal clear, and extend blooming freshness. When assembling color palettes, follow the standard design rule of choosing one dominant primary hue, one supporting secondary tone, and a contrasting accent color, balanced by plenty of natural green foliage. For arrangements that incorporate candlelight, install battery-operated, warm-white wax candles when working near delicate dried foliage or low-hanging ribbons to ensure complete fire safety. Finally, assemble a venue day-of emergency repair kit stocked with extra floral wire, greening pins, extra water vials, paper towels, and extra stems to quickly handle any unexpected transport damage during table setup.
Styling, Presentation, or Organization Ideas
Styling cohesive, picture-perfect wedding tablescapes requires considering how your centerpieces interact with tablecloths, napkins, dinnerware, and the broader venue decor. Pair loose, whimsical floral designs with natural, textured linens—such as crinkled cotton gauze, woven linen runners, or velvet ribbons—to complement organic floral shapes without feeling rigid. When decorating long banquet tables, repeat design elements rhythmically down the table, alternating taller floral clusters with low votives and scattered bud vases to maintain balanced visual interest. Match the metallic elements in your centerpieces, such as brass candleholders, gold rimmed chargers, and flatware finishes, to create a polished, unified design thread across the reception room. For table number markers, use calligraphy printed on textured cotton rag paper or pressed between mini glass frames, nestling them directly alongside your centerpiece greenery. When photographing finished tables for your records, capture wide-angle shots down the length of the table in soft, indirect natural morning light, which highlights subtle floral textures and avoids harsh overhead shadows.
Budget or Time Planning
Creating custom wedding centerpieces on a budget requires smart flower sourcing, disciplined materials buying, and efficient time management. To keep wholesale floral costs low, prioritize in-season, locally grown field flowers rather than expensive imported stems, using textured seasonal greenery to build up bulk and visual structure. Thrift stores, garage sales, and wedding buy-back groups are fantastic resources for gathering collections of mismatched brass candlesticks, vintage books, and clear bud vases at low costs. When planning your preparation timeline, finish non-perishable tasks—such as cleaning glassware, cutting ribbons, testing fairy lights, and prepping table numbers—two to four weeks before the event date. Pick up fresh flowers three days before the wedding, trim and hydrate the stems on day two, and assemble final arrangements the day before the ceremony. Organize an assembly-line workspace using long folding tables, grouping materials by table number so setup teams can grab and place complete sets efficiently on wedding morning. Enlisting three or four dependable friends to handle specific setup tasks ensures your decor is placed quickly and calmly, giving you time to relax before the festivities begin.
Creative Expansion and Advanced Inspiration
Once you feel comfortable with foundational centerpiece mechanics, you can explore advanced variations that incorporate multi-sensory accents, dramatic scales, and interactive guest elements. Consider weaving fresh culinary herbs—such as fragrant rosemary, flowering thyme, lavender sprigs, and sweet mint—directly into floral garlands to release subtle, natural fragrance as guests sit down for dinner. You can also incorporate miniature personalized bud vases directly into individual place settings, serving double-duty as a customized guest escort card and a lovely take-home wedding favor. For couples seeking elevated modern drama, try adding soft fabric drapery suspended from ceiling rafters above your centerpieces, mirroring the lines of your floral runners below. Experiment with adding unexpected edible elements to your tablescapes, such as clusters of dark purple grapes, small bosc pears, or split pomegranates, which bring deep Dutch-still-life color into autumnal weddings. Exploring these layered, mixed-media design ideas lets you push past standard wedding styling, crafting an immersive, romantic environment that feels thoughtful, expressive, and truly unforgettable.