Fairy lights provide an ethereal, ambient illumination that elevates reception tables into luminous botanical landscapes without the fire hazards of open flames. Designing custom wedding table displays with warm micro LED wiring allows decorators to balance organic floral arrangements, vintage glassware, and rustic timber surfaces with soft, radiant points of light. This comprehensive guide details ten structured DIY fairy light wedding centerpiece ideas, ranging from enclosed glass terrariums and vintage cloches to suspended hoop rings, illuminated wine bottles, and glowing eucalyptus runners. Readers will learn the exact electrical management systems, battery concealment techniques, botanical hydration safety protocols, and spatial balance methods needed to construct reliable, professional-grade centerpieces. Crafting your own illuminated displays gives you complete artistic control over color temperatures, metallic wire sheathing, and floral pairings, all while significantly reducing reception styling expenses. Furthermore, mastering these lightweight lighting techniques provides practical craft knowledge that easily transitions into holiday home decor, outdoor patio accents, and interior shelf organization. By using accessible materials like flexible copper wire lights, floral adhesive tape, and repurposed vintage containers, decorators of any skill level can produce gallery-worthy tabletop features. The following sections provide core preparation steps, complete material lists, step-by-step guides for ten individual designs, and strategic project planning frameworks.
Why This Idea Is Trending or Useful
Illuminated tabletop decor continues to lead trending ideas across modern digital mood boards and Pinterest ideas because it delivers high-impact romantic ambiance within functional event budgets. Modern reception venues often enforce strict restrictions on open candle flames, making battery-operated micro LED string lights an indispensable alternative that complies with venue safety codes. From an artistic viewpoint, micro LEDs introduce delicate light points that enhance textures in sheer runners, faceted crystal glassware, and fresh foliage without casting harsh shadows. As a rewarding DIY creative project, building illuminated centerpieces requires minimal specialized tooling and can be assembled well in advance of the wedding day without wilting concerns. Because foundational light wrapping and vessel packing follow straightforward, beginner friendly techniques, this craft serves as an accessible entry point into event floristry and styling. Integrating energy-efficient LED copper strands also delivers dependable budget ideas, as high-output strands cost very little per unit and run reliably across twelve-hour celebration timelines. Additionally, these completed illuminated centerpieces adapt naturally to residential home decor, functioning as cozy mantel accents or patio displays long after the wedding festivities conclude.
Materials and Preparation
Thorough planning and disciplined supply acquisition form the essential foundation for safe, reliable fairy light centerpiece displays. The core lighting element should focus on warm-white micro LED wire strands powered by compact, switch-operated battery packs; warm-white color temperatures between 2700K and 3000K cast a flattering, golden glow that mimics traditional candlelight. Gather structural vessels and display foundations such as cylindrical glass hurricane vases, geometric brass lanterns, antique wine bottles, wooden slabs, and glass bell cloches. Essential floristry and mechanical tools include floral shears, clear waterproof adhesive tape, low-temperature hot glue, dark floral wire, zip ties, and fresh alkaline batteries. Supporting botanicals should include resilient, long-lasting foliage like seeded eucalyptus, Italian ruscus, and salal, paired with sturdy blooms such as spray roses, baby’s breath, and preserved hydrangeas. Preparation begins by testing every single light strand for twenty minutes to confirm consistent output and inspect wire continuity before assembly. Clean all glass surfaces with a streak-free vinegar solution to maximize light refraction, and measure venue table widths to ensure chosen designs leave adequate room for dinner service and guest glassware.
1. Glowing Glass Bell Cloche with Preserved Woodland Moss
Step-by-Step Guide
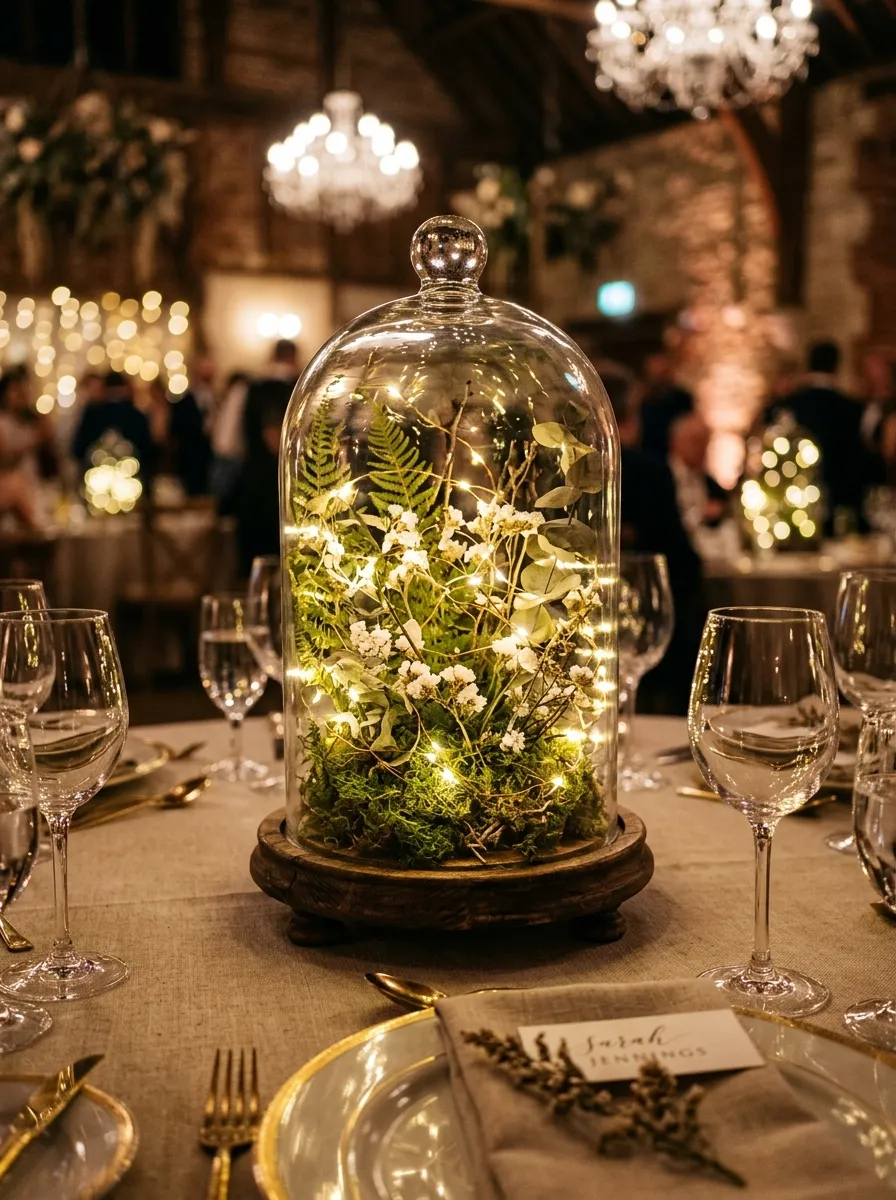
The glass bell cloche centerpiece creates an enchanting, encapsulated miniature ecosystem that combines classic botanical terrarium aesthetics with warm illumination. This design positions a high-domed glass cloche over a natural turned-wood or slate base, enclosing a verdant carpet of preserved reindeer moss, dried fern fronds, and delicate woodland florals. Weaving an ultra-fine copper wire fairy light strand throughout the foliage creates an organic distribution of light points that filter softly through the greenery and curved glass. The bell cloche keeps the botanical materials neatly contained and shielded from outdoor breezes or accidental beverage spills during dinner service. The vertical dome draws the eye upward without blocking cross-table conversations, fitting comfortably on both round banquet tables and long banquet setups. The interplay of dark forest greens, aged wood textures, and golden light points brings an authentic, fairy-tale garden atmosphere to indoor ballroom settings.
To construct this centerpiece, select an eight-inch diameter glass cloche paired with a recessed wooden base, checking that the glass rim seats securely. Secure the battery pack to the underside of the wooden base using hook-and-loop adhesive strips, feeding the thin copper wire upward through a small pre-drilled channel or along the rear edge. Cover the top surface of the wood base with a dense layer of preserved sheet moss and pillow moss, using small dabs of low-temperature hot glue to secure the greenery. Carefully unwind a six-foot warm-white micro LED strand, weaving the wire loosely among the moss clumps and securing delicate sprigs of dried white statice and miniature pinecones along the wire path. Shape the upper portion of the wire into a loose, spiral coil that rises vertically into the interior space of the cloche dome. Carefully lower the glass cloche over the illuminated botanical composition, checking that no green moss fibers are pinched beneath the glass rim.
2. Geometric Brass Lantern Filled with Tumbled Micro LEDs
Execution Process
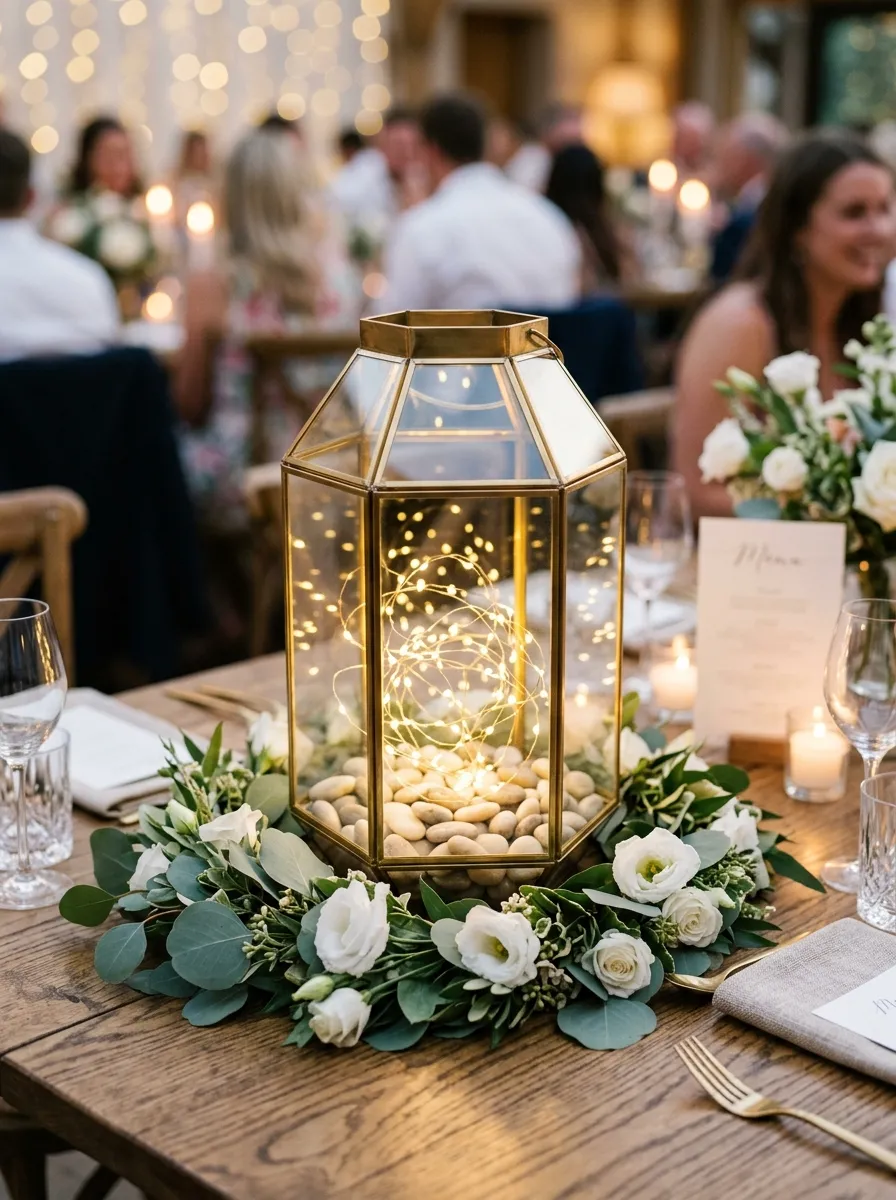
Modern geometric lanterns bring architectural structure, clean metallic lines, and contemporary Scandinavian warmth to reception tablescapes. This centerpiece design incorporates a multifaceted hexagonal or pyramidal brass-framed lantern, left open or paneled with clear glass, filled with a loose tangle of warm fairy lights. Rather than wrapping the lights tightly around an interior pillar, allowing the wire to tumble freely within the lantern creates an expansive, three-dimensional cloud of glowing dots. The brushed brass frame catches the internal reflections, throwing angular geometric patterns across the table linen as evening falls. Framing the lantern base with a loose, asymmetric ring of silver dollar eucalyptus softens the metallic profile, creating a balanced harmony between architectural minimalism and organic texture. This durable, contained design is exceptionally stable, preventing tipping accidents on active family-style banquet tables.
Begin by cleaning the glass panels of a twelve-inch brass lantern with an alcohol wipe to remove smudges and fingerprints. Affix the compact battery compartment to the interior ceiling or the inside rear corner of the lantern using clear double-sided mounting tape, positioning the switch for easy finger access. Uncoil a ten-foot micro LED strand featuring silver or gold wire, gathering the strand into loose, irregular loops roughly the width of the lantern interior. Place the coiled light bundle gently into the base of the lantern, allowing the natural spring tension of the copper wire to expand outward against the interior walls. For additional depth, nestle three different sizes of smooth, pale river stones or white faux tumbled sea glass among the bottom loops to anchor the wire. Close and latch the lantern door, then arrange fresh sprigs of olive branches and white lisianthus in a crescent shape around the outside base of the brass lantern.
3. Submerged Fairy Light Cylinder with Floating Gardenia
How to Create
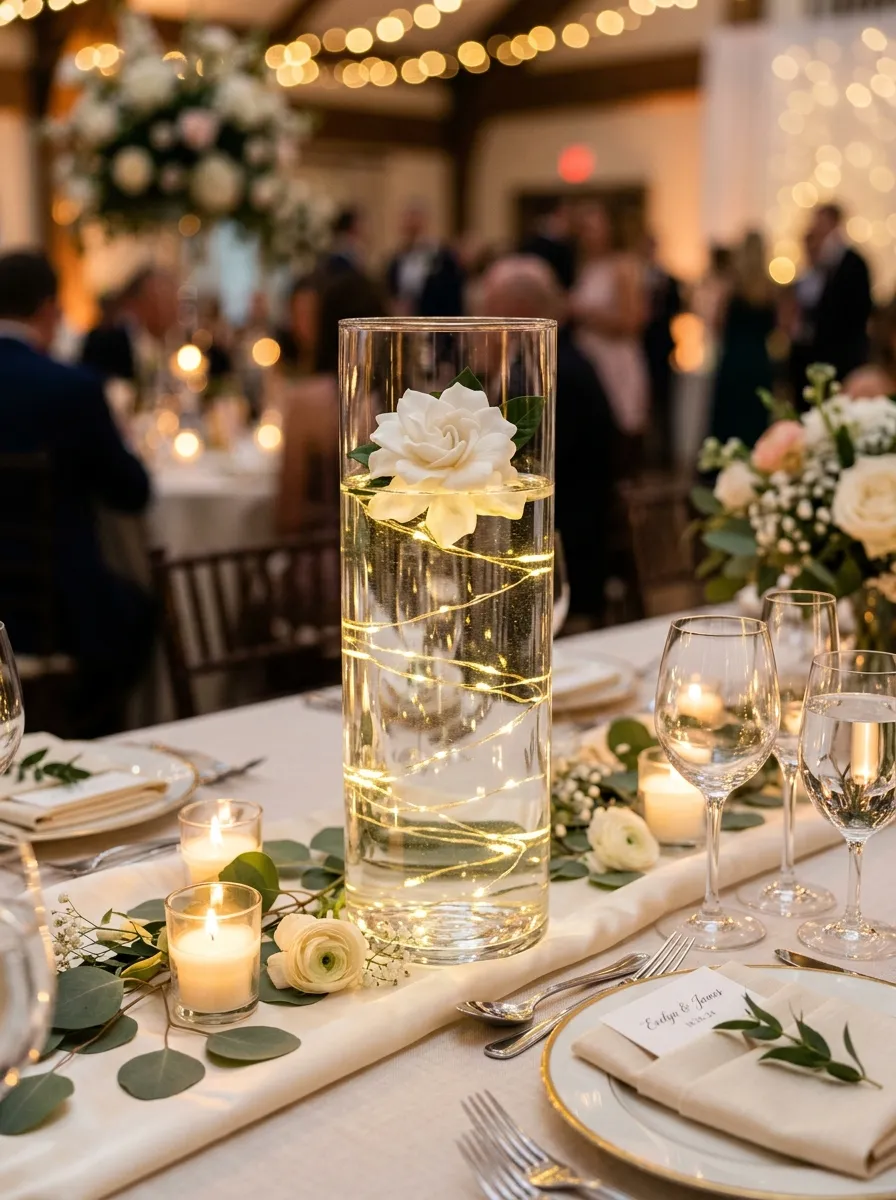
Submerging waterproof micro LED lights inside water-filled glass cylinders creates an opulent, shimmering refraction that amplifies light output across the entire tabletop. This concept uses a tall, straight-sided glass cylinder filled with purified water, encasing a spiral of waterproof lights that illuminates a floating botanical bloom from below. The surrounding water acts as a natural lens, magnifying each tiny LED diode and casting rippling reflections across surrounding dinnerware and silverware. A single, fragrant gardenia, open garden rose, or ivory floating candle rests at the water surface, crowning the radiant column with organic elegance. Because the light mechanism is fully submerged, the design remains completely windproof, making it an exceptional centerpiece for breezy outdoor receptions, coastal tents, and rooftop terraces. The vertical column delivers dramatic visual height while consuming a very small tabletop footprint, leaving ample space for place cards and wine glasses.
To assemble this illuminated water feature, verify that your chosen micro LED strand is explicitly rated fully waterproof, noting that the battery housing itself must remain completely dry outside the vessel. Anchor the non-battery end of the light wire to a heavy glass marble or lead floral weight using clear floral tape, lowering the weight to the bottom center of a twelve-inch cylindrical glass vase. Wind the remaining wire upward in a loose corkscrew spiral along the interior walls of the vase, securing the upper wire just below the exterior rim with a small piece of clear waterproof tape. Conceal the exterior battery box beneath the table runner or inside an adjacent floral cuff at the base. Pour distilled water slowly into the cylinder up to two inches below the rim to avoid air bubble formation on the glass walls. Gently float a trimmed, fully open ivory gardenia bloom onto the water surface directly above the rising illuminated column.
4. Cascading Fairy Light and Seeded Eucalyptus Garland Runner
Step-by-Step Guide
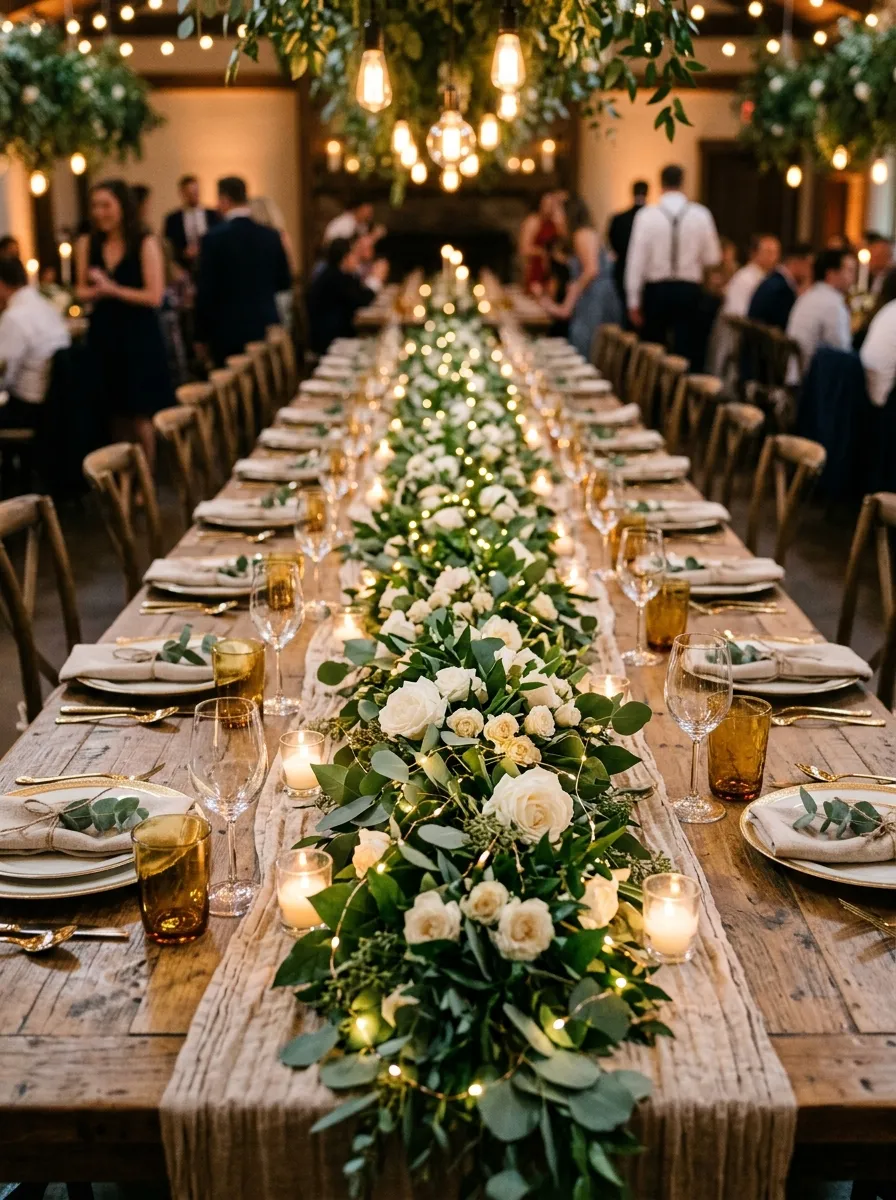
Long banquet and rustic farmhouse tables require continuous horizontal centerpieces that visually unify the length of the dining space without creating tall visual barriers. This design weaves multiple strands of warm fairy lights through a dense, continuous runner of fresh seeded eucalyptus, Italian ruscus, and silver dollar foliage. The pliable copper wires mold effortlessly around woody branches, hiding the wiring beneath broad leaves while allowing the tiny glowing diodes to emerge like morning dew drops. Interspersing small clusters of white spray roses and textured thistle along the garland adds focal points that break up the long foliage expanse. As ambient venue lighting dims, the woven garland becomes a winding river of soft, warm light down the center of the table. The low profile preserves completely clear sightlines across the table, allowing guests to converse naturally without ducking around arrangements.
Begin by laying a washed ivory cheesecloth or raw linen fabric runner down the center of an eight-foot banquet table, gathering the textile into soft, organic folds. Lay down foundational branches of sturdy Italian ruscus end-to-end to establish the spine of the garland, layering leafy stems of seeded eucalyptus and olive branch over top to build volume. Take two nine-foot warm-white copper wire light strands, concealing the battery housings beneath the folded fabric runner at opposing ends of the table. Weave the light wires back and forth through the greenery, tucking the wire underneath larger stems while pulling individual LED bulbs up to sit prominently atop flat leaf surfaces. Insert water-tubed stems of white spray roses, ranunculus, and baby’s breath into the garland every twelve inches, hiding the green water vials under dense eucalyptus clusters. Turn on the light strands and adjust leaf placement to ensure consistent light distribution across the table length.
5. Frosted Wine Bottle with Twinkling Cork Stopper Lights
Execution Process
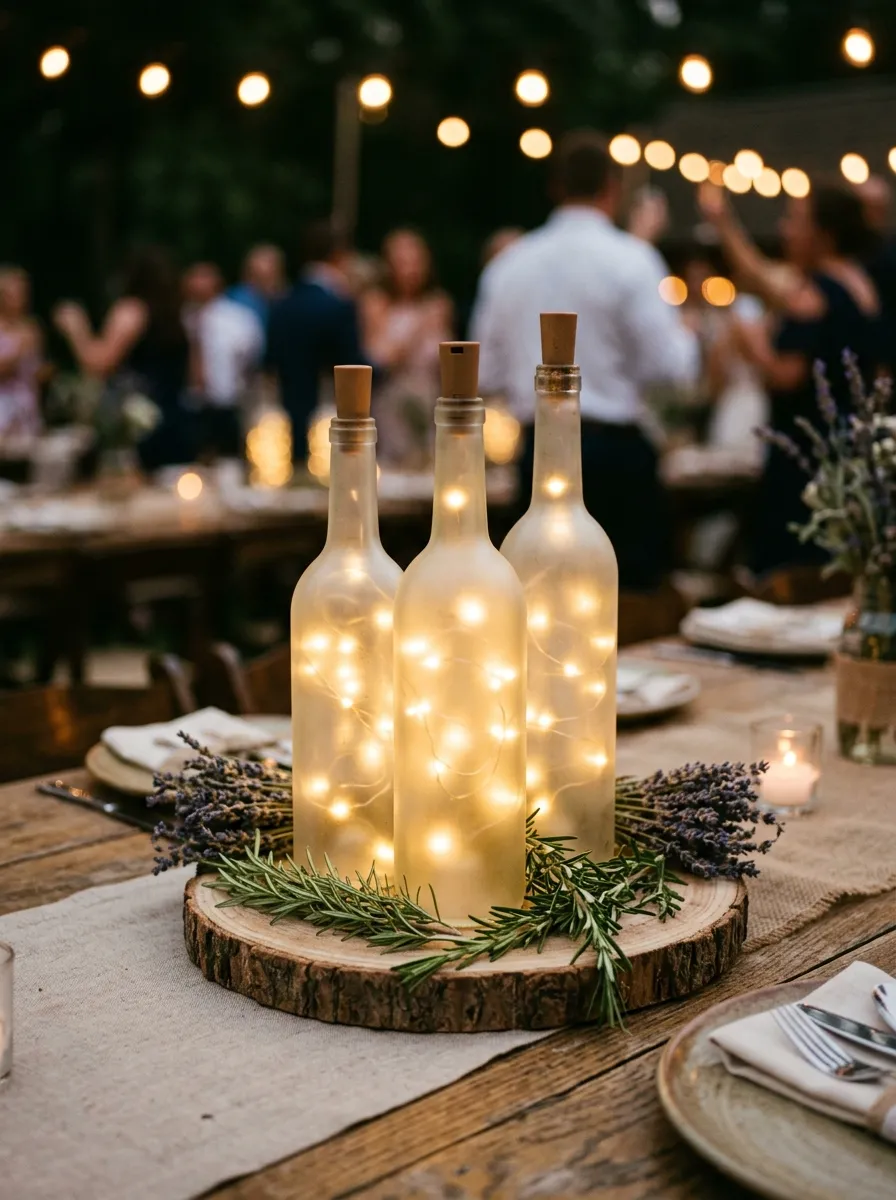
Repurposing vintage glass wine bottles into illuminated tabletop luminaries brings rustic vineyard charm, sustainable upcycling, and intimate warm light to wedding receptions. This design utilizes matte-frosted or amber-tinted wine bottles fitted with specialized fairy light strands that originate from a plastic cork-shaped battery stopper. The frosted finish diffuses the intense focal points of the internal LEDs into a soft, milky glow that spreads evenly across the glass surface. Grouping bottles in trios of varied heights, shoulder profiles, and glass tones creates an engaging visual rhythm down the center of the table. Decorating the bottle necks with knotted velvet ribbons or hanging metallic calligraphy tags introduces personalized elegance that complements the rustic glass. This self-contained centerpiece is completely spill-proof, cost-effective, and easy to transport, making it an ideal choice for budget-conscious destination celebrations.
To make this centerpiece, collect clean, label-free wine bottles, spraying the exteriors with two light coats of semi-translucent frosted glass spray paint to produce a soft sea-glass texture. Let the paint cure for twenty-four hours in a well-ventilated area until completely dry and smudge-resistant. Purchase cork-shaped LED light units, which feature a miniature battery pack and power switch integrated directly into a tapered plastic stopper attached to a six-foot wire strand. Carefully feed the wire strand through the narrow bottle mouth, gently shaking the bottle as the wire descends to help it distribute evenly throughout the lower chamber. Press the plastic cork stopper firmly into the bottle neck to seal the opening and keep the switch accessible at the top. Group three finished bottles together on a circular wood slice, weaving loose sprigs of fresh rosemary and dried lavender around their bases to complete the fragrant, illuminated cluster.
6. Suspended Floral Hoop Ring with Woven Fairy Lights
How to Create
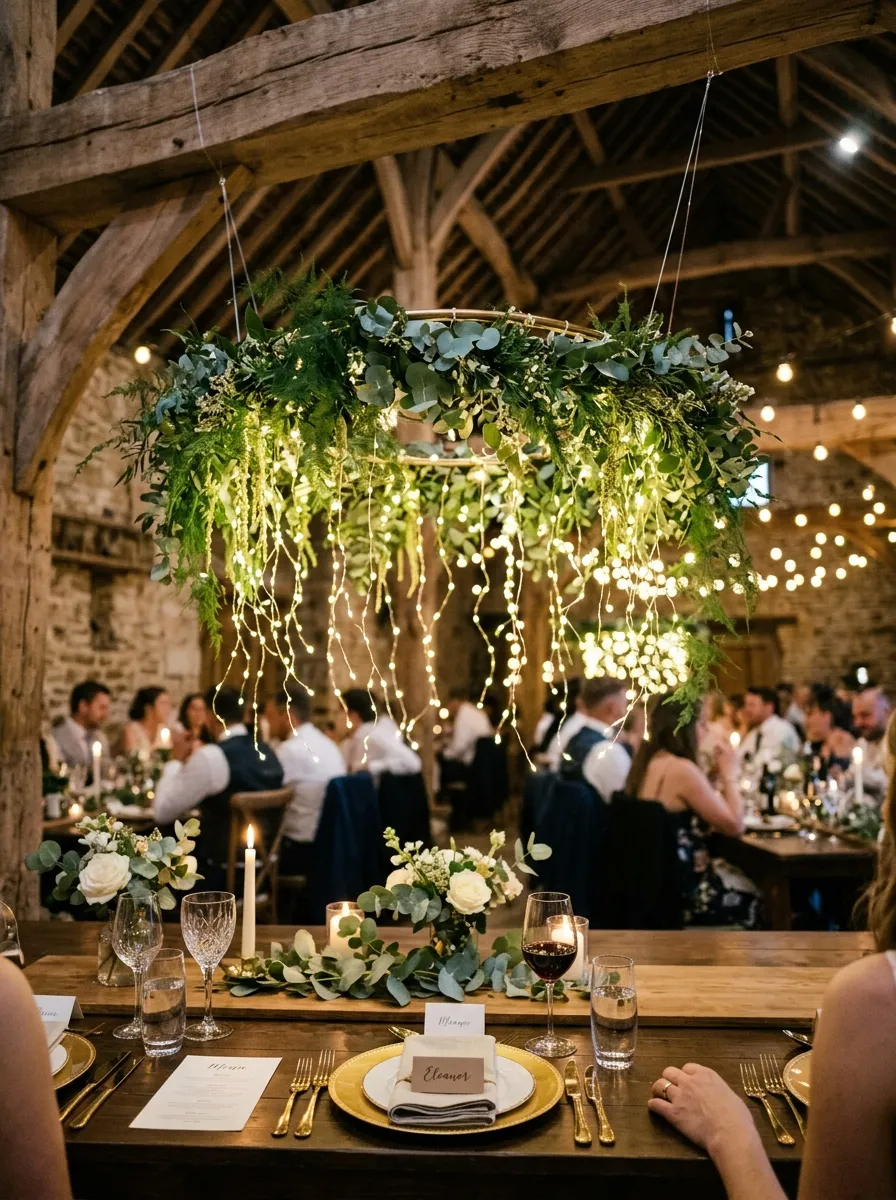
Elevating the primary centerpiece above the tabletop plane creates a dramatic, atmospheric canopy that transforms high-ceilinged venues into intimate garden settings. This suspended design features a lightweight metal or natural bamboo embroidery hoop wrapped in delicate greenery and woven fairy lights, suspended horizontally above dining tables using clear monofilament wire. By lifting the floral and lighting elements overhead, the table surface remains open for dinnerware, shared platters, and wine bottles. The downward-facing micro LEDs cast a gentle, flattering glow over seated guests, creating the ambiance of dining beneath an illuminated arbor. Weaving airy foliage like plumosa fern and asparagus greenery around the hoop frame ensures the suspended ring catches ambient air currents, producing gentle movement. This approach is well suited for modern barn venues, open pavilions, and industrial lofts with exposed overhead beams.
Select a sturdy, lightweight gold metal or wooden floral hoop measuring eighteen to twenty-four inches in diameter. Cut four equal lengths of fifty-pound test clear fishing line, knotting them symmetrically around the hoop perimeter and gathering the loose ends at a central overhead swivel hook to ensure the hoop hangs level. Fasten a battery pack securely to the top curve of the hoop using zip ties, choosing a unit with an integrated remote control for easy activation after hanging. Wrap a fifteen-foot strand of warm micro LEDs tightly around the circular hoop frame, spacing each wrap one inch apart to distribute light evenly around the circle. Use dark green floral wire to attach lightweight garlands of artificial smilax, preserved eucalyptus, and trailing ivy over the light wire, allowing leafy tendrils to dangle beneath the frame. Suspend the completed ring from venue ceiling beams at a height of approximately seven feet from the floor.
7. Vintage Wire Birdcage Housing Cascading Micro Lights
Step-by-Step Guide
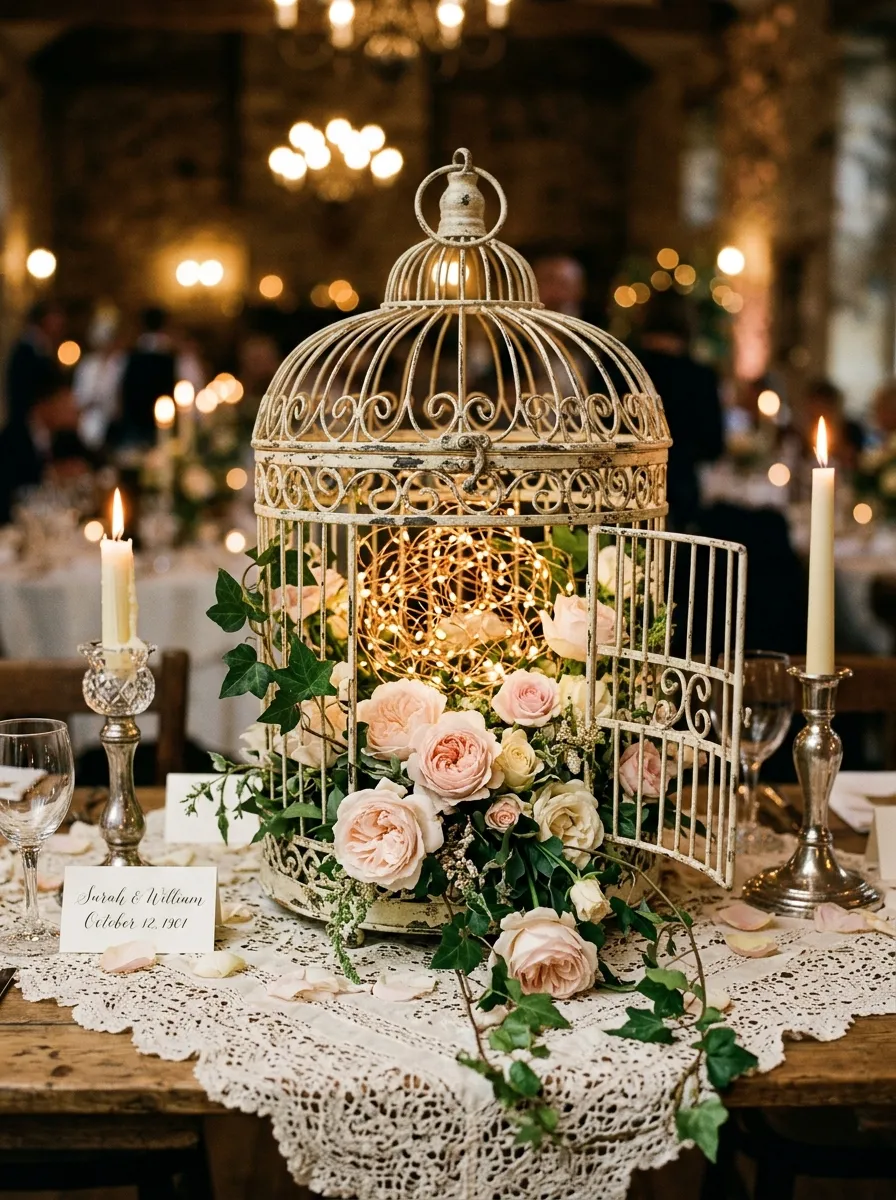
Antique wire birdcages provide romantic Victorian charm, architectural structure, and intricate iron scrollwork that casts patterned shadows across reception tables. This concept positions an aged cream, distressed iron, or verdigris wire birdcage in the center of the table, filled with an overflowing abundance of fairy lights and delicate trailing florals. The thin metal bars act as a three-dimensional framework, allowing light wires to weave through the interior space while trailing vines spill outward onto the table. The domed top of the cage draws the eye upward, while the wide, flat base sits securely on table linens. Pairing the rigid iron wire with soft, voluminous blooms like blush garden roses and cascading sweet peas creates an appealing balance between industrial metalwork and romantic floristry. This design serves as an eye-catching focal point for vintage parlor, garden tea-party, or historic estate wedding themes.
Begin by selecting an authentic or reproduction decorative wire birdcage measuring roughly fourteen inches in height with an operational hinged access door. Clean the metal framework thoroughly, applying a light coat of clear matte sealant if the vintage paint shows signs of flaking. Fasten a battery compartment underneath the interior domed roof using thin floral wire, keeping the power switch accessible through the wire bars. Thread a ten-foot copper light strand through the cage, looping the wire back and forth across the interior perch bars to create multiple vertical light columns. Place a shallow, water-filled plastic floral dish fitted with floral foam into the bottom floor of the cage. Insert focal stems of blush roses, white spray carnations, and trailing ivy into the foam, allowing the foliage to drape outward through the open door and lower bars. Close the cage door partially, securing it with a frayed silk ribbon bow tied to the latch.
8. Carved Wooden Dough Bowl Filled with Lights and Baby’s Breath
Execution Process
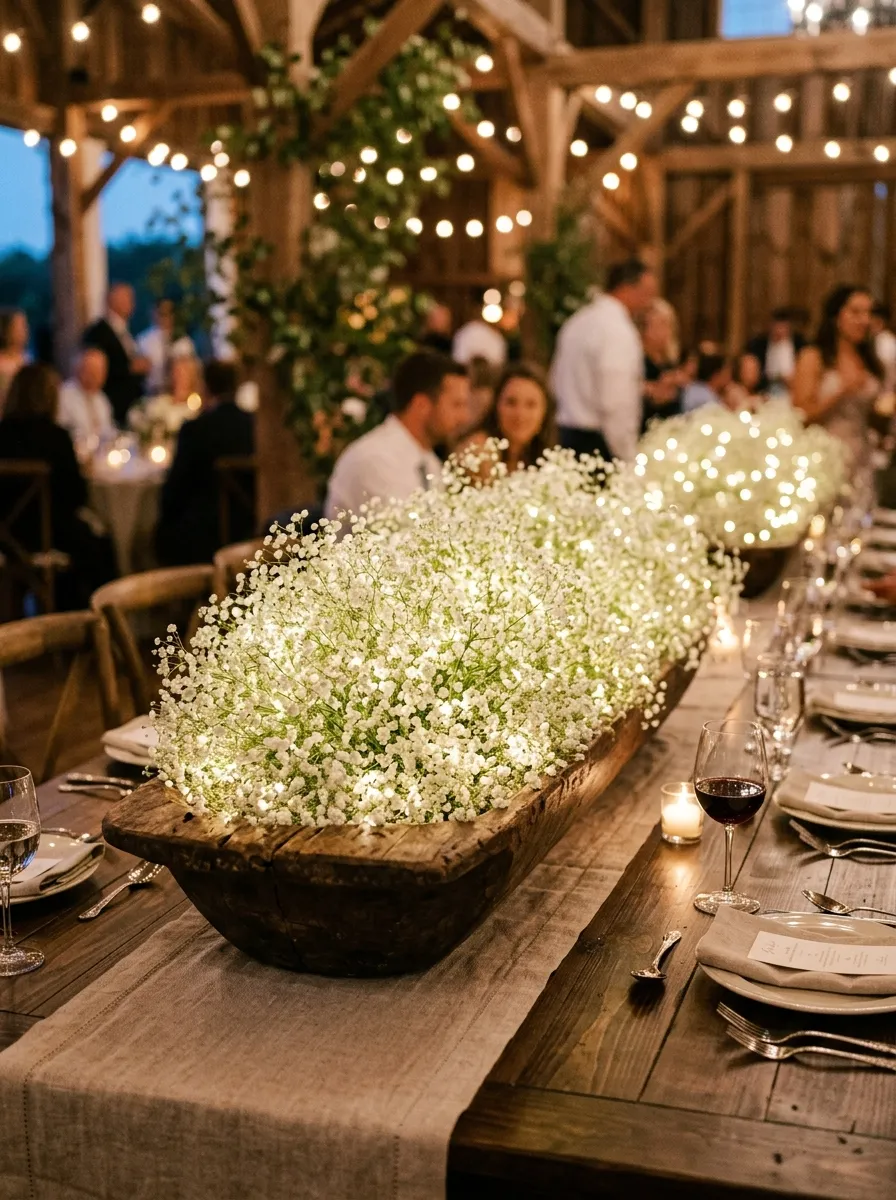
Rustic farmhouse celebrations benefit from broad, organic wood vessels that introduce natural timber grain, substantial weight, and earthy warmth to the tablescape. This design utilizes a hand-carved paulownia or reclaimed pine dough bowl, filled with a cloud-like mass of fresh white baby’s breath interwoven with hundreds of tiny fairy lights. The contrast between the dark, carved wood and the airy white gypsophila blossoms produces a modern minimalist design that feels both grounded and celebratory. The integrated fairy lights illuminate the millions of tiny white flower heads from within, transforming the floral mass into a glowing cloud. The low, elongated shape of the wooden bowl makes it ideal for rectangular banquet tables, providing significant visual volume without creating conversational barriers. The sturdy construction prevents tipping, while the natural wood tones pair effortlessly with raw linen runners and textured ceramic dinnerware.
Source a carved wooden dough bowl measuring approximately twenty inches long, six inches wide, and three inches deep, checking that the base sits flat without rocking. Line the interior basin with a sheet of clear plastic wax paper to protect the porous wood from damp floral stems. Place three flat battery packs along the bottom of the bowl, securing them with mounting putty and weaving their combined thirty feet of copper light wire into a loose, uniform mesh across the basin. Cut fresh stems of white baby’s breath into short, four-inch clusters, inserting the stem ends between the light wires until the bowl is completely filled with a dense floral cushion. Gently pull individual LED diodes upward into the blossoms using tweezers so the lights sit just beneath the outer petal surface. Finish by resting the dough bowl on a natural linen table runner, tucking a few loose sprigs of olive foliage around the exterior wood base.
9. Layered Pedestal Compote with Floating Fairy Lights and Hydrangeas
How to Create
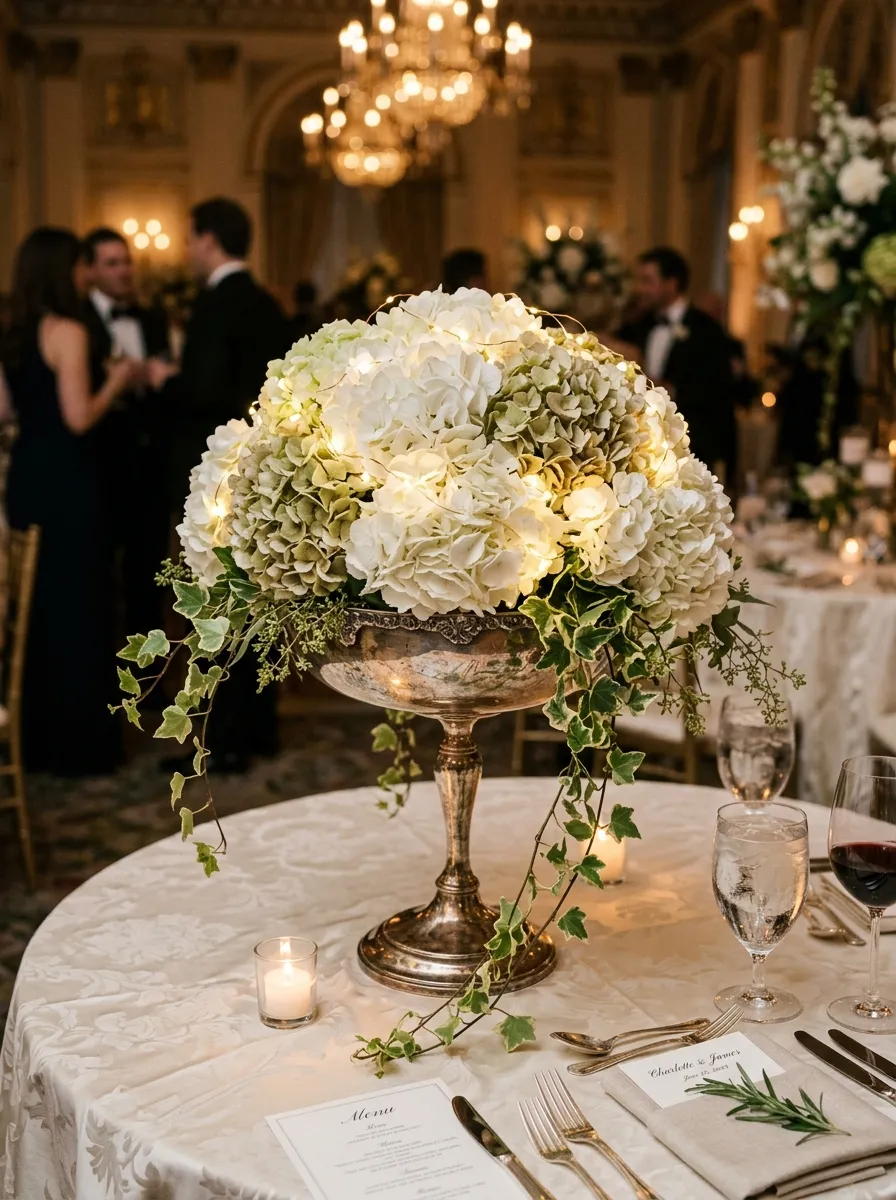
Pedestal compote bowls bring classical symmetry, elevated elegance, and timeless romance to formal reception dining rooms. This centerpiece utilizes an antique silver-plated, mercury glass, or weathered stone compote to lift an arrangement of lush, rounded hydrangeas and fairy lights above the tabletop. The elevated pedestal stem lifts the arrangement, freeing up space around the base for dinner plates, stemware, and menu cards. Weaving battery-operated micro lights throughout the dense, rounded petals of white and pale blue hydrangeas produces a soft, diffused internal glow that highlights the ruffled floral texture. The gentle, rounded silhouette mirrors traditional European garden arrangements, creating an understated focal point that complements fine china and crystal glassware. The metallic or reflective finish of the compote bowl catches surrounding light, adding subtle shine beneath the floral sphere.
Select an eight-inch diameter pedestal compote bowl, verifying that the bowl basin is balanced atop its stem. Cut a piece of wet floral foam to fit the compote, soaking it in preservative-treated water before securing it inside the bowl with a cross of waterproof floral tape. Secure a waterproof micro LED light strand around the perimeter of the foam base, keeping the battery pack mounted to the underside of the compote base with floral clay. Insert four large, dense heads of white or antique-green hydrangeas into the foam at opposing angles, pushing the woody stems deep into the core to create a solid, rounded dome. Weave the flexible light wire gently between the individual hydrangea florets, tucking the wire deep between the petals so only the glowing LED nodes remain visible on the exterior surface. Intersperse trailing stems of variegated ivy around the lower rim to drape gracefully over the pedestal edge toward the table.
10. Stacked Antique Book Pedestal with Twinkle Light Bell Jar
Step-by-Step Guide
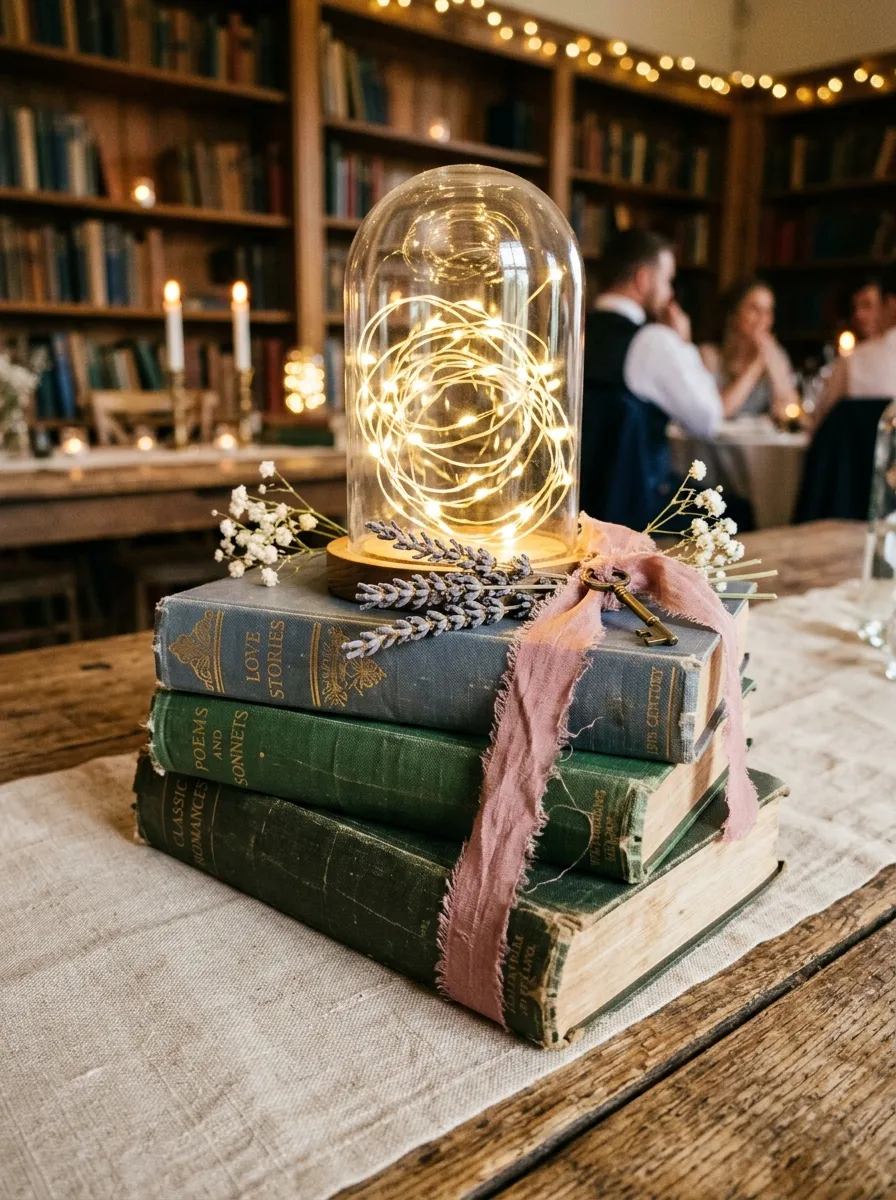
Literary-themed weddings and historic library venues provide a sophisticated backdrop for centerpieces that integrate aged vintage paperbacks with warm illumination. This design uses a tiered stack of three genuine cloth-bound antique books to elevate a miniature glass bell jar containing a swirling strand of fairy lights. The deckled paper edges, embossed spines, and weathered fabric covers of the books introduce tactile, historic texture that coordinates beautifully with antique brass and lace. Placing the illuminated bell jar on top of the literary foundation creates a focused vertical accent that casts warm light down onto the vintage titles below. Surrounding the base of the book stack with loose dried botanicals, vintage brass keys, and velvet ribbons anchors the display to the table linen. This design serves as a delightful conversation piece that adds vintage personality to celebration spaces.
Gather three vintage hardcover books in coordinating tones like slate blue, forest green, and dusty cream, wiping the covers with a dry microfiber cloth to clear surface dust. Stack the three volumes flat in the center of the table, turning each book slightly off-center to create an informal, staggered staircase effect. Place a compact, six-inch-tall glass bell jar featuring a small wooden base directly onto the top book cover, securing the base to the cloth with removable museum putty to ensure stability. Coil a three-foot strand of warm-white micro LED wire tightly inside the glass dome, using a battery pack concealed within a hollowed-out cavity in the top book or tucked discreetly behind the spine. Lower the glass dome over the lights, switching the unit on to illuminate the book stack. Weave delicate sprigs of dried lavender and pale ribbon around the base of the books to complete the tablescape.
Common Beginner Mistakes and How to Avoid Them
The most critical mistake in fairy light centerpiece construction is failing to conceal the plastic battery packs, which look unsightly on formal reception tables. Exposed battery boxes with bright red indicator switches immediately disrupt the romantic aesthetic of an otherwise beautiful centerpiece. Prevent this by securing battery packs to the undersides of wooden bases, wrapping them inside dark floral tape, or hiding them beneath dense layers of sheet moss and folded fabric runners. Another frequent error is using cool-white or daylight-balanced LED lights; cool diodes emit a harsh, bluish light that clashes with warm candlelit environments and makes fresh florals look dull. Always purchase warm-white micro LEDs with a color temperature around 2700K to achieve a flattering, golden glow. Decorators also frequently damage delicate light strands by pulling the copper wires too tight around sharp container edges, causing internal wire fractures that make the lights flicker or fail mid-event. Handle thin micro wires gently, using wide, sweeping loops rather than sharp folds. Finally, never immerse non-waterproof battery boxes in water-filled vases; always verify that your light strands carry certified waterproof ratings before submerging them in liquid.
Practical Tips for Better Results
Achieving professional, gallery-grade illuminated centerpieces relies on disciplined assembly habits and thoughtful material testing. Always install brand-new, high-capacity alkaline batteries into every light unit forty-eight hours before the event, avoiding used or generic batteries that may lose power midway through the reception. When wrapping lights around fresh floral stems, position the wire along the back of the branches, securing it with paper-wrapped bind wire rather than bare metal ties to avoid cutting into botanical stems. Use fairy light strands that feature coated copper or silver wire that matches your color palette: copper wire blends into rustic wood and warm floral arrangements, while silver wire hides cleanly inside clear glass and water-filled containers. Invest in battery packs with built-in six-hour automatic timers or remote controls; this allows venue staff to activate all table centerpieces simultaneously without lifting heavy glass domes or disturbing delicate place settings. Finally, test your completed centerpiece prototypes in a darkened room ahead of time to evaluate how the light reflects off glass surfaces and ensure the brightness provides adequate ambiance without overpowering dining guests.
Styling, Presentation, or Organization Ideas
Integrating illuminated centerpieces into your reception design requires careful coordination with surrounding table linens, dinnerware, and room lighting. Pair warm fairy lights with textured fabrics like raw-edge cheesecloth, washed Belgian linen, or crushed velvet runners that catch and soften the light. Keep metallic elements consistent across the tablescape; match brass lantern frames with brushed gold cutlery and gold-rimmed glassware, or pair clear glass cloches with polished silver hollowware for a clean look. When styling long banquet tables, alternate between tall illuminated focal designs—such as lanterns or suspended hoops—and low horizontal elements like eucalyptus garlands to create an undulating visual rhythm across the room. Ensure that central tabletop arrangements stay below fourteen inches or hang above twenty-four inches from the table plane, preserving clear sightlines so seated guests can converse comfortably. Complete the styling by tucking small, matching sprigs of fairy-lit greenery into auxiliary areas, such as the guestbook station, dessert display, and cocktail bar, to carry the warm lighting concept cohesively throughout the venue.
Budget or Time Planning
Executing a full suite of illuminated centerpieces across ten to twenty reception tables requires organized budgeting and disciplined production scheduling. Purchase micro LED wire strands in bulk multipacks online to secure significant volume discounts, and collect vintage glass vessels, cloches, and dough bowls gradually from thrift markets and estate sales throughout your planning months. Create an assembly-line workflow for production: dedicate the first session to testing light strands, installing batteries, and cleaning glass containers; use a second session to construct structural bases, moss pads, and dry components; and reserve the day before the event for adding fresh botanicals and final styling. Simple designs like the geometric lantern or frosted wine bottle require roughly fifteen minutes of active assembly per table, whereas complex arrangements like the submerged cylinder or suspended hoop take thirty to forty-five minutes each. Store completed non-perishable bases in clear, labeled plastic storage totes, keeping extra batteries, floral snips, and adhesive tape packed in an accessible emergency kit for fast on-site touch-ups before guest arrival.
Creative Expansion and Advanced Inspiration
Once you have mastered foundational fairy light mechanics, explore advanced variations to expand your lighting design across the entire venue space. Adapt tabletop lighting concepts into large-scale architectural installations, such as wrapping matching micro LED strands through towering entryway floral arches or hanging dozens of glowing glass orbs from historic courtyard trees. You can also craft personalized guest favors that reflect your centerpiece style, such as gifting miniature cork-lit bottles filled with dried flower petals and personalized thank-you tags at each place setting. Experiment with incorporating specialized lighting effects, such as choosing micro lights with gentle, slow-fade pulse settings that mimic the natural flicker of fireflies in summer gardens. Consider designing cohesive lighting features for the ceremony space, lining the central aisle with matching glowing lanterns or illuminated hurricane vases to connect the ceremony and reception aesthetics. After the wedding celebration, these durable fairy light strands and vintage vessels can be easily incorporated into permanent home decor, serving as enchanting patio lights, mantelpiece displays, and holiday decorations that preserve cherished memories of your celebration.