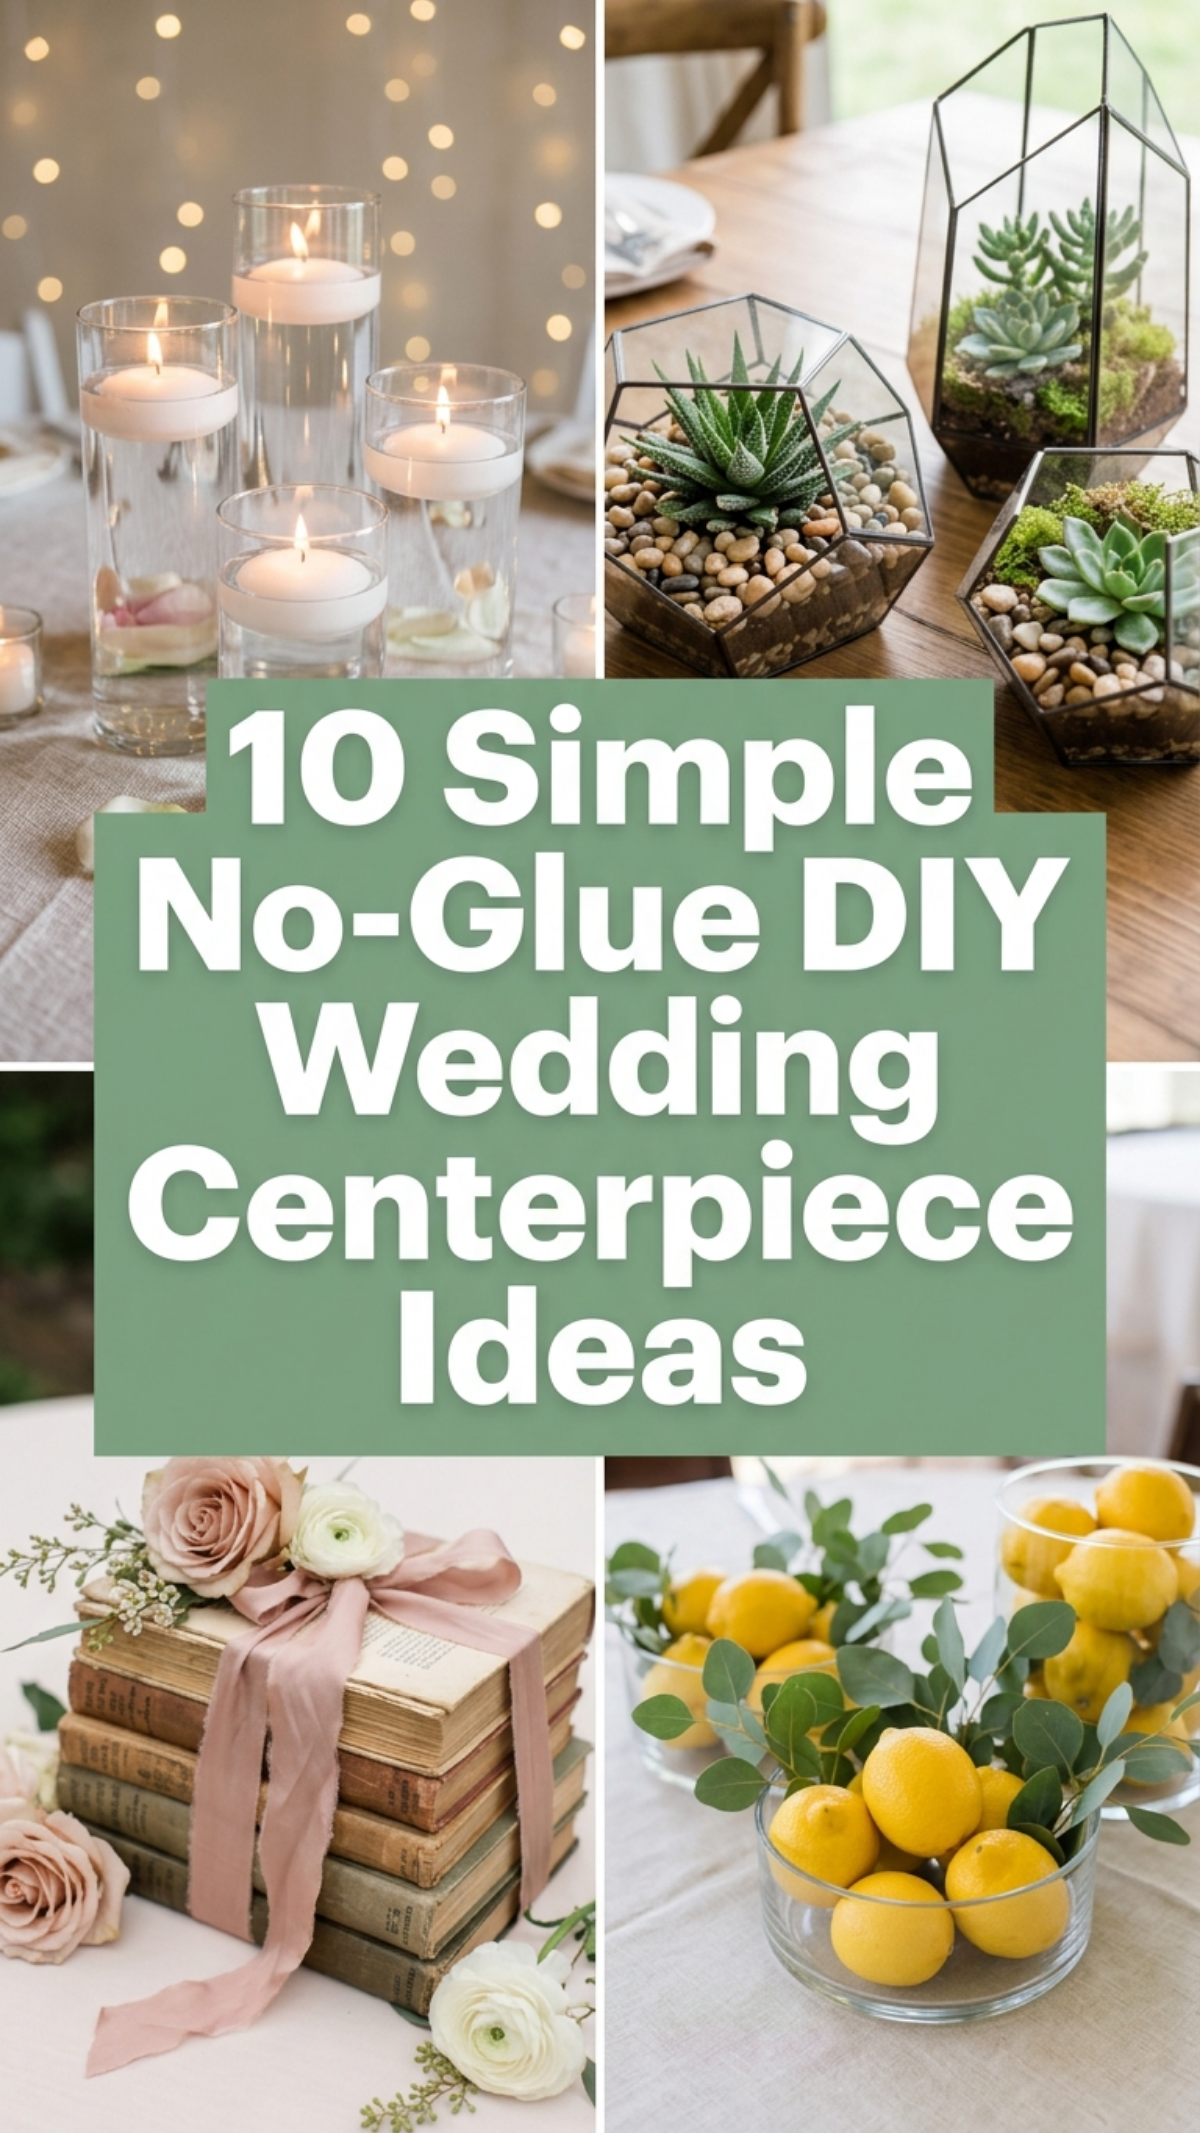
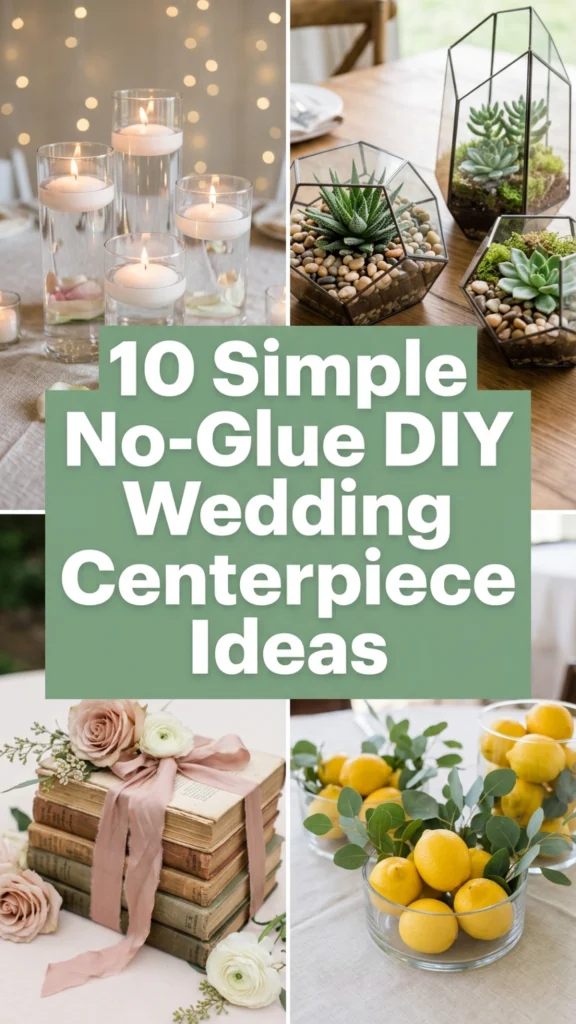
Planning refined wedding reception tables requires thoughtful design choices that balance aesthetic beauty, logistical efficiency, and budget management. Wedding centerpieces anchor the entire visual atmosphere of a dining space, establishing the tone for celebration while drawing guests into a cohesive stylistic environment. Traditional floral arrangements and decorative crafts often rely heavily on hot melt adhesives, industrial glues, or chemical bonding agents to secure elements in place. While adhesives provide immediate stability, they introduce notable drawbacks: toxic fumes, permanent material alteration, messy glue strings, and the complete inability to disassemble and repurpose expensive decor components after the celebration concludes. Exploring no-glue DIY wedding centerpiece concepts opens practical avenues for creating sophisticated, high-end arrangements using structural tension, strategic vessel layering, natural gravity, water immersion, and organic tying materials like floral wire, twine, and ribbon. Readers will discover ten complete, original concepts detailing the structural anatomy and assembly mechanics required for stable table displays. Each project prioritizes zero-adhesive construction, allowing couples, planners, and hobbyists to master elegant tablescapes while preserving materials for resale, gifting, or long-term home decor integration. Learning these construction principles guarantees pristine results without the stress of adhesive failures during transit or temperature shifts.
Why This Idea Is Trending or Useful
No-glue wedding decor continues to dominate modern inspiration boards because contemporary celebrations increasingly favor sustainable, mindful, and multi-functional event design. Couples today seek meaningful creative ideas that reduce single-use waste without compromising visual elegance or photographic appeal. Adhesive-free techniques allow expensive glass vessels, brass candleholders, ceramic compotes, and faux floral stems to remain completely undamaged throughout the event lifecycle. When a centerpiece relies on gravity, water weight, wire armatures, or mechanical tension rather than permanent glue, every single component retains its full resale and reuse value. From a practical assembly perspective, omitting glue eliminates common DIY pitfalls such as visible yellowed residue, brittle bonds caused by cold reception hall air conditioning, and tacky surfaces that collect airborne dust. Furthermore, no-glue construction allows host teams to pack delicate elements flat for transportation, assembling them directly on reception tables within minutes. This modular approach significantly lowers setup labor, minimizes transport vehicle volume, and prevents accidental transit breakage. The resulting minimalist style captures the coveted airy, modern aesthetic popular across high-end editorial bridal spreads, proving that sustainable construction methods yield cleaner, more refined visual results than traditional craft-heavy alternatives.
Materials and Preparation
Achieving flawless structural integrity without adhesive begins with systematic planning, vessel selection, and smart mechanical support tools. Essential hardware includes pre-cut floral stem wire (preferably 22-gauge to 26-gauge for delicate greens and 18-gauge for heavy woody stems), waterproof coated binding wire, natural jute twine, cotton bakery string, and double-faced satin ribbons. Clear floral frogs (kenzan), heavy brass pin frogs, pebble aggregates, natural river stones, polished sea glass, and fine silica sand serve as primary ballast and foundational grip agents within containers. Clean, clear glass hurricane sleeves, footed apothecary jars, compote bowls, wooden risers, and tapered brass candlesticks provide the primary structural framework. Before starting assembly, thoroughly wash and degrease all glassware using a warm vinegar-and-water solution to ensure crystal-clear transparency under venue lighting. Strip lower leaves and thorns from all fresh floral stems to prevent underwater bacterial decay and water cloudiness. If using high-grade silk florals, bend stem wires into supportive counter-weight loops rather than trimming them permanently. Measure dining tables meticulously, ensuring centerpiece heights either remain beneath fourteen inches or extend above twenty-four inches to preserve direct eye-level conversation lines across banquet seating.
1. Submerged Floral Cylinders with Floating Flame Elements
Execution Process
The submerged botanical concept creates a dramatic, museum-quality visual effect by using water refraction to magnify natural textures, petals, and foliage inside clear glass. Transparent cylindrical vases filled to varying heights form a clean, multi-tiered tablescape that reflects ambient candlelight across reception spaces. Because buoyancy causes loose floral stems to float uncontrollably toward the water surface, structural stability requires strategic mechanical weighting rather than adhesives. Smooth, dense materials such as polished river jade, clear glass marbles, or tumbled quartz act as natural ballast at the base of the cylinder. When submerged, the stems remain anchored beneath the stones while water pressure stabilizes the vertical alignment of the blooms. Submerging whole blossoms like orchids, calla lilies, or long-stemmed roses transforms modest floral quantities into striking architectural displays. The water acts as an organic magnifying lens, making the petals appear fuller, crisper, and intensely saturated under evening illumination. The upper perimeter remains unobstructed, providing the ideal buoyant platform for paraben-free paraffin floating discs that illuminate the water column from above.
Begin by selecting three thick-walled cylindrical glass vases measuring eight, ten, and twelve inches in height to achieve dynamic vertical variation on the table. Clean each cylinder thoroughly with lint-free microfiber cloths to eliminate interior smudges, lint, and fingerprints. Place a two-inch layer of washed, smooth river stones or polished glass pebbles into the bottom base of each vessel. Trim the stems of fresh cymbidium orchids, dendrobiums, or calla lilies to fit the precise interior height of the respective vase, leaving one inch of clearance beneath the anticipated water line. Gently wedge the bottom end of the stem into the stone base, ensuring the pebbles encase the stem firmly without crushing plant tissue. Slowly pour room-temperature distilled water down the tilted interior wall of the vase to prevent turbulence and eliminate micro-bubbles clinging to the petals. Fill the vessel until the water level rests approximately two inches below the top rim. Finally, gently place a circular floating wax candle onto the center of the water surface, ensuring the wick remains dry and ready for evening lighting.
2. Tiered Wooden Crate and Potted Herb Greenery Display
Setup Method
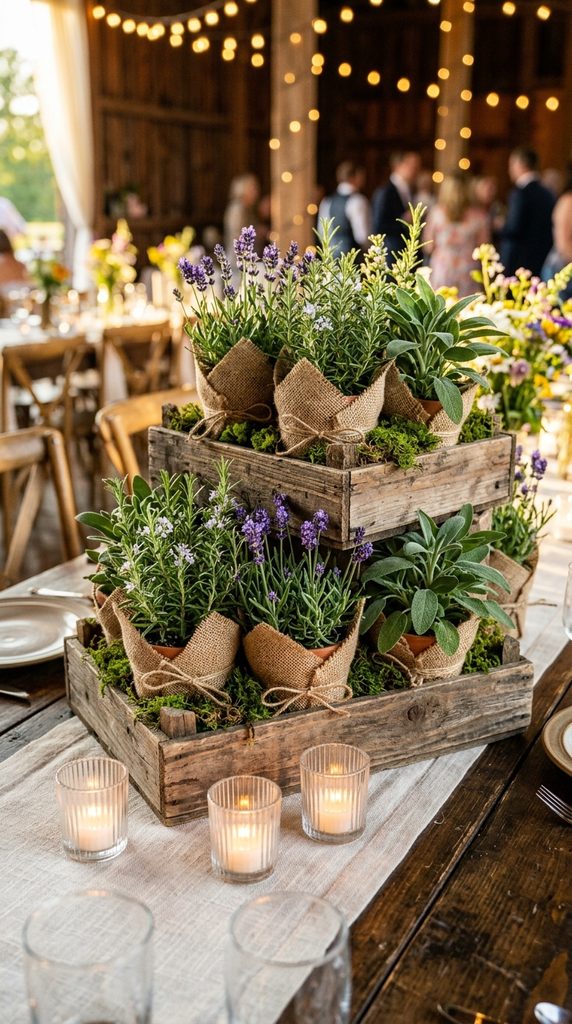
Embracing rustic farmhouse charm with an organized, sustainable layout, the tiered wooden crate display integrates living potted flora into a zero-waste centerpiece. This concept avoids foam blocks, floral preservatives, and glue guns by relying on sturdy nesting wooden crates and potted botanicals that remain healthy throughout the celebration. Living culinary herbs—such as silver-hued rosemary, broadleaf Italian sage, variegated thyme, and creeping mint—impart a subtle fragrance across banquet seating without overwhelming dinner service. The warmth of natural wood tones complements ivory linens, burlap runners, or exposed wood trestle tables, providing earthy texture that feels timeless. By incorporating differing crate dimensions, the arrangement achieves stable elevation naturally through vertical stacking and surface tension. Guests appreciate the interactive, organic atmosphere, and the living plants transition seamlessly into post-wedding favors for bridal party members or permanent additions to a personal kitchen garden. The absence of cut flowers ensures that heat, direct sunlight, or long ceremony delays will not cause wilting or drooping foliage.
Source two small, rectangular untreated pine or reclaimed cedar crates, ensuring one fits loosely inside or stacks perpendicularly across the base unit. Sand down any rough exterior splinters with fine-grit sandpaper while maintaining the rustic grain character, leaving the wood raw or sealing it with natural beeswax polish. Place the larger crate flat on the table runner, positioning the second crate on top at a dynamic forty-five-degree diagonal angle to create recessed display alcoves. Wrap four-inch plastic grower pots of fresh rosemary, lavender, and thyme in natural burlap squares, securing the fabric around the rim using knotted natural jute twine. Arrange the wrapped pots into the crate openings, utilizing the interior corners to brace the pots upright without hardware. Tuck preserved sheet moss or dry Spanish moss into the gaps between the pots to conceal plastic rims and create a lush carpet effect. Interweave unlit ribbed ivory pillar candles placed within deep glass votives between the crates for textural balance and absolute fire safety.
3. Sand-Anchored Taper and Wildflower Terrarium
How to Create
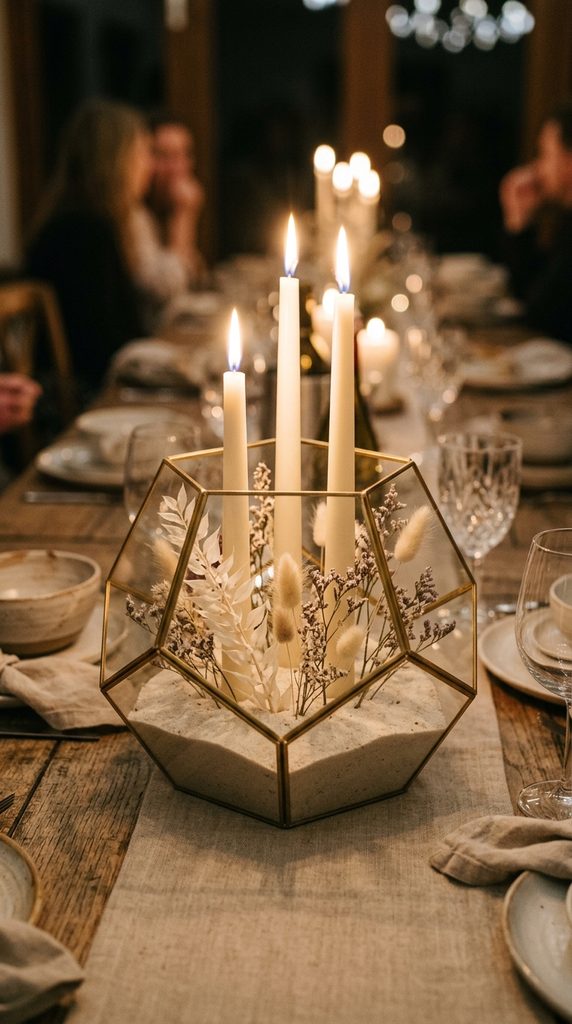
A coastal-inspired sand terrarium combines the warm glow of slender tapered candles with the delicate movement of dried grasses, seed pods, and preserved wildflowers. Fine silica sand provides a dense, granular matrix that offers instant structural resistance, holding vertical items firmly in place through frictional resistance. This method removes the need for metal candle cups, floral foam, or sticky candle-wax adhesives that often damage delicate glass bottoms. The soft, neutral tones of desert sand, crushed limestone, or off-white beach sand create a minimalist base that highlights sculptural botanicals like bunny tails, sea lavender, bleached ruscus, and dried eucalyptus. Contained within geometric glass terrariums or wide-mouth hurricane bowls, the arrangement remains completely sheltered from sudden banquet drafts, preventing uneven candle dripping. The textural interplay between fine, powdery granules, crisp translucent glass, and wispy floral stems produces an understated bohemian elegance suited to beachside, desert, or contemporary loft celebrations.
Position a wide, open-top geometric glass terrarium with brass or black zinc framing in the center of the dining table. Pour fine, dry quartz sand directly into the center until the bed reaches an even depth of approximately three to four inches. Smooth the surface using a flat wooden ruler or cardboard edge to ensure a clean, level plane. Take three non-drip, standard-diameter taper candles of varying heights and press their bases firmly down into the sand until they touch the glass floor, packing sand tightly around their bases to ensure vertical rigidity. Select an assortment of dried stems—such as bleached phalaris, dried billy buttons, lavender sprigs, and delicate oat grass—and trim their lower stems to staggered lengths between four and eight inches. Insert each dried stem individually into the sand around the perimeter of the candles, letting the granular tension hold each stem at its intended angle. The natural weight of the packed sand holds every element secure without shifting during tabletop vibrations.
4. Vintage Book Stack and Ribbon-Bound Botanical Trio
Step-by-Step Guide
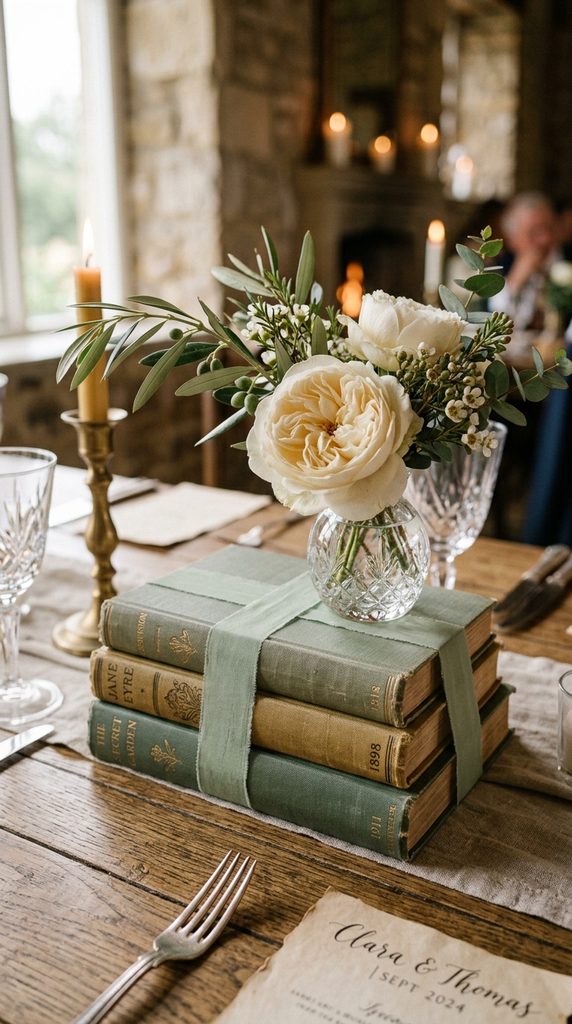
The literary-themed botanical stack is an elegant solution for book-loving couples, vintage aesthetics, and romantic heritage venue spaces. This design establishes height and structural balance through the natural mass of antique hardback books bound securely with rich textiles. By relying entirely on tension knots, fabric wraps, and interlocking stacks, historic volumes remain completely unmarked and undamaged by chemical adhesives or tape. Selecting books with embossed cloth bindings in coordinated shades of sage green, navy, slate blue, or muted gold adds historical depth to reception tables. The horizontal orientation of the books creates an elevated platform for small cut-glass vessels, antique inkwells, or bud vases holding single focal blossoms. Because the books provide weight, the display remains stable throughout meal service, resisting accidental knocks from passing guests or busy catering staff. This approach celebrates classic literature, antique curation, and sustainable assembly while functioning as a conversation piece that invites guests to examine vintage titles and decorative endpapers.
Collect three hardcover vintage books of descending sizes, choosing volumes with neutral, fabric-bound spines and covers that harmonize with your reception color palette. Wipe the covers with a dry cloth to remove dust, ensuring pages are completely dry. Stack the three books squarely in the center of the table, placing the largest, heaviest volume on the bottom and the smallest on top. Cut a five-foot length of two-inch-wide silk chiffon or double-sided velvet ribbon. Wrap the ribbon vertically and horizontally around the entire book stack like a traditional parcel, pulling it taut to lock the books together through external tension. Tie the ribbon into a structured square knot or tailored bow at the top, leaving three-inch tails cascading down the side. Slide a small, heavy-bottomed crystal bud vase underneath the ribbon loop on top, using the taut fabric band to anchor the base securely against the upper book cover. Fill the bud vase with water using a narrow-spout watering can, inserting two garden rose stems and a sprig of olive leaf to complete the display.
5. Floating Geometric Hoop with Suspended Herbarium Frames
Assembly Method
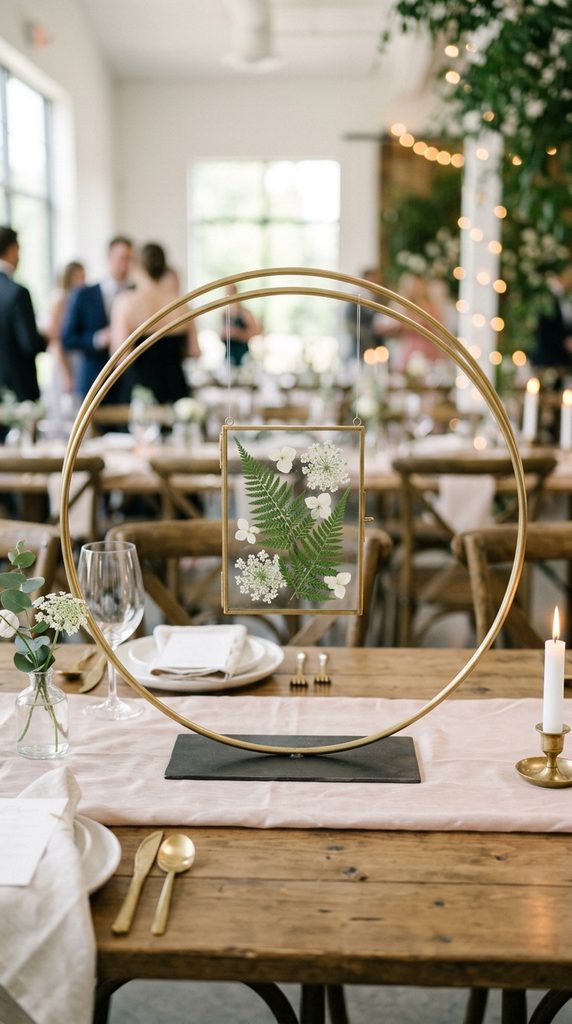
Modern minimalist weddings frequently use airy, three-dimensional geometry to draw the eye upward without blocking dinner table sightlines. The floating circular hoop structure employs balance, gravity, and hanging tension to suspend delicate double-glass floating frames within a freestanding metallic ring. Rather than gluing foliage against glass surfaces, this method secures pressed flowers and skeletal leaves purely through the mechanical clamping pressure exerted by hinged floating frame latches. The hoop itself mounts into a solid slotted hardwood base, creating a sturdy vertical anchor that requires zero screws, brackets, or adhesives. Suspended within the circle, the framed botanicals appear weightless, catching ambient light while casting soft shadows across the table runner. Framing preserved specimens such as pressed maidenhair ferns, violas, or delicate lace flowers introduces an artful, curated sensibility that feels refined and contemporary. The structural balance of the hoop ensures stability even in active reception halls with ceiling fans or flowing curtains.
Begin with a free-standing, matte-brass or black iron floral hoop welded to a flat, heavy rectangular metal or wood base plate to ensure structural balance. Inspect the base to verify it sits flush on the tabletop without wobbling. Select a miniature four-by-six-inch brass double-glass floating photo frame equipped with a mechanical sliding clasp. Open the frame, arrange dried pressed botanical specimens—such as fern fronds, white larkspur petals, or pressed maple foliage—onto the lower pane, and close the top pane over the specimens. Secure the mechanical sliding latch tightly, allowing friction between the glass sheets to hold the botanicals permanently without sliding. Cut an eight-inch segment of thin, transparent monofilament fishing line or fine metallic cord. Loop the line through the frame’s top hanging ring, pass it over the apex of the larger decorative hoop, and tie a secure double surgeon’s knot at the desired hanging height. The downward pull of gravity holds the frame suspended plumb in the center of the circular hoop.
6. Interlocking Driftwood and Tillandsia Air Plant Sculptural Spire
How to Build
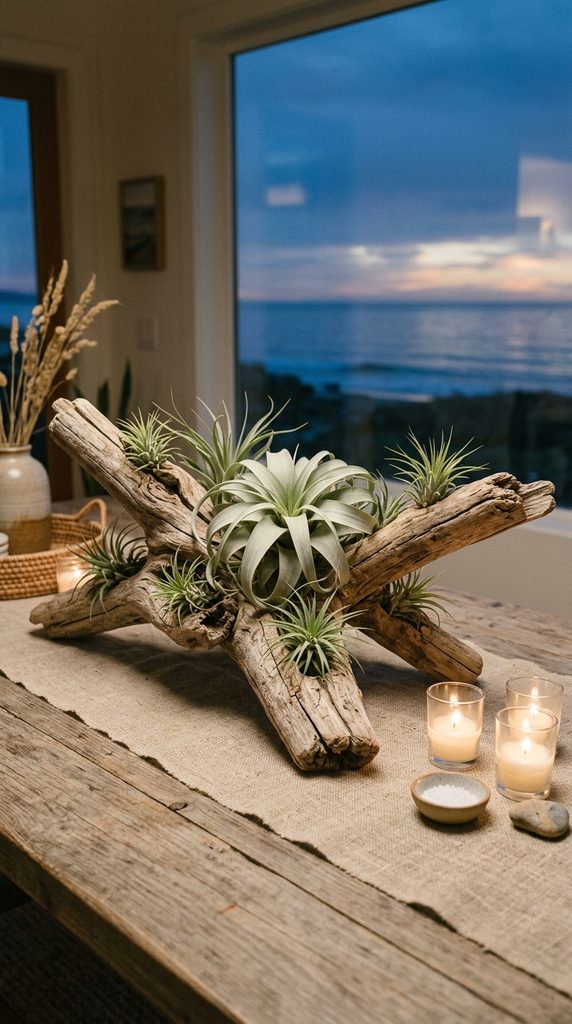
Coastal, minimalist, and modern bohemian weddings benefit from the organic, architectural lines of sun-bleached coastal driftwood and hardy air plants. Tillandsia air plants require no soil, floral foam, or submerged water sources to thrive, absorbing moisture directly from environmental humidity. This makes them ideal for zero-glue structural construction, as they can be positioned directly within the natural knots, crevices, and branching angles of aged timber. Driftwood pieces collected or sourced for centerpieces possess complex, irregular shapes that naturally interlock through friction, weight distribution, and notched joints. By selecting complementary branches that balance without mechanical fasteners, you construct an organic sculpture unique to each table. The silvery-grey patina of weathered wood paired with the powdery sage-green rosettes of air plants forms a refined, organic color scheme. This sculptural approach produces a dynamic horizontal or vertical silhouette that remains completely intact without single-use consumables, resulting in zero venue breakdown waste.
Select three distinct pieces of natural driftwood—one primary curved base limb measuring sixteen to eighteen inches, and two smaller secondary branches with fork structures. Test the primary limb on a flat surface to locate its natural center of gravity, ensuring it rests solid and stable without rocking. Carefully interlock the two secondary branches into the natural forks and hollows of the base piece, adjusting their contact points until friction and counterbalancing weight hold all three pieces locked together. Inspect the natural recesses, hollow knots, and crevices along the wood surface. Gently set various sizes of live tillandsia—such as Tillandsia xerographica for the central focal point and smaller Tillandsia ionantha for accent points—directly into these wooden pockets. The spiky, firm leaves of the tillandsia naturally catch against the textured wood grain, anchoring the plants securely without wire or adhesive. Complete the arrangement by setting small glass votive cups into surrounding flat indentations around the driftwood base.
7. Wire-Latticed Ceramic Compote with Fresh Garden Cuts
Execution Process
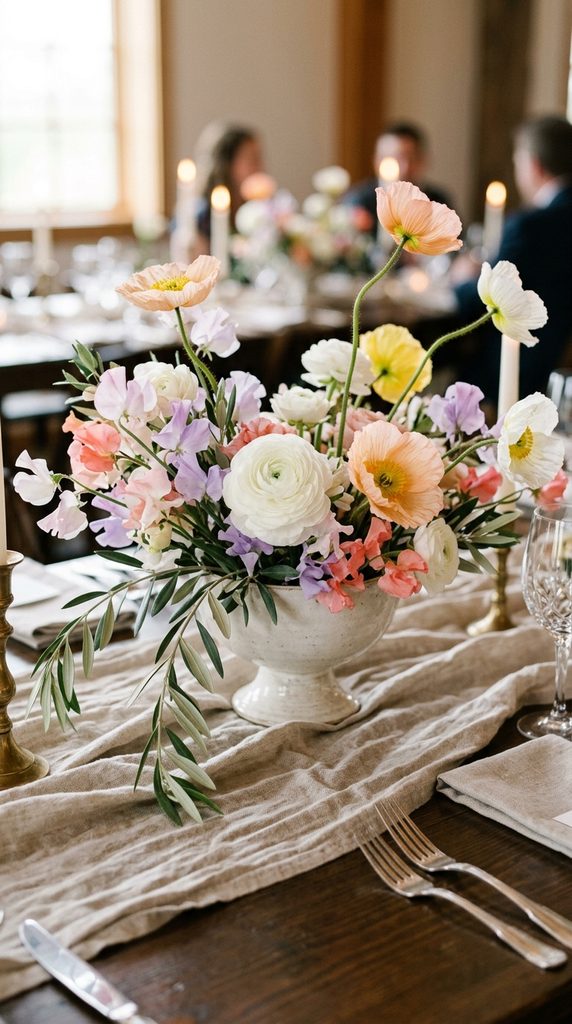
The historic floristry technique known as the floral grid or wire frog framework replaces synthetic floral foam entirely, utilizing reusable coated wire netting to support fresh stems. Placing a wire lattice across the mouth of a wide ceramic compote or stoneware bowl creates a resilient three-dimensional grid beneath the rim. When floral stems pass through multiple layers of this metal weave, the opposing tension points hold each blossom at the exact angle desired by the designer. This allows soft garden stems—such as sweet peas, ranunculus, delicate poppies, and blossoming fruit branches—to stand tall or arch gracefully over the bowl edges without slipping. Water inside the vessel remains completely uninhibited by foam particles, allowing stems to hydrate naturally and prolonging the display’s freshness. The weight of the ceramic bowl provides absolute stability on reception tables, preventing tipping even when holding long, asymmetrical foliage branches that create organic, garden-gathered drama.
Begin with a heavy stoneware or ceramic footed compote bowl having an eight-inch diameter and a four-inch depth. Cut a circular section of plastic-coated green chicken wire (hexagonal wire netting with one-inch openings) roughly double the diameter of the bowl’s opening. Mold the cut wire into a dome-shaped, double-layered circular cage using your hands, ensuring wire ends point upward to avoid scratching the ceramic glaze. Press the wire cage firmly into the bowl so that the top of the dome rests level with or slightly below the rim, with the bottom layer resting against the vessel floor. Cut a length of waterproof floral binding tape or clear pot tape, wrapping it across the top rim in a cross pattern and anchoring the ends over the exterior lip to secure the wire cage mechanically. Fill the compote three-quarters full with fresh water. Insert woody foliage stems—such as salal, bay leaf, or olive branches—first through both layers of wire netting to establish an anchor framework, then follow with delicate focal blossoms through the open grid spaces.
8. Glass Hurricane Cloche with Inverted Botanical Nesting
Setup Method
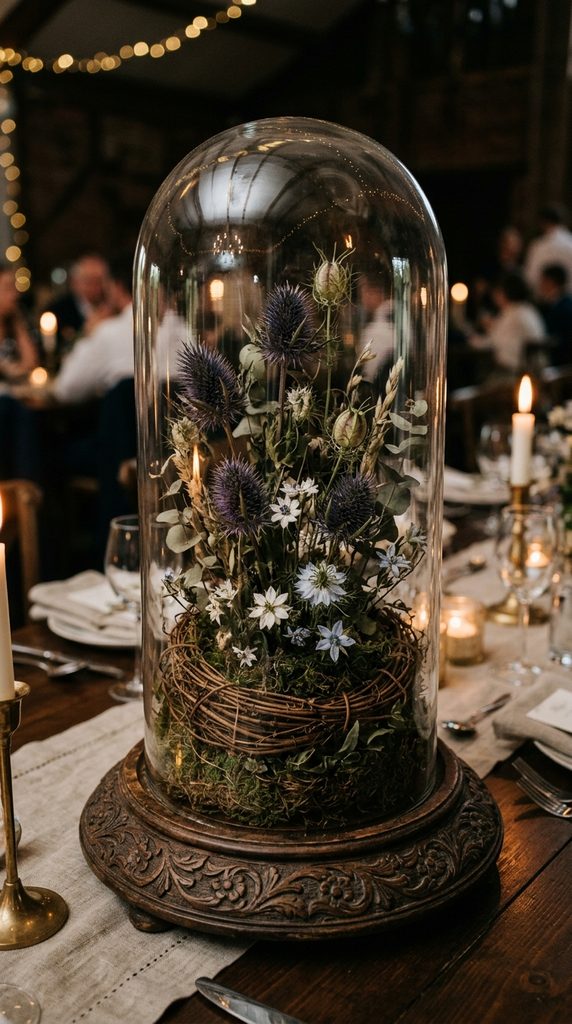
The glass cloche or bell jar display evokes Victorian botanical collections, enclosing delicate compositions in a dust-free, draft-resistant capsule. Traditional cloches require heavy bases and adhesive putty to keep interior elements upright, but an inverted bell jar assembly utilizes simple gravity and balance to hold elements steady. By employing natural woven vine nests, dried birch twigs, or moss bases shaped to match the cloche diameter, the base plate holds all interior florals securely through compression fit. Inside the cloche, the protected micro-environment safeguards fragile dried florals, miniature paper butterflies, or delicate botanical seed heads from being bumped by passing guests. The reflective curve of the bell glass catches venue downlights, transforming simple botanical elements into luminous display artifacts. This technique works exceptionally well on narrow banquet tables where wide, sprawling floral arrangements might intrude upon shared family-style dining platters, salt cellars, or wine service carafes.
Select a clear glass cloche with an accompanying circular wooden or slate base plate that features a recessed interior groove. Form a dense, circular ring of natural coiled grapevine or curly willow twigs sized to fit within the perimeter of the base groove. Lay a circular cushion of preserved sheet moss inside the vine ring, pressing it flat to create a stable, fibrous floor. Select a collection of dried focal botanicals—such as dried thistle heads, small nigella pods, cotton puffs, and tiny star flowers—trimming all stems to three inches or shorter. Insert the stem ends directly down into the dense moss and intertwined vine loops, which grip the stems through natural compression. Ensure the total height of the floral composition remains two inches shorter than the interior curve of the glass bell. Carefully lower the glass cloche vertically over the arrangement, guiding the glass rim into the carved perimeter groove of the wooden base. The downward weight of the heavy glass keeps the display securely enclosed and completely immobile.
9. Interlocking Geometric Brass Lantern Cluster with Ribbon Accents
How to Create
Lanterns are an enduring favorite for evening wedding decor, offering dependable structural framing and romantic candle containment. Rather than leaving lanterns isolated or gluing them to base boards, grouping lanterns of differing heights creates a solid centerpiece through geometric interlocking. The metal framework provides vertical planes that lean against and brace each other, while tension-wrapped fabric ribbons tie the grouping into a single, cohesive structural cluster. Inside the lanterns, thick pillar candles sit safely behind glass panels, preventing open flame hazards while radiating warmth across table settings. Placing the lanterns directly onto long linen runners grounds the grouping and introduces contrasting textures. The absence of permanent fixatives means lanterns can be unpacked from protective transport cartons, combined on-site in moments, and broken down at midnight without scraper tools or chemical solvents, leaving venue surfaces completely free of wax and residue.
Gather three modern brass or black iron architectural lanterns of staggered heights—such as fourteen, ten, and six inches tall. Clean all glass panes using a vinegar glass spray and lint-free cotton cloth to remove dust and oil smudges. Position the tallest lantern slightly off-center on the reception table, placing the medium lantern flush against its wide back pane and nestling the shortest lantern into the front corner angle. This triangular clustering pattern creates interlocking points of contact that stabilize the trio against lateral bumps. Cut a wide, three-inch double-faced velvet ribbon measuring four feet in length. Thread the ribbon through the top carry rings of all three lanterns, cinching them together under moderate tension before tying a crisp flat knot with hanging split-end tails. Open the lantern doors, insert a heavy, unscented wax pillar candle into the center of each compartment, and latch the doors shut. The internal candle weight provides ballast, while the tied ribbon keeps the cluster from separating.
10. Stacked Stone Cairn and Sculptural Bare Twig Armature
Step-by-Step Guide
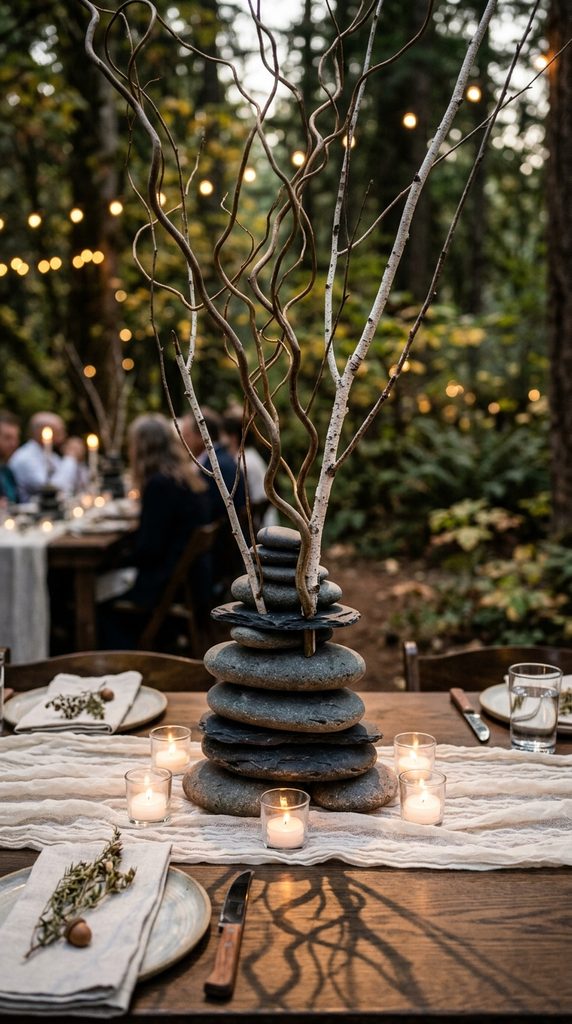
Drawing inspiration from natural balanced rock cairns and modern organic sculpture, this centerpiece uses gravitational counterbalancing to construct an eye-catching tablescape. Flat slate disks, river-smoothed granite stones, and structural branches combine to form an earthy centerpiece suited to modern, Scandinavian, or woodland wedding designs. The core stability relies completely on friction and horizontal mass: heavy, broad stones support progressively smaller stones through balanced placement without industrial epoxies. Delicate, architectural branches—such as Japanese curly willow, dogwood, or birch twigs—slip between the stacked stones, using the stones’ downward mass to clamp their ends securely. The resulting display resembles an organic rock garden, introducing verticality and artistic flair without heavy floral costs. The minimalist composition pairs naturally with low tea lights set in clear glass cups around the stone base, casting striking linear shadows across the table runner during the evening meal.
Source several smooth, naturally flat river rocks or cut slate disks, selecting three to four stones per table in descending sizes from eight inches across down to three inches. Wash and dry the stones thoroughly to remove all surface dust and loose grit that could cause slippage. Lay the largest, heaviest stone flat in the center of a gauzy table runner. Place the second largest stone on top, adjusting its position until it sits flat without wobbling. Take two long, sculptural curly willow or budding birch branches and place their trimmed stem ends across the top of the second stone. Immediately place the third, medium-sized stone directly over the stem ends, allowing the mass of the third stone to clamp the wood branches flat against the stone below. Place a small, rounded focal pebble on the very top of the stack as an aesthetic capstone. Test the assembly by gently tapping the branch tips; the friction-locked stone sandwich holds the branches vertical and rigid without shifting.
Common Beginner Mistakes and How to Avoid Them
When executing no-glue wedding centerpieces, the most common oversight is underestimating the center of gravity and lateral stability of free-standing components. Without chemical adhesives to lock parts together, arrangements rely entirely on mass, friction, and physical interlocking to resist bumps from energetic guests. A frequent mistake is placing tall taper candles or long floral branches into vessels without sufficient base ballast. When someone accidentally kicks a table leg or leans heavily against the edge, poorly weighted elements can tip over. To prevent this, always incorporate counter-weights such as washed gravel, dense silica sand, polished river stones, or metal floral frogs into the vessel bottoms. Another common error is using standard craft twine or ribbons that stretch over time; under continuous tension, low-grade fibers slacken, causing bundled elements like vintage books or clustered lanterns to loosen. Always select non-stretch textiles like heavy grosgrain, double-faced satin, or wired ribbon to ensure structural wraps remain tight throughout the night. Finally, always test a complete prototype at home weeks before the event, giving it a firm bump test to verify stability.
Practical Tips for Better Results
Achieving professional results with no-glue construction requires careful attention to material prep, surface friction, and clean mechanics. When using smooth glass vessels on slick wooden or linen tables, place clear, non-adhesive silicone grip dots or thin felt pads under the base. These pads generate friction that prevents vases from sliding when tables are bumped, all without leaving sticky residue. For submerged floral arrangements, avoid cloudiness by washing decorative stones thoroughly in warm water and using distilled water rather than mineral-rich tap water. Tap water contains dissolved air that forms tiny bubbles on glass walls and submerged petals within hours, diminishing transparency. When building wire armatures or cages, fold cut wire ends inward so they cannot scratch antique tableware or pinch catering staff during cleanup. Keep an assembly toolkit at the venue with extra stem wire, sharp bypass shears, microfiber towels, and a narrow-spout watering can to top off vessels neatly after table placement.
Styling, Presentation, or Organization Ideas
A centerpiece should not sit as an isolated decorative island; it must integrate naturally into the broader dining setting. To elevate individual no-glue centerpieces into an expansive tablescape, layer coordinating textiles, scattered elements, and ambient lighting across the table’s length. Lay down an airy cheesecloth, washed linen, or velvet runner to define the display zone and soften hard table surfaces. Place the primary structural centerpiece in the visual center, then extend the design outward using low-profile accessories like ribbed glass tea light holders, brass votives, or loose sprigs of olive foliage. Vary the heights of surrounding accent pieces to create a dynamic visual rhythm that draws the eye across the table. For round banquet tables, arrange elements in a triangular layout to ensure balance from all seating angles. For long rectangular farm tables, repeat centerpiece units every four to five feet, connecting them with loose trailing greens to create continuous, cohesive styling that photographs beautifully from any perspective.
Budget and Time Planning
Constructing zero-adhesive centerpieces delivers substantial financial and time savings when managed with a structured production timeline. Because components remain pristine, couples can source premium containers, vintage books, and brass lanterns secondhand, reselling them after the wedding to recoup up to seventy percent of initial decor costs. To optimize your budget, source reusable materials in bulk wholesale lots and choose hardy, long-lasting botanicals like dried grasses, herbs, or seasonal greenery over fragile, expensive imported blossoms. Time management is equally crucial: establish an organized assembly line forty-eight hours before the ceremony. Pre-cut all floral stem wires, wash glassware, and bundle dry components like book stacks or terrariums in labeled plastic bins. Because no-glue designs eliminate glue-drying wait times, assembly moves swiftly. On wedding morning, assign a trusted coordinator or helper to place the pre-assembled bases on tables, add water via narrow-spout cans, and trim fresh stems on-site, completing twenty tables in under an hour.
Creative Expansion and Advanced Inspiration
Once you master foundational no-glue techniques, explore advanced variations that elevate your tablescapes into high-concept art installations. Consider suspending large overhead floral clouds above banquet tables using tension-clamped aircraft cable and interlocking branches, mirroring the zero-glue philosophy above the dining plane. Experiment with kinetic water elements, such as multi-tiered gravity fountains crafted from nested ceramic bowls, where circulating water anchors floating blossoms while adding tranquil ambient sound. Incorporate hidden internal illumination by tucking submersible, remote-controlled LED lights beneath translucent sea glass or quartz crystals inside submerged floral cylinders, creating an ethereal glow from within the vessel base. For winter celebrations, replace living herbs with layered evergreens, pinecones, and birch logs interlocked with wire netting, dusting the display with powdered marble dust to evoke frosted winter woodlands. Mastering these gravity-based, mechanical joining methods frees your creativity, allowing you to design breathtaking, eco-conscious event decor that is as practical to break down as it is stunning to behold.