Wedding reception lighting serves as the foundational architectural element of evening event design, transforming plain venues into immersive, romantic environments. Exploring professional illumination strategies allows couples, wedding planners, and stylists to control ambient mood, define spatial boundaries, and accentuate decorative focal points across indoor and outdoor reception spaces. In this comprehensive guide, readers will discover ten curated illumination concepts ranging from sweeping bistro bulb canopies and organic foliage chandeliers to modern neon statement installations and grounded lantern pathways. Understanding the technical mechanics of lumens, correlated color temperature, dimmer calibration, and electrical distribution provides immense practical value, preventing common visual errors like harsh glare or uncomfortably dim dining tables. The step by step instructions provided throughout this tutorial break down structural rigging requirements, fire safety protocols, and fixture placement principles necessary for seamless execution. By mastering these beginner friendly methods, event hosts can construct balanced illumination schemes that honor classic Pinterest ideas while elevating photography quality throughout the night. Whether you are transforming a rustic barn, an industrial warehouse, or an open-air coastal lawn, these practical concepts deliver stunning aesthetic results that maintain warmth, safety, and elegance from the first toast to the final departure.
Why This Idea Is Trending or Useful
Carefully planned reception lighting has established itself as one of the most prominent trending ideas across modern Pinterest wedding boards because it delivers unmatched atmospheric transformation for any event venue. Contemporary event aesthetics emphasize warmth, intimate ambiance, and immersive spatial styling that generic venue overhead lighting simply cannot achieve. From an ergonomic perspective, intentional lighting establishes visual hierarchy, naturally directing guest traffic from the cocktail patio to the formal dining room and energetic dance floor. For creative couples exploring DIY options, many modern illumination setups offer accessible execution using affordable materials, providing exceptional budget ideas that maximize visual impact without requiring complex electrical refits. Furthermore, professional wedding photographers rely heavily on soft, warm ambient light sources to capture crisp, flattering portraits without depending on harsh on-camera flash units. The versatility of modern lighting elements—including low-voltage warm LEDs, wireless uplights, and programmable dimmer packs—empowers decorators to transition venues smoothly from relaxed daylight dining to dramatic, celebratory evening dancing. Mastering these simple setups offers enduring practical utility, bridging high-end lighting design with straightforward, realistic event planning.
Materials and Preparation
Executing a professional and secure wedding lighting installation requires systematic hardware selection, power load calculations, and organized spatial planning before rigging begins. Key structural materials include heavy-duty commercial outdoor string lights, shatterproof LED Edison bulbs rated between 2200K and 2700K color temperature, aircraft-grade stainless steel suspension cables, turnbuckles, and industrial zip ties. For wireless tabletop styling, gather smokeless dripless taper candles, tempered glass hurricane cylinders, micro-fairy string lights with warm copper wiring, and wireless rechargeable LED uplight fixtures. Essential installation tools include a laser distance measurer, heavy-duty wire strippers, ladder systems, electrical outlet testers, and matte gaffer tape for flush cable concealment along footpaths. Before hanging any fixtures, conduct a comprehensive electrical site survey to calculate total wattage demands per circuit breaker, ensuring that caterers, musical entertainment, and decorative lighting share power safely without tripping breakers. Review venue guidelines regarding ceiling anchor permissions, flame restrictions, and maximum ladder heights to avoid day-of-event compliance delays. Establishing a detailed rigging schedule with reliable assistant support ensures that all overhead fixtures, ground paths, and tabletop elements are secured safely well before the first guest arrives.
1. Suspended Bistro Filament Canopy
How to Create
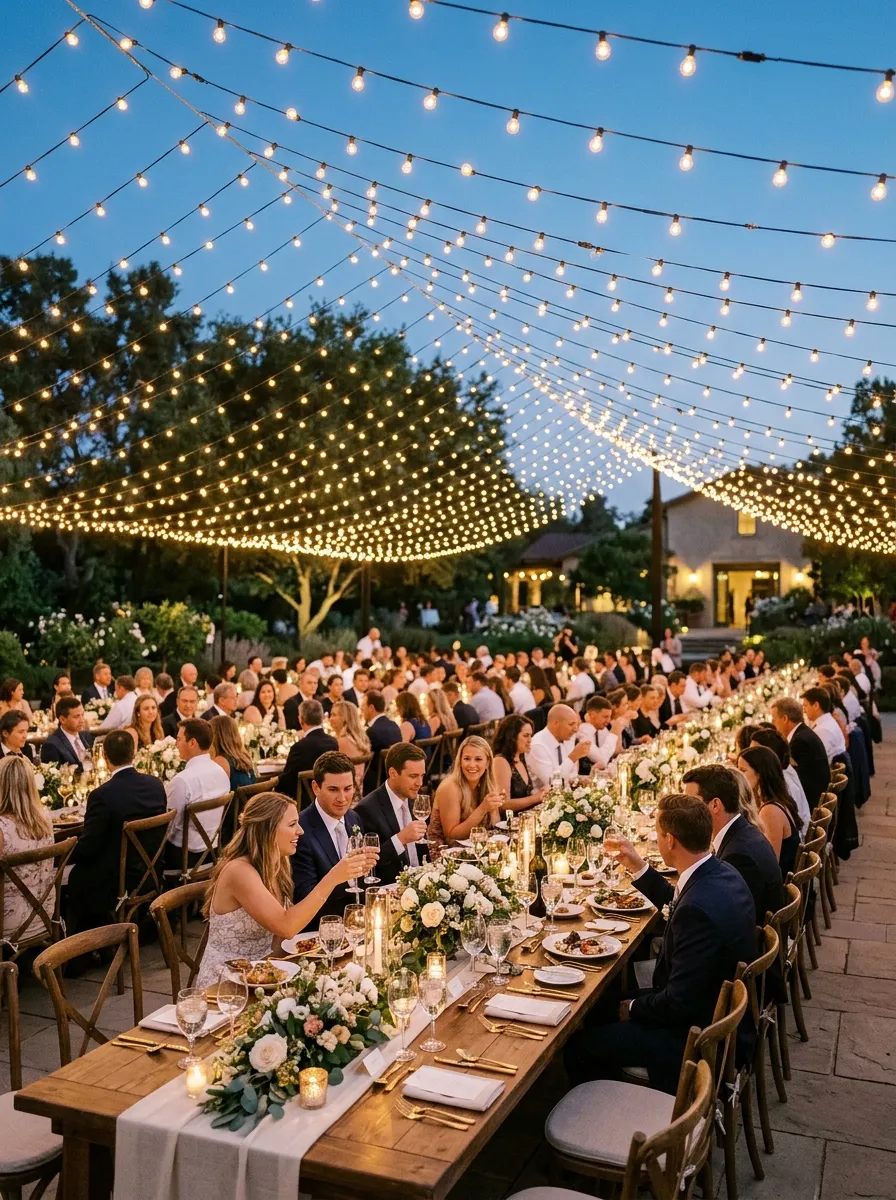
The suspended bistro filament canopy utilizes sweeping crisscross arrays of exposed vintage-style Edison bulbs to construct an intimate ceiling of golden ambient light over open-air or high-ceilinged reception venues. This design relies on tensioned perimeter support cables that suspend warm filament bulbs in parallel rows, gentle swags, or radial starburst formations extending outward from a central focal point. The visible spiral filaments inside amber glass globes cast a soft, flattering 2200K golden glow, lowering the visual ceiling height in cavernous spaces to foster a cozy dining atmosphere. The industrial nature of black rubberized commercial cord pairs seamlessly with exposed brick walls, timber barn rafters, and open tent structures, offering a versatile rustic-modern design foundation. By eliminating harsh downlighting in favor of a broad, evenly distributed ambient glow, this setup provides consistent light levels across extensive banquet table layouts. Its architectural simplicity serves as an ideal baseline lighting design that works beautifully as a standalone feature or paired with lush botanical accents.
To install this illuminated canopy, measure the diagonal distances of your reception area using a laser distance tool, establishing sturdy anchor points on structural beams, tent poles, or securely weighted steel support masts. Anchor stainless steel aircraft wire across each planned span using heavy-duty eye bolts, tensioning the lines completely taut with threaded turnbuckles to prevent mid-span sagging when bearing bulb weight. Attach commercial-grade string light cords directly to the tensioned support wire using black UV-resistant cable ties placed every eighteen inches, ensuring the sockets hang downward in a clean vertical line. Screw in shatterproof warm-white LED filament bulbs after the cord is fully suspended to prevent accidental bulb breakage against ladders or rigging hardware during hanging. Connect the master feed line to an inline rotary dimmer pack rated for the total circuit wattage, testing the dimming gradient from bright pre-dinner prep down to a soft forty-percent dinner glow. Secure all vertical drop cords flush against support columns using matte black gaffer tape to keep service routes safe.
2. Organic Foliage and Pendant Chandelier Installation
Step-by-Step Guide
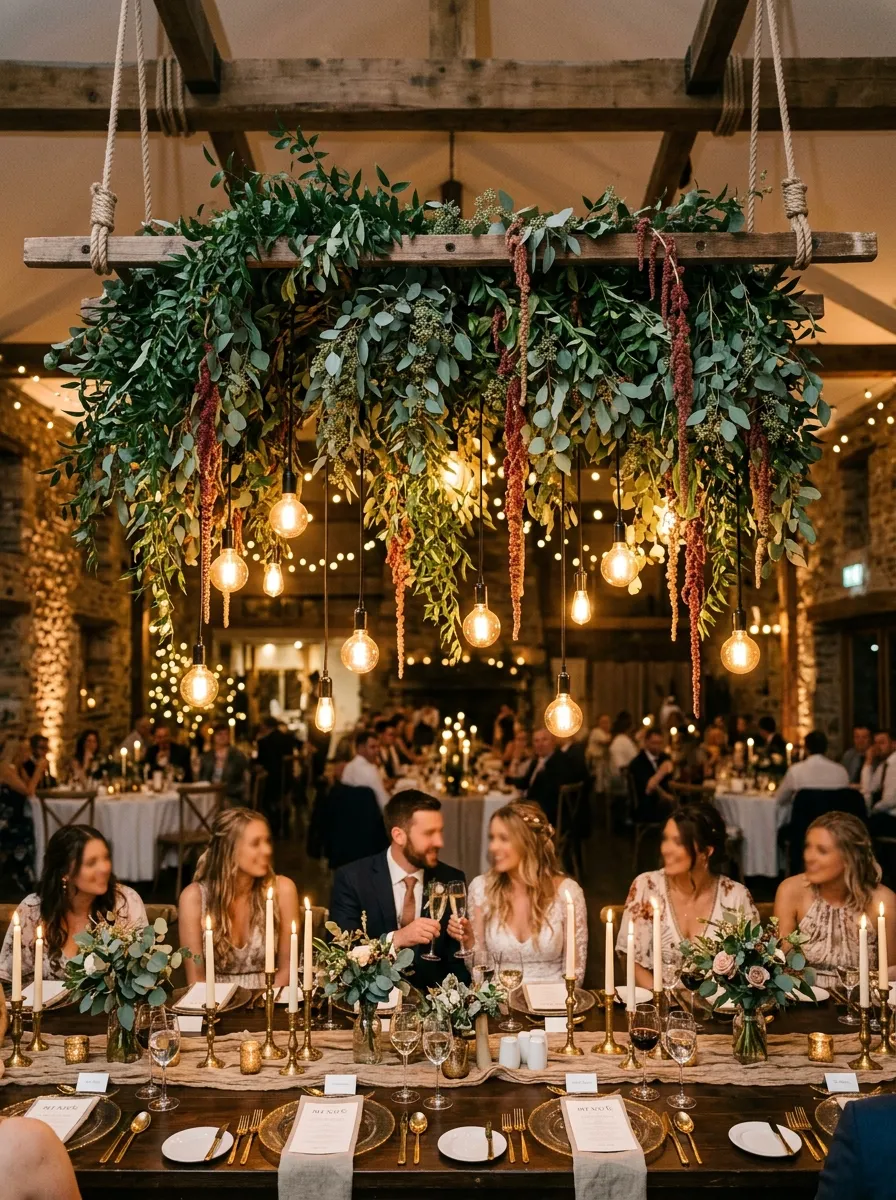
The organic foliage and pendant chandelier installation merges modern industrial lighting with lush botanical floristry, creating dramatic suspended ceiling gardens that hover directly over head tables or dance floors. This concept features an elevated horizontal framework constructed from timber ladders, metal grids, or natural birch branches, densely woven with cascading greenery such as Italian ruscus, eucalyptus, and hanging amaranthus. Suspended at varied heights through the hanging greenery are exposed cord pendants, geometric wire cages, or handwoven rattan basket lamps fitted with oversized amber globe bulbs. The soft, downward-directed light filters naturally through the suspended leaves, casting delicate, organic shadow patterns across dining tables and floor spaces below. This structural combination provides an incredible visual anchor in expansive venues, drawing guest eyes upward to appreciate vertical volume while concealing industrial ceiling architecture. Its textured aesthetic complements bohemian, garden romantic, and modern minimalist wedding themes, delivering high aesthetic impact through layered materials.
Begin construction by assembling a sturdy six-foot by four-foot rectangular wooden or wire grid framework on clean ground tarps directly beneath the intended suspension location. Secure four high-tensile steel hanging cables to each corner of the frame using rated swaged sleeve loops, running the cables upward to load-tested ceiling beams via locked carabiners. Wire six independent pendant cord sockets through the internal grid structure, staggering their drop lengths between twelve and twenty-four inches below the frame to establish varied lighting heights. Thread dense garlands of salal, olive branch, and seeded eucalyptus around the structural perimeter, fastening the foliage stems securely with green floral wire to conceal all electrical wiring. Hoist the fully dressed chandelier frame upward evenly using a synchronized manual pulley system until it reaches its target height of nine to ten feet above the finished floor level. Screw in high-lumen warm-white LED globes and connect the central harness to a dedicated dimmer switch, balancing light output so the hanging foliage is illuminated without blinding seated guests below.
3. Pillar Candle and Glass Hurricane Runner
How to Make
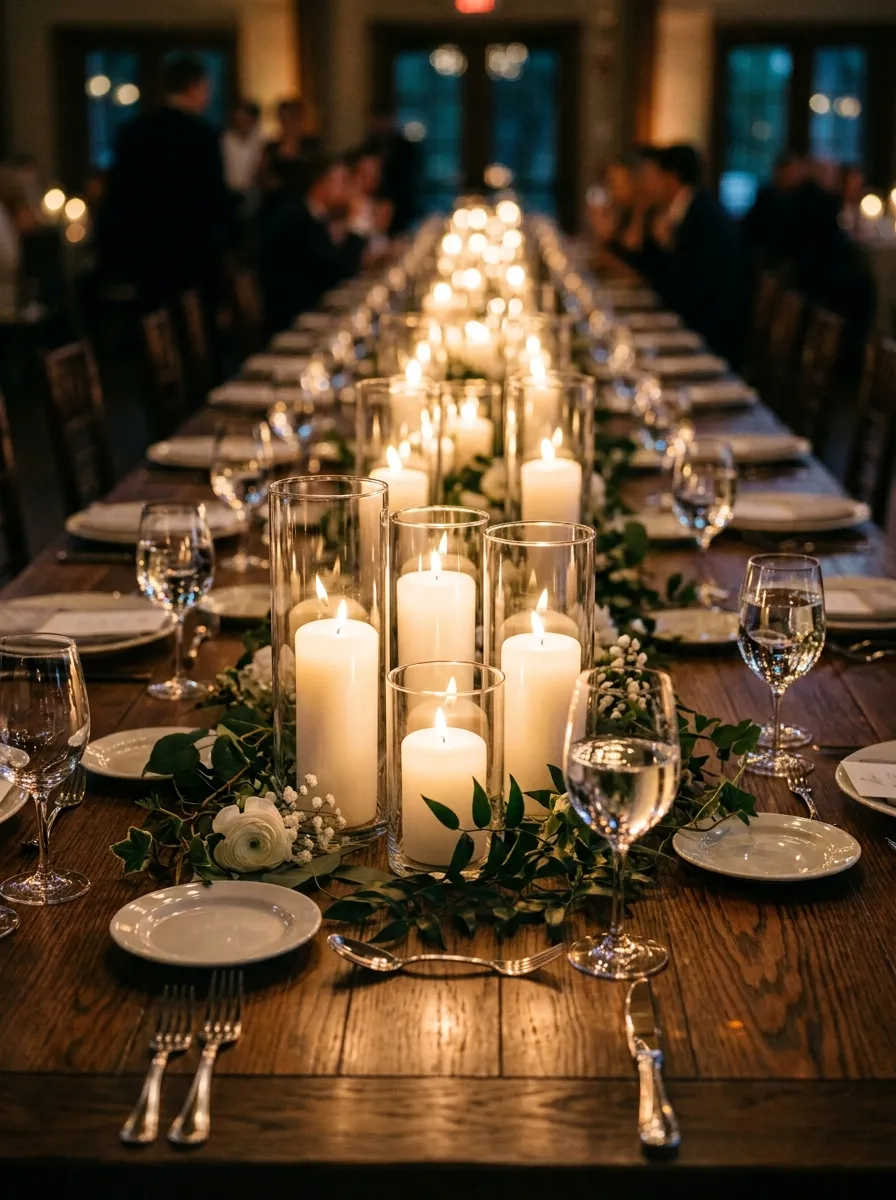
The pillar candle and glass hurricane runner creates an unbroken ribbon of romantic, kinetic candlelight extending down the entire length of long wooden banquet tables. This classical design features alternating groupings of smooth white and ivory wax pillar candles in varied heights, completely enclosed within tall, crystalline glass hurricane sleeves. The clear cylindrical glass shields the naked flames from cooling draft currents or outdoor breezes, ensuring steady, smokeless combustion throughout dinner service while preventing accidental contact with flowing table linens. The warm, flickering light reflects through the glass barriers, creating a luminous golden path that flatters guest complexions and enhances the natural textures of linen runners and floral centerpieces. This grounded, low-level illumination source eliminates visual barriers between seated diners, encouraging conversation and connection across the table. Its clean geometry and organic movement fit seamlessly into traditional estate receptions, modern minimalist celebrations, and candlelit vineyard dinners alike.
To assemble this runner, place a textured linen or silk table runner along the center axis of each banquet table, leaving an eight-inch clear margin along both place settings for tableware. Arrange grouping clusters of three pillar candles—measuring four, six, and eight inches in height—spaced evenly every two feet along the entire length of the table. Carefully place open-ended glass hurricane chimneys over each candle, making sure the glass rim extends at least two inches above the candle wick to catch wind currents. Fill the negative spaces between hurricane cylinders with low-profile greenery vines, such as smilax or preserved moss, keeping all organic material resting flat on the table runner. Use an extended electronic arc lighter to ignite the wicks thirty minutes prior to guest seating, beginning at the far end of the room and moving toward the entryway. Maintain a small prep kit containing extra long matches, microfiber glass cleaning cloths, and needle-nose tweezers to adjust wicks and wipe wax smudges quickly during dinner service.
4. Architectural Uplighting on Historic Textures
Execution Process
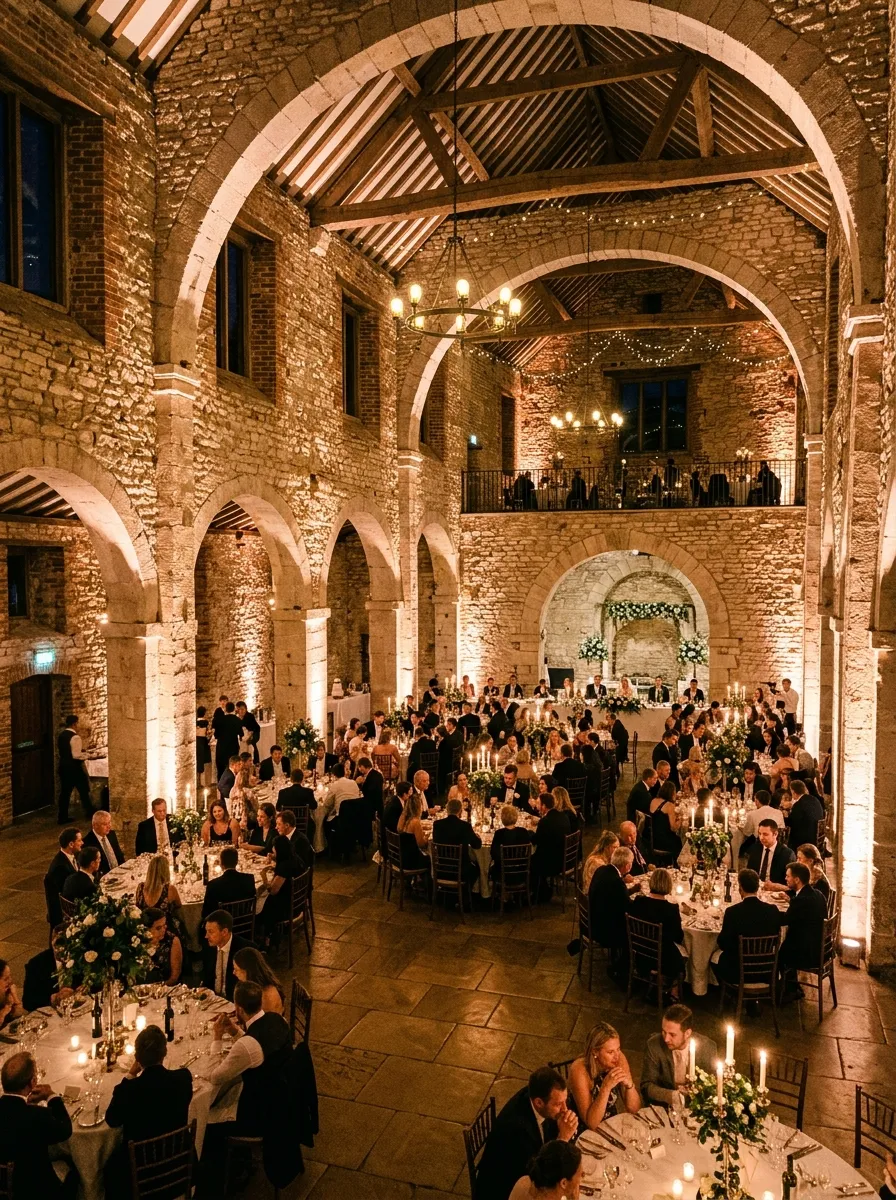
Architectural uplighting utilizes precision floor-mounted LED fixtures angled upward to transform plain venue walls into dramatic, textured canvases of soft ambient color. This technique highlights the distinctive character of raw interior materials—such as exposed red brick, rough-hewn stone masonry, fluted plaster columns, and draping fabric—using controlled vertical beams of light. The primary design objective is to bathe the room perimeter in a warm amber or soft champagne hue, eliminating dark shadowy corners and expanding perceived room volume without washing out the room. Modern wireless battery-powered fixtures eliminate the clutter of tangled extension cords along walls, maintaining a clean, professional aesthetic along guest walkways. By balancing perimeter brightness against central table lighting, this setup establishes a comfortable, cohesive visual frame that unifies the entire reception space. It represents an essential foundational lighting layer for industrial warehouses, historic estates, and modern loft venues where textured surfaces deserve celebrated focus.
Begin by walking the interior perimeter of the venue to identify distinctive architectural details such as structural columns, stone arches, window recesses, and textural transitions. Place compact, wireless LED uplighting pucks on the floor against the wall base, spacing the units evenly between eight and twelve feet apart along unbroken wall spans. Angle the adjustable lens heads at fifteen to twenty degrees toward the wall surface to produce clean, vertical light columns that graze the texture without creating glare. Calibrate the digital color channels on the master controller to a warm amber palette (combining amber and warm white diodes) that matches the color temperature of your table candles. Test the vertical light projection, ensuring the beams reach the upper ceiling borders without bouncing harsh reflections off glossy door surfaces or exit pathways. Secure any visible charging cords with heavy-duty carpet tape where units connect to wall outlets, verifying that battery capacities provide at least ten to twelve hours of continuous runtime.
5. Cascading Twinkle Fairy Curtain Backdrop
Setup Method
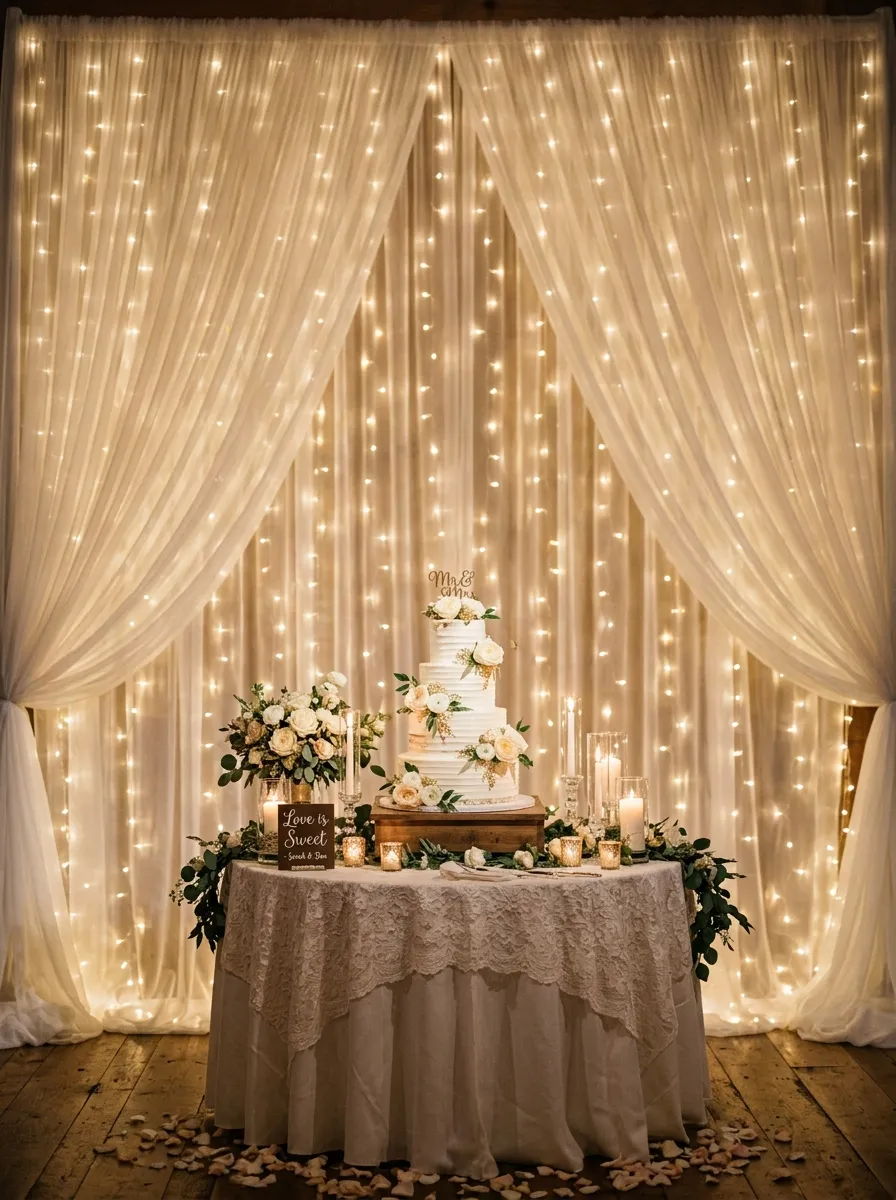
The cascading twinkle fairy curtain backdrop creates an ethereal vertical waterfall of miniature light points, serving as a breathtaking photo backdrop behind the head table or cake display. This concept pairs translucent, floor-to-ceiling sheer fabric panels—such as soft white voile, chiffon, or organza—with dense vertical drops of micro-LED fairy lights. The delicate copper wire strings hang flush behind the sheer fabric, diffusing the sharp pinpoint LED light into soft, glowing orbs that evoke a field of distant stars. This luminous vertical wall adds tremendous photographic depth to formal reception portraits, providing an uncluttered, high-end background that hides unsightly venue walls or service exits. The cool or warm micro-lights draw attention directly toward the couple, framing speeches, cake cuttings, and formal moments with timeless elegance. Its compact, collapsible design makes it an exceptionally practical solution for transforming generic rental halls or community center walls into high-end celebration spaces.
To build this shimmering backdrop, assemble an adjustable heavy-duty aluminum pipe-and-drape stand system, extending the top horizontal crossbar to your desired width between ten and twenty feet. Fasten a multi-drop curtain string light harness along the top crossbar using nylon cable ties, spacing the vertical light drops every four to six inches along the rail. Carefully unbind the individual hanging light strands, letting the copper wires drop straight downward toward the floor base plates without tangling or twisting adjacent lines. Thread sheer white chiffon or flame-retardant voile drape panels onto a secondary front drapery rod, sliding the fabric panels over the hanging light harness to diffuse the glow. Plug the master power harness into a commercial foot-switch or wall dimmer, adjusting the controller to a steady, non-flashing ambient setting to ensure clean photography. Anchor the heavy steel base plates firmly to the floor using black vinyl sandbags to guarantee absolute stability against foot traffic or drafts throughout the evening.
6. Luminous Glass Lantern Pathway
How to Create
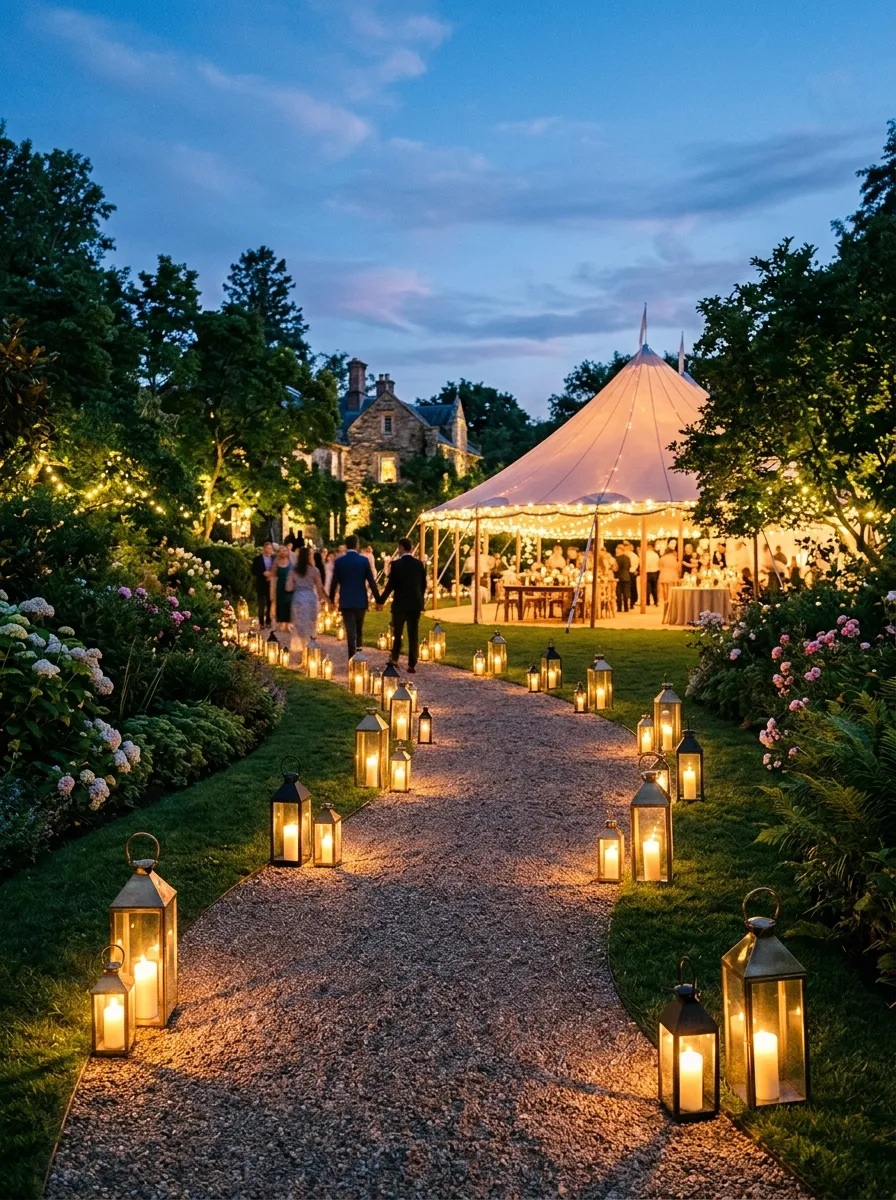
The luminous glass lantern pathway defines guest traffic flow through exterior reception grounds, using grounded candlelight to establish safe, romantic transitional walkways between spaces. This design utilizes collections of geometric metal and glass lanterns—finished in matte black, antique brass, or weathered zinc—arranged along outdoor gravel paths, stone steps, and garden lawns. Housing large pillar candles or high-lumen flameless LED candles, the lanterns cast gentle geometric shadow patterns onto the ground, marking walkway borders with inviting warmth. The enclosed metal frames protect illumination sources from gusty winds and foot traffic, preventing trip hazards while guiding guests smoothly between the cocktail patio, outdoor bar, and main reception tent. This functional approach to landscape lighting bridges natural garden beauty with practical outdoor safety, extending your reception’s visual footprint into the surrounding darkness. Its versatile styling adapts effortlessly to seaside beach walkways, woodland estate lawns, and rustic farm paths alike.
To lay out an effective lantern pathway, measure the total walking distance connecting your primary reception zones, identifying natural path borders, elevation changes, and stone steps that require safety lighting. Arrange lanterns along both sides of the pathway in staggered, alternating positions spaced six to eight feet apart, avoiding rigid parallel lines to maintain an organic, inviting look. For stone staircases, position a single medium-sized lantern on the outer edge of every second step tread, keeping the central walking path clear for guests in formal attire. Place sturdy, five-inch outdoor-rated LED candles inside each lantern housing, ensuring the internal battery compartments are sealed with waterproof silicone gaskets against lawn dampness. Set the integrated electronic timer switches on each LED unit to activate automatically at dusk, or assign an assistant to light real wax wicks with a blowtorch lighter forty-five minutes before sunset. Weigh down the base interiors of lightweight wire lanterns with clean river stones or decorative pea gravel to prevent them from tipping over during strong evening wind gusts.
7. Custom Script Neon Monogram Installation
Step-by-Step Guide
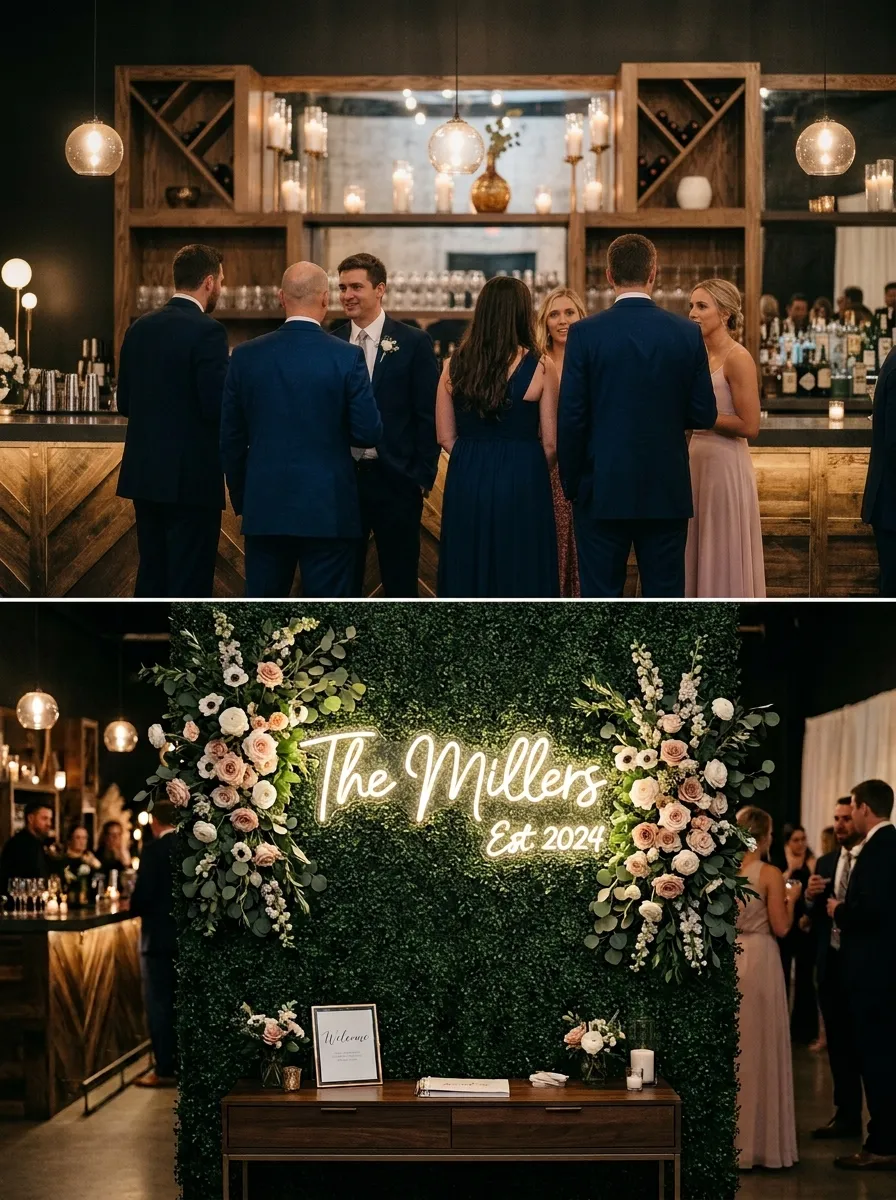
The custom script neon monogram installation introduces vibrant retro-modern energy into wedding reception spaces, acting as a bold, contemporary focal point that commands social photo attention. This design features a bespoke LED flexible neon sign bent into the couple’s shared surname, shared initials, or a playful romantic phrase, mounted flush against a textured decorative wall. The vibrant, colorful glow cuts cleanly through ambient dining illumination, providing a modern visual counterpoint to classic floral arrangements, wood finishes, and neutral linens. Backing materials such as dense faux-boxwood greenery panels, slatted natural oak screens, or arched plaster flats provide textural contrast, letting the neon script pop in wedding photography. Placed strategically near the reception entrance, the photo booth station, or above the main bar, the neon installation creates a lively, celebratory atmosphere that energizes guests as dinner transitions into dancing. It represents an accessible modern accent that couples can later dismount and display as a permanent piece of home decor.
Begin by unpacking your custom acrylic-backed LED neon sign, checking the clear mounting backplate for surface scratches and verifying the operation of the accompanying twelve-volt low-voltage power supply. Erect a stable structural backdrop wall, such as a freestanding boxwood hedge unit or a painted timber frame, ensuring the wall is weighted securely behind the base. Position the neon sign against the center of the wall at eye level (typically between five and a half to six feet above the floor), marking pilot hole locations through the acrylic pre-drilled holes. Fasten the sign directly to the backdrop structure using threaded decorative metal standoffs, leaving a half-inch clearance behind the acrylic backplate to prevent pinching the electrical wires. Run the thin translucent low-voltage power cable discreetly down the back of the backdrop wall, securing the wire with staple clips and connecting it to a digital dimmer control module. Calibrate the neon brightness down to approximately sixty percent power, ensuring the script letters photograph clearly on mobile devices without blowing out the camera lens.
8. Illuminated Rattan Basket Pendant Cluster
How to Make
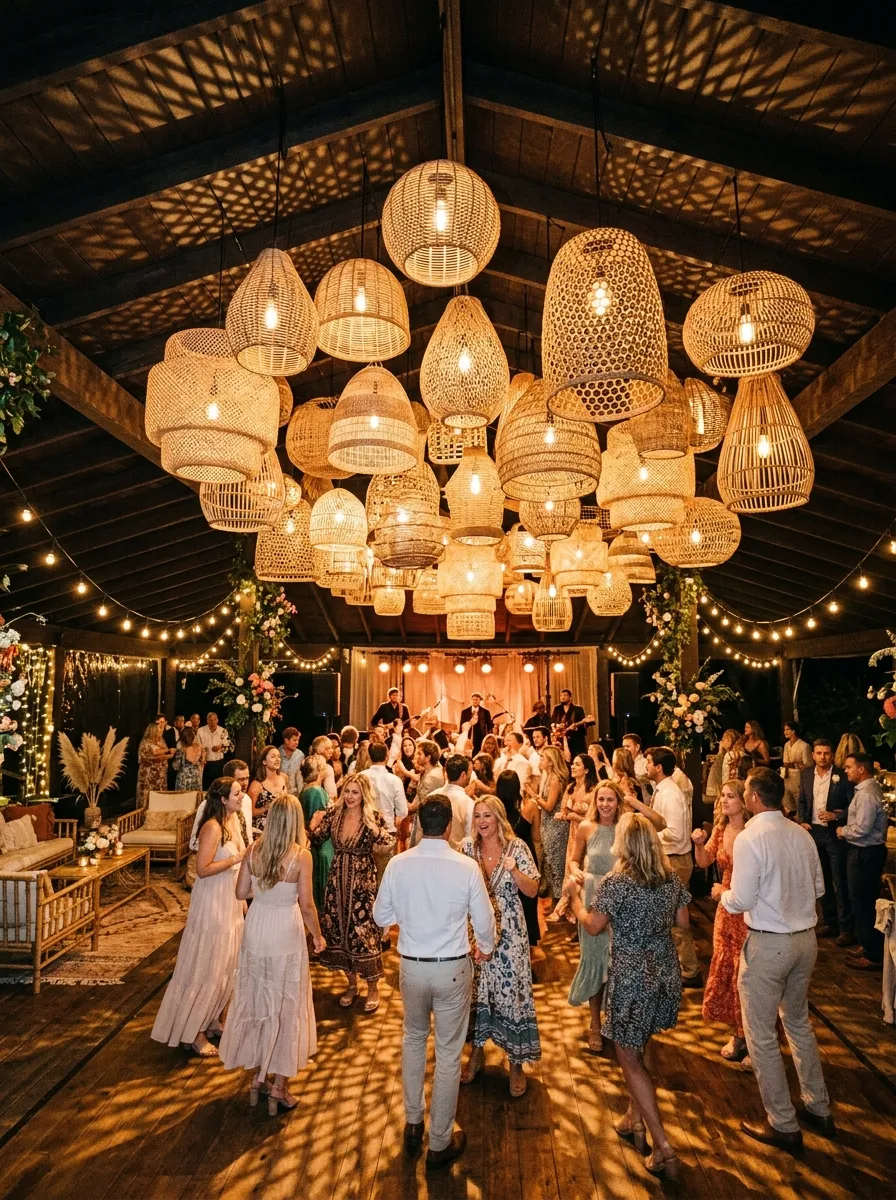
The illuminated rattan basket pendant cluster channels relaxed coastal aesthetics and bohemian warmth through an asymmetrical grouping of woven natural fiber light fixtures. This concept gathers multiple handwoven wicker, seagrass, and bamboo basket lamps of varied shapes and sizes, suspending them in an artful cluster over the central dance floor or lounge area. The woven natural fiber acts as a natural light filter, casting intricate latticed shadow patterns across surrounding walls, ceilings, and guest tables. The earthy, golden tones of raw bamboo and unbleached rattan add warmth to sterile white tent interiors, creating an inviting, comfortable atmosphere suited for informal celebrations. The cluster arrangement turns individual light fixtures into a cohesive, high-impact ceiling sculpture that provides soft downward ambient light. This design appeals strongly to couples hosting coastal, tropical, or bohemian wedding receptions, celebrating handcrafted natural materials that tie into sustainable event design principles.
Gather an assortment of seven to nine woven rattan and bamboo pendant shades ranging from twelve to twenty-four inches in diameter, selecting diverse bell, dome, and spherical silhouettes. Wire individual porcelain light sockets into each shade using heavy-duty natural jute-wrapped or black fabric electrical cords, staggering the cord lengths between three and six feet. Anchor an overhead industrial rigging ring directly to a load-bearing ceiling beam, threading all individual pendant cords through the central ring to form a tight, cascading umbrella shape. Adjust the vertical hanging height of each basket shade so the lower rims overlap by three to four inches, hiding the internal sockets and building a dimensional, clustered fixture. Thread all pendant cord terminals into a multi-port junction box mounted securely above the ceiling line, running a single master feed line to a commercial wall dimmer. Screw warm 2400K LED filament globe bulbs into each socket, turning on the power to verify that the light shines through the woven basket fibers without blinding guests directly below.
9. Glowing Floating Water Lily Pool Installation
Execution Process
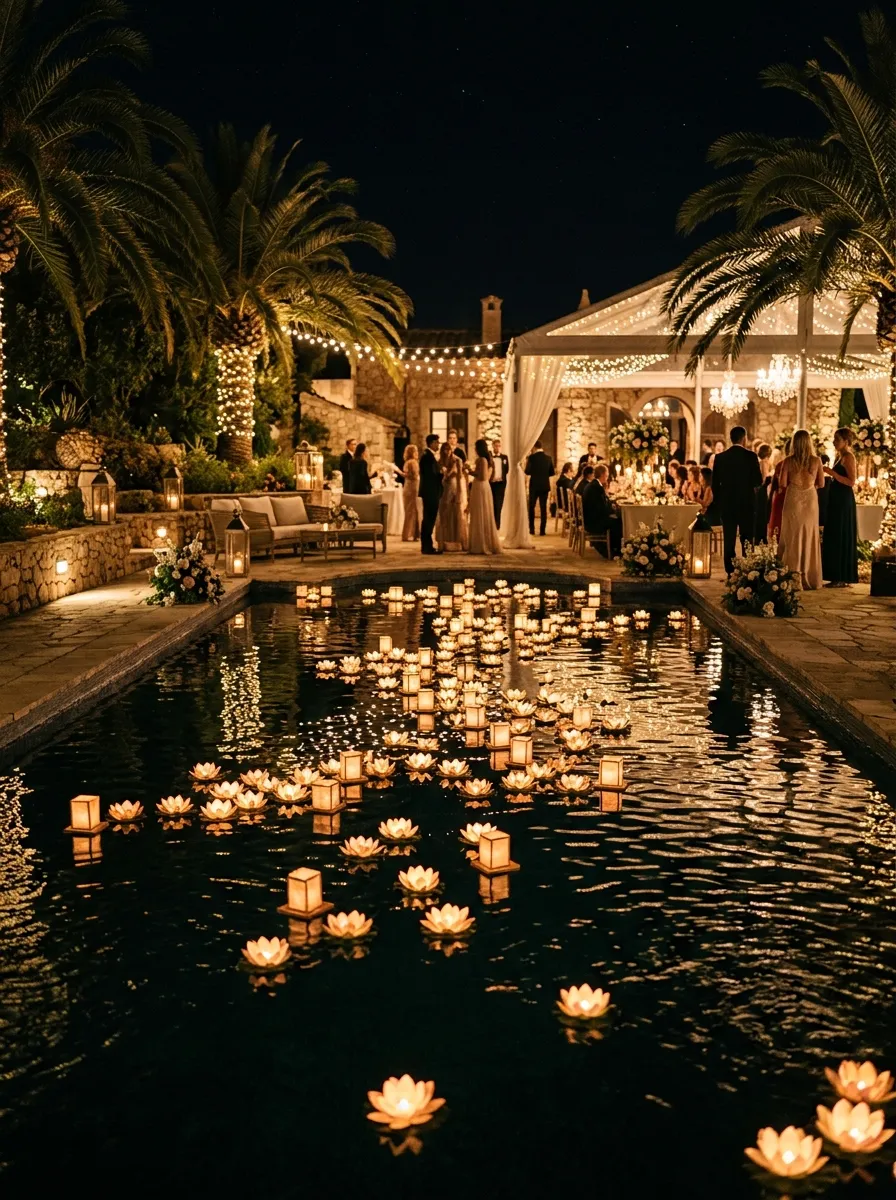
The glowing floating water lily pool installation transforms venue water features—such as swimming pools, courtyard fountains, or tranquil estate ponds—into reflective nocturnal showpieces. This design utilizes buoyant, water-sealed LED or real candle platforms shaped like delicate water lilies, lotus petals, or simple geometric floating lanterns that drift across the water surface. The gentle movement of the illuminated floats creates dynamic, shimmering reflections that dance across surrounding venue walls, stone terraces, and outdoor dining patios. Soft lighting along water surfaces turns potentially dark, dangerous landscape hazards into romantic focal points that integrate outdoor architectural features into the event design. This approach is particularly effective for private estate and luxury resort receptions, extending the decorative styling of the main tent outward across the entire landscape. Its serene, floating presence creates an enchanting outdoor atmosphere, inviting guests to step out for quiet conversation by the waterside during lively dance breaks.
Measure the surface area of your venue water feature, calculating the number of floating light modules required to achieve a balanced, uncluttered look (typically one floating module per twenty square feet of water surface). Prepare water-sealed floating lotus lanterns, verifying that each unit features a dense, buoyant foam base plate that keeps the lighting component upright even in light water movement. For battery-powered LED modules, inspect the threaded rubber O-rings on the bottom battery compartments, coating each seal with a micro-thin layer of silicone grease to ensure complete waterproof protection. Weight the undersides of select floating modules with small lead fishing sinkers attached to thin monofilament lines, dropping the weights into the pool to keep lanterns clustered naturally without drifting into corner skimmer traps. Activate the warm-white LED diodes thirty minutes prior to dusk, gently releasing the floating lanterns from the pool perimeter using an extended skimming pole. Turn off any harsh overhead pool floodlights and submerged perimeter spotlights, allowing the soft, floating candlelight to reflect naturally across the dark, still water.
10. Vintage Glass Chandelier and Festoon Webbing
Setup Method
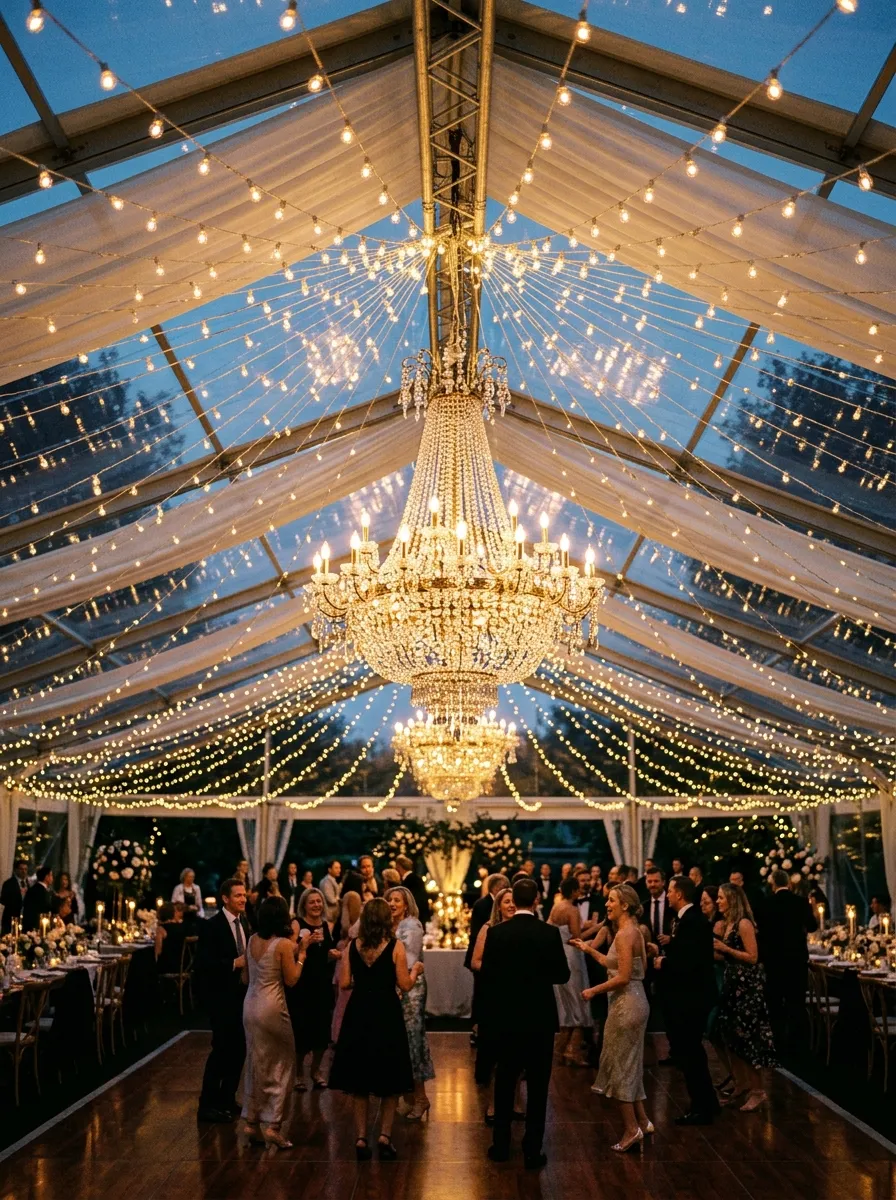
The vintage glass chandelier and festoon webbing concept combines old-world ballroom grandeur with modern outdoor festival energy, creating a memorable overhead celebration space. This design suspends a massive, cut-glass or crystal chandelier from the central rafter of a clear-span tent or open outdoor timber pergola, radiating horizontal string light festoons outward like a luminous spiderweb. The sparkling glass crystal prisms refract light from the central fixture into thousands of glittering patterns, while the radiating string light festoons draw the eye outward across the entire space. This layered approach satisfies both ambient and decorative lighting needs, providing functional downlighting over the dance floor while filling the upper ceiling volume with warm, starry illumination. The unexpected presence of an elegant crystal ballroom chandelier suspended beneath open skies creates an engaging contrast that feels both luxurious and approachable. It serves as an impressive visual centerpiece for high-end country estate weddings, historic barn receptions, and open-air lawn galas.
Identify a central structural ceiling beam rated for heavy suspended loads, mounting a heavy-duty steel safety hoist hook equipped with a screw-locking carabiner. Hoist a cleaned cut-glass or brass crystal chandelier (weighing thirty to fifty pounds) into position using a mechanical winch, locking the safety cable onto the overhead hook. Run four heavy-gauge stainless steel guide wires outward from the central chandelier frame to anchor posts along the outer perimeter, tensioning each wire with turnbuckles. Connect commercial string light cords to each radiating tension wire, running the festoons outward from the chandelier center to form an even, geometric canopy across the room. Connect the central crystal chandelier and the radiating festoon lines to separate channels on an electronic lighting console, allowing for independent brightness control throughout the evening. Screw dimmable warm LED candelabra bulbs into the chandelier sockets and Edison globes into the radiating festoons, testing both systems together to balance the soft glitter of the crystals against the warm amber glow of the surrounding canopy.
Common Beginner Mistakes and How to Avoid Them
Designing wedding reception lighting requires careful attention to technical details, as minor planning errors can create harsh glares, blown electrical fuses, or visually flat photography. The most common mistake beginners make is selecting bulbs with mismatched color temperatures, combining cool white 5000K daylight LEDs alongside warm 2200K amber filament strings. This jarring contrast ruins the cozy, romantic mood and makes capturing natural skin tones difficult for wedding photographers; always standardize your lighting sources between 2200K and 2700K for consistent, flattering warmth. Another frequent error is overloading standard wall circuits by plugging multiple high-wattage string runs into a single residential power strip, which can trip breakers midway through dinner speeches. Always calculate the total amperage requirements beforehand, dividing your lighting loads across multiple independent circuit breakers throughout the venue. Insecure overhead cable suspension is another hazardous oversight; never hang string light cords alone across wide spans without supporting them with a high-tensile stainless steel aircraft safety cable. Finally, avoid using naked wax pillar candles on outdoor tables without protective glass hurricane chimneys, as even a gentle evening breeze can blow out wicks or splatter molten wax over fine table linens.
Practical Tips for Better Results
Achieving a clean, gallery-quality wedding lighting installation relies on disciplined post-rigging adjustments that turn functional fixtures into polished, cinematic design features. Always install dedicated commercial-grade inline dimmers on every overhead string light and chandelier circuit, allowing you to lower light levels from bright pre-dinner prep down to a soft forty-percent dinner glow as natural twilight fades. When wrapping structural barn posts or outdoor trees with micro-fairy lights, work from the top down, keeping the copper wire wraps spaced evenly at three-inch intervals to maintain a clean, professional aesthetic. Use heavy-duty, commercial-grade black cloth gaffer tape rather than plastic duct tape to secure all floor cabling, ensuring the tape leaves zero sticky residue on fine venue flooring while eliminating tripping hazards along guest pathways. If using wireless LED uplighting fixtures, position the units directly behind structural columns or lush potted palms, letting the light graze the architectural surface while hiding the plastic hardware from guest sightlines. Finally, take a series of test photos with a smartphone and professional camera during your afternoon technical rehearsal, checking that your light sources provide sufficient illumination for faces without creating harsh shadows or washing out decorative details.
Styling, Presentation, or Organization Ideas
Styling wedding reception lighting effectively requires treating illumination as an architectural element that interacts with your venue, floral design, and overall color palette. Coordinate overhead fixture tones with your tabletop metals; pair warm antique brass chandeliers and gold candelabras with warm-amber bistro filaments, or match sleek matte black iron pendants with industrial minimalist table settings. When designing reception layouts, use lighting variations to define distinct functional zones within an open room; wash dining table zones in low, intimate candlelight while framing the energetic bar and photo booth with vibrant custom neon signs. To keep hanging fixtures visually balanced, hang overhead installations like foliage chandeliers at least eight to nine feet above the floor, ensuring tall guests can move underneath safely while preserving sightlines across the room. Store your lighting cables, backup bulbs, dimmers, and rigging hardware in heavy-duty, labeled plastic storage totes, coiling cords neatly around reel spools to prevent time-consuming tangles during setup. This disciplined organization minimizes stress on the wedding day, ensuring all lighting elements are hung, tested, and polished well before the first guests arrive.
Budget or Time Planning
Creating an enchanting wedding reception lighting scheme is achievable on a sensible budget through smart material sourcing, power planning, and efficient installation scheduling. Begin organizing your lighting design four to five months before the wedding date, conducting early venue walkthroughs to note existing outlet placements, ceiling anchor ratings, and circuit capacities. Save substantially on lighting hire costs by purchasing commercial-grade string light cords and LED filament bulbs in bulk online, selling the hardware to future couples after the event to recoup a significant portion of your initial expenses. Schedule your installation workflow methodically across setup day: complete heavy overhead cable rigging and chandelier hoisting first before dining tables and floral centerpieces are brought inside, leaving tabletop candle placement and path lantern setup for the final two hours before the event begins. Allocate a small contingency budget for extra extension cords, heavy-duty gaffer tape, spare bulbs, and professional inline dimmer packs to handle unforeseen venue quirks. Dedicating a four-hour window with an assistant to hang, test, and dim all lighting circuits ensures your reception venue is ready for guests without last-minute panic.
Creative Expansion and Advanced Inspiration
Once you feel comfortable with foundational lighting setups, there are many creative avenues to explore to further elevate your wedding reception design. Experiment with dynamic smart-lighting systems, utilizing wireless DMX controllers to program subtle, automated color and brightness transitions that synchronize with key moments like the grand entrance, first dance, and late-night party sets. Advanced decorators can combine projection mapping techniques with standard uplighting, projecting soft organic leaf patterns or architectural textures across plain venue ceilings and bare dance floors. You can also explore custom fabric installations, weaving wide ribbons of unbleached linen or sheer champagne silk gauze between suspended bistro light strings to create a romantic, illuminated draped ceiling. Another inspiring direction is incorporating sculptural light elements, such as oversized, custom-welded geometric steel frames holding floating Edison bulbs above modern lounge seating. These advanced adaptations demonstrate that thoughtful lighting is much more than simple utility, acting as a transformative design medium that turns any reception venue into an unforgettable, atmospheric celebration of love.