Lantern centerpieces bring warmth, architectural structure, and timeless ambient lighting to wedding reception tables. When planning event decor, finding arrangements that balance visual elegance with practical execution is an essential consideration for couples and event designers. This tutorial guides you through ten versatile styling concepts that transform standard lighting fixtures into captivating floral and geometric focal points. Centerpieces establish the visual tone of an entire banquet space, drawing the eye inward and anchoring table settings across both indoor and outdoor venues. By utilizing structured lanterns, decorators introduce functional height and depth without obstructing sightlines across banquet rows or round tables. Throughout this guide, you will learn the foundational mechanics of balancing structural framework with fresh blooms, seasonal foliage, ambient pillar lighting, and assorted textural accents. Each design framework provides actionable instructions for assembling durable, professional-grade arrangements tailored to various venue aesthetics. Mastering these straightforward construction methods empowers planners to achieve upscale event styling reliably, ensuring that every dining station maintains structural balance, cohesive theme continuity, and practical illumination throughout the celebration.
Why Lantern Centerpieces Remain a Timeless Wedding Trend
The enduring popularity of lantern-based table styling across modern event boards stems from its dual function as both sculptural art and practical ambient illumination. From an aesthetic perspective, the clean lines of glass and metal framing complement virtually every wedding theme, spanning rustic outdoor receptions, sleek metropolitan gatherings, and romantic garden celebrations. Incorporating illumination within an enclosed structure safeguards candle flames from sudden air currents or air conditioning vents, maintaining steady, safe light levels from the first toast until the final dance. From a logistical standpoint, these focal pieces offer exceptional adaptability, allowing couples to balance floral investments efficiently. Rather than requiring dense, costly mass floral arrangements to achieve visual volume, a structural lantern commands table presence through its height and geometric perimeter, requiring only minimal accent foliage to produce a rich visual impact. Because basic lantern frames can be prepared well in advance of the wedding date, they streamline day-of venue installation. The combination of design durability, architectural presence, and functional safety makes lantern arrangements an essential resource for intentional, reliable event styling.
Essential Materials and Preparation for Table Construction
Executing sturdy lantern displays requires acquiring dependable base materials, durable floral mechanics, and safe illumination sources before assembling components. The primary structures consist of wood, matte metal, brass, or polished glass lanterns ranging from twelve to eighteen inches in height, depending on ceiling scale and tabletop dimensions. Internal illumination is best achieved using high-grade, unscented wax pillar candles paired with safety glass enclosures, or battery-operated LED pillars featuring realistic warm-white flicker functions to comply with varied venue fire regulations. For decorative attachments, gather professional florist shears, waterproof binding wire, low-profile zip ties, pre-soaked oasis foam blocks, and sealed floral water vials to sustain live botanical accents throughout the day. Table surface protection requires felt adhesive pads applied to the underside of all lantern corners, preventing scratches on rented linens or polished wood banquet surfaces. Preparation requires establishing clean workspace stations, inspecting glass panels for transit smudges, testing illumination batteries, and measuring table widths to confirm sightline clearance before initiating batch production.
Idea 1: Architectural Eucalyptus and Classic Brass Pavilion
Step-by-Step Guide
The brass pavilion arrangement combines mid-century geometric metals with cascading sprigs of silver dollar and seeded eucalyptus for a balanced aesthetic. The reflective qualities of warm brass provide an ideal counterpoint to muted, powdery green foliage, producing an elevated palette suitable for both historic indoor ballrooms and open-air vineyard dining. Inside the open structure, a trio of staggered pillar candles establishes varied heights of light, casting a rich glow through the surrounding foliage without overwhelming the surrounding dinnerware. The primary design concept focuses on deliberate asymmetry: botanicals gather densely along one corner of the base and climb diagonally along an upright support pillar, softening the rigid metal structure. This intentional balance prevents the lantern from feeling austere, anchoring it naturally upon the linen while maintaining a sophisticated, uncluttered footprint. The combination of structural brass, broad eucalyptus leaves, and gentle illumination provides an organic yet formal centerpiece that integrates smoothly into minimalist or botanical table settings.
To construct this arrangement, start by wiping the brass frame with a lint-free cloth to eliminate fingerprints and dust. Apply heavy-duty adhesive felt tabs to the base corners to protect the table fabric. Position three ivory wax or LED pillar candles measuring four, six, and eight inches tall in the center of the lantern interior, securing them to the metal floor using floral adhesive dots. Next, construct an external botanical garland base: bundle small groupings of seeded eucalyptus, spiral eucalyptus, and Italian ruscus together, binding their stems with green paper-wrapped floral wire. Secure the central portion of the foliage spray to the bottom exterior corner of the lantern using a discreet, color-matched zip tie, trimming the excess tail flush. Guide several flexible branches upward around the exterior vertical bar, fastening them loosely with fine wire so the leaves maintain their natural drape. Mist the foliage lightly with clean water before table placement to ensure maximum freshness.
Idea 2: Weathered Whitewash Barn Lantern with Garden Roses
Setup Method
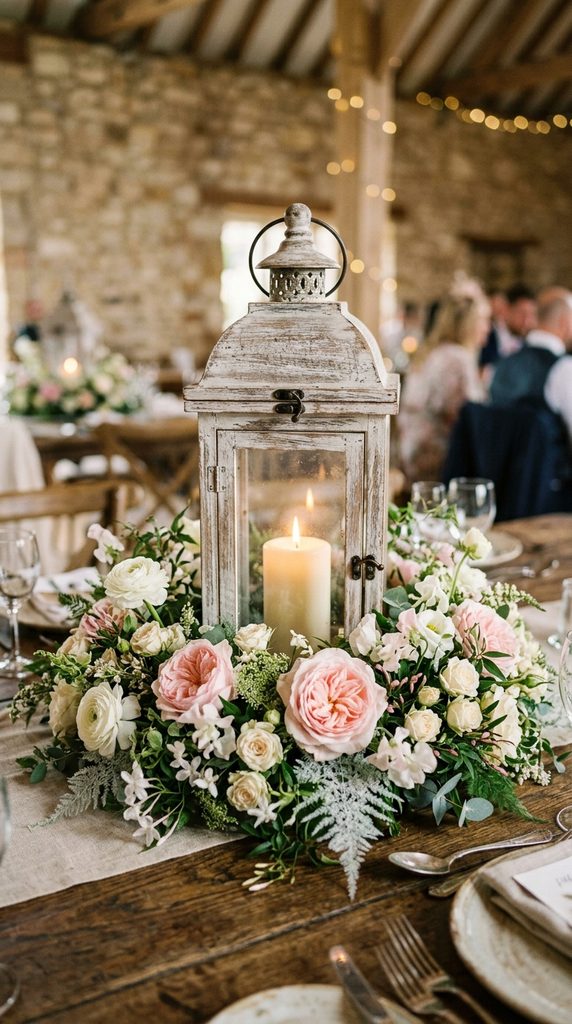
This arrangement highlights rustic romance by uniting weathered white pine framing with fragrant, fully bloomed garden roses and field botanicals. The distressed timber frame softens the visual weight of the lantern, making it an ideal choice for farmsteads, historical estates, or relaxed outdoor receptions. Soft blush, champagne, and cream blooms rest in clustered harmony around the structure, softening the straight wood joins with layered, velvet-textured petals. Internally, a solitary wide-diameter paraffin or battery-operated pillar candle provides steady illumination, casting soft shadows through open-panel sides. The aesthetic balances homespun warmth with high-end floral artistry, proving that rustic materials can be elevated to formal wedding standards when paired with premium botanical textures. By focusing floral density primarily around the outer skirt of the wooden perimeter, the lantern retains its purpose as an active light source while functioning as an anchor for a wider, low-lying floral meadow across the banquet runner.
Begin by inspecting the wooden lantern base for stability, ensuring all joints are secure and splinter-free before installation. Cut a shallow, circular plastic florist tray to fit snugly beside the lantern corner, and press a pre-hydrated brick of floral foam into the tray, securing it with waterproof anchor tape. Center the wooden lantern upon the table runner, placing a protective acrylic disc underneath to prevent moisture seepage. Insert the central ivory candle inside the glass chamber. Begin building the floral perimeter by pushing broad lemon leaf and boxwood cuttings horizontally into the foam base, establishing a wide, low perimeter that conceals the plastic tray. Insert trimmed stems of garden roses, spray roses, and white ranunculus directly into the foam at varied angles, keeping the tallest stems beneath the mid-line of the lantern glass to protect view lines. Finish by weaving loose sprigs of plumosa fern throughout the base to introduce soft textural movement.
Idea 3: Minimalist Matte Black Prism with Floating Petals
Execution Process
The matte black prism design leverages clean, sharp lines and open negative space to produce a distinct contemporary statement. Characterized by slender iron bars and unobstructed glass panes, this approach aligns seamlessly with modern industrial settings, repurposed warehouse lofts, or urban rooftop celebrations. The simplicity of the black frame demands precise interior curation; rather than filling the interior space with dense vegetation, the focus remains on sharp symmetry, deliberate glass reflections, and singular organic specimens. A single, tall glass cylinder hurricane rests centrally within the iron enclosure, shielding an unscented white candle flame, while the perimeter floor is layered with a deliberate dusting of white lisianthus petals or dark river stones. This minimalist treatment prioritizes uncluttered elegance, offering reception tables an architectural decorative element that complements monochrome place settings, matte black flatware, and clean slate runners without competing for visual dominance.
Begin construction by thoroughly cleaning the glass panes of the matte black prism lantern using an ammonia-free glass cleaner to prevent interior streaking under illumination. Measure the central footprint and insert a heavy, circular clear-glass cylinder vase that measures roughly two-thirds the height of the outer frame. Place a four-inch diameter modern smooth-finish pillar candle inside the inner cylinder, utilizing a small dab of florist putty beneath the candle base to prevent shifting during table movement. Surrounding the base of the inner cylinder, distribute a uniform one-inch layer of tumbled slate pebbles or smooth black river stones to weight the frame and conceal mechanical edges. Scatter several fresh, clean orchid blossoms or lisianthus petals gently over the stone bed, ensuring botanicals do not come into direct contact with the interior flame zone. Position the finished piece along the table centerline atop an unadorned light linen runner to accentuate the graphic black perimeter.
Idea 4: Terrarium-Inspired Moss and Fern Enclosed Lantern
How to Create
Transforming a brass or glass case into a contained botanical ecosystem introduces an immersive woodland woodland atmosphere directly to banquet tables. This design encapsulates the appeal of a living terrarium, utilizing vibrant preserved reindeer moss, delicate maidenhair fern sprigs, and polished river pebbles enclosed entirely behind protective glass walls. By containing all botanical and lighting elements inside the structure, this concept resolves outdoor wind interference while eliminating the risk of foliage drooping onto place settings or dinner plates. Illumination is integrated smoothly through battery-powered micro LED wire strands woven beneath the moss layer, casting an interior glow that illuminates the varied green textures. This creative direction functions exceptionally well for garden gatherings, library receptions, or botanically focused celebrations where couples wish to present an intimate, nature-focused visual aesthetic that sparks quiet conversation among seated guests.
To assemble this enclosed woodland concept, select an oversized rectangular or hexagonal lantern featuring accessible door latches and clear glass panels. Line the metal interior floor with a thin sheet of heavy-gauge florist plastic, trimming the edges precisely flush with the inner bottom perimeter. Lay down an even base layer of natural sheet moss, light green reindeer moss, and preserved forest lichen, varying the textures to mimic a natural forest floor. Unravel a warm-white, copper-wire micro fairy light strand equipped with a compact battery pack; conceal the pack beneath the moss in a rear corner, weaving the lit wire gently upward through the moss clumps. Nest miniature potted fern plugs or high-quality faux maidenhair frills into the moss bed, anchoring them with green floral pins. Position three varying sizes of smooth white ceramic taper holders or an LED pillar in the center, close and latch the glass door securely, and verify uniform interior illumination.
Idea 5: Cascading Orchard Fruit and Polished Silver Lantern
Step-by-Step Guide
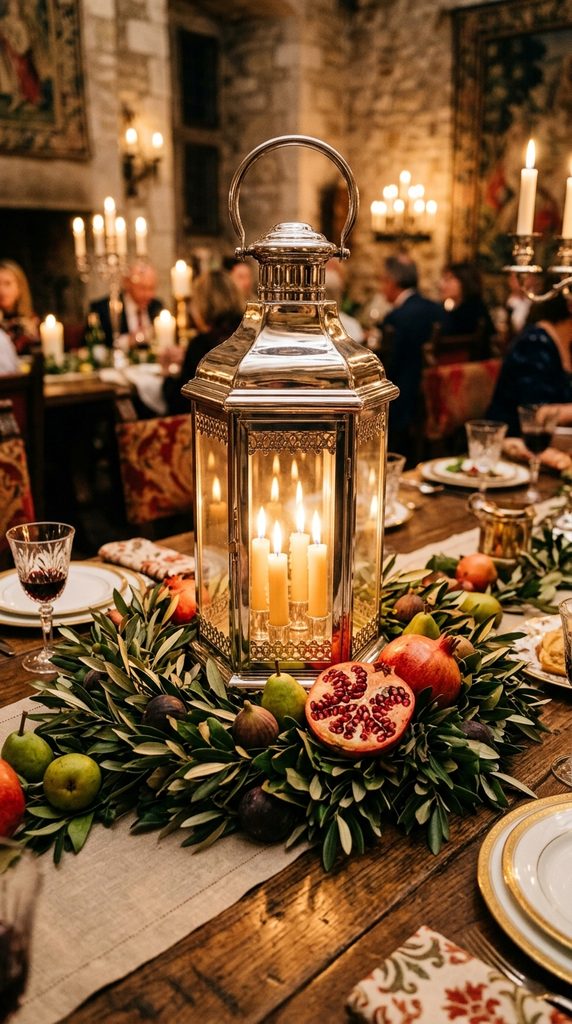
The silver orchard design integrates polished chrome or silver-plated lanterns with rich, organic orchard elements like fresh figs, small pomegranates, and olive branches. The cool, mirror-like finish of the silver provides an elevated contrast against the deep jewel tones of ripe fruit and the silvery-green leaves of Mediterranean foliage. This approach reflects classical European banqueting traditions, bringing opulence and textural variety to table decor without requiring massive arrangements of delicate cut flowers. Illumination emerges from a wide, multi-wick candle seated within the silver frame, which casts flickering highlights across the glossy surfaces of the surrounding fruit and polished metal. Designed to be viewed from all sides, this low-to-mid-height arrangement serves as a multisensory focal piece, enriching vineyard venues, autumn gatherings, and classic formal dinners with rich natural color, classical symmetry, and deep visual warmth.
Begin assembly by polishing the silver lantern exterior using a soft microfiber cloth to bring the metal to a high shine and eliminate oxidation marks. Secure a heavy, round, unscented three-wick wax candle into the interior basin of the lantern, pressing it firmly onto three small discs of adhesive floral tape. Surrounding the exterior base on the reception table, lay down a loose ring of seeded olive branch cuttings and silver-dollar ruscus, pinning overlapping branches together with narrow hairpins to form an unbroken oval wreath. Next, arrange clean, firm fresh fruit—such as halved pomegranates showing jewel-toned seeds, whole dark figs, small green seckel pears, and clusters of seedless black grapes—directly among the olive leaves. Use floral wooden picks inserted into the bases of the fruit to anchor them into the underlying foliage ring, preventing them from rolling out of position during the event. Inspect the display from seated eye level to verify that fruit distribution remains balanced from every perspective.
Idea 6: Coastal Driftwood and Frosted Sea-Glass Lantern
Setup Method
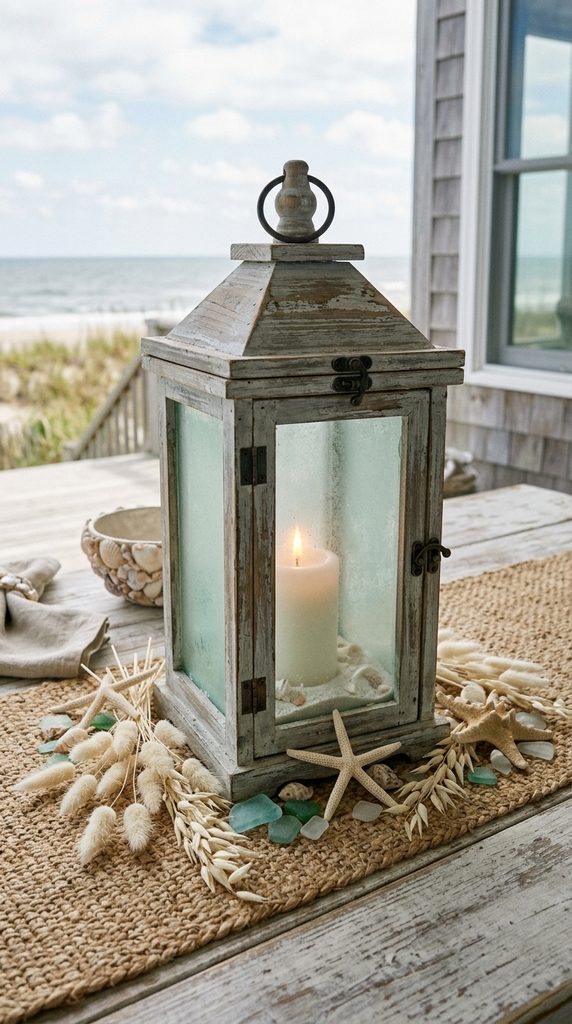
Capturing coastal atmosphere without relying on literal beach motifs requires an emphasis on weathered organic textures, frosted glass materials, and neutral palettes. This design pairs a weathered driftwood-colored wooden lantern with soft seafoam-tinted or frosted glass inserts, evoking shoreline tones through refined craft. Surrounding the centerpiece, elements such as bleached white finger starfish, natural sea glass fragments, dried bleached bunny tails, and dried ivory grasses create a soft, wind-swept perimeter. Lighting within this arrangement relies on a soft amber-toned candle surrounded by a shallow bed of natural coarse sand, casting a diffused, warm light reminiscent of late-afternoon coastal tides. The aesthetic provides an understated, sophisticated solution for seaside venues, nautical yacht clubs, or destination gatherings where the objective is celebrating the natural coastal landscape through organic elements rather than bold marine themes.
Initiate the construction by preparing the wooden lantern, applying a light dry-brushing of pale gray and chalk-white acrylic paint to the outer frame if needed to mimic genuine ocean-aged driftwood. Pour approximately two inches of sterilized, fine white quartz sand directly into the glass chamber, leveling the surface with the back of a spoon. Press a smooth six-inch ivory pillar candle into the center of the sand, sinking it roughly one inch to secure its balance against movement. Scatter several pieces of tumbled sea glass around the candle base, selecting soft aqua, seafoam, and pale blue shades to provide subtle color accents beneath the candle flame. Around the outside base of the lantern, form an asymmetrical cluster of bleached dried botanicals, including preserved ivory sea oats, bunny tails, and delicate dried fan palms, securing them using thin florist wire. Finish by nestling two clean, natural sugar starfish beside the foliage base, avoiding direct symmetry for a more organic presentation.
Idea 7: Geometric Copper Pavilion with Suspended Floating Votives
Execution Process
This design emphasizes structural suspension, using an open copper pipe or geometric wire frame to hold suspended clear-glass hanging tea-light orbs above an open botanical bed. The dynamic use of vertical space draws the eye upwards while keeping the physical profile of the centerpiece open and transparent across dining tables. The warm, metallic luster of bright copper brings vibrancy to contemporary tablescapes, contrasting against dark banquet linens or stark marble surfaces. Suspended votives float above a modern grouping of air plants, low-profile succulents, and flat stone surfaces positioned on the table surface. This multi-level lighting scheme casts light from both above and below, producing a complex, layered glow. Ideal for modern couples seeking an alternative to traditional vertical floral towers, this concept delivers noticeable structural presence while remaining exceptionally clean and easy to maintain throughout long reception evenings.
Begin by fabricating or sourcing an open-sided geometric copper lantern frame with a solid, weighted base and open upper crossbars. Cut four uniform lengths of clear, twenty-pound monofilament fishing line, tying each securely to the upper metal suspension bar of the lantern. Attach the lower ends of these lines to the hanging loops of small, round, four-inch glass terrarium globes, balancing their suspended heights so they hang staggered between five and eight inches below the top frame. Insert battery-powered, moisture-sealed LED tealights into each hanging glass sphere to ensure safety and prevent soot accumulation within the glass. At the bottom base plate of the copper lantern, arrange a structured grouping of live Tillandsia air plants, echeveria succulents, and natural gray river rocks, adhering the succulents to flat stone bases using floral cold glue. Ensure all hanging lines hang plumb and test the assembly by lightly swaying the lantern to confirm the globes do not collide with the outer copper bars.
Idea 8: Dramatic Monochromatic Candle-Clustered Black Lantern
How to Create
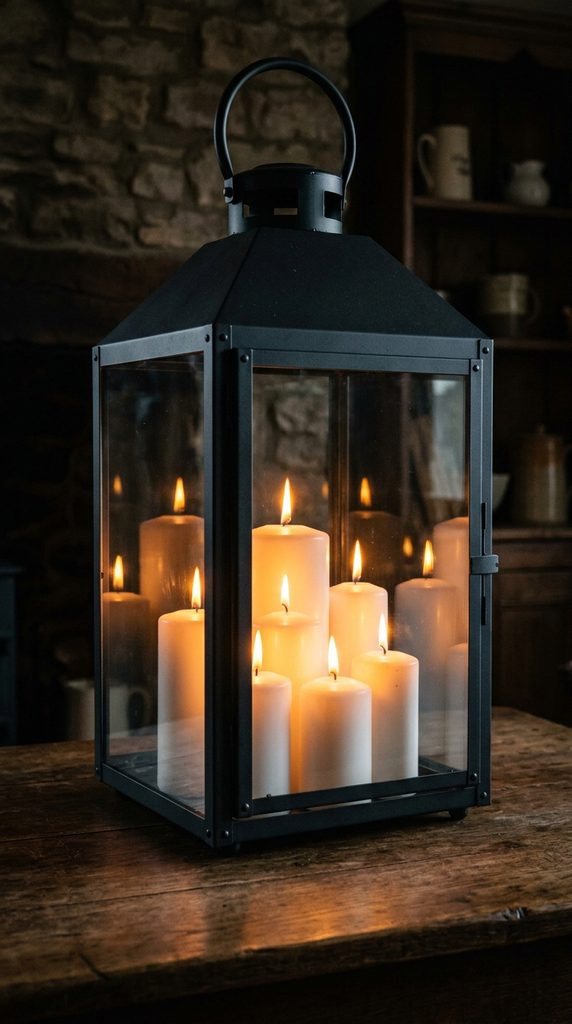
Focusing on the intensity of raw illumination, this approach trades perimeter greenery for a dense interior cluster of varied candles within an oversized, dark metal lantern frame. By omitting botanical accents, the design emphasizes pure, radiant candlelight, clean geometric lines, and strong visual contrast. The interior contains between five and seven slender pillar candles, ranging across multiple heights and diameters, packed together to form an active field of light. When illuminated, the overlapping glass reflections create an infinity-box visual effect, amplifying the perceived light output across the reception hall. This treatment works well for formal evening events, historical industrial spaces, and minimalist venues where the goal is a moody, candlelit ambiance. The simplicity of this arrangement makes it an efficient, reusable option for extended banquet rows, creating a rhythm of warm light across the entire venue.
Select an oversized, deep charcoal or matte black lantern measuring at least twenty inches in height with clear glass panels on all four sides. Thoroughly clean both the interior and exterior of all glass surfaces using a microfiber towel to remove all smudges, as the concentrated candlelight will highlight any marks on the glass. Gather six solid white wax or LED pillar candles with diameters varying between two and four inches, and cut their heights down to staggered steps ranging from three to nine inches. Arrange the candles within the lantern floor, positioning the tallest pillars in the center and shorter candles along the outer edges to maintain clear visibility from every side. Secure each candle to the base using industrial floral adhesive putty disks to keep them aligned during transit and table service. If using live flame candles, trim every wick to a strict quarter-inch length before lighting to ensure a clean, smokeless burn throughout the reception dinner.
Idea 9: Bohemian Rattan Lantern with Pampas Grass and Dried Palms
Step-by-Step Guide
The bohemian rattan concept introduces natural woven textures, warm earth tones, and feathered dried grasses to relaxed wedding table settings. The open, woven exterior of a bamboo, wicker, or rattan lantern creates intricate shadow patterns across table linens when internal light filters through the weave. Around the woven base, a textured collar of bleached pampas grass plumes, sun palms, preserved lunaria, and bunny tails brings volume and movement to the display. This design serves warm-weather outdoor celebrations, desert celebrations, and contemporary bohemian spaces, leaning into neutral tones, textural interest, and dried botanicals that remain immune to wilting. The natural wood and dried reed palette integrates smoothly with gauze table runners, stoneware dinner plates, and raw timber banquet tables, establishing an artisanal, relaxed presence that feels both custom-crafted and visually cohesive.
Begin by selecting an authentic woven rattan or bamboo lantern equipped with a secure inner glass hurricane sleeve, which prevents dried materials from contacting the central illumination source. Place a battery-powered, warm-toned flickering LED candle inside the central glass cylinder, as open flames should never be paired with woven flammable materials or dried ornamental grasses. Next, construct a low crescent-shaped floral mechanics base using dry floral foam wrapped in chicken wire, placing it firmly around one side of the rattan lantern base. Insert dried, sun-bleached spear palms into the rear of the foam to establish an upward-angled fan shape that echoes the lantern’s vertical line. Cut pampas grass plumes down to six-inch stems, inserting them into the front and sides of the foam base along with sprays of preserved white bunny tails, seed pods, and dried skeleton leaves. Adjust the pieces until the foam base is completely concealed, and mist the dried grasses with a light coat of unscented hairspray to prevent airborne shedding around guest meal settings.
Idea 10: Antique Iron Farmhouse Lantern with Cascading Ivy Wreath
Setup Method
This design centers around an aged cast-iron lantern enclosed by a lush, cascading wreath of fresh English ivy, Italian ruscus, and miniature spray roses. The deep slate tone of the iron framework anchors the table setting, while cascading vine tendrils trail onto the linen, breaking up the rigid perimeter of the table center. A soft, warm pillar candle provides clear light from inside the glass housing, highlighting the deep green tones of the leaves and the delicate petals of small white flowers nestled around the perimeter. This arrangement complements traditional ballroom settings, historic estate celebrations, and outdoor courtyard dinners, evoking the visual balance of a classical English garden. By utilizing continuous, flexible climbing vines, this centerpiece offers substantial visual presence, softening rectangular wooden tables or large round banquet settings through organic, unstructured botanical lines.
Begin by preparing a pre-formed eight-inch circular floral foam ring base, submerging it in water enriched with floral preservative until fully saturated. Position the saturated foam ring centrally on the table surface within a low-profile plastic leak-proof tray, and set the heavy antique iron lantern squarely in the middle of the open ring. Secure a tall, five-inch diameter ivory wax pillar candle inside the lantern, verifying that the glass door latches without catching on any external foliage. Cut lengths of long-runner English ivy and variegated vinca vine, pushing the cut ends into the wet foam while allowing the long, flexible trails to cascade outward across the banquet linen. Fill the remainder of the foam ring with dense insertions of salal leaves, boxwood, and short-stemmed white spray roses, angling them outward to create a dome-shaped green collar. Mist the finished wreath thoroughly with cold water to maintain leaf hydration and store in a cool location until the reception begins.
Common Mistakes and Prevention Strategies
A frequent issue when designing lantern centerpieces is selecting structural heights that obstruct guest sightlines across banquet rows. Centerpieces must sit below eye level—typically underneath fourteen inches—or rise sufficiently above it to permit open conversation across the table without forcing guests to lean around decorative elements. Another common misstep involves underestimating reception hall fire regulations; venues frequently prohibit open, unshielded flames, making high-quality, realistic LED alternatives with weighted bases an essential planning backup. Additionally, decorators often secure floral installations too close to lantern vents, which can scorch petals or cause wicks to burn unevenly from restricted oxygen flow. To prevent this, ensure all fresh and dried botanicals remain fastened outside the glass framework, leaving the top chimney clear. Finally, failing to clean glass panels before event assembly results in visible dust, fingerprint smudges, and glue residue that become noticeable once interior lighting turns on, making a careful pre-event glass polish an essential preparation step.
Practical Methods for Professional Assembly
Achieving a clean, professional finish across dozens of reception tables requires developing efficient mechanical routines and systematic assembly workflows. Begin by pre-building floral attachments in identical, modular segments utilizing caged foam pieces or zip-tied wreaths that can be transported separately and attached to frames on-site in minutes. This modular process minimizes time spent dressing tables in the reception hall and safeguards delicate blooms against bruising during transit. Always incorporate mixed textural elements within surrounding greens, pairing broad, flat leaves with fine, airy ferns or textured seeds to introduce depth and photograph cleanly under evening event lighting. When sourcing candles, select smooth, unscented, dripless wax pillars or programmable remote-controlled LED units that allow coordinators to illuminate the entire venue with a single button press before guest arrival. Applying small, clear silicone bumpers to the base of every lantern ensures physical stability, prevents wobbling on textured table linens, and protects the underlying wood surfaces from moisture rings or wax spots.
Strategic Presentation and Table Styling Configurations
Presenting lantern centerpieces effectively relies on balancing the central fixture against secondary elements like dinnerware, stationery, and textured table runners. On long, rectangular banquet tables, pair large feature lanterns with low floral garlands, alternating secondary elements like small tea-light holders and fruit to create a rhythmic, continuous display down the table length. On round banquet tables, ground the lantern on a circular wooden riser, slate slab, or shallow metallic tray to define the centerpiece’s footprint, then wrap delicate greenery loosely around the base to visually soften the transition to the tablecloth. Coordinate the metallic finish of the lantern—whether aged iron, polished brass, or brushed silver—with place setting elements like charger plates, cutlery, and menu card accents for visual unity. Varying the surrounding lighting levels by scattering three to five low glass votive cups around the central lantern introduces layered light heights, softening shadows and casting a comfortable, welcoming glow across seated guests throughout the evening dinner service.
Timeline Management and Budget Allocation
Managing time and decor expenses requires strategic material sourcing and an efficient batch-production assembly schedule. When purchasing lanterns in volume, order standard sizes directly from commercial event supply wholesalers or architectural liquidators well ahead of time, avoiding costly retail markups. Reduce overall botanical expenses by establishing the lantern as the main visual anchor, framing it with long-lasting, budget-friendly foliage like Italian ruscus and salal rather than high volumes of premium, delicate floral blooms. Build a disciplined production timeline: clean glass panes, attach protective base feet, and prepare candle bases two to three weeks before the wedding date. Fresh floral foam collars can be built and hydrated forty-eight hours in advance if stored in a cool, dark environment, leaving only final placement and wick trimming for the morning of the wedding. This structured scheduling keeps decor investments reasonable while ensuring setup teams complete venue decorating calmly and efficiently.
Creative Expansions and Alternative Visual Variations
Beyond standard table styling, versatile lantern designs can be adapted to serve multiple roles throughout a wedding celebration. Identical lantern arrangements used during an outdoor afternoon ceremony as aisle markers can be relocated to reception dining tables by event coordinators during the cocktail hour, maximizing their decorative value. For outdoor celebrations, lantern fixtures can be suspended from low tree branches or shepherd hooks using heavy-gauge iron S-hooks, forming an illuminated canopy over open-air dance floors or pathway borders. Transitioning the decorative concept between seasons is straightforward: substitute spring garden roses with miniature white pumpkins and amber foliage for autumn weddings, or incorporate fragrant pine boughs, frosted pinecones, and cinnamon branches for winter celebrations. By understanding the core mechanics of lantern decor, couples can easily adapt these practical structural frameworks into cohesive, personalized decorative statements that reflect their venue, theme, and creative vision.