Designing a reception tablescape requires balancing height, texture, and visual cohesion, and dried botanical installations offer an enduring, sophisticated solution for contemporary celebrations. This comprehensive guide details ten distinct pampas grass wedding centerpiece concepts, providing practical methods to assemble balanced, striking decorative focal points. Readers will learn the exact mechanical assembly, stem selection, container pairing, and volume control required to construct stable arrangements that enhance guest sightlines. Utilizing preserved grasses provides an organic aesthetic that bridges bohemian warmth with refined architectural clarity. These concepts eliminate the stress of day-of floral wilting, allowing event hosts to prepare structural decor weeks ahead of the celebration date. In addition to aesthetic versatility, these dried elements significantly lower overall floral investments while delivering high-impact volume that traditional fresh cuts struggle to match at scale. By examining the step-by-step assembly processes, proportion guidelines, and safety considerations outlined across each concept, designers and couples will develop the technical foundation necessary to style elegant, photogenic reception spaces with confidence.
Pampas grass arrangements dominate modern event styling boards due to their natural architectural volume, neutral palette, and exceptional functional reliability. Unlike delicate fresh-cut flowers that demand continuous hydration and climate-controlled transport, dried plumes maintain their structural integrity across varying indoor and outdoor microclimates. This physical resilience provides immense practical value for open-air venues, beach gatherings, and sunlit loft spaces where live petals typically dehydrate rapidly. From a design perspective, the feathered plumes introduce soft, tactile movement that contrasts cleanly against sharp table geometry, polished glassware, and smooth ceramic tableware. The neutral tones, ranging from warm ivory and oat to soft taupe, complement almost any color story, effortlessly accommodating minimalist, rustic, and modern palettes. Furthermore, working with dried plumes is exceptionally accessible for beginners tackling personal styling projects, as stems can be repeatedly repositioned, trimmed, and adjusted without risking damage or petal loss. This combination of structural durability, timeless organic styling, and forgiving physical assembly solidifies dried grass centerpieces as an essential staple of contemporary event design.
Executing clean, durable grass centerpieces depends on disciplined preparation, quality stem selection, and appropriate mechanical tools. Begin by sourcing dried floral stems in varying grades, distinguishing between dense, full-plumed primary focal stems and slender, shorter accents used for filler depth. Assemble essential floral mechanics including heavy metal floral frogs, dry floral foam blocks, florist tape, sharp heavy-duty bypass pruners, and clear matte aerosol hairspray to control natural shedding. Prior to construction, carefully unpack the plumes outdoors and gently rotate the stems between your palms to loosen compressed branches. Expose the plumes to direct, warm sunlight for two to three hours, which expands the natural feather fibers to their maximum diameter and visual softness. Once expanded, apply a light, even coat of aerosol hairspray across the branches from an arm’s length distance to set the fibers and prevent stray shedding on dining tables. Measure the height of your venue tables and chairs to determine structural boundaries, ensuring centerpieces remain either below fifteen inches or above twenty-four inches to preserve open conversation lines for seated guests.
1. Architectural White Ceramic Cylinder Plume Display
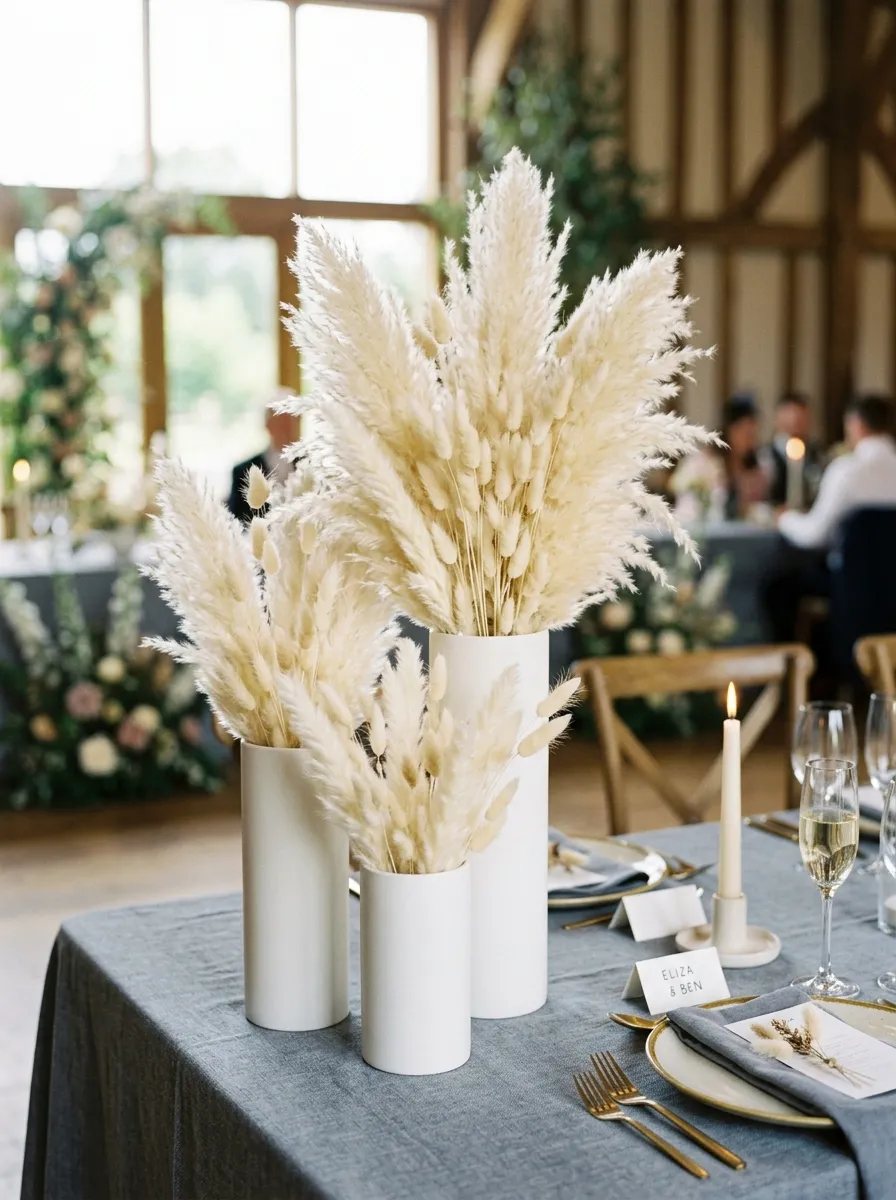
How to Create
The white ceramic cylinder display establishes a contemporary aesthetic by contrasting dense, feathery textures against sleek, unblemished geometric pottery. This concept utilizes three cylindrical ceramic vessels of staggered heights, typically measuring six, eight, and ten inches, clustered closely at the center of the reception table. The stark, matte surface of the pottery provides a crisp foundation that highlights the subtle oat and champagne tones of natural dried grasses. Rather than spreading the plumes outward into a wide fan, this design keeps the branches aligned in an upright, vertical composition that commands attention without encroaching onto dining place settings. The vertical posture emphasizes linear precision, making it an exceptional pairing for modern banquet tables, clean slate linens, and structured monochrome place cards. The contained silhouette also ensures that the feathery plumes do not tangle with wine glasses or flatware, preserving practical table utility while presenting an elevated, gallery-inspired focal point.
Begin assembly by placing dry floral foam blocks snugly inside each ceramic cylinder, trimming the foam flush with the vessel rim using a utility knife. Secure the foam by crossing two strips of clear waterproof floral tape over the top in an X pattern. Take your tallest ten-inch vessel and insert five tall pampas stems into the center, trimming their bare bottom stems so the plumes start three inches above the container edge. Next, work on the mid-sized cylinder, inserting four stems cut slightly shorter to create a descending visual tier that draws the eye across the cluster. Finish by filling the smallest six-inch cylinder with three compact plumes paired with three dried bleached bunny tail stems to ground the base. Spray the entire trio with a light coat of finishing aerosol to anchor any loose fibers, then position the three vessels tightly together on the table linen, rotating them until their fullest profiles face outward toward the surrounding guest chairs.
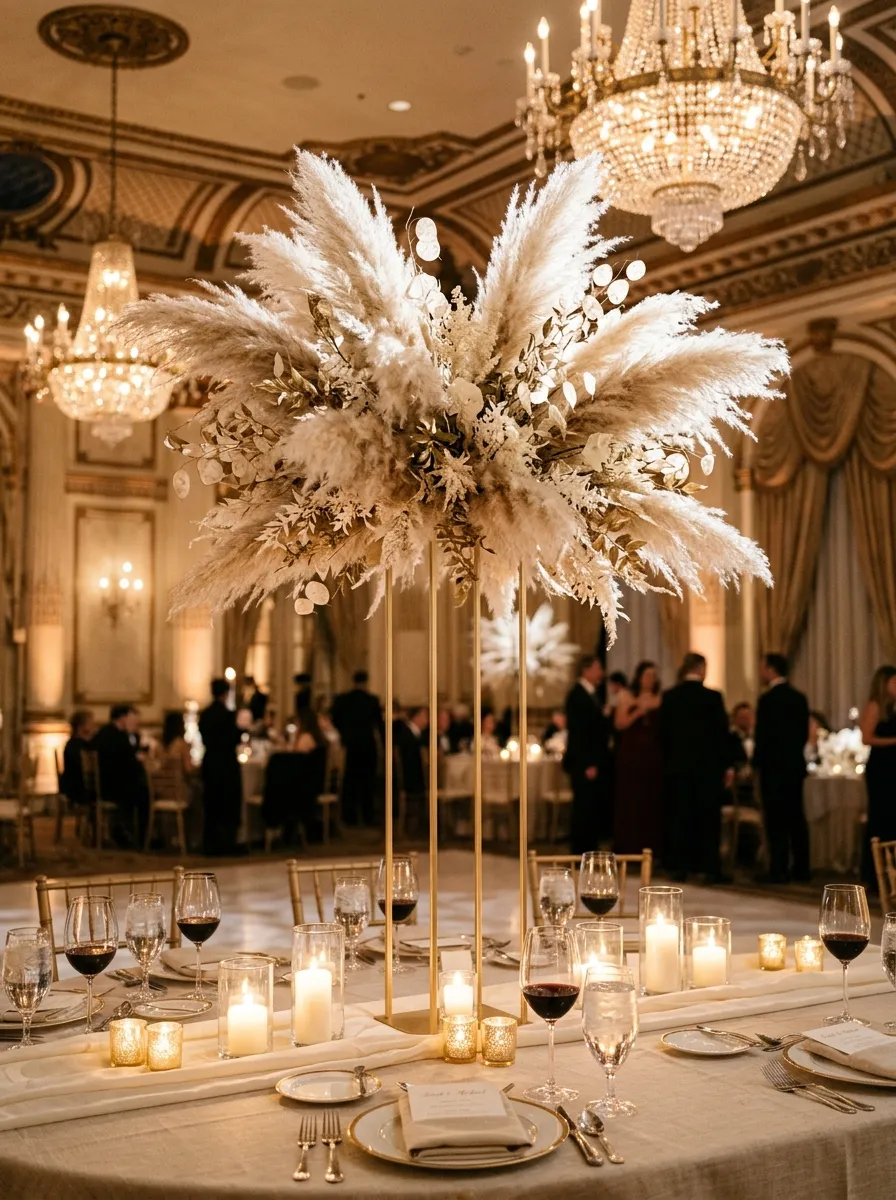
2. Floating Gilded Pedestal Cloud Centerpiece
Step-by-Step Guide
The elevated pedestal cloud centerpiece solves the perennial challenge of creating commanding visual height without obstructing cross-table guest communication. This architectural design mounts an expansive, billowing cloud of dried grasses atop a slender, matte-gold metal riser measuring approximately twenty-eight inches in height. By elevating the botanical mass well above eye level, the design leaves the tabletop completely open for family-style food service, vintage stemware, and low candlelight. The botanical cluster forms an airy, horizontal ellipse that appears to float weightlessly above the dining area, casting soft, diffused shadows beneath venue chandeliers. The warm metallic finish of the pedestal framework complements the golden-tan tones of the dried pampas fibers, creating an upscale, luminous ambiance suitable for grand ballrooms or open-concept industrial venues. The substantial volume of the overhead cloud visually lowers high ceilings, transforming cavernous reception halls into intimate, warmly textured dining environments.
Start by fastening an elevated floral tray firmly to the top plate of your metal pedestal stand using heavy-duty floral adhesive putty or zip ties. Cut a block of dry floral foam to fit the tray, wrapping the block in a small section of chicken wire to reinforce its structural integrity against the leverage of long, heavy stems. Insert four long, arching pampas stems horizontally into the left and right sides of the foam block, establishing an overall horizontal wingspan of thirty-six inches. Next, insert slightly shorter, dense plumes into the front, back, and underside of the foam, angling them downward to completely obscure the mechanics, wire, and base plate from seated guests. Fill the top dome with medium-length upright plumes, building a continuous, seamless cloud silhouette that tapers gently at the outer tips. Ensure every stem penetrates the foam by at least two inches to prevent dislodging during table transit, and complete the installation by securing low glass votive candles directly on the table below the riser.
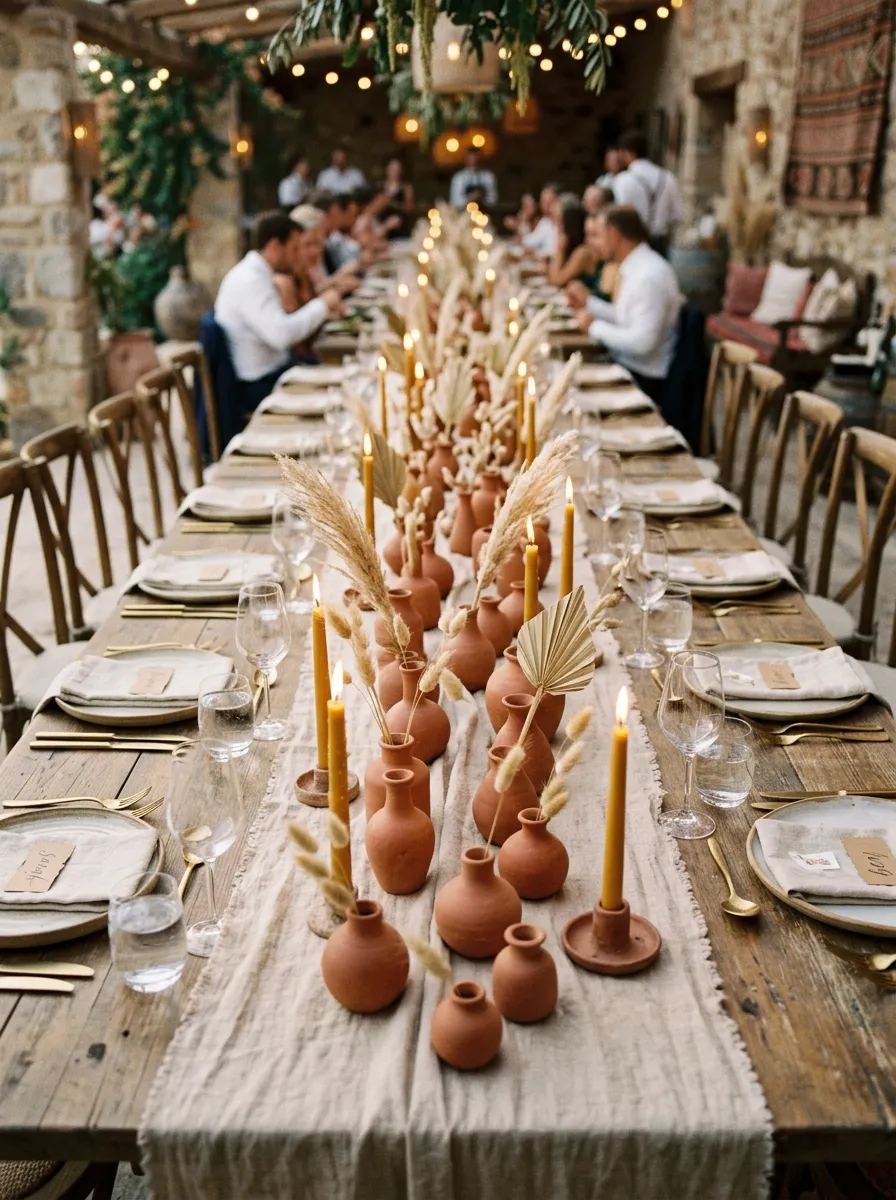
3. Terracotta Bud Vase Botanical Pathway
Execution Process
The terracotta bud vase pathway trades the traditional central floral mass for an elongated, continuous landscape of petite clay vessels running down the length of long wooden banquet tables. This approach utilizes an array of small, handmade terracotta containers in varying organic silhouettes, such as amphoras, spherical mini-jugs, and pinched bottles, scattered alongside raw linen table runners. Each vessel hosts only one to three carefully pruned botanical stems, emphasizing the individual shape, line, and texture of each preserved branch. The warm, sun-baked clay tones harmonize with the soft cream grasses, bringing an earthy Mediterranean warmth to wedding receptions. By distributing the floral weight evenly down the table axis rather than concentrating it in a single high-impact center point, this concept provides every seated guest with an immediate, intimate visual accent. It also integrates smoothly with low tapered beeswax candles, creating a dynamic, rhythmic tablescape filled with warmth and movement.
Begin by unrolling a raw-edged neutral linen table runner along the entire center axis of the table, allowing the fabric to gather into soft, organic folds. Space five to seven small terracotta bud vases per eight feet of table length, arranging them in a gentle, wandering zigzag pattern rather than a rigid straight line. Use heavy floral snips to divide larger pampas plumes into small, three-to-five-inch feather clusters, removing any excess wood from the lower stem to fit small vase necks. Insert a single miniature plume into every other vessel, alternating with individual dried palm spears, bleached ruscus, or slender lagurus stems to create visual diversity. Because bud vases lack the water weight of fresh floral containers, drop two small lead fishing weights or smooth pebbles into the base of each clay pot before inserting stems to ensure physical stability. Space slender brass candleholders between the vases, verifying that candle flames remain at least six inches away from the dry botanical tips.
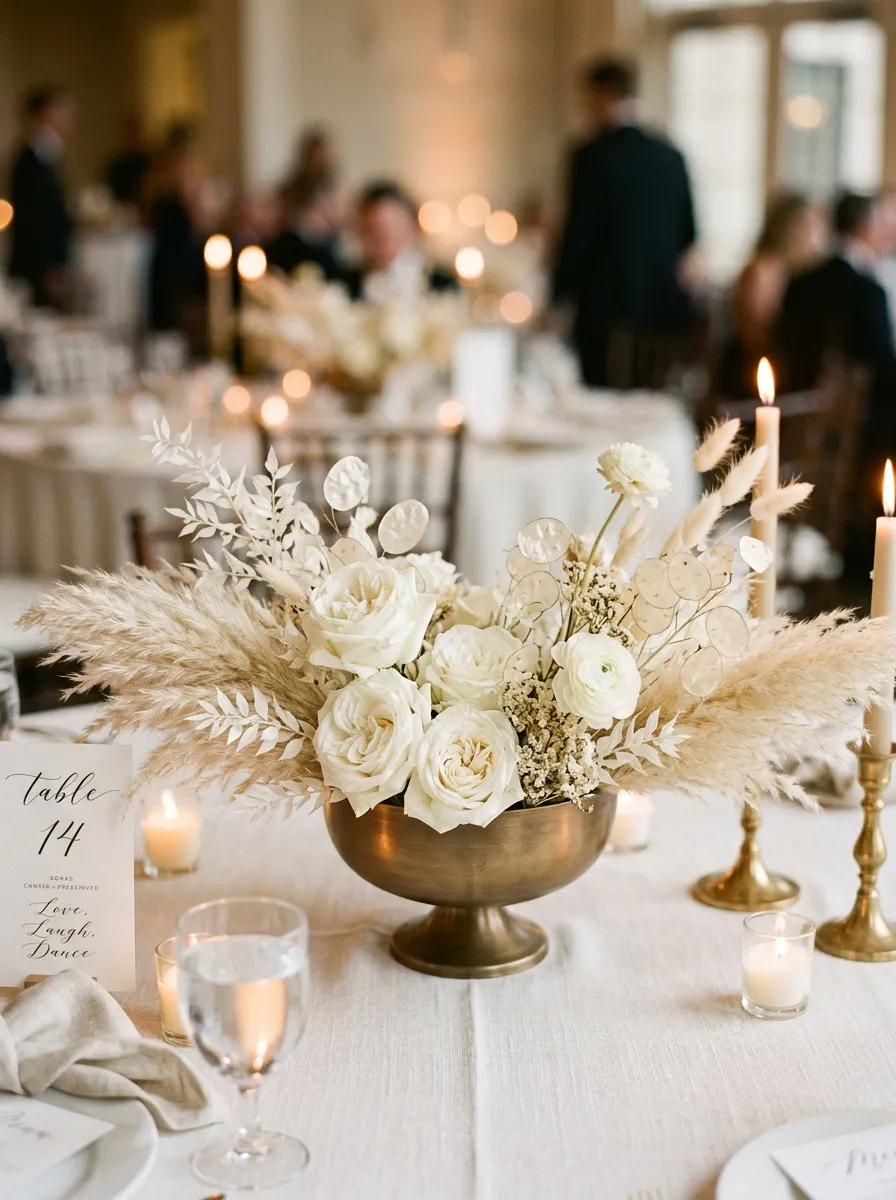
4. Low Profile Compote Bowl with Bleached Preserved Blooms
Setup Method
The low-profile compote bowl centerpiece offers an elegant, low-profile arrangement that sits comfortably on round dining tables, keeping center sightlines entirely clear. Hosted in a wide, shallow footed vessel made of brushed bronze, stone, or matte ceramic, this design blends soft pampas grass fibers with sculpted, preserved floral accents. The plumes are trimmed down and arranged to form a soft, horizontal cushion that billows over the container rims, framing focal accents of preserved white garden roses, dried banksia, and bleached hydrangea florets. This structural combination balances the wild, informal texture of ornamental grasses with the romantic symmetry of classical wedding florals. The wide footed pedestal lifts the entire arrangement two inches off the tabletop, creating a sense of weightlessness while maintaining a compact footprint that leaves ample room for banquet bread plates, water goblets, and printed menu stationery.
Begin by anchoring a metal floral pin frog to the center bottom of a six-inch-diameter compote bowl using a marble-sized ball of waterproof floral adhesive putty. Press the frog down firmly with a twisting motion to create an airtight seal that locks the heavy metal pins to the vessel floor. Cut the stems of six dense pampas plumes down to eight inches, stripping the lower two inches of feather fibers to expose the raw wooden stem. Push these stems firmly onto the perimeter pins of the frog, angling them outward at a forty-five-degree angle so they spill gently over the rim of the compote. Insert three bleached preserved roses into the center pins, placing them slightly recessed within the grass collar to serve as primary visual anchors. Fill any remaining exposed gaps between the roses and outer plumes with dried lunaria seed pods, which introduce translucent, reflective textures that catch the surrounding candlelight across the dinner service.
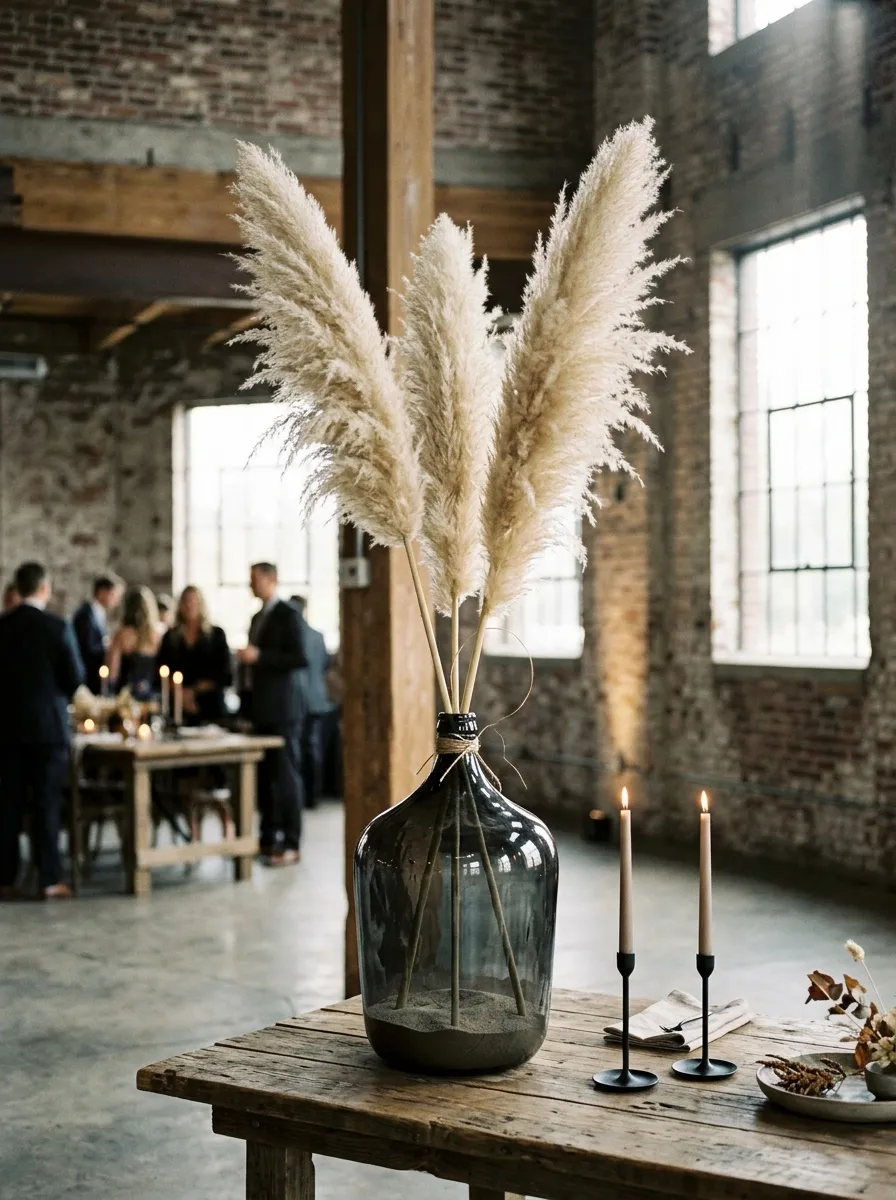
5. Industrial Smoked Glass Demi-John Arrangement
How to Make
Smoked glass demi-john arrangements introduce an industrial edge to dried botanical designs, using oversized tinted glass carboys to create dramatic vertical presence. The translucent charcoal, amber, or deep olive glass provides visual weight that anchors soaring five-foot pampas plumes, making this concept ideal for high-ceilinged warehouse venues and modern urban spaces. The transparent nature of the glass exposes the raw, trimmed wooden stems inside the bottle, transforming structural plant anatomy into an intentional design feature. By using only three to five oversized, premium-grade cortaderia plumes per bottle, this concept leans heavily into minimalist restraint, proving that massive scale does not require visual clutter. The smooth, reflective surface of the curved glass contrasts dynamically with the soft, cloud-like texture of the plumes rising above, producing a clean, sophisticated statement piece that requires minimal assembly time.
Select a heavy, vintage-style glass demi-john or narrow-necked carboy with a minimum height of fourteen inches to ensure a strong, stable center of gravity. Pour one cup of fine horticultural sand or small crushed quartz crystals through a funnel into the bottom of the bottle to add stabilizing ballast against passing foot-traffic drafts. Select three tall, extra-fluffy pampas grass stems, measuring their length so the bottom of the feathery plume begins precisely at the lip of the bottle mouth. Trim the bare wood cleanly with bypass pruners at a sharp angle to facilitate smooth insertion through the narrow glass neck. Slide the stems into the bottle one by one, allowing them to cross naturally inside the container so their upper plumes fan outward into an asymmetrical spray. Finish by draping a neutral raw-silk ribbon around the vessel neck, or leave the glass entirely bare to celebrate clean, uncluttered architectural lines on the dining surface.
6. Monochromatic Bleached Fan and Pampas Crescent
Step-by-Step Guide
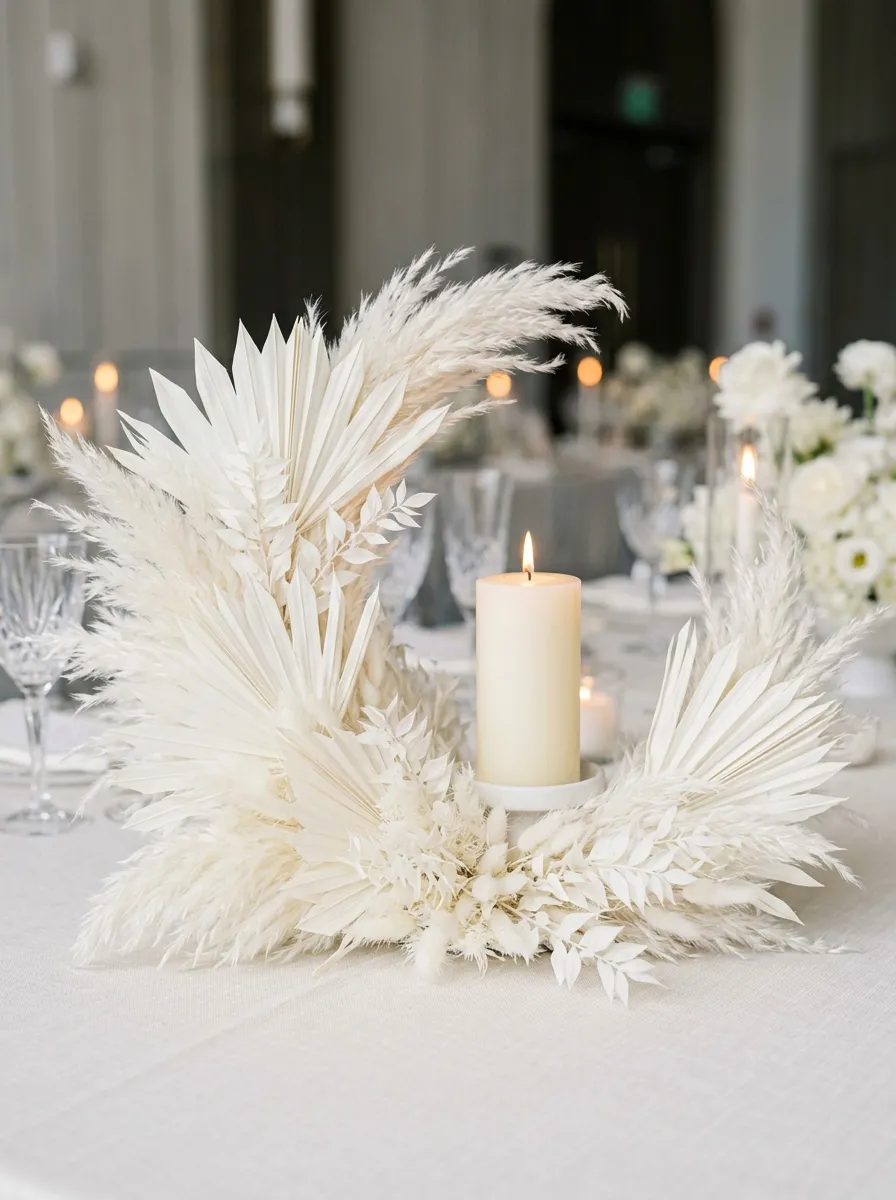
The monochromatic bleached crescent centerpiece utilizes an all-ivory color palette, blending varied plant textures to craft an avant-garde, sculptural focal point. This design combines fluffy white pampas plumes with sun-dried, bleached spear palms that have been trimmed into sharp geometric triangles and radiating arcs. Arranged within a low, semi-circular crescent trough, the materials curve gently around the curve of a circular centerpiece mirror or cluster of pillar candles. The absence of contrasting color focuses the viewer’s eye entirely on texture, form, and the play of light across dried botanical surfaces. The stark white aesthetic aligns naturally with modern luxury weddings, tropical beach gatherings, and high-fashion minimalist receptions. Its low, curved footprint wraps around table numbers and menu holders, unifying disparate tabletop elements into one cohesive, beautifully organized presentation.
Start by securing a curved crescent floral foam container to a heavy melamine base plate using two-inch floral anchor tape. Pre-cut three dried, bleached palm spears using sharp craft shears, trimming their outer edges into precise scalloped arcs or sharp diamond points. Insert the prepared palm spears upright into the back edge of the curved foam base, overlapping them slightly to construct a rigid, architectural backdrop. Next, cut ten to twelve small pampas grass stems to six-inch lengths, pushing them into the foam directly in front of the palm spears at varied angles to soften the stiff fan geometry. Layer in small clusters of preserved white Italian ruscus and bleached strawflowers along the base to conceal the foam mechanics completely. Ensure the highest point of the crescent sits at twelve inches on the outer edge, sloping gently down to four inches at the opposite tip to maintain visual movement across the table surface.
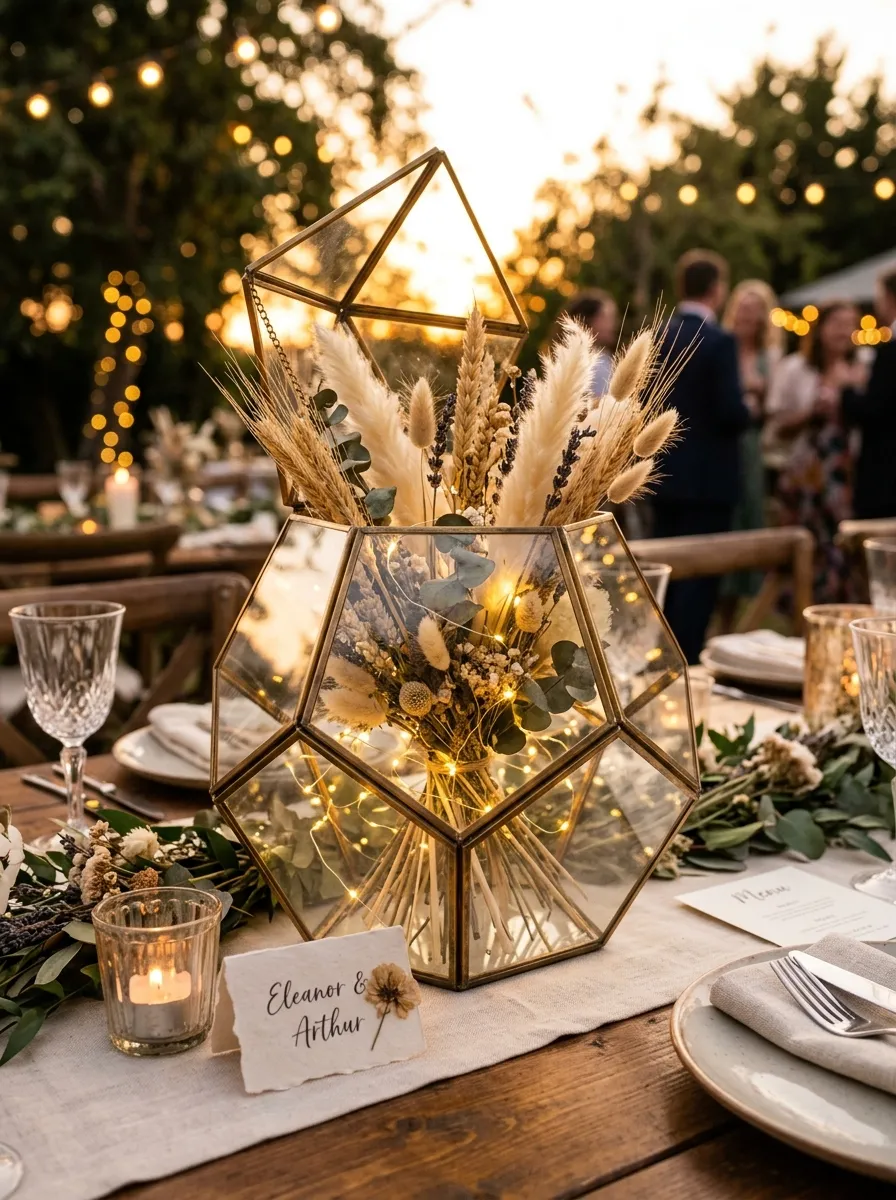
7. Geometric Brass Lantern with Internal Dried Bouquet
Execution Process
Integrating dried grasses inside geometric brass lanterns updates a classic centerpiece concept with contemporary bohemian texture. This design places a dense, carefully arranged bundle of miniature pampas plumes, dried grasses, and seed heads inside an open-sided or glass-paneled brass lantern frame. The rigid, clean-lined metal framework acts as a structural shadowbox, encasing the organic, wild textures of the botanical elements within clean architectural boundaries. This contained layout is particularly effective for outdoor weddings, windy coastal venues, or breezy garden verandas, as the lantern housing shields delicate plumes from air currents that might otherwise scatter loose fibers. Rather than placing a traditional flame candle inside the lantern, illumination is achieved by coiling micro-LED fairy lights through the base of the stems, or by placing flame-resistant LED pillar candles alongside the exterior glass, casting soft, warm patterns across the dining table.
Select an open-faced geometric brass lantern measuring fourteen inches tall by six inches wide, ensuring the top latch opens smoothly for easy mechanical access. Cut a three-inch square block of dry florist foam, wrap it in neutral brown kraft paper to mask the green color, and secure it to the internal floor of the lantern using double-sided floral adhesive strips. Trim six miniature pampas grass stems so their plumes measure eight inches in length, inserting them vertically into the rear portion of the foam block. Layer dried wheat stems, oats, and small flax pods directly in front of the pampas plumes to introduce diverse agricultural textures within the brass enclosure. Weave a delicate copper wire string of warm-white micro-LED lights through the botanical bundle, concealing the battery pack securely beneath the paper-wrapped foam base. Close the lantern door carefully, ensuring no feathery fibers are caught in the metal frame, and set the finished piece atop the table runner.
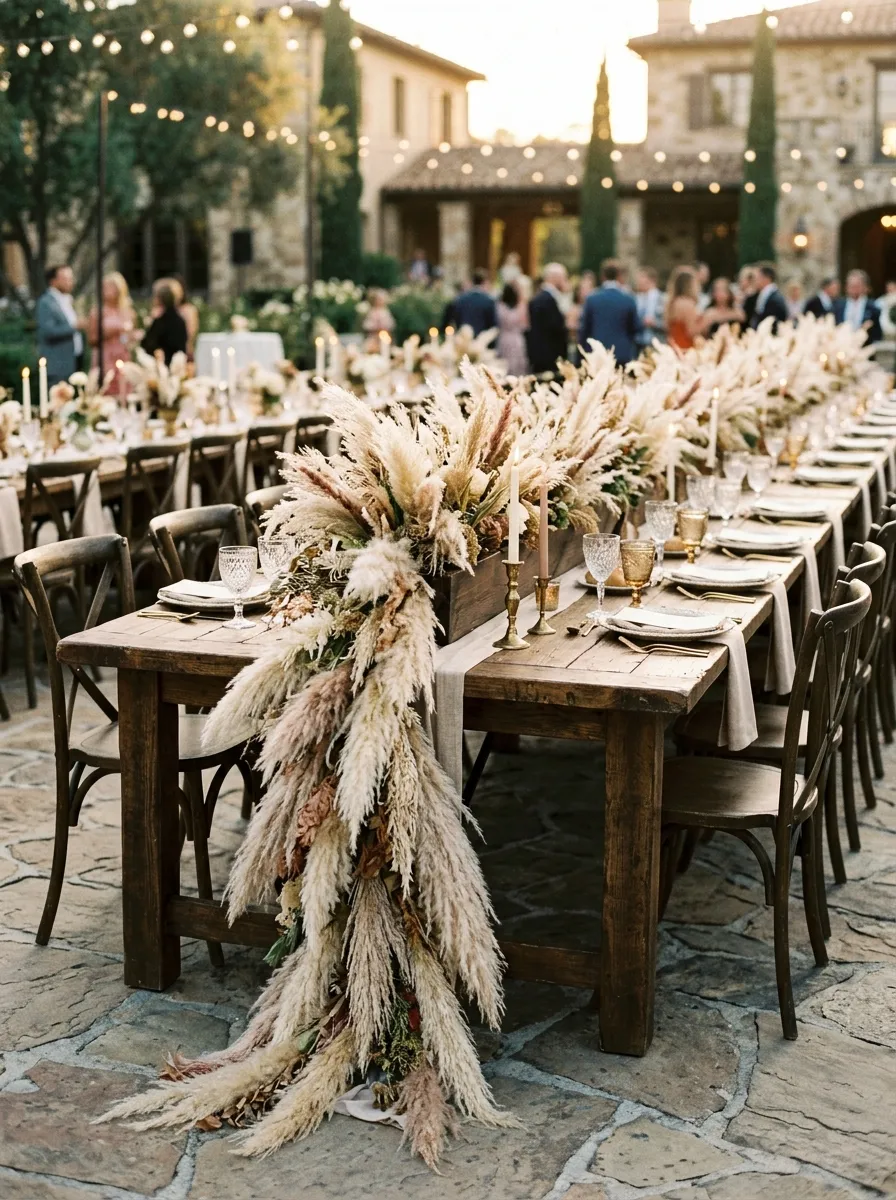
8. Cascading Wood Trough Plume Runner
Setup Method
The cascading wood trough plume runner transforms long head tables and estate seating into lush, continuous landscapes of rich botanical texture. This concept utilizes low, narrow wooden planting boxes that span down the center of long tables, filled with an abundant, horizontal spray of dried grasses that billows outward and dips gently toward the floor at the table ends. The rustic grain of dark walnut, weathered oak, or raw cedar wood adds structural earthiness that grounds the airy, featherweight aesthetic of the pampas grass. Because the trough is shallow and elongated, it supports a high density of materials without creeping into guest place settings, leaving generous room for shared dining platters and glassware. The horizontal rhythm guides the eye down the entire length of the reception space, tying long banquet configurations together into an integrated, immersive architectural installation.
Obtain a low wooden trough measuring approximately thirty-six inches long, four inches wide, and three inches deep, lining the interior with heavy wax paper to protect the wood from mechanical marking. Cut standard bricks of dry floral foam to fill the entire length of the trough, shaving down the edges so the foam sits one-half inch above the wooden rim. Secure the foam bricks by wrapping three bands of dark floral tape around the entire circumference of the wooden box. Insert dense pampas plumes along both long sides of the trough, pushing the stems horizontally into the foam so the plumes extend outward six inches, softening the hard wooden edges. Fill the central top channel with alternating stems of dried sorghum, fluffy pampas segments, and preserved eucalyptus, angling them upward at a gentle twenty-degree incline. For table-end troughs, insert extra-long arching pampas stems into the outer short ends, letting the plumes cascade gracefully down toward the floor linens.
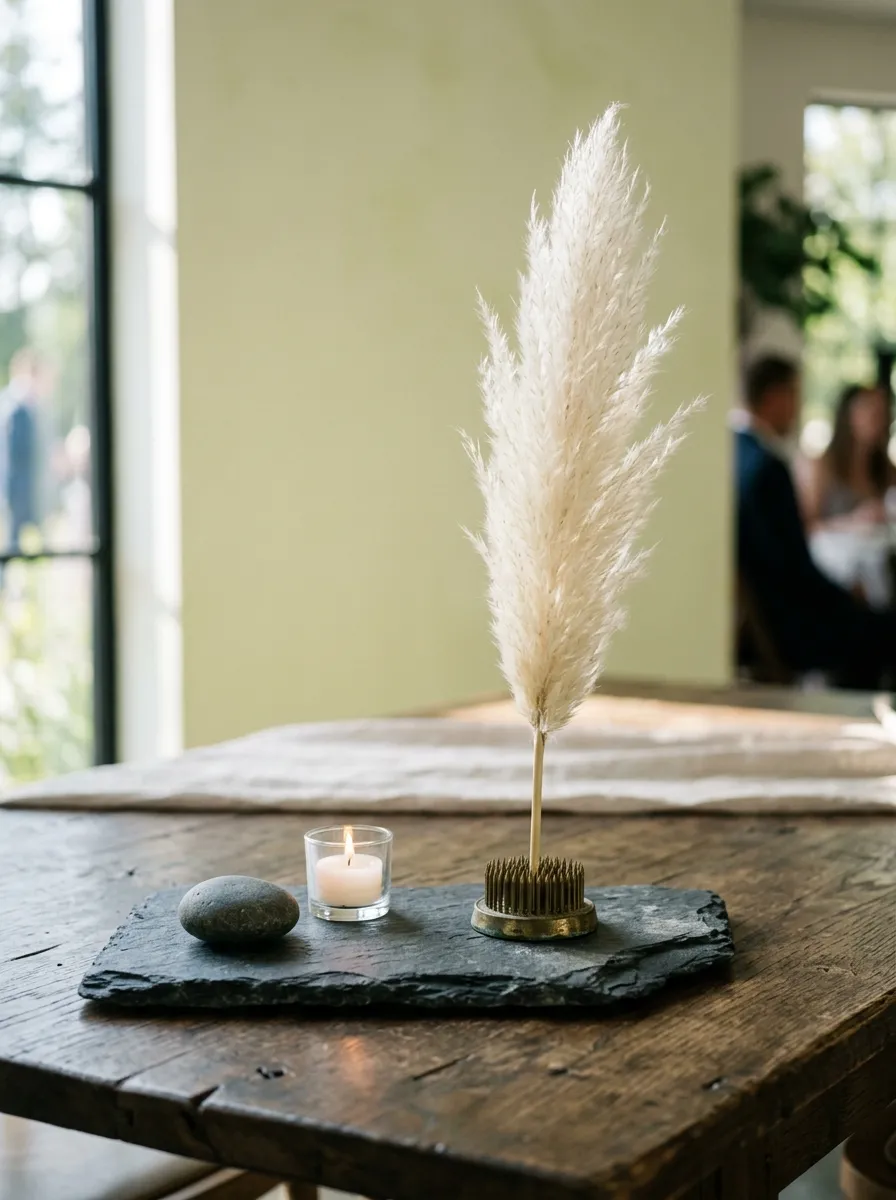
9. Minimalist Single-Plume Slate Slab Presentation
How to Make
The single-plume slate presentation strips away botanical excess, celebrating the clean lines and subtle beauty of individual dried stems. This hyper-minimalist concept places a solitary, pristine pampas plume inside an exposed heavy brass pin frog, set directly atop a raw-edged dark slate or honed travertine stone slab. By isolating a single stem, the eye is drawn to the natural curvature, delicate feather graduation, and organic movement of the plant. The heavy, dark stone foundation provides visual weight and tactile contrast, keeping the featherweight grass balanced and physically grounded on the table. This styling approach aligns effortlessly with modern minimalist, Japanese-Scandinavian, and gallery-style weddings that emphasize negative space, curated restraint, and intentional material selection. It also provides an exceptionally streamlined setup process, eliminating the labor and transportation volume required by traditional multi-stem floral arrangements.
Begin by selecting flat, rectangular slabs of natural dark charcoal slate or raw travertine stone, measuring approximately eight by twelve inches, ensuring the bottoms feature felt pads to prevent scratching venue furniture. Position a heavy round brass floral kenzan, or pin frog, on the left third of the stone surface, securing it firmly with a disk of clear mounting putty. Choose a single, high-grade pampas plume with an exceptionally straight central spine and pristine, unbent feather branches. Using sharp bypass pruners, trim the base of the wooden stem at an acute forty-five-degree angle to a total height of eighteen inches. Press the cut stem firmly down onto the brass pins until it sits deeply seated and plumb, verifying that the stem remains upright and stable when exposed to light air movement. Balance the composition by placing a single smooth river stone and a low glass tealight cup on the opposite side of the slate slab.
10. Sculptural Wire Mesh Suspended Botanical Canopy
Step-by-Step Guide
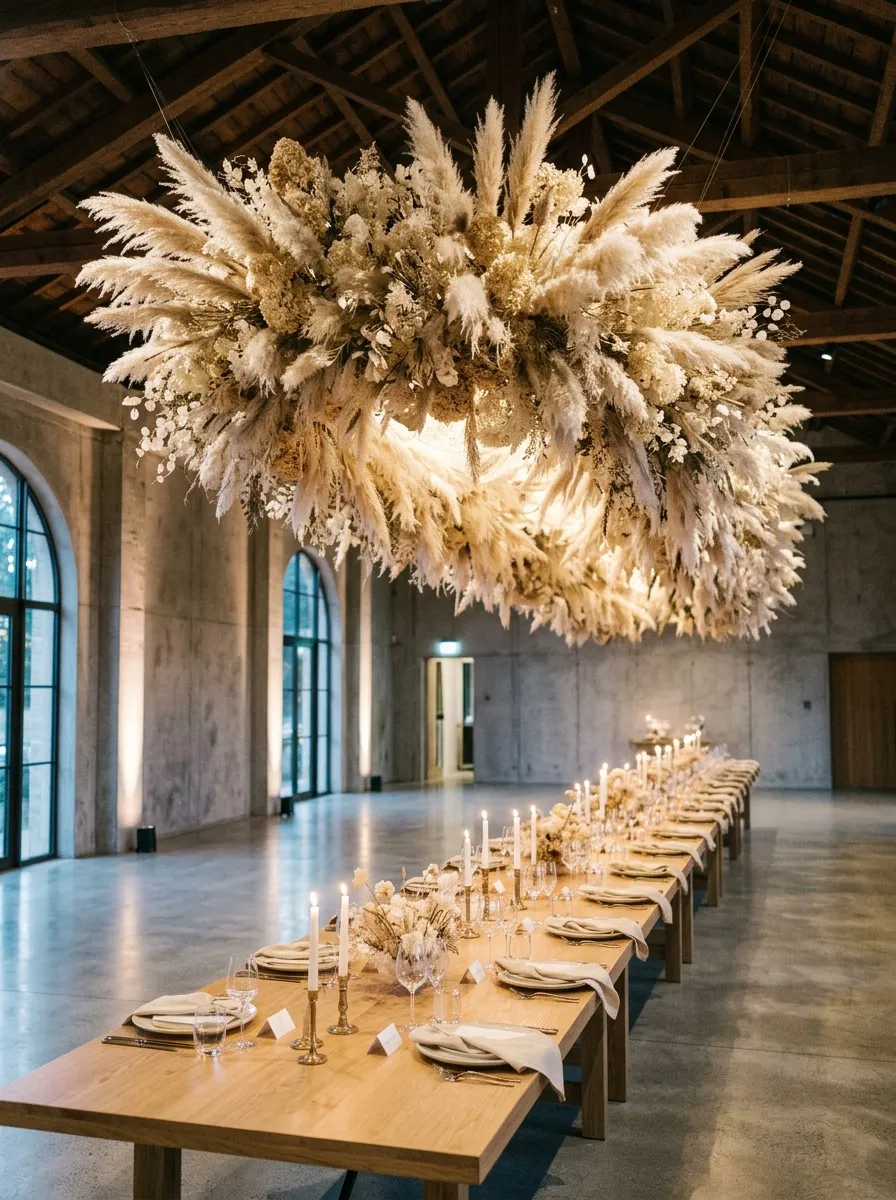
The sculptural suspended canopy shifts the wedding centerpiece concept upward, trading table-bound containers for an overhead cloud that hangs suspended above the bridal party or central banquet table. This installation shapes industrial galvanized chicken wire into an organic, floating armature packed with hundreds of dense, airy pampas plumes. The resulting cloud hangs from structural venue beams via transparent monofilament line or industrial brass hanging wire, floating gracefully over the dining tables. This overhead canopy leaves the entire tabletop clear, allowing couples to curate minimalist table settings focused on flatware, fine linens, and low ambient candles. The suspended cloud catches uplighting from venue fixtures and ambient candlelight from below, creating an ethereal, luminous focal point that defines the reception space. Its dramatic visual impact makes it an unforgettable centerpiece for grand architectural venues, barn conversions, and industrial warehouse celebrations.
Construct the foundation by rolling out a five-foot section of two-inch galvanized hexagonal chicken wire, forming it into a hollow, three-dimensional cylinder and crimping the cut wire edges together with pliers. Compress and bend the wire cylinder by hand to create an organic, uneven oval shape with soft, sweeping contours. Secure four points of load-tested ceiling suspension wire to the internal frame, hanging the empty armature at a comfortable working height in your preparation space. Insert long, dense pampas grass stems through the wire mesh from the outside inward, weaving the bare wooden stems through multiple wire openings to lock them mechanically without tape or glue. Work from the bottom perimeter upward, angling lower plumes downward to obscure the structural wire, while inserting upper plumes horizontally to expand the cloud’s width. Step back periodically to check the overall volume and balance, filling any thin spots with secondary stems of bleached amaranthus, dried oats, or fluffy pampas clusters before hoisting the canopy to its final venue height.
Amateur event stylists and DIY couples frequently encounter preventable issues when assembling dried grass centerpieces, with premature plume shedding serving as the primary frustration. Untreated pampas grass sheds fine airborne fibers when touched by passing guests or exposed to outdoor air currents, coating dark table linens and nearby dinner plates. Prevent this by shaking out every plume outdoors before styling, followed immediately by an even, generous application of firm-hold hairspray or commercial dried-flower floral sealant. Another frequent mistake is ignoring table scale, leading to arrangements that stand right at seated eye level, between sixteen and twenty-two inches high. This awkward height obstructs cross-table conversation and forces guests to crane their necks during dinner service. Solve this structural error by designing centerpieces that sit strictly below fifteen inches, or by utilizing elevated risers that hold the botanical mass above twenty-four inches, maintaining clear, open sightlines. Additionally, placing dried botanicals too close to open candle flames creates an extreme fire hazard; always encase table candles inside tall glass hurricane cylinders that rise at least three inches above the active wick.
Achieving a polished, professional finish with pampas grass centerpieces relies on thoughtful preparation and balancing varying plant textures. When purchasing plumes, seek out stems of varied ages and harvests; blending pale cream plumes with deeper caramel and taupe varieties creates natural shadow depth that photograph with richer dimensional realism. Never insert dried stems directly into fresh floral water, as damp conditions rot dried cellulose fibers, causing plumes to droop and grow mold within days. If integrating live fresh roses or foliage into a dried centerpiece, utilize water tubes on the fresh stems to isolate hydration, keeping the surrounding dried grasses completely dry. To restore plumes that were compressed during flat storage or box shipping, hold them over the gentle steam of a garment steamer or tea kettle for ten seconds, then rotate them upside down to let gravity pull the fluffy fibers outward. Finally, always clean the exterior of your vessels with a microfiber cloth before placement, eliminating any settled stray fibers to keep your tabletop presentation crisp, clean, and elegant.
Presenting pampas grass centerpieces successfully involves balancing natural organic textures against smooth, reflective tableware and venue surfaces. Pair these airy botanical arrangements with crisp, high-contrast table elements, such as textured raw silk runners, matte black flatware, and polished ribbed glassware, to create visual balance. Introducing varied forms of ambient table illumination maximizes the soft, light-filtering qualities of dried plumes; position low glass votive candles and tall glass hurricane lamps around the vessel base so flickering light catches the feathered edges. In terms of spatial distribution across the room, alternate your centerpiece designs between banquet tables to avoid visual monotony. For instance, balance tall smoked glass demi-johns on long rectangular family tables with low compote bowls on circular guest tables, creating an engaging rhythm throughout the venue. Anchor the base of each vessel with small styling details, such as deckled-edge calligraphy place cards, raw wood table numbers, or natural linen napkins tied with rough twine, to produce a cohesive, elevated aesthetic.
Careful timeline planning and budget allocation make dried botanical centerpieces an exceptionally cost-effective option for wedding celebrations. Unlike live flowers that must be cut, conditioned, and arranged within forty-eight hours of the wedding, dried pampas grass centerpieces can be assembled months in advance. Schedule your centerpiece construction four to six weeks before the event date, storing the completed vessels in breathable cotton garment bags or cardboard cartons inside a cool, dry room away from direct window sunlight. This advance timeline eliminates frantic wedding-week setup pressure, allowing wedding parties to focus entirely on day-of event coordination. From a budget perspective, high-grade pampas grass costs more per stem than standard fresh carnations, but its massive volumetric coverage means three plumes can fill the visual space of twenty fresh stems. Furthermore, because these centerpieces never wilt, they can be carefully packed up after the reception concludes and repurposed as home decor accents, or resold to future couples, recouping a substantial portion of the original decor investment.
Once foundational centerpiece arrangements feel comfortable, explore advanced creative concepts that expand the structural limits of dried botanical styling. Consider tinting natural pampas plumes using specialized aerosol floral dyes, introducing soft ombre gradients of dusty rose, sage green, or muted slate blue to harmonize with unique event color palettes. Experiment with mixed-media foundations by wrapping vessel exteriors in textured lime-wash plaster, raw clay slip, or woven raffia cord to add artisanal richness to the container surface. You can also integrate unexpected non-botanical elements into your centerpiece clusters, such as geometric architectural stone fragments, selenite crystals, or structural dried seed pods, to craft avant-garde gallery compositions. Beyond wedding reception tables, scale these identical techniques to construct matching entryway arrangements, photo backdrop arches, and bar installations that unify the entire event environment. Document your structural formulas, stem counts, and material sources in an event design journal, creating an adaptable blueprint for future celebrations and styling projects.