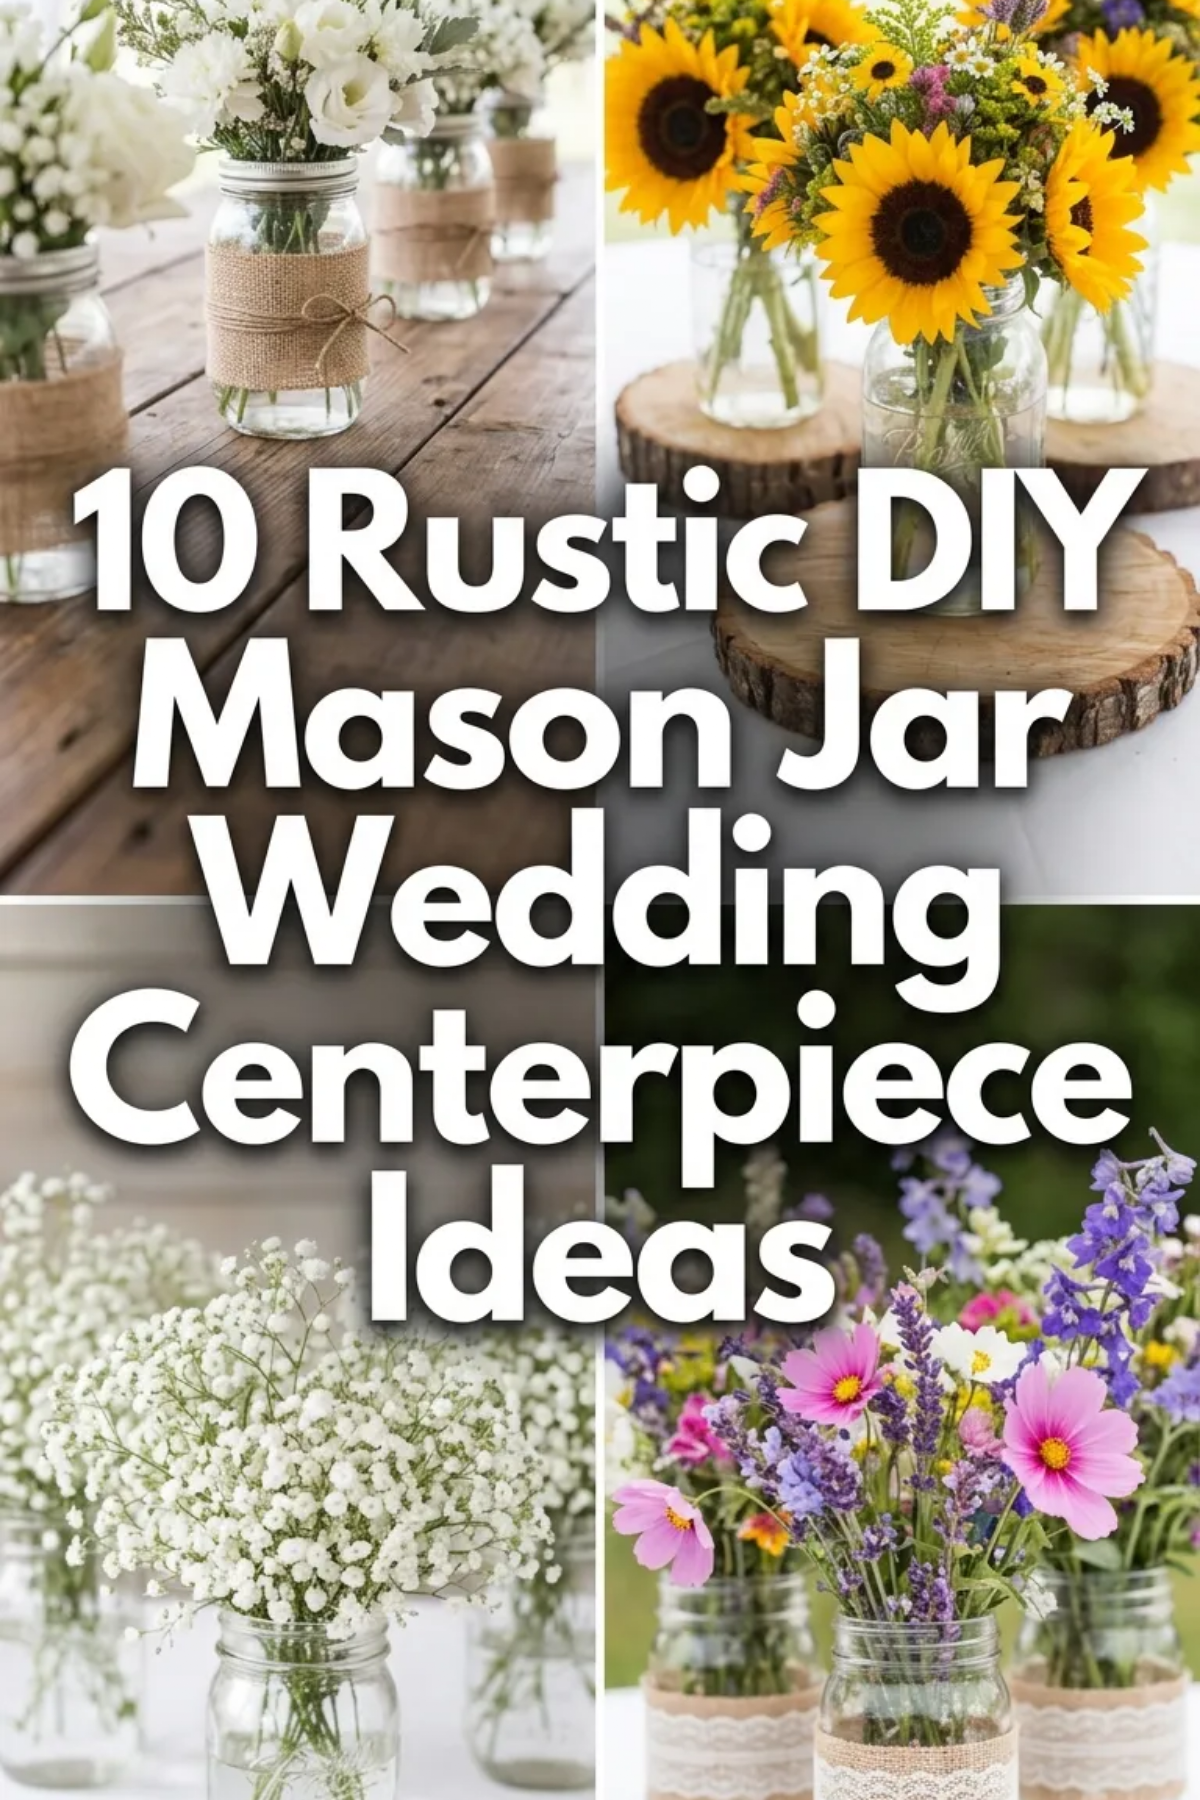
Creating cohesive, memorable reception tables is a primary goal for couples planning modern celebrations, and handmade elements offer unmatched flexibility for event styling. Glass preserving vessels serve as…
Creating cohesive, memorable reception tables is a primary goal for couples planning modern celebrations, and handmade elements offer unmatched flexibility for event styling. Glass preserving vessels serve as versatile, cost-effective vessels for event floristry, ambient illumination, and bespoke table decor. This tutorial outlines ten practical DIY mason jar wedding centerpiece ideas designed to align with various wedding aesthetics, ranging from minimalist modern layouts to structured botanical designs. Readers will learn the exact preparation methods, floral arranging techniques, vessel embellishments, and structural balancing principles needed to assemble long-lasting displays. Incorporating handmade elements allows hosts to customize palettes, scale floral volumes to table dimensions, and repurpose decorative elements across ceremony and reception areas. By understanding essential glassware preparation, hydration techniques, and structural balancing rules, anyone can construct professional-grade displays without requiring specialized floral training. These creative ideas combine functional stability with elevated aesthetic appeal, ensuring each finished centerpiece withstands the duration of a multi-hour wedding event while maintaining fresh, balanced proportions.
Why This Idea Is Trending or Useful
Glass preserving containers remain prominent across modern Pinterest ideas and curated event boards because they offer structural durability, standard dimensions, and accessible price points. These vessels feature thick, molded glass that provides substantial counterweight for top-heavy floral stems, floating candles, and tall branches, preventing accidental tipping on active banquet tables. From a design perspective, the clean cylindrical geometry of standard canning jars integrates naturally into modern design schemes, rustic environments, and contemporary industrial event venues. Their clear surfaces maximize light refraction, enhancing the warm glow of tea lights, submerged micro-lights, and metallic coatings. The practical DIY appeal centers on simple sourcing; standard quart and pint jars are readily available in bulk quantities, eliminating supply chain delays common with specialty ceramics. For beginner crafters, working with uniform glassware simplifies volumetric calculations for water, floral stems, and embellishments, allowing precise budgeting across dozens of tables. This combination of structural reliability, neutral geometry, and cost efficiency makes jar-based displays an essential solution for modern celebration decor.
Materials and Preparation
Successful execution requires gathering fundamental materials and establishing a systematic preparation workflow before handling live botanicals or liquids. Core supplies include standard 16-ounce pint and 32-ounce quart glass jars, floral shears, waterproof floral tape, natural twine, chalk-finish mineral paints, foam brushes, adhesive dots, and clean wiping cloths. Specialized elements include battery-operated submerged micro-lights, floating wax discs, preserved moss, decorative sand, and seasonal cut blooms such as garden roses, spray eucalyptus, and baby’s breath. Preparation begins by thoroughly washing all glassware in hot, soapy water to strip away manufacturing oils, chemical residues, and dust particles that degrade paint adhesion or cloud fresh floral water. Dry each vessel completely using lint-free microfiber towels, and inspect rims for micro-fractures. Planning considerations require measuring reception table diameters to determine whether single statement jars or multi-vessel trios best suit the floor plan. Group all dry craft assembly tasks, such as painting and exterior wrapping, at least forty-eight hours prior to the event, reserving fresh floral stem trimming, hydration mixing, and final assembly for the final day.
Frosted Sea Glass Vessels with White Ranunculus
Step-by-Step Guide
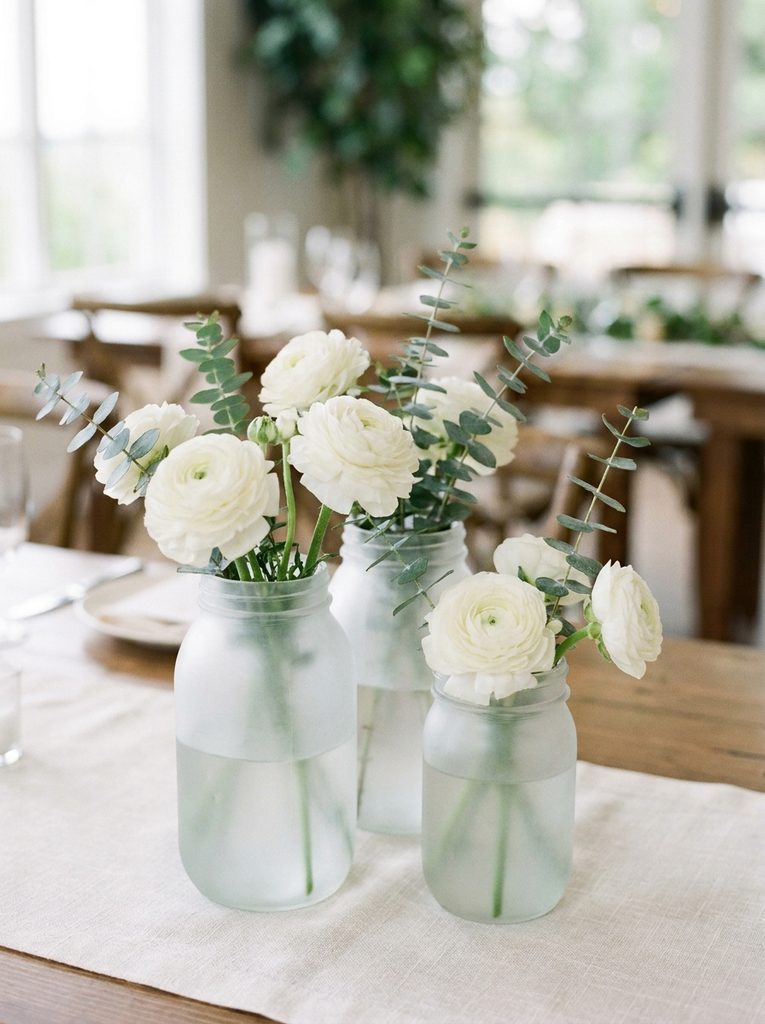
The frosted sea glass design pairs smooth matte translucent surfaces with crisp, multi-petaled ranunculus stems to produce a refined, minimalist style centerpiece. Applying a fine semi-translucent misting across clear glass softens direct light transmission, creating a velvety glow that highlights clean floral silhouettes without visible stem clutter. White ranunculus flowers feature high petal counts and clean circular forms that provide visual weight without demanding overwhelming floral mass. Pairing three varying vessel heights—such as a half-pint, pint, and quart jar—creates dynamic vertical progression across long banquet tables or round settings. The cool sea glass tint complements neutral linens, brushed metal flatware, and pale stone surfaces, establishing a contemporary aesthetic that remains grounded and functional. This concept works effectively for daytime greenhouse weddings as well as evening indoor banquets where indirect accent illumination enhances the diffused frosted exterior.
To create this centerpiece, wash and thoroughly dry your glass containers before wiping the external surfaces with isopropyl alcohol to remove residual fingerprints. Working in a well-ventilated space, apply two ultrathin coats of translucent frosted glass aerosol finish, allowing twenty minutes of drying time between applications to avoid running or uneven pooling. Once the paint cures fully, fill the vessel two-thirds full with tepid water mixed with standard floral preservative powder. Cut white ranunculus stems at a forty-five-degree angle underwater, trimming them to measure roughly one and a half times the total height of the chosen container. Form an internal grid across the jar mouth using half-inch strips of clear waterproof floral tape to stabilize individual stems. Insert three to five primary ranunculus blooms into the central compartments, finishing the arrangement by inserting sprigs of silver dollar eucalyptus around the perimeter to soften the glass rim.
Twine-Wrapped Lidded Lanterns with Luminous Micro-Lights
Setup Method
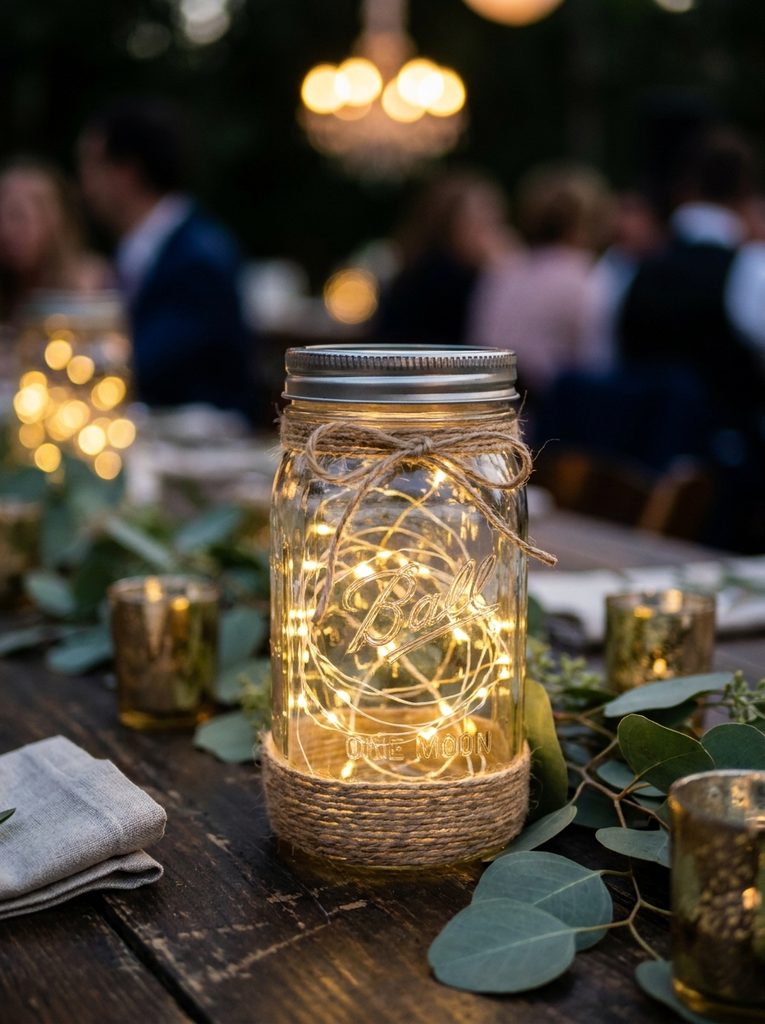
Twine-wrapped lanterns utilize warm ambient illumination and structured textural fiber to build an inviting evening centerpiece suitable for outdoor pavilions and barn venues. By wrapping the threaded neck and lower third of a quart-sized mason jar with natural jute cord, the reflective properties of the central glass band become more pronounced when illuminated from within. The inclusion of the original two-piece metal lid ring provides an authentic vintage silhouette while concealing the internal battery housing of warm white micro-lights. This arrangement eliminates open flame hazards, making it compliant with historic venue regulations while delivering steady, reliable illumination throughout the night. The balanced combination of rough organic twine, clear glass, and micro-illumination generates an intimate atmosphere that pairs seamlessly with exposed wood farmhouse tables, linen runners, and dark greenery garlands.
Begin execution by securing the starting end of medium-weight jute twine to the lower base of a clean 32-ounce jar using a drop of high-tack floral adhesive. Wind the twine tightly upward in continuous, uniform rows for approximately two inches, ensuring no glass shows through the wraps, before securing the final loop with adhesive. Repeat this wrapping technique along the threaded glass collar beneath the lip, wrapping five to six neat revolutions to mask the metal screw threads. Uncoil a six-foot strand of battery-operated warm micro-lights on thin copper wire, wrapping the wire loosely around your hand to create a flexible, spring-like nest. Lower the wire coil into the jar so the tiny diodes disperse evenly from base to rim rather than bunching at the bottom. Affix the compact battery switch to the underside of the flat lid insert using double-sided mounting tape, screw the metal ring securely into place, and test the toggle.
Submerged Greenery Cylinders with Floating Disc Candles
Execution Process
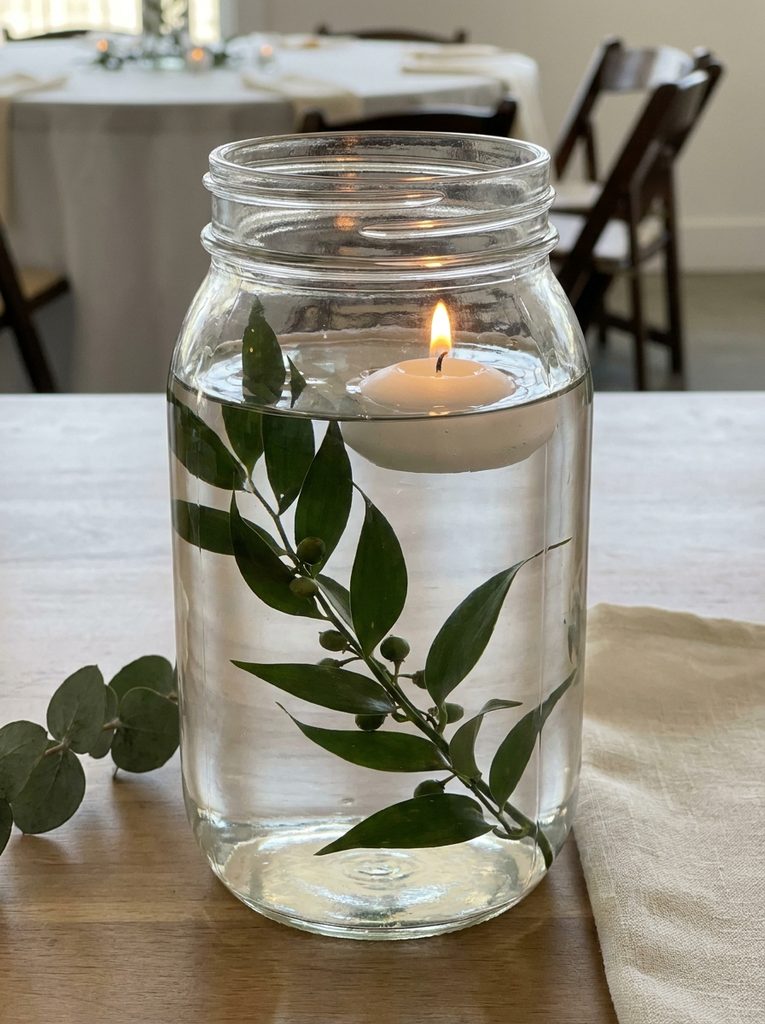
The submerged greenery centerpiece introduces liquid refraction and suspended movement to wedding reception tables by fully immersing botanical foliage beneath a floating wax flame. Water magnifies the delicate leaf structures of Italian ruscus, olive branches, or seeded eucalyptus, making individual foliage textures appear vibrant, lush, and modern. Placing a slow-burning white floating disc candle across the surface creates clean horizontal separation between the illuminated water column and the open air above. This clean layout adheres closely to modern design principles by prioritizing negative space, crisp lines, and botanical clarity over dense floral clustering. Because the greenery remains entirely submerged beneath the waterline, it remains fresh and buoyant without wilting, offering reliable visual appeal even in heated indoor reception halls or humid outdoor settings.
To assemble this design, trim clean stems of hearty greenery such as Italian ruscus or broadleaf fern so their total height sits approximately two inches below the interior rim of a wide-mouth quart jar. Attach a small, clear glass floral marble or heavy aquarium pebble to the base of each botanical stem using waterproof clear floral wire to act as an anchor. Lower the weighted stem into the dry jar, pressing the anchor firmly against the bottom glass plate so the foliage stands vertical and centered. Slowly pour room-temperature distilled water down the tilted interior wall of the vessel to minimize air bubble accumulation on the leaves and glass. Fill the container until the water level rests precisely one inch below the upper rim, then allow any tiny air bubbles to dissipate naturally for ten minutes. Gently position a standard three-inch white floating wax disc onto the calm water surface, ensuring the wick remains dry and accessible for lighting before guests arrive.
Matte Sage Mineral-Painted Trio with Dried Florals
How to Make
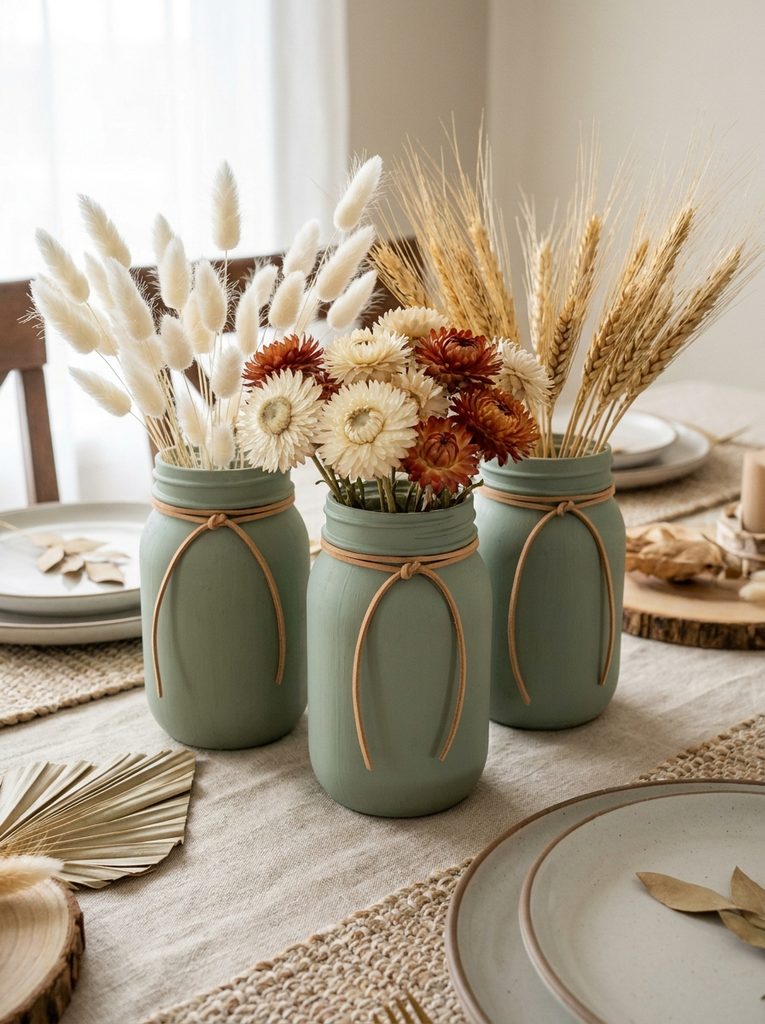
Matte sage painted vessels combined with preserved botanicals provide an earthy, sculptural centerpiece option that eliminates the need for water maintenance on event day. Applying opaque chalk-based mineral paint to the exterior turns ordinary utilitarian glassware into smooth, ceramic-like stoneware featuring a muted botanical hue. Dried floral components—such as bleached bunny tails, preserved white larkspur, dried strawflowers, and golden wheat stalks—introduce structural variety, visual movement, and permanent longevity. This style complements linen table runners, unbleached cotton napkins, and matte ceramic tableware, serving as a dependable decor element that can be completely prepared weeks before the celebration. The soft sage tone acts as a grounding neutral that works across all seasons, pairing equally well with warm autumn earth tones or fresh spring pastels.
Start by wiping three varying sizes of smooth-sided glass jars with alcohol, ensuring the exterior is completely free of dust and grease. Using a wide foam brush, apply an even coat of ultra-matte sage green chalk mineral paint to the exterior, brushing in long, vertical strokes from the rim straight down to the base. Allow the first layer to dry for two hours, then apply a second thin coat to ensure complete opacity and eliminate any visible streaks or sheer patches. Once the paint cures, wrap a single strand of thin natural leather cord around the neck of each jar, knotting it simply with two-inch trailing ends. Cut dried floral stems to staggered lengths, keeping the tallest dried grasses at twice the vessel height and secondary filler blooms at one and a half times the height. Arrange the stems loosely within the dry vessels, placing one statement textured pod or bloom in the center of each jar to establish balance.
Tiered Mirrored Cluster with Hydrangea and Spray Roses
How to Create
The tiered cluster format combines multiple glass vessels upon a reflective circular base to multiply light, floral volume, and visual depth across wide reception tables. Placing three pint-sized preserving jars onto a polished mirror plate reflects the glassware profiles, doubling the visual density of the white blooms and glowing candlelight. Filling the jars with white cloud hydrangea heads and miniature pale blush spray roses delivers an abundant, romantic presentation that feels tailored and lush without requiring tall pedestal stands. The low profile of this arrangement ensures clear sightlines across banquet seating, fostering effortless guest conversation during dinner service. The repetition of circular elements—from the jar openings to the rounded mirror edge and spherical flower blooms—creates geometric harmony that elevates straightforward glassware into a balanced, professional floral statement.
Begin by placing a clean ten-inch circular bevel-edged mirror flat in the center of the reception table to define the centerpiece footprint. Fill three matching 16-ounce pint canning jars three-quarters full with conditioned water containing liquid commercial floral food to extend bloom longevity. Cut a single large stem of white mophead hydrangea short, placing the woody stem directly into the center of the first jar so the broad petals rest securely on the glass lip. In the second jar, combine four to five stems of miniature blush spray roses, staggering stem heights slightly so the smaller buds emerge gracefully above the main rose clusters. In the third jar, insert a dense cluster of white ranunculus or lisianthus blooms to complete the coordinated floral trio. Position the three filled vessels in an asymmetrical triangular cluster on the reflective base plate, nesting two clear glass tea light cups between the jars to bounce warm light across the mirrored surface.
Wrapped Hessian Lace Vessels with Wild Gypsophila
Step-by-Step Guide
Combining rough woven hessian fabric with fine white cotton lace around clear glass vessels produces a balanced balance of rustic texture and delicate bridal styling. The open, airy architecture of gypsophila—commonly known as baby’s breath—billows outward from the jar mouth, creating soft, cloud-like volumes that contrast with the structured textile band beneath. This straightforward design remains one of the most accessible DIY budget ideas for extensive wedding setups, requiring minimal floral manipulation while filling substantial visual volume. The soft ivory lace overlay tempers the coarse brown fibers of the underlying burlap, allowing the finished piece to blend seamlessly with polished silverware, lace-trimmed runners, and classic banquet settings. It offers durable, low-stress construction, as gypsophila handles ambient room temperatures exceptionally well without wilting throughout long celebrations.
To construct this centerpiece, measure the circumference of a 32-ounce regular-mouth jar and cut a strip of natural three-inch-wide burlap ribbon to fit with a half-inch overlap. Cut a matching length of two-inch-wide white floral cotton lace, centering the lace directly over the burlap band and securing it with thin fabric glue. Wrap the layered band around the middle belly of the glass jar, fastening the seam neatly at the back using a line of clear industrial craft adhesive. Fill the container with three inches of clean water. Take two full branches of fresh white baby’s breath and strip all tiny foliage and side buds from the lower four inches of each stem. Cut the primary stems short with sharp floral snips, inserting them into the jar so the branching flower heads interlock, creating a single, unbroken hemispherical dome that completely conceals the opening of the glass jar.
Gilded Mercury Glass Transformation with Dark Burgundy Dahlias
Setup Method
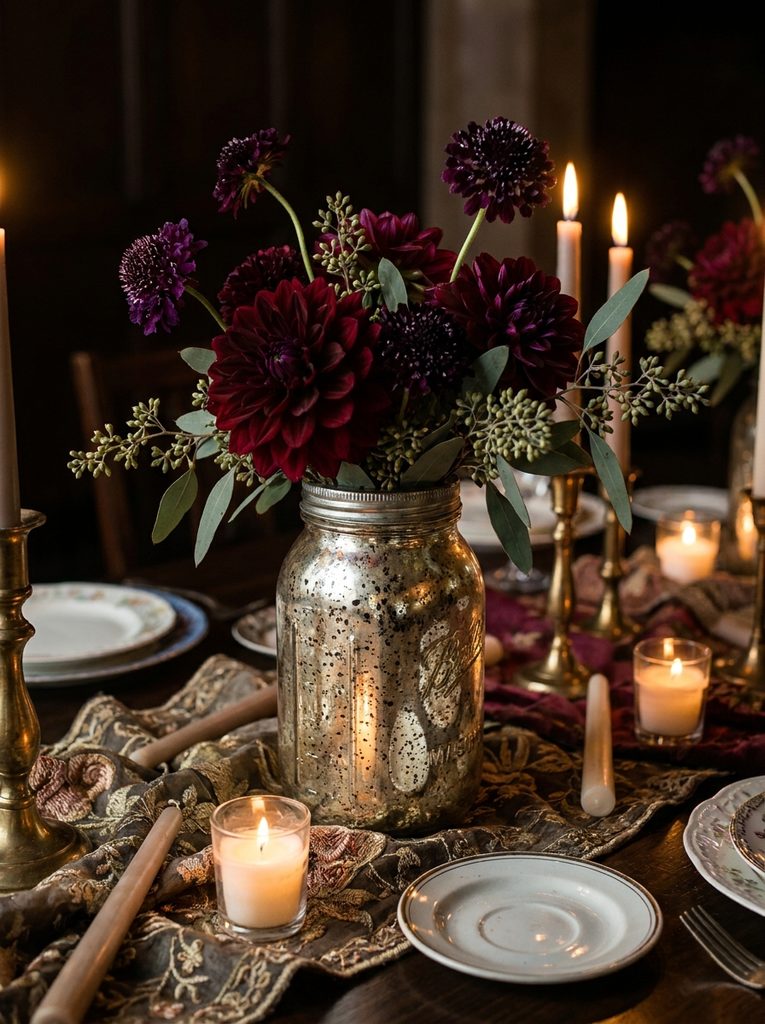
The faux mercury glass technique transforms ordinary clear canning vessels into gleaming, antiqued metallic containers that capture and bounce dramatic candlelight across dinner tables. Combining reflective metallic silver or gold interior coatings with textured, translucent wear marks replicates the character of historic heirlooms. Filling these rich, reflective jars with deep burgundy dahlias, dark scabiosa, and deep plum foliage creates an elevated, moody color story well-suited for formal autumn and winter weddings. The high-contrast pairing of deep, velvety flower petals against lustrous metallic glass creates striking visual depth. This arrangement suits upscale ballroom receptions or candlelit historic venues where rich jewel tones and metallic accents take center stage.
Create the antiqued metallic finish by mixing equal parts distilled white vinegar and tap water in a fine-mist spray bottle. Lightly spritz the interior walls of a clean quart jar with the acidic mist, then immediately apply a light, even coat of metallic mirror-effect spray paint directly into the damp interior. Allow the paint to react with the water droplets for one minute, then gently pat the interior surface with a crumpled paper towel to lift paint away where beads formed, leaving an authentic mottled appearance. Allow the interior to cure undisturbed for twenty-four hours before carefully inserting a slender plastic protective cup inside to hold water, shielding the painted finish from direct moisture. Fill the inner cup with water and insert three large, deep burgundy dahlia stems, cutting them short so the heavy blooms rest firmly against the reflective metallic rim alongside two sprigs of seeded eucalyptus.
Hanging Macramé Plant Hanger Table Riser
How to Create
Suspending mason jar centerpieces from slender tabletop shepherd hooks or timber frames introduces vertical height without cluttering valuable table space. By nestling clear glass preserving jars within handmade off-white cotton macramé knotting, this design draws the eye upward, accentuating high venue ceilings and dynamic structural architecture. The suspended vessels can house trailing ivy, delicate cascading string-of-pearls, or compact arrangements of fresh garden blooms that drape naturally downward. Elevating the main focal point above eye level preserves functional space across the banquet linen for family-style serving platters, printed dinner menus, and wine carafes. This approach delivers an airy, modern design aesthetic that introduces sculptural interest, textural knotwork, and botanical movement to contemporary wedding reception layouts.
Begin by cutting eight strands of four-millimeter natural cotton macramé cord, each measuring approximately four feet in length. Gather the cords together, tie an overhand gathering knot two inches from the bottom ends to form a decorative tail, and divide the eight working cords into four equal pairs. Tie a simple square knot in each pair two inches above the base knot, then alternate adjacent cords to tie a second row of square knots, forming a flexible diamond mesh cradle. Insert the base of a clean quart-sized jar into the woven mesh basket, pulling the four hanging structural strands upward along the glass walls to ensure the vessel sits level and plumb. Tie the four upper ends securely to the crossbar of an iron tabletop riser stand. Fill the secure jar with two inches of water, then insert trailing English ivy vines around the perimeter, finishing with two open white garden roses placed directly in the center.
Layered Sand, Shells, and Floating Votive Coastal Display
Execution Process
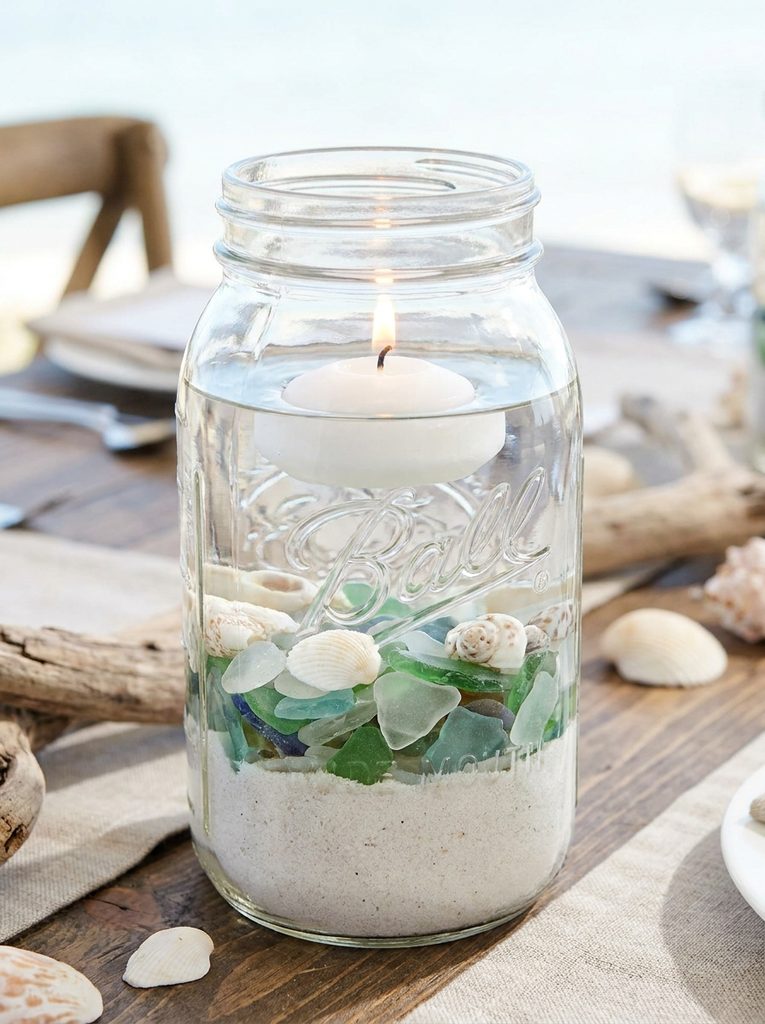
The coastal glass centerpiece combines natural shoreline materials, mineral textures, and buoyant light to evoke a refined seaside atmosphere without relying on literal kitsch. Layering fine white quartz sand, smooth sea glass shards, and natural bleached miniature shells across the jar floor provides a solid, textural base that anchors the vessel against coastal breezes. Filling the remaining upper volume with crystal-clear water highlights the pristine grains below, while a smooth floating wax candle provides radiant light across the aquatic layers. This design is exceptionally practical for beachside venues, outdoor yacht club verandas, and open-air pavilion weddings where fresh florals might wilt quickly under direct sunlight or sea breezes. The simple, clean horizontal strata of natural materials align cleanly with modern minimalist decor principles.
Construct this display by pouring two inches of washed, fine white quartz sand into the base of a clean 32-ounce wide-mouth canning jar, smoothing the sand surface using the flat handle of a wooden spoon. Carefully drop a single layer of tumbled sea glass pieces and three tiny bleached auger shells onto the sand bed, positioning them along the outer perimeter where they remain clearly visible through the glass wall. Place a clean circular paper card gently over the sand before pouring water to prevent the stream from disturbing the smooth sand foundation. Slowly pour fresh water over the card until the vessel is three-quarters full, then gently extract the paper guide with craft tweezers. Allow the water to settle until completely crystal clear, then place a smooth white floating candle disc onto the water surface, trimming the cotton wick to one-quarter inch for a clean, smokeless burn.
Botanical Specimen Preservation with Floating Oil Wick
How to Make
The botanical specimen centerpiece pairs delicate botanical preservation with the functional utility of a continuous oil-burning candle lamp. Submerging whole woody botanicals—such as fresh rosemary sprigs, sliced dehydrated citrus rounds, and whole cinnamon sticks—in clear paraffin lamp oil suspends the plant materials in three dimensions while preserving their color and fine structural details. The oil magnifies the botanical veins and seed pods, turning standard preserving jars into glowing, scientific-style presentation cases. Topped with a floating brass wick collar, this centerpiece burns steadily for hours without the dripping wax, rapid water evaporation, or constant maintenance common with conventional candles. Its clean lines and natural organic materials make it a striking addition to minimalist autumn dinners, winter celebrations, and industrial venue spaces.
To build this arrangement, thoroughly clean and dry an eight-ounce or sixteen-ounce smooth glass canning jar, ensuring not a single droplet of moisture remains inside the container. Arrange two sturdy branches of fresh woody rosemary, one dried orange wheel, and two whole cinnamon sticks vertically inside the empty jar, using the natural friction of the glass walls to hold the items in place. Slowly pour high-purity clear liquid paraffin lamp oil into the jar, filling it until the liquid sits half an inch below the lower screw thread. The submerged botanicals will deepen in color and remain fully preserved within the non-aqueous medium. Thread a round braided fiberglass wick through a round floating brass or aluminum wick disc, adjusting the wick height so only one-eighth of an inch emerges above the metal plate. Rest the assembly directly on the oil surface, allow the wick to saturate for five minutes, and ignite.
Common Beginner Mistakes and How to Avoid Them
A frequent mistake beginners make when assembling handmade centerpieces is neglecting proper glass surface preparation before applying paints, adhesives, or tapes. Residual manufacturing dust, natural hand oils, and damp glass prevent paints from bonding securely, resulting in flaking and unsightly peeling during event transport. Always clean vessels thoroughly using warm water, dish soap, and a final isopropyl alcohol wipe-down before beginning dry craft steps. Another regular misstep is overfilling floral arrangements, which can crowd delicate stems, block light, and cause water to spill onto table linens. Use clear floral tape grids across jar openings to maintain balanced spacing and structural control without jamming excessive stems into the vessel opening. Additionally, overlooking table proportions often leads to centerpieces that are either swallowed by expansive tables or so tall they obstruct conversation. Always confirm banquet dimensions in advance, keeping overall centerpiece heights either below fourteen inches or above twenty-four inches to preserve unobstructed lines of sight for dinner guests.
Practical Tips for Better Results
Achieving professional, polished results with glass table centerpieces requires implementing reliable staging, assembly, and maintenance techniques throughout the design process. When working with fresh floral stems, cut all botanicals diagonally underwater using sharp floral snips rather than standard household scissors, which crush vascular stem channels and hinder water uptake. Condition cut flowers in cool, preservative-treated water for at least four hours before final arrangement assembly to maximize internal hydration. When applying aerosol paints, frosted sprays, or liquid chalk finishes, work in a climate-controlled, dust-free environment, applying multiple ultrathin coats rather than one heavy layer to prevent unsightly runs. For battery-powered internal illumination, purchase warm-white micro-diodes that feature integrated six-hour automatic timers, allowing you to activate table lighting early in the afternoon without draining power before reception formalities conclude. Finally, transport filled centerpieces in sturdy divided cardboard cartons lined with non-slip grip mats to prevent tipping, scratching, or water leakage during venue transit.
Styling, Presentation, or Organization Ideas
Cohesive reception presentation depends on thoughtfully integrating glass centerpieces with the surrounding table landscape, linens, paper goods, and ambient room lighting. Rather than positioning a solitary jar in the center of an expansive round table, arrange vessels in coordinated trios or clusters of varying heights to build visual depth and dynamic scale. Place groups of jars on textured natural wood chargers, slate plates, or bevel-edged mirrors to define the centerpiece footprint and protect delicate table linens from condensation. When styling long banquet or farm tables, repeat individual arrangements every two to three feet along a central runner made of cheesecloth, seeded eucalyptus, or ruscus garland to establish continuity across the room. Complement the primary focal jars by interspersing low votive cups, handwritten calligraphy table numbers, and slender taper candles along the table axis. Aligning the primary tones of your jar accents—such as metallic finishes, painted bands, or fabric ties—with place settings and floral varieties produces a polished, professionally designed reception space.
Budget or Time Planning
Careful timeline management and strategic material sourcing are essential for executing multiple handmade centerpieces efficiently while staying within your event budget. Sourcing canning jars by the case from wholesale distributors, restaurant supply outlets, or agricultural retailers yields significant savings over buying individual specialty glassware at craft boutiques. Establish an assembly-line production schedule: complete all glass cleaning, surface painting, and decorative wrapping three to four weeks before the wedding day, safely storing finished dry vessels in covered boxes. Purchase durable decorative elements—including fairy lights, floating candles, ribbons, and quartz sand—well in advance to take advantage of bulk discounts and avoid expedited shipping fees. Reserve fresh botanical processing, stem trimming, and water filling for the twenty-four-hour window immediately preceding the celebration to guarantee absolute freshness. Enlist two to three assistants on event morning, assigning specific assembly tasks—such as water filling, floral placement, and candle lighting—to streamline execution and eliminate last-minute venue setup delays.
Creative Expansion and Advanced Inspiration
Once you master foundational vessel assembly and floral balancing, explore advanced techniques to elevate basic glassware into sophisticated sculptural focal points. Consider etching personalized monograms, venue line art, or botanical illustrations directly into the outer glass surface using fine-grit abrasive etching pastes and custom cut adhesive vinyl stencils. Experiment with ombre color transitions by blending multiple shades of translucent glass paint from base to rim, creating a smooth gradient that shifts light dynamically as evening progresses. For multi-day wedding weekends, design multipurpose centerpieces that double as functional aisle markers during the ceremony using detachable wire hanger brackets, then transfer them to reception tables during the cocktail hour. You can also explore suspended installation concepts, grouping multiple illuminated jars at staggered heights from ceiling beams or hanging wooden ladders to create a floating canopy of light above head tables. These adaptable concepts enable you to expand a straightforward DIY project into a fully customized, professional-grade visual experience.