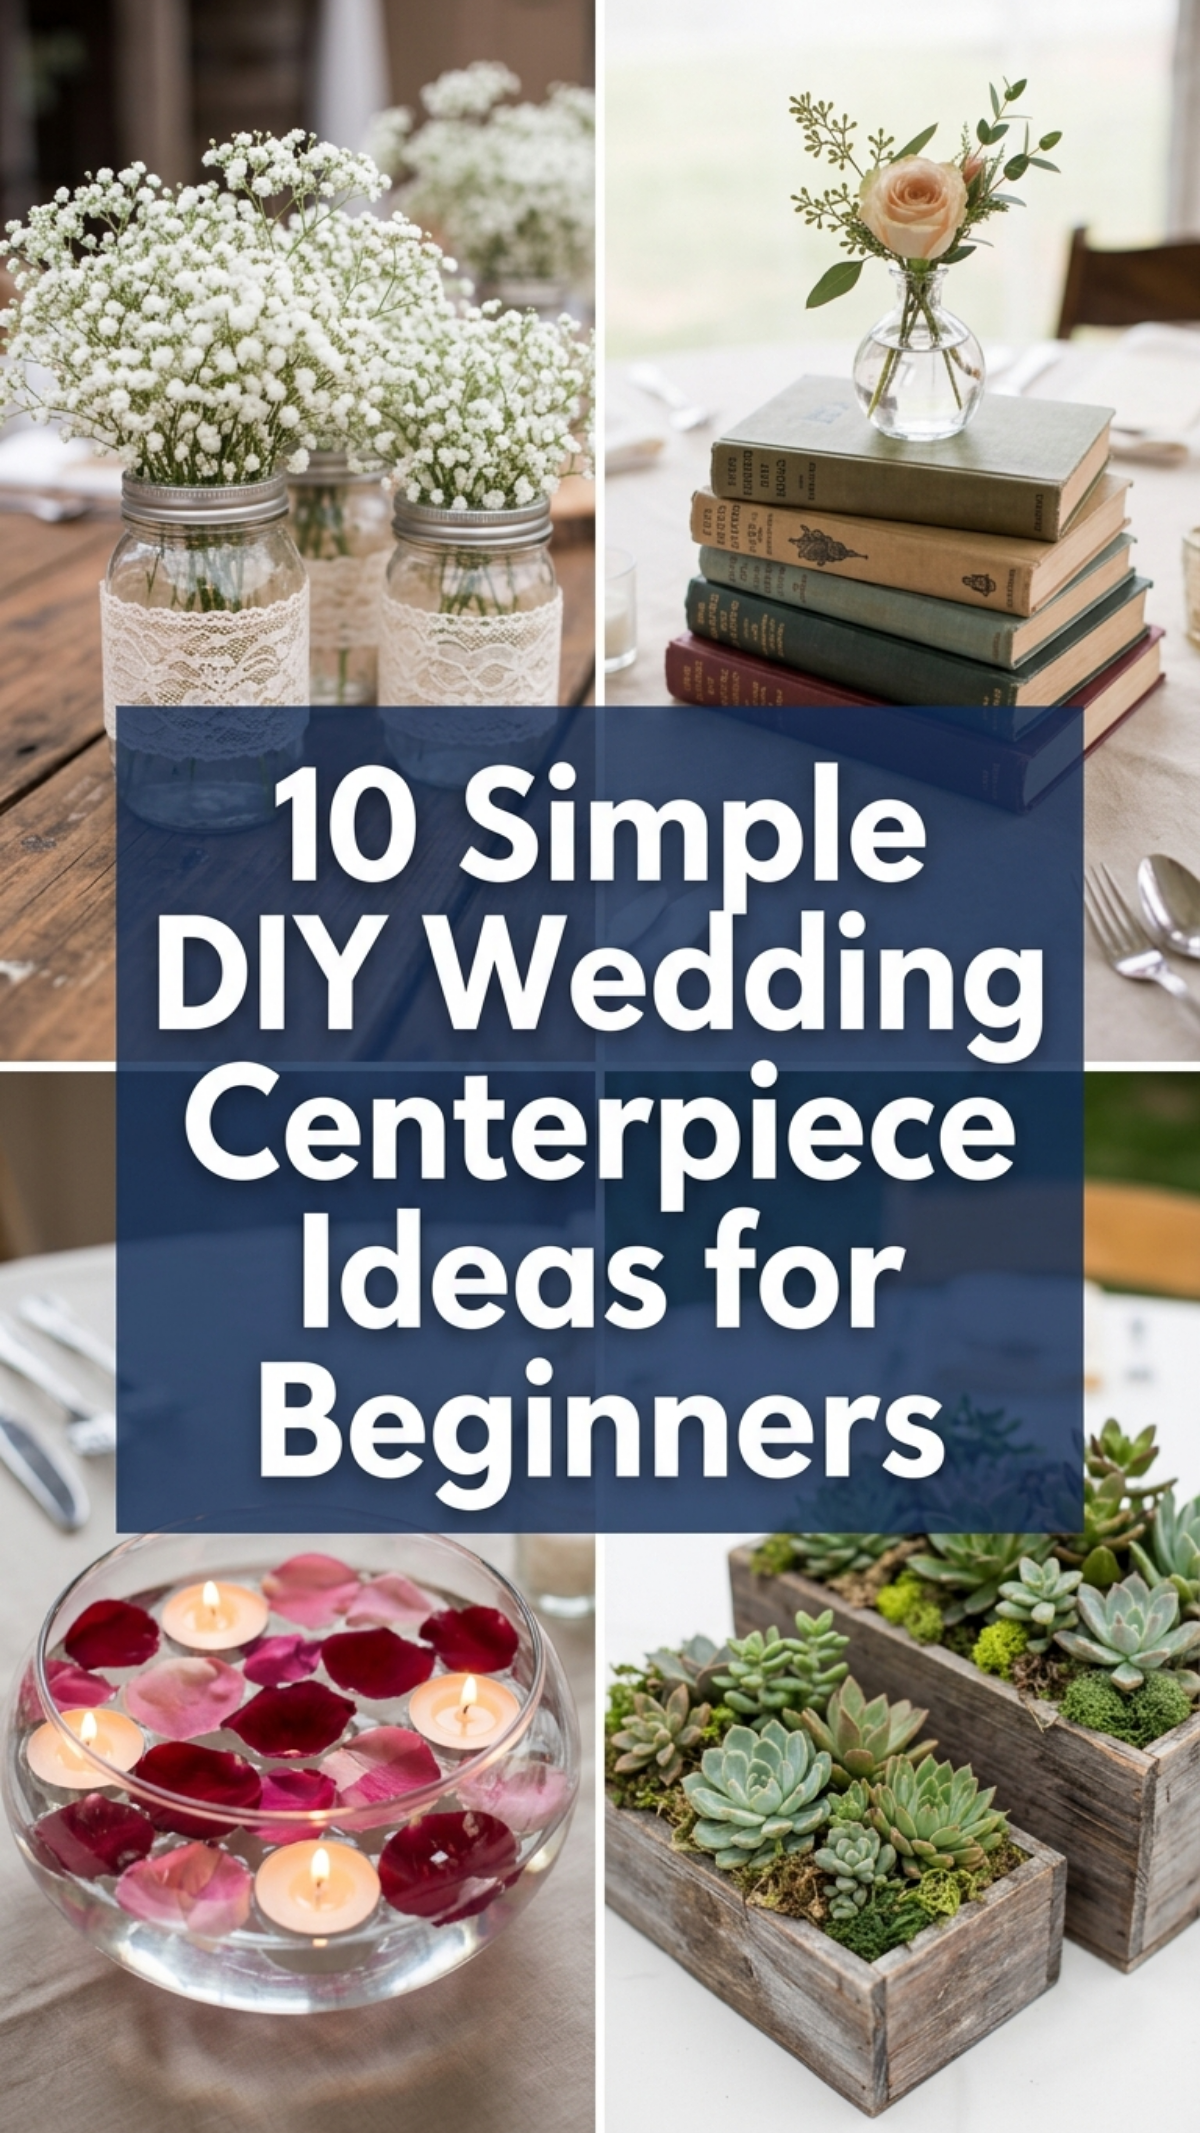
Creating custom wedding table decor allows couples to establish an inviting atmosphere while maintaining direct control over their event styling. Handcrafted focal arrangements display deliberate creative choices that…
Creating custom wedding table decor allows couples to establish an inviting atmosphere while maintaining direct control over their event styling. Handcrafted focal arrangements display deliberate creative choices that reflect a distinct wedding theme. This comprehensive tutorial outlines ten accessible centerpiece designs specifically structured for novice decorators seeking refined aesthetic results. Readers will explore balanced floral layouts, geometric glassware configurations, organic botanical displays, and warm illuminated concepts. Each project eliminates complex assembly techniques, relying instead on dependable design fundamentals and readily available supplies. By breaking down professional floral mechanics into manageable stages, this guide equips planners with actionable methods to produce stable, balanced table accents. Handcrafting decor reduces event expenses without sacrificing presentation quality or structural integrity. Whether designing for an intimate backyard gathering or a formal reception hall, these practical concepts deliver clear visual impact across various venue styles.
Why Handcrafted Table Arrangements Resonate
Table styling concepts across wedding mood boards consistently highlight personalized arrangements that balance visual beauty with practical construction. Modern wedding decor shifts away from rigid, overly formal displays in favor of organic textures, purposeful negative space, and sustainable components. Novice crafters benefit directly from this aesthetic evolution, as modern trends prioritize balanced simplicity over intricate floral manipulation. Simple groupings of seasonal stems, textured foliage, and reflective glassware create elegant sightlines that encourage natural guest conversation across dining tables. Embracing self-directed assembly offers substantial budget advantages, freeing financial resources for other event priorities while ensuring the tables reflect deliberate personal choices. Furthermore, the accessibility of bulk components enables creators to master core assembly processes efficiently. These designs preserve practical value, allowing hostesses to repurpose glassware, vessels, and natural accents within everyday residential spaces long after the reception concludes.
Essential Materials and Preparation Protocol
Careful logistical preparation ensures a seamless assembly workflow when constructing multiple reception arrangements. Fundamental equipment includes bypass floral shears, waterproof stem tape, wire snips, clear grid tape, and clean preservation buckets. Key design elements range from clear cylinder vases, geometric terrariums, and ceramic compotes to seasonal greenery, focal stems, and secure pillar candles. Begin preparation by establishing a cool, spacious assembly area equipped with sturdy, waterproof work surfaces. Every fresh botanical element requires direct stem hydration; trim live stems at a forty-five-degree angle underwater and allow them to rest in floral preservative solutions for twelve hours prior to handling. Carefully inspect and polish all glassware using a lint-free cloth and diluted white vinegar to eliminate dust, smudges, and moisture marks. Establish a clear assembly schedule that positions durable non-perishable construction days in advance, reserving delicate live floral placement for the final twenty-four hours before the event.
1. Floating Botanical Cylinder Trio
Assembly Process
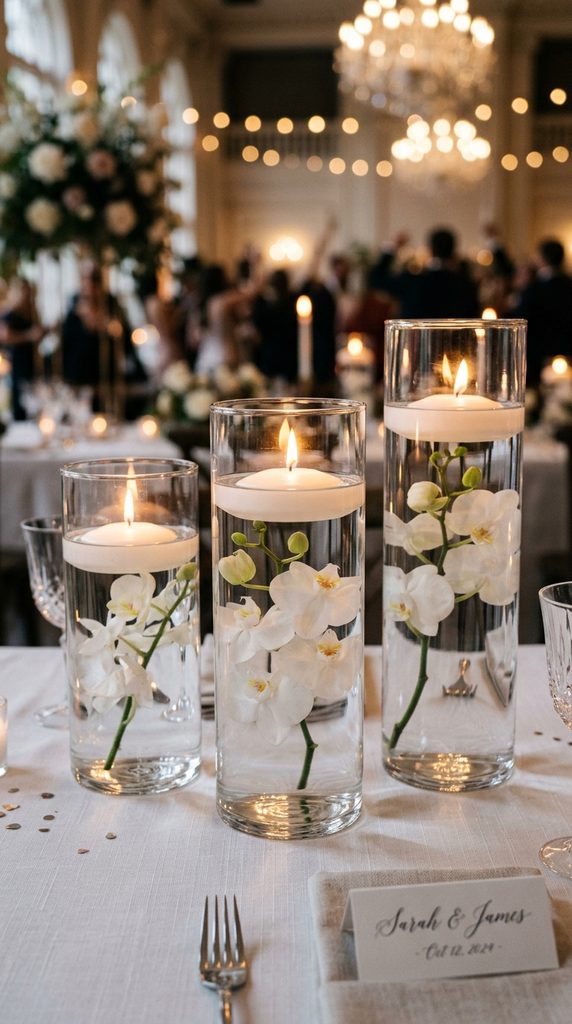
The floating botanical cylinder trio utilizes vertical glassware filled with water to suspend delicate floral elements beneath soft illumination. This design uses three glass cylinder vessels of staggered heights, typically measuring six, eight, and ten inches, to establish visual rhythm across flat surfaces. Transparent water magnifies submerged natural elements while providing a secure foundation for floating paraffin discs at the waterline. Submerged white blooms such as orchids, calla lilies, or long-stemmed roses remain upright through natural stem tension against glass walls, generating a clean aesthetic suitable for contemporary indoor venues. The refraction of candlelight through clean water produces dynamic ambient patterns that illuminate tablecloths without obstructing horizontal lines of sight between seated dinner guests. This arrangement remains resilient throughout extended receptions because fully immersed botanicals cannot wilt or dehydrate during warm evening celebrations.
Select three graduated glass cylinders per table and position them closely to establish a coherent cluster. Thoroughly rinse the vessels to remove internal residue before securing a dense floral stem inside each cylinder. Anchor the base of the botanical element by wrapping clear floral tape or weighting the stem foot with polished river river stones if natural buoyancy causes displacement. Pour room-temperature distilled water gently down the interior wall of the vessel, filling each cylinder to approximately two inches below the rim. Distilled water prevents micro-bubble formation along glass walls, preserving absolute optical clarity. Gently set a wax floating candle onto the water surface, ensuring the wick remains dry. Light the candles immediately before guest seating begins to guarantee maximum burn time throughout dinner.
2. Potted Aromatic Herb Clusters in Weathered Terracotta
Assembly Process
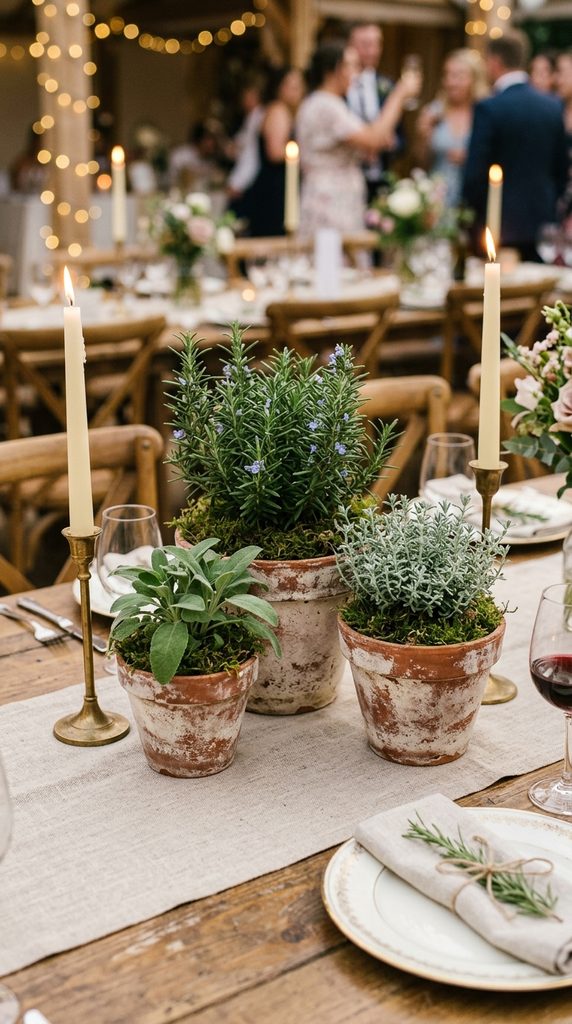
Potted living herb arrangements offer an organic table presentation grounded in natural textures, earthy aromas, and traditional garden character. This composition arranges aged terracotta vessels filled with robust culinary botanicals such as rosemary, silver thyme, broadleaf sage, and lavender. Combining varied leaf architectures creates layered visual depth, contrasting soft silvery foliage against vibrant emerald tones. Terracotta pottery introduces warm, porous masonry textures that ground linen runners, complementing rustic, outdoor, or vineyard settings. Beyond functional aesthetics, live potted herbs emit gentle, refreshing scents that enhance dining areas without overwhelming complex meal service. This living arrangement eliminates concerns surrounding stem wilting, providing a durable solution that survives direct sunlight, changing indoor air currents, and lengthy outdoor receptions without compromising structural balance or visual vitality.
Begin by selecting three to five graduated terracotta pots for each reception table, treating the exterior surfaces with a diluted lime wash if an aged patina is preferred. Line the interior base of each pot with a thin saucer to contain moisture, preventing water seepage through porous clay onto formal linens. Transfer healthy, potted nursery herbs into the prepared containers, filling remaining internal cavities with standard potting medium until the soil settles one inch below the rim. Press the soil firmly around each root mass and water the plants lightly forty-eight hours prior to table placement to avoid excess saturation. Conceal exposed soil surfaces using preserved sheet moss or pea gravel. Cluster the pots centrally along tables, interspersing slender taper candles in simple brass holders to supply height contrast.
3. Geometric Terrarium and Micro-Greenery Display
Assembly Process
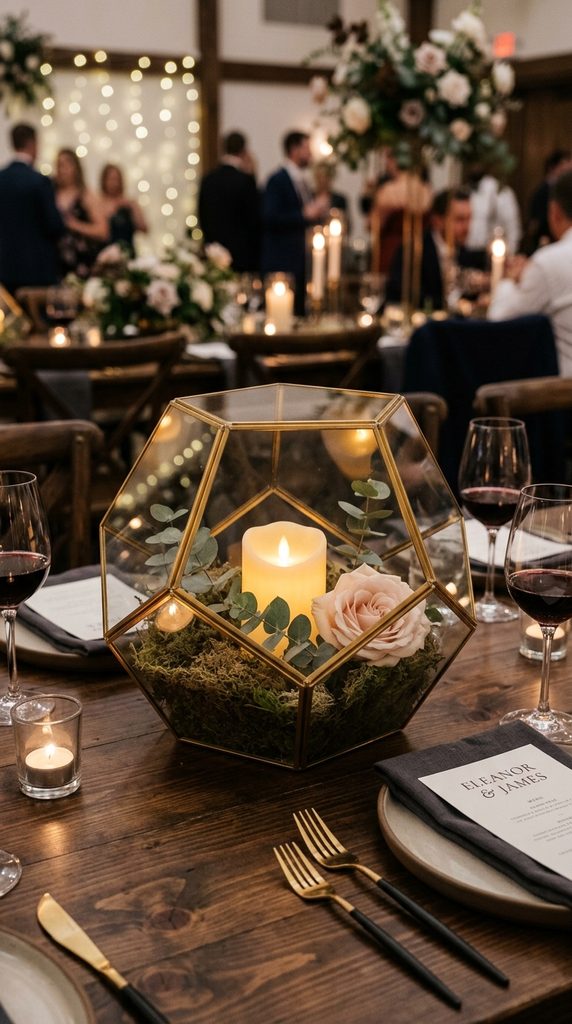
Geometric terrariums constructed from faceted glass and soldered metal framing provide a structured focal point that aligns with modern geometric design principles. Brass, copper, or matte black frames introduce sharp architectural profiles that anchor fluid floral elements within contemporary banquet layouts. The interior volume of a multifaceted terrarium protects delicate greenery from environmental air conditioning drafts while presenting clean viewing angles from every dining chair. Softening rigid metallic lines requires the strategic inclusion of pliable botanicals, such as silver dollar eucalyptus, Italian ruscus, and preserved reindeer moss. Positioned atop dark wood tables or neutral runners, these multifaceted containers reflect surrounding dinner lighting across metallic joints, infusing contemporary dimension into traditional event styling while maintaining low-profile stability across crowded dinner surfaces.
Wipe down the interior facets of each geometric terrarium using a microfiber cloth to ensure streak-free glass before introducing decorative materials. Layer dry, preserved forest moss across the bottom plate to establish an organic bed roughly one inch deep. Insert a battery-operated wax pillar candle or a micro-strand of warm fairy lights into the core of the moss base, concealing battery packs beneath preserved botanical layers. Weave short cuttings of fresh seeded eucalyptus around the perimeter of the light source, ensuring plant foliage remains clear of mechanical elements. Add a single durable focal flower, such as an open garden rose or succulent rosette, using a water-filled plastic floral vial hidden within the moss foundation. Close the primary access door or position the angled entrance toward the head of the table.
4. Pressed Botanical Glass Frame Centerpiece
Assembly Process
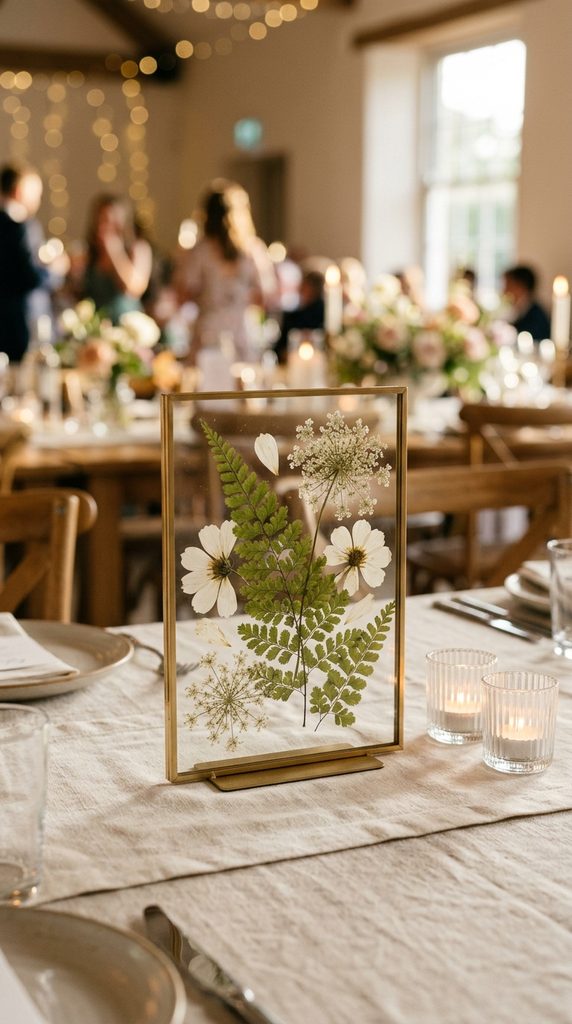
Pressed botanical displays present dried, preserved flora suspended within double-paned floating glass frames, yielding an ethereal, two-dimensional decorative alternative. By sealing flattened fern fronds, delicate wildflowers, and translucent petals between clear panes, this style highlights subtle organic contours and venation patterns. Slender wood or brass framework provides upright support without creating visual barriers across table arrangements. Paired alongside clear bud vases containing fresh coordinating stems, pressed frames establish a curated, gallery-style aesthetic suitable for historical venues, intimate dining rooms, or minimalist outdoor gatherings. The two-dimensional format preserves visual access across tables while resisting ambient temperatures, making it a reliable, mess-free option that creators can complete weeks in advance of the event.
Source two-sided glass floating frames equipped with standing hinge supports or weighted display bases. Collect flat-pressed botanicals such as delicate maidenhair fern foliage, cosmos petals, Queen Anne’s lace, and sweet pea blooms that have dried between weighted paper for two weeks. Open the glass framing mechanism, placing the bottom pane on a non-scratch surface. Arrange dried components deliberately across the glass surface using craft tweezers, leaving clear borders around each specimen to emphasize negative space. Apply a micro-dot of clear drying craft adhesive beneath dense stem junctions to prevent shifting. Lay the top glass pane down and seal the closure latch securely. Arrange completed frames centrally alongside two small clear glass votives to catch light across the glass planes.
5. Driftwood and Wildflower Table Runner
Assembly Process
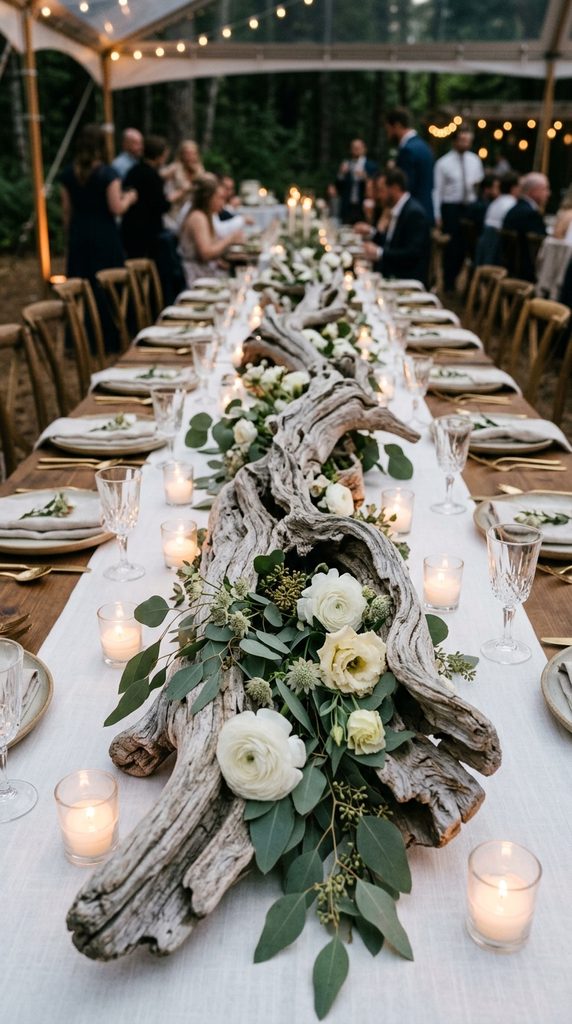
The driftwood and wildflower runner format structures fallen, sand-blasted branch sections into a continuous, low-profile central spine tailored for rectangular banquet tables. Naturally bleached wood provides sculptural contours, varied graining, and muted gray tones that fit coastal, woodland, or organic reception themes. Softening the rugged, weathered surface of fallen wood involves integrating trailing foliage and vibrant seasonal stems directly into naturally occurring branch hollows and crevices. This continuous horizontal approach eliminates distinct boundary lines between individual arrangements, producing an organic decorative path that guides the eye along table lengths. The substantial weight of stabilized driftwood prevents casual displacement during meal service, providing an earthy foundation that balances delicate floral textures.
Acquire smooth, cured driftwood branches measuring roughly two to three feet in length, verifying that all surfaces are clean and dry. Position branches along table centers, overlapping ends to establish a continuous central spine across long tables. Secure concealed water tubes along the reverse side or within natural depressions of the timber using dark, waterproof floral tape. Insert broad stems of salal foliage and weeping eucalyptus into the tubes, directing leaves outward to soften the contact point between wood and table linens. Add resilient field-grown flowers such as lisianthus, ranunculus, and astrantia into the water supplies, angling stems to follow natural timber curves. Fill surrounding table gaps with low glass tealight holders placed at alternating intervals to illuminate wood grain contours during evening hours.
6. Monochromatic Single-Stem Bud Vase Collection
Assembly Process
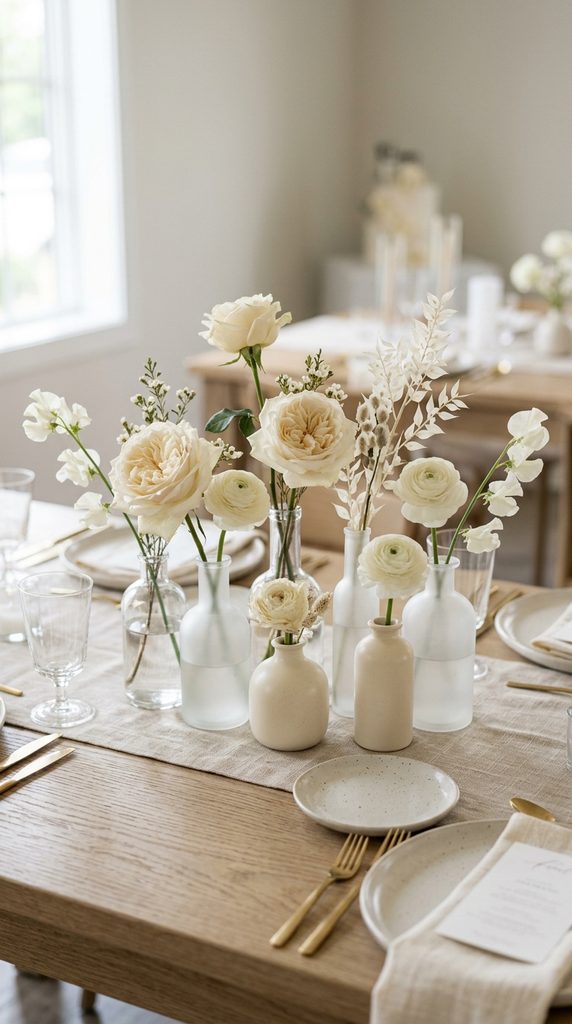
The monochromatic bud vase arrangement distributes single floral stems across a scattered collection of small glass, ceramic, or amber vessels. Focusing on a single color family—such as warm creams, deep burgundies, or soft peaches—unifies diverse floral varieties into an intentional, contemporary display. Varying the height, mouth diameter, and visual opacity of collection vessels prevents uniformity while maintaining structural rhythm along rectangular or circular tables. This approach highlights individual flower anatomy, celebrating the petal structure, stem curve, and delicate foliage of each unique stem. Novice decorators avoid the structural balance challenges of complex vase arrangements by isolating stems, producing an airy, modern look that adapts easily to any table footprint.
Assemble seven to nine small bud vases per table, selecting varied silhouettes spanning three to seven inches in height. Fill every vessel three-quarters full with fresh water treated with commercial floral nutrient solution. Cut fresh flower stems individually, matching stem length to twice the height of its intended vessel. Remove all lower leaves to keep water clean and avoid bacterial growth inside narrow vase necks. Place a single focal flower, such as an open peony, dahlia, or carnation, into each container, using secondary vessels for textured elements like hypericum berries or single stems of veronica. Distribute the completed bud vases across the center third of the dining table, maintaining three to four inches between bottles to ensure a balanced, non-crowded pattern.
7. Elevated Potted Fern and Moss Pedestal
Assembly Process
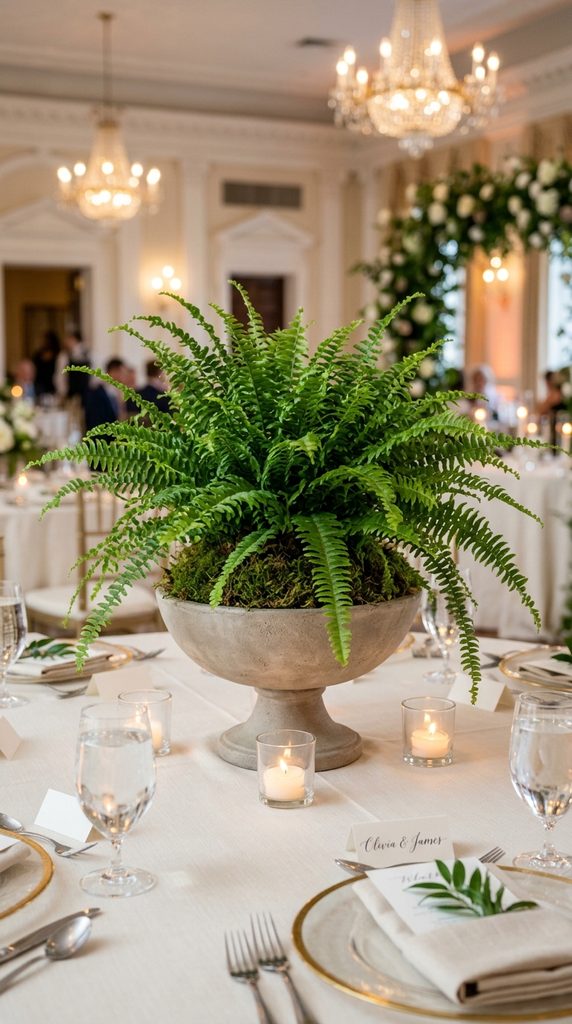
Elevated potted ferns set atop modest display pedestals provide rich green foliage that softens formal banquet rooms without blocking across-table conversation. Utilizing durable, feathery houseplants such as Boston ferns, bird’s nest ferns, or maidenhair varieties produces architectural texture and graceful arching lines. Placing container plants on low stone, metal, or turned-wood pedestals elevates the foliage slightly above dinnerware, maximizing available table surface for glassware, flatware, and family-style platters. The lush volume of natural fern foliage covers functional mechanics naturally, eliminating the need for complex floral structuring. This botanical method remains resilient throughout indoor and outdoor celebrations, offering an enduring alternative that survives fluctuating temperatures without drooping.
Select low, stable display risers measuring four to six inches in height to avoid blocking seated eye levels across tables. Set a watertight ceramic or composite bowl atop each pedestal, securing contact points with clear floral mounting putty. Transfer healthy, potted ferns into the presentation vessels, ensuring nursery pots remain hidden within decorative outer containers. Pack damp sheet moss or Spanish moss around the top rim to conceal internal pots and soil. Mist the fern foliage with clean room-temperature water before the event to enhance shine and maintain humidity around delicate fronds. Surround the pedestal base with three low glass votive candles, setting them back several inches from arching fern leaves to ensure flame clearance.
8. Citrus and Olive Branch Classical Garland
Assembly Process
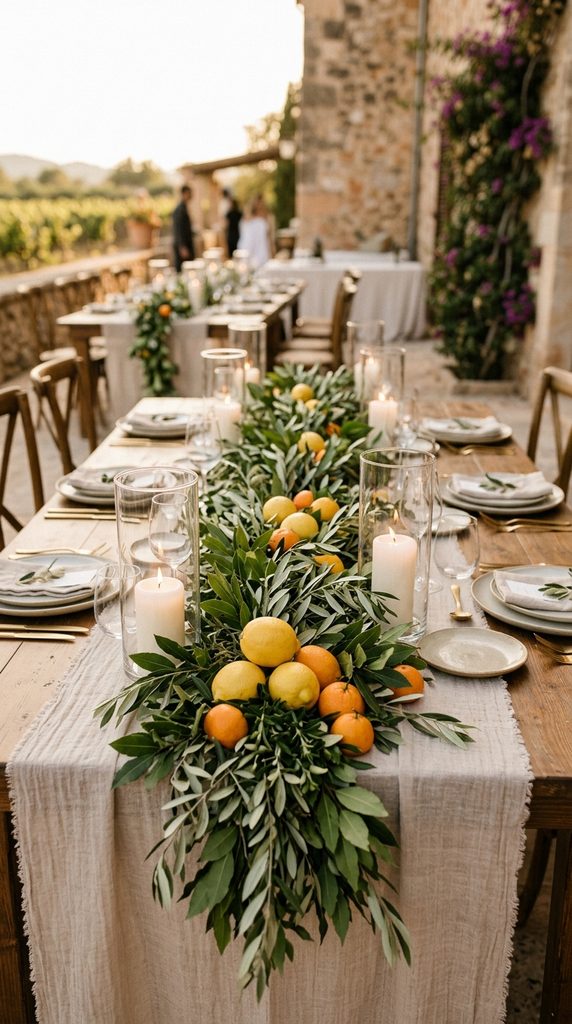
Integrating whole fresh citrus fruits with hardy Mediterranean greenery produces a vibrant arrangement rooted in traditional European banquet traditions. Slender branches of silvery olive foliage provide a structural bed, while fresh whole fruits such as lemons, clementines, or small green figs supply vibrant focal accents and matte surface textures. The contrasting colors of dark leaf surfaces, pale branch undersides, and bright citrus peels generate rich visual warmth across dining surfaces. This composition performs reliably across warm summer or destination outdoor weddings, as uncut fresh fruit and hardy olive cuttings resist heat, direct sun, and dry winds far longer than cut garden flowers. The natural composition creates a welcoming atmosphere that balances effortless Mediterranean character with formal event spaces.
Unroll a dense, woven runner of fresh olive branch garland along the center of dining tables, ensuring the greenery rests flat without obstructing place settings. Prune away irregular, upright twigs using clean shears to maintain a balanced, low profile. Distribute whole, unblemished citrus fruits along the garland spine, tucking items securely into leafy branch pockets to prevent rolling. Alternate fruit placements by grouping elements in natural odd-numbered clusters of one, three, and five pieces along the greenery runner. Weave additional stems of silver dollar eucalyptus or bay laurel around the fruit bases to hold each element in place. Interlock simple white pillar candles in glass hurricane shades along the arrangement to illuminate the fruit skins during evening dinner service.
9. Contemporary Pillar Candle and River Stone Sanctuary
Assembly Process
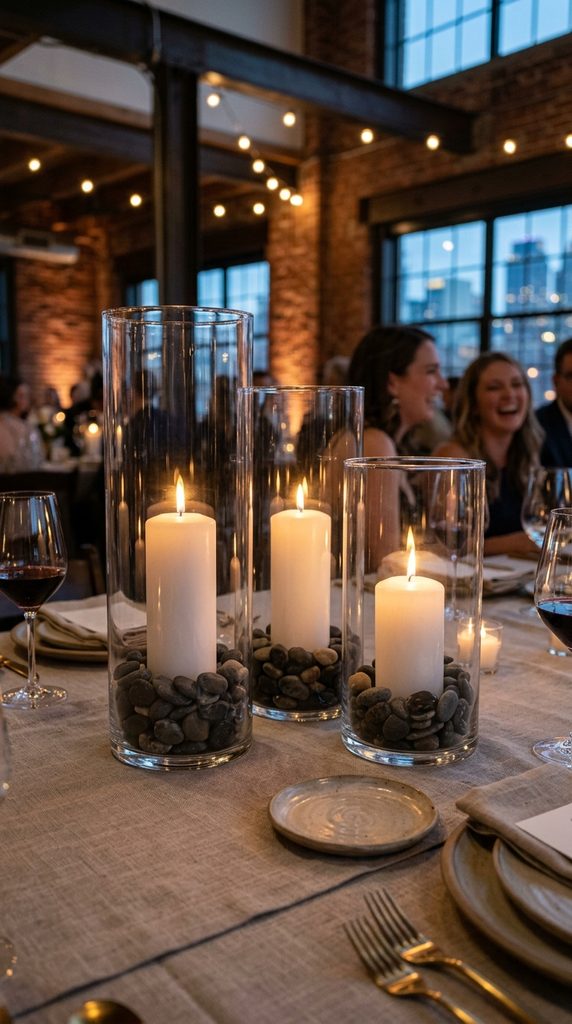
The stone and candle sanctuary pairs polished river pebbles with smooth, columnar wax pillar candles to create a calm, organic centerpiece display. Arranging wax pillars of varied heights inside wide, clear glass cylinder hurricanes introduces reliable illumination while protecting open flames from room drafts. Surrounding the candle bases with natural river stones, smooth basalt, or matte slate chips secures the wax elements, conceals internal wicks, and introduces natural outdoor textures into dining rooms. The warm, shifting candlelight reflects off smooth, curved pebble surfaces, creating subtle shadow play that brings dynamic visual movement to the table. This non-floral concept remains cost-effective, easily constructed days before the wedding, and completely impervious to wilting, making it an ideal choice for minimalist and industrial warehouse reception settings.
Select wide glass hurricane shades measuring five inches in diameter and varying in height from six to twelve inches. Place one dripless, unscented paraffin wax pillar candle into the center base of each hurricane glass, securing candle bottoms with floral wax adhesive dots. Carefully pour clean, dry river stones around the candle base, building up a balanced, level layer two inches deep to stabilize the wax foundation. Verify the stones leave at least four inches of clearance below the top of the candle wick to prevent wax displacement when lit. Group three finished hurricane vessels centrally on each table atop a natural linen runner. Check that wicks are trimmed to one-quarter inch prior to lighting to maintain steady, smoke-free flames throughout dinner service.
10. Sculptural Fruit Compote Arrangement
Assembly Process
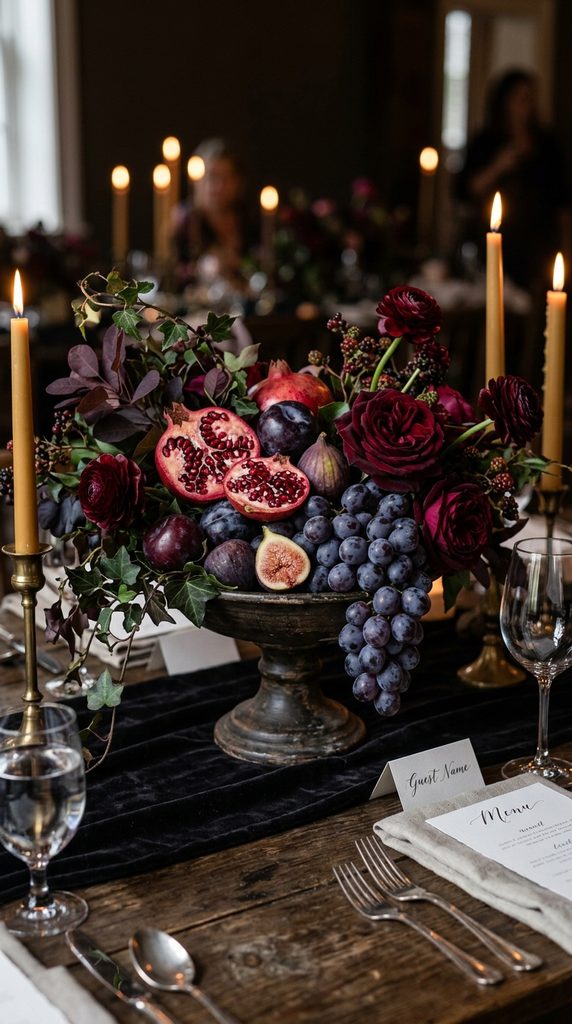
The sculptural fruit compote draws inspiration from classical Dutch still-life paintings, using wide, shallow pedestal urns filled with textured produce, trailing vines, and dark foliage. Pedestal compotes raise arrangements several inches above the tabletop, creating visual focus while leaving the table surface clear. Mixing deep-toned whole fruits such as dark grapes, plums, pomegranates, and fresh figs alongside cascading greenery produces deep, rich visual interest without requiring large quantities of expensive cut flowers. Deep crimson, violet, and muted green tones provide an opulent visual balance that complements fall receptions, historic venues, and intimate banquet settings. The solid structure of whole fresh fruit provides reliable support for leafy stems, establishing an artistic centerpiece that holds its shape throughout extended evening receptions.
Secure a block of saturated floral foam or a metal floral pin frog inside the basin of a low stone or ceramic compote using waterproof floral tape. Build a soft perimeter of greenery using weeping ivy, plum foliage, or trailing jasmine, guiding trails downward past the pedestal rim to soften container edges. Place whole, firm fruits such as split pomegranates, small clusters of black grapes, and fresh pears around the rim, anchoring heavy pieces into position with floral picks. Insert small accent blooms such as chocolate cosmos, deep garden roses, or scabiosa into internal gaps, sliding stems directly into the wet mechanics below. Inspect the arrangement from all four sides to ensure structural balance, filling any open spots with small clusters of dark berries.
Navigating Common Assembly Mistakes
Novice floral designers often struggle with arrangement scale and sightline management across event dining tables. A frequent error involves constructing arrangements that sit directly at eye level, blocking clear views and conversation between seated guests. Centerpieces must sit below fourteen inches or rise above twenty-four inches on slender supports to preserve open sightlines across the table. Another common issue is inadequate botanical hydration; cutting flower stems with dull household scissors crushes internal vascular tubes, preventing adequate water uptake and leading to premature wilting. Always trim stems with clean, sharp floral shears at an angle under cool, running water. Additionally, creators often underestimate the impact of ambient room temperatures on fresh materials. Placing delicate floral arrangements directly beneath heating ducts, near air conditioners, or in direct window sunlight accelerates dehydration and causes flower petals to brown prematurely. Maintain cut floral designs in cool, darkened spaces until final table placement to ensure maximum freshness throughout the reception.
Practical Techniques for Professional Presentation
Applying reliable assembly principles elevates simple DIY concepts into polished, professional reception designs. Establish visual balance by working with odd-numbered stem and vessel groupings, as clusters of three, five, or seven elements appear more natural than rigid, even configurations. Integrate varied visual textures within every arrangement by pairing smooth, broad floral faces with fine, feathery foliage, rough natural branches, or reflective glass accents. When assembling water-filled glass arrangements, wipe the exterior of the glass with diluted isopropyl alcohol to eliminate fingerprints, grease smudges, and moisture spots before table placement. When designing low arrangements, turn the vessel continuously during assembly to ensure the floral composition appears balanced from every dining seat. Finally, prepare a dedicated transport kit containing clean water buckets, spare stems, extra shears, waterproof tape, and adhesive dots to manage last-minute table adjustments quickly and calmly during venue setup.
Styling Harmony and Table Integration
A successful centerpiece should integrate naturally with the surrounding table elements, linens, and venue architecture. Coordinate the scale of your arrangements with the dining table proportions; long, narrow banquet tables benefit from low, running designs like greenery garlands or bud vase rows, while large circular tables require balanced, rounded central displays. Frame centerpiece displays with high-quality textiles such as stonewashed linen runners, raw-edge gauze, or natural cotton napkins to provide a soft, cohesive foundation that grounds glassware and dinnerware. Incorporate subtle ambient lighting around the main display by using ribbed glass votives or slender taper candles to add dimensional height and reflective warmth across dinnerware. Keep the surrounding decor clean and deliberate, leaving ample open space for place settings, wine glasses, communal bread baskets, and beverage carafes so the table never feels overcrowded during formal meal service.
Budget Discipline and Production Scheduling
Managing project expenses and timelines requires thoughtful planning, organized sourcing, and a practical assembly schedule. Control component expenses by purchasing glassware, ceramic vessels, and hardware in bulk from commercial decor suppliers rather than standard retail craft stores. Source seasonal, regional flowers through local flower farms or wholesale distributors, selecting varieties that naturally thrive during your event month to keep costs down and quality high. Construct a structured multi-day production schedule: wash glassware, assemble dried materials, and build structural foundations three to four days prior to the wedding date. Dedicate the final two days before the celebration to hydrating fresh stems, assembling live floral elements, and loading containers for transport. Designate an organized setup team armed with a clear master styling diagram to place finished arrangements efficiently on the event morning, avoiding unnecessary stress during final preparation hours.
Creative Evolution and Advanced Variations
Once basic centerpiece mechanics are mastered, crafters can expand simple designs through subtle layered styling variations. Introduce custom color treatments by applying matte textured spray paints to plain ceramic vases, mimicking high-end stone, concrete, or aged terracotta surfaces. Combine distinct centerpiece categories across alternating reception tables; for instance, alternate tall geometric terrariums on one table with low bud vase groupings on the next to bring dimensional rhythm across wide reception halls. Explore subtle botanical modifications by misting robust foliage with metallic floral pigments, or introduce fine branch elements like dried curly willow, delicate bleached ruscus, or soft bunny tails into fresh greenery clusters. These modular adjustments let you tailor basic centerpiece structures to matching escort card tables, cocktail displays, and lounge focal points, creating a cohesive, professionally designed atmosphere across the entire wedding celebration.