Vintage wedding centerpieces bring narrative depth, layered textures, and historical elegance to modern wedding reception tables. When browsing wedding decoration boards on visual platforms, couples frequently seek focal points that balance nostalgic heirloom appeal with intentional table organization. This comprehensive tutorial explores ten versatile centerpiece arrangements built around authentic antique vessels, weathered elements, and classic floral combinations. Readers will discover clear methods for styling aged metal urns, milk glass vases, weathered books, and antique glass bottles into balanced tabletop displays. Developing cohesive vintage centerpieces allows event planners and couples to design captivating focal points that enrich the overall room ambiance without obstructing cross-table conversations. Throughout this guide, you will learn the foundational mechanics of floral support, vessel restoration, safe candlelight integration, and balanced spatial distribution across both long banquet rows and circular dining tables. Each featured concept provides actionable instructions for assembling durable, professional-grade displays tailored to various historic eras. Mastering these straightforward construction methods empowers you to deliver an authentic aesthetic that honors classic design heritage while maintaining practical setup efficiency during wedding planning.
Why Vintage Wedding Decor Inspires Modern Event Styling
The continued interest in antique wedding styling across digital lifestyle platforms stems from a desire for distinct character, sustainability, and personal storytelling. Modern mass-produced decor often lacks the unique patinas, organic imperfections, and structural variety found in genuine historic tableware. Incorporating vintage elements offers notable practical value through upcycling, allowing decorators to breathe new life into discarded architectural fragments, thrifted glassware, and family heirlooms. From an aesthetic design perspective, antique centerpieces bridge the gap between historic charm and modern design, blending warm metallics, muted glassware, and romantic florals into cohesive themes. These creative ideas offer substantial DIY appeal because the natural variation of mismatched vintage pieces accommodates minor assembly differences without compromising the finished look. Sourcing pre-owned vessels also aligns with thoughtful budget ideas, reducing overall floral expenses by letting sculptural vessels anchor the tablescape. Because these heirloom collections can be acquired over time and styled without complex commercial floristry machinery, they offer a beginner friendly approach to professional event design.
Sourcing Authentic Vessels and Workshop Preparation
Assembling sturdy antique table arrangements requires gathering dependable base materials, protective mechanical supplies, and proper floral tools before starting construction. The core vessels include ornate brass urns, pressed glass compotes, amber medicine bottles, tin planters, and carved wooden crates. Supporting materials consist of green florist wire, waterproof floral tape, heavy metal flower frogs (kenzans), pre-soaked foam bricks, and clear silicone suction cups to keep stems firmly aligned. You will also need sharp floral shears, a fine-tooth glass cleaning brush, and museum wax to stabilize delicate glassware on banquet linens. Workspace preparation begins with inspecting vintage containers for micro-fractures, mineral deposits, and structural balance. Because authentic antique metals and unglazed ceramics can be porous, inserting discrete plastic liners or glass ramekins into the vessels prevents leaks that could damage event tablecloths. Cleaning glassware thoroughly with mild vinegar solutions removes decades of oxidation while preserving authentic antique patinas. Systematically organizing vessels by height and opening diameter streamlines assembly, guaranteeing that each centerpiece maintains steady balance, proper water volume, and lasting stability throughout the celebration.
1. Antique Brass Compote with Cascading Garden Florals
How to Create
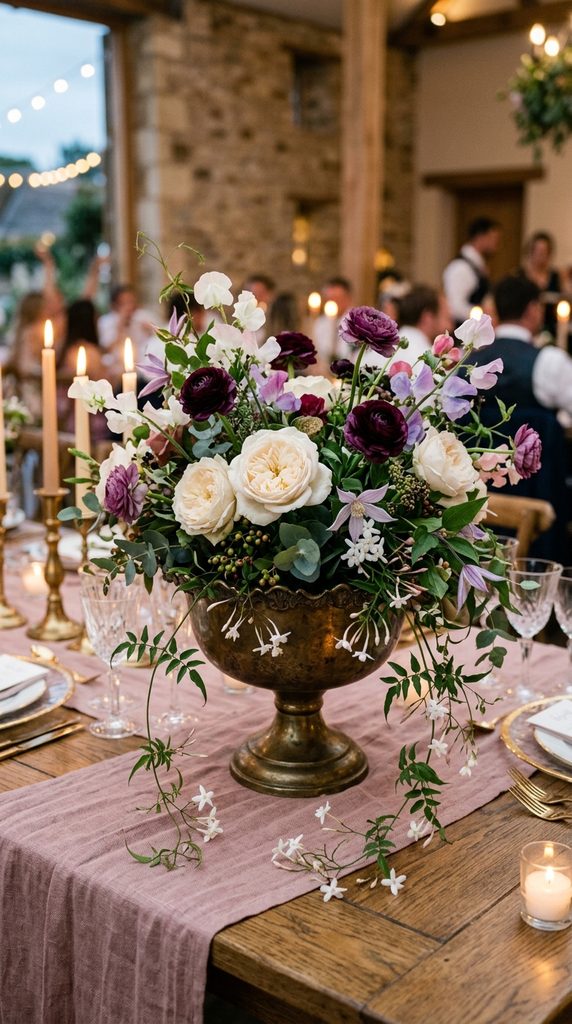
The antique brass compote centerpiece pairs the warm, aged finish of classical footed metalware with the loose elegance of cascading English garden florals. The elevated bowl silhouette lifts blooms slightly above the tabletop, creating visual lightness while preserving open sightlines for seated wedding guests. This design draws inspiration from seventeenth-century European still-life paintings, using deep plums, muted mauves, soft ivory, and trailing foliage to soften the warm metallic finish of the vessel. The weathered patina of natural brass provides an ideal contrast against soft garden roses and fine greenery, producing an elevated aesthetic suitable for vineyard estates, historic manors, or intimate library receptions. The central concept focuses on intentional balance: lush blooms rest densely within the bowl core, while trailing jasmine vines and sweet peas cascade organically over the scalloped rim, breaking the rigid geometric perimeter of the metal bowl.
To construct this arrangement, start by securing a heavy metal floral frog to the interior bottom of a polished brass compote using a dime-sized sphere of waterproof floral putty. If using floral foam, trim a saturated foam block to fit snugly inside a plastic liner cup, then insert it into the bowl and anchor it with green waterproof tape crossed in an X pattern over the rim. Begin structural greenery placement by inserting stems of variegated ivy, Italian ruscus, and jasmine vine at low angles along the outer edge, allowing the tips to sweep gracefully toward the table runner. Insert larger focal stems—such as fully opened garden roses and pale ranunculus—into the center at varied heights, keeping the highest stem beneath twelve inches to maintain open sightlines. Fill remaining gaps with airy spray roses, lisianthus, and scabiosa, turning the compote continuously to ensure uniform floral density from every angle. Finally, pour fresh floral preservative water into the vessel until full, checking the exterior base for dryness before placing the piece on the table.
2. Weathered Botanical Book Stacks with Taper Candles
Step-by-Step Guide
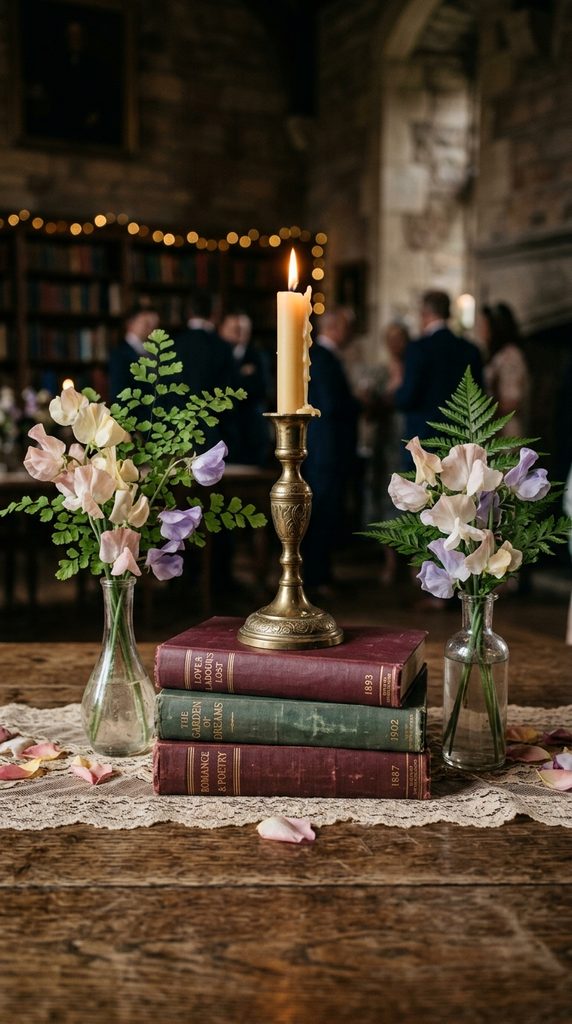
This literary-inspired tablescape unites clothbound antique books with slender brass taper candlesticks and delicate scattered bud vases, creating an intimate, historic atmosphere. The layered book risers introduce structured height variations across long banquet tables, providing a stable foundation for small floral accents and ambient evening lighting. Choosing books with muted covers—such as aged linen, hunter green, deep navy, or faded burgundy—creates an understated, vintage library aesthetic that complements classic romantic themes. This design eliminates the need for large, dense flower arrangements, relying instead on the historical textures of gold-embossed spines, weathered page edges, and the warm glow of candlelight. By distributing small glass vessels around the book stacks, this layout maintains an open, uncluttered footprint that leaves ample room for formal dinnerware, wine carafes, and place cards.
Begin assembly by sourcing vintage hardcover books with spines between seven and ten inches long, checking that covers are clean, structurally sound, and free of moisture damage. Stack two to three books horizontally at the center of the table runner, positioning the largest volume at the bottom and rotating the top volume slightly off-center to create visual interest. Next, place a heavy, felt-bottomed brass candlestick holder directly onto the top book, securing the base with museum wax to prevent accidental tipping. Insert an ivory or beeswax taper candle into the socket, making sure the candle stands vertically plumb. Place two petite glass bud vases directly adjacent to the book stack on the tabletop surface. Fill each bud vase with clean water and insert two or three delicate stems, such as single French anemones, sprigs of maidenhair fern, and pale sweet peas. Wrap a single strand of natural hemp twine loosely around the lower book spines, tucking in a small sprig of dried lavender to complete the presentation.
3. Pressed Milk Glass Pedestals with Pastel Peonies
Execution Process
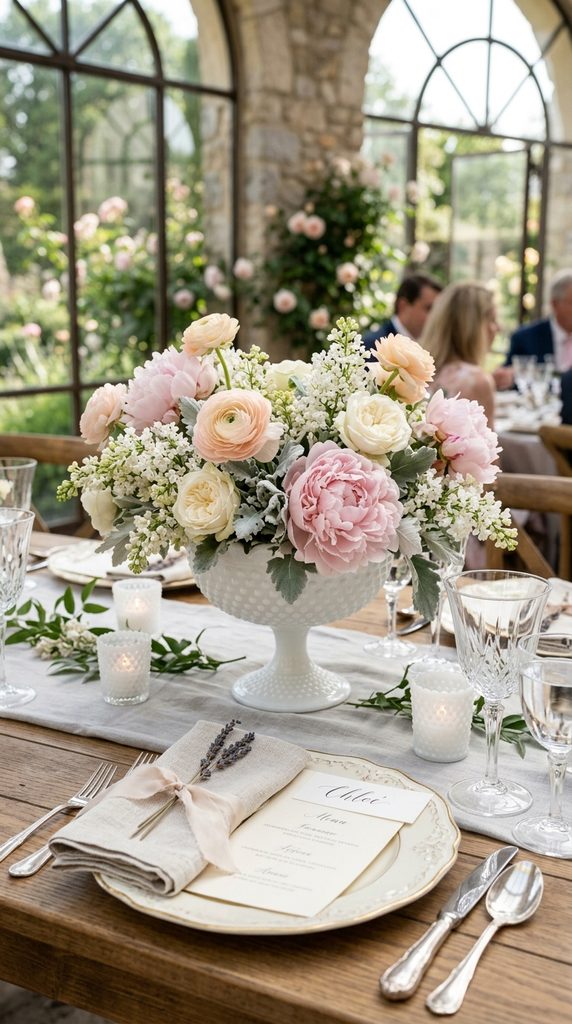
The pressed milk glass pedestal design embraces the delicate, collectible charm of mid-century American glassware, pairing milky white patterns with soft pastel blooms. Milk glass offers a bright, opaque surface that masks internal floral stems and mechanics, resulting in a crisp, clean aesthetic suited for garden weddings, historic estate celebrations, and modern vintage themes. The soft white finish reflects natural daylight beautifully while providing high contrast against romantic flowers like blush peonies, pale peach ranunculus, and silvery dusty miller leaves. The pedestal foot elevates the arrangement, giving the display a balanced profile that coordinates well with both round dining tables and linear family-style layouts. This concept balances the structural weight of opaque glass with soft, billowy petals, establishing a joyful, romantic focal point that enhances the light and airy feel of a daytime or early evening reception.
Start by wiping the pressed milk glass pedestal container thoroughly with a lint-free microfiber towel to remove any surface fingerprints or dust. Fit a pre-soaked cylinder of high-density floral foam into the bowl, leaving approximately one-half inch of foam extending above the rim, and secure it using narrow transparent floral tape. Begin framing the arrangement by inserting silvery dusty miller, silver dollar eucalyptus, and pale sage foliage around the perimeter, angling the stems downward to conceal the rim of the glass. Insert three large, fully bloomed blush peonies into the center of the foam to serve as the dominant visual anchors. Next, tuck stems of pale peach spray roses, white lilac clusters, and light pink snapdragons into the intermediate spaces, maintaining a rounded, dome-shaped silhouette across the top. Ensure all stems are pushed at least one inch deep into the foam for continuous hydration. Place the finished pedestal centrally atop a soft linen table runner, ensuring the base sits flat and level on the table surface.
4. Repurposed Apothecary Bottles with Meadow Botanicals
Setup Method
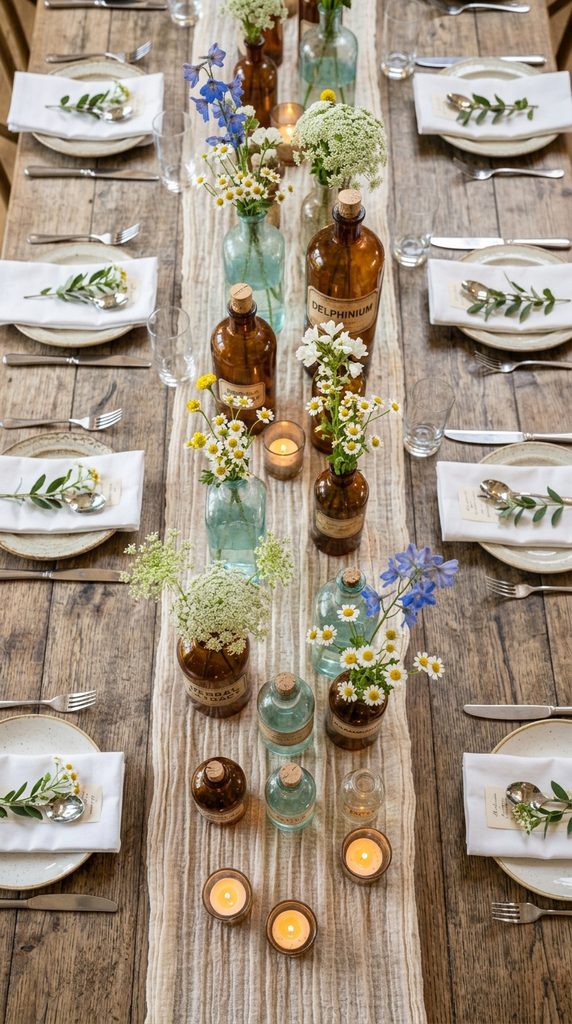
The apothecary bottle centerpiece pairs clusters of vintage amber, cobalt, and clear glass medicine bottles with delicate, wildflower-inspired botanical stems. This modular approach introduces visual rhythm and transparency along the table centerline, allowing candlelight to glow through colored glass without creating heavy visual barriers. Sourcing bottles in varied heights, neck diameters, and embossed patterns gives each dining station an authentic, curated character that celebrates the art of antiquing. The narrow necks naturally support slender stems, eliminating the need for floral foam or complex internal wiring mechanics. This design works exceptionally well for farm-to-table celebrations, outdoor orchard dinners, and rustic barn venues, evoking the charm of an old-world apothecary or field naturalist’s study. Because the individual bottles have a small footprint, they integrate easily among shared family-style platters and glassware.
Begin by collecting seven to nine authentic vintage glass medicine bottles per table, choosing a harmonious mix of amber, clear, and pale sea-glass tones ranging from four to ten inches in height. Clean the interiors using a bottle brush, warm water, and mild detergent to remove any residual debris, then rinse the glass thoroughly and let it dry completely. Fill each bottle two-thirds full with fresh water mixed with a drop of liquid flower food. Arrange the bottles in an organic, elongated cluster along the center of the table runner, placing the tallest bottles toward the middle and tapering the shorter bottles toward the outer ends. Trim fresh meadow florals—such as chamomile daisies, Queen Anne’s lace, blue delphinium tips, scabiosa, and slender grasses—to varied heights, cutting each stem at a sharp forty-five-degree angle. Insert one to three stems per bottle, letting the natural curve of the botanicals direct their drape. Interlace small glass votive candles among the glass bases to produce warm, multi-level evening illumination.
5. Ornate Silver Teapot with Soft English Florals
How to Create
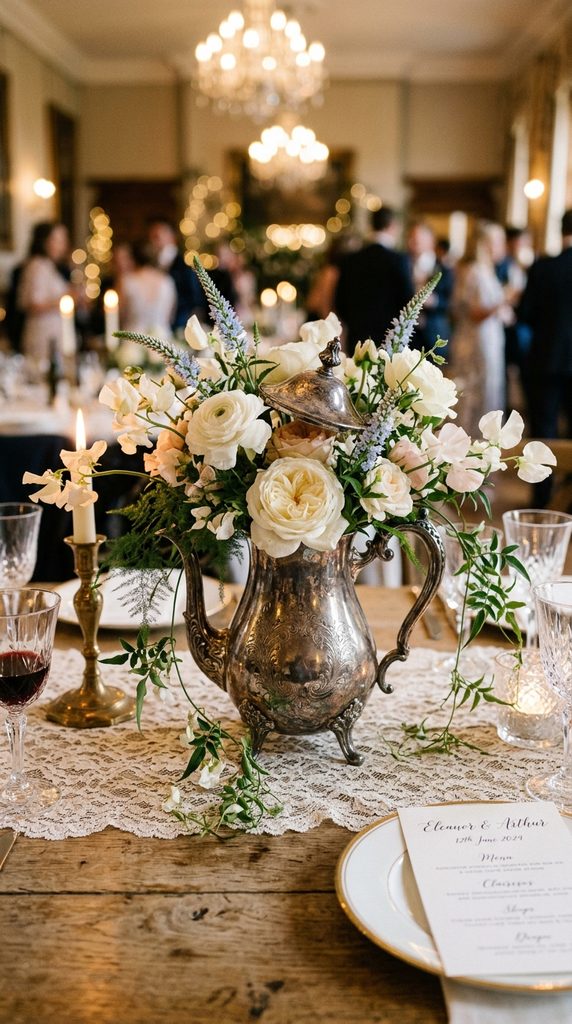
The ornate silver teapot arrangement brings formal Victorian charm and reflective metallic luxury to traditional wedding reception styling. Whether using polished sterling silver or pleasantly tarnished Sheffield plate, an antique teapot provides sculptural interest through curved spouts, ornate handles, and engraved filigree details. The cool, reflective surface of vintage silver contrasts gracefully against warm candlelight, catching ambient light throughout the evening dinner service. Pairing this structured metal vessel with soft, ruffled florals—such as David Austin roses, trailing sweet peas, and pale hydrangeas—softens the metallic edges, producing a lush, antique garden aesthetic. This design is well suited for historic ballroom settings, elegant tea-party celebrations, or classical estate receptions, offering a distinguished focal point that feels personal, historically grounded, and elevated.
Prepare the silver vessel by inspecting the bottom for leaks, and if necessary, place a small plastic cup or sealant liner inside the chamber to protect the interior metal against water damage. If an aged look is desired, leave the natural gray tarnish intact; if a radiant sheen fits the theme better, polish the exterior with a gentle metal cream before assembly. Submerge a trimmed block of floral foam in clean water until saturated, then slide it into the interior liner, trimming it flush with the rim. Begin the floral layout by inserting a wide-headed pale hydrangea into the main opening, using its dense petals as a natural cushion for surrounding accent blooms. Insert long-stemmed English garden roses, trailing white sweet peas, and soft veronica into the foam, angling several stems to drape gracefully past the spout and handle. Weave small sprigs of trailing plumosa fern through the base to echo the curved contours of the teapot. Finally, wipe down the exterior metal surface to remove any water spots before table installation.
6. Weathered Wooden Produce Crate with Field Greens
Step-by-Step Guide
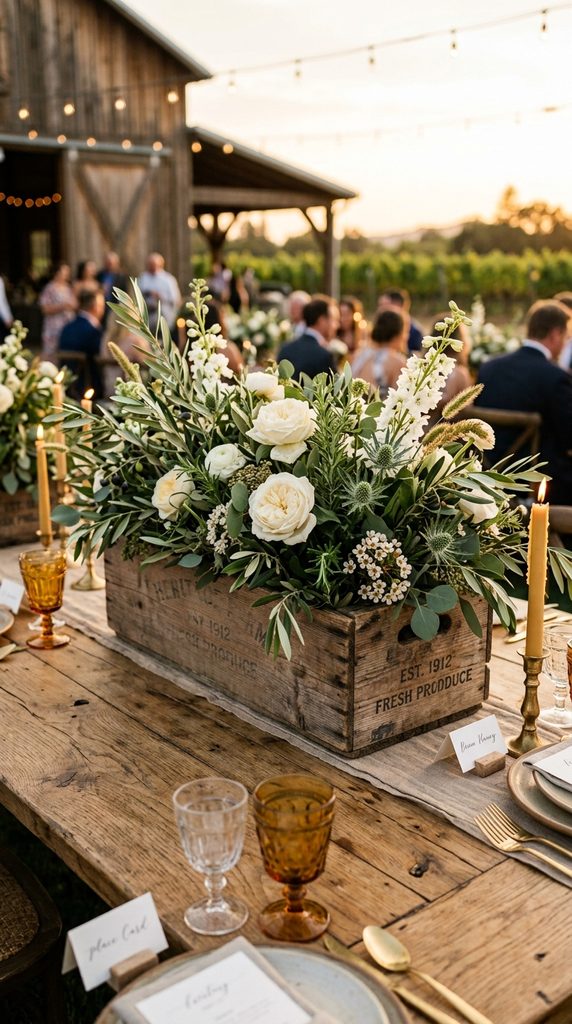
The weathered produce crate centerpiece uses rustic architectural wood to bring grounding warmth and earthy textures to casual, outdoor, or harvest-style celebrations. Featuring reclaimed slat wood, exposed iron nails, and authentic vintage farm stamps, these low-profile boxes establish a rustic base for sprawling botanical arrangements. The substantial rectangular footprint anchors long banquet tables, creating a rich visual runner that echoes natural outdoor surroundings. Filling the crate with seasonal field greens, seeded herbs, and textured woodland flowers produces a relaxed, organic aesthetic that avoids rigid symmetry. This design fits barn receptions, mountain celebrations, and outdoor vineyard dinners, celebrating countryside simplicity and natural beauty. Because the wooden frame conceals internal plastic trays, decorators can use robust, water-retentive mechanics that keep fresh botanicals hydrated through warm afternoon celebrations.
Begin by selecting an authentic, shallow wooden produce or soda crate measuring approximately eighteen inches long and four inches deep, making sure the wood slats are clean and structurally stable. Cut a heavy-duty waterproof pond liner or durable plastic sheeting to fit the interior floor, securing the edges with a staple gun to create a watertight internal reservoir. Insert two saturated standard floral foam blocks side by side into the lined basin, taping them securely to the wooden crate frame with green waterproof anchor tape. Begin greenery construction by pushing broad salal leaves, silver olive branches, and textured rosemary sprigs into the outer foam perimeter, letting the foliage extend over the edges to soften the wooden corners. Next, insert vertical stems of snapdragons, white larkspur, and seeded eucalyptus across the center to build a soft, low floral ridge. Fill the interior gaps with open cream garden roses, green thistle, and waxflower. Mist the arrangement with clean water and position the crate along the centerline of the table.
7. Classical Glass Cloche over Specimen Florals
Execution Process
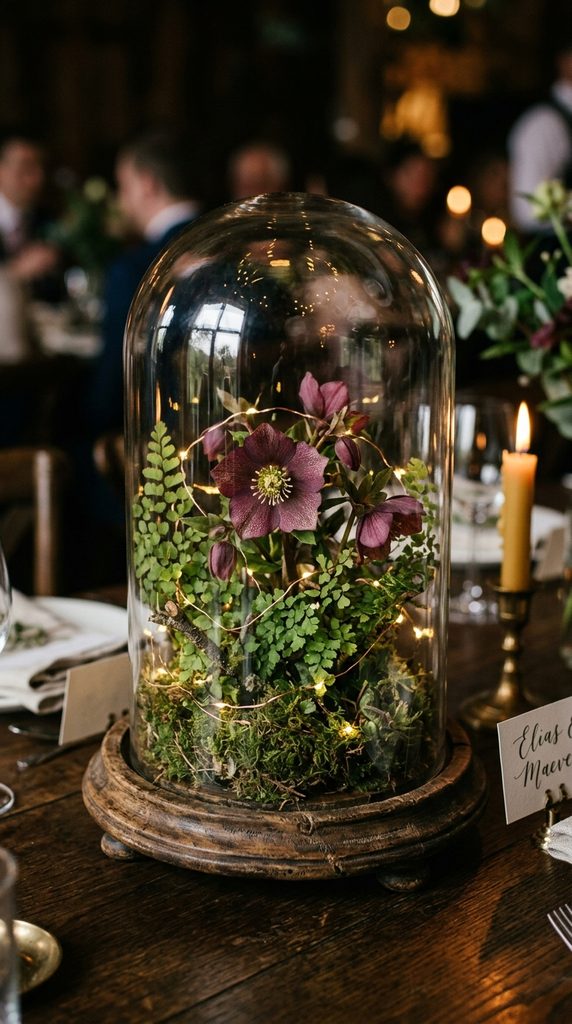
The classical glass cloche centerpiece transforms botanical elements into protected curiosities, drawing inspiration from nineteenth-century natural history collections. A bell-shaped glass dome rests atop an authentic turned-wood or aged marble base, enclosing delicate botanical specimens and battery-powered fairy lights in a dust-free display. This design creates a magical, intimate focal point that invites guests to lean in and inspect the fine botanical details. By enclosing the central elements beneath glass, this concept protects fragile blooms from sudden outdoor breezes and changes in venue airflow. The vertical cloche profile adds structured height without expanding across the tabletop, leaving plenty of room for dinnerware and glassware. This style works well for historic greenhouse celebrations, botanical garden venues, and elegant museum spaces, offering a refined, intellectual design that bridges fine art and historic styling.
Start by preparing a circular turned-wood or polished marble base that features an indented perimeter groove designed to seat the glass dome securely. Cut a thin disk of dry floral foam or use a miniature kenzan pin frog, anchoring it to the center of the base with strong floral adhesive putty. Conceal the mechanical base by pressing a layer of preserved sheet moss and velvety reindeer moss over the bottom, securing the moss edges with discreet green floral pins. Carefully insert the stems of selected specimen flowers—such as a single dark burgundy hellebore, a miniature stem of spray orchids, or an architectural thistle—directly into the central pin frog. Weave a micro-strand of warm-white, copper-wire LED fairy lights through the moss bed, concealing the battery pack under the wooden base rim. Clean the inside of the glass cloche with glass cleaner to eliminate all interior dust or lint. Carefully lower the glass dome over the botanical arrangement, confirming that no leaves are pinched beneath the rim, and set the cloche squarely in the center of the table.
8. Ornate Gilt Framed Mirrors with Clustered Glass Votives
Setup Method
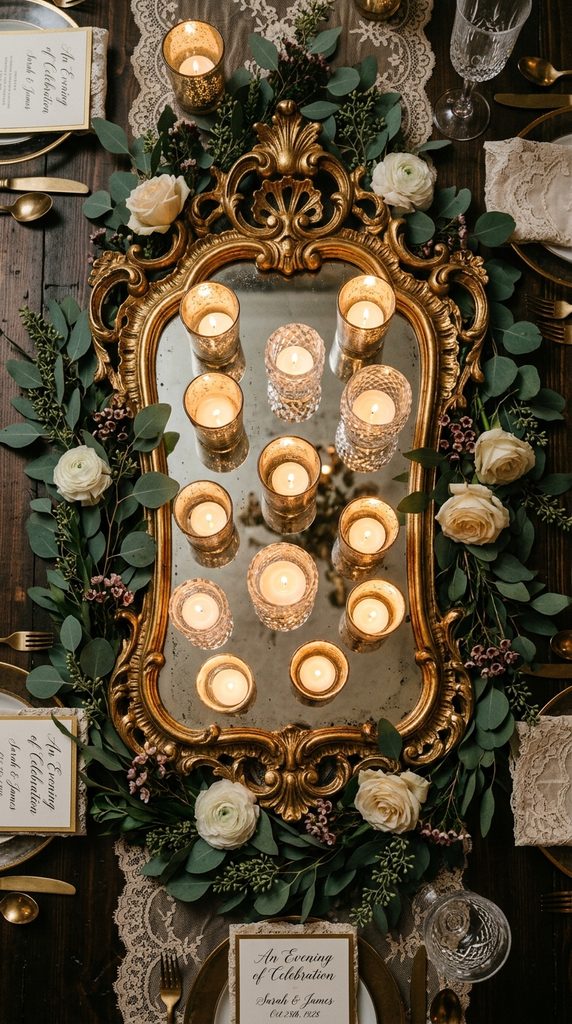
The gilt framed mirror centerpiece pairs the reflective charm of antique wall decor with the radiant warmth of concentrated candlelight. Laying an ornate gold-leaf or brass-framed mirror flat along the center of the table creates a reflective base that bounces ambient light throughout the reception room. This design is well suited for evening dinner receptions, moody ballroom venues, and romantic historic estates, transforming simple candlelight into an expansive, luminous visual plane. Surrounding the mirror with varied glass votives, mercury glass cups, and loose, scattered greenery produces an opulent, layered setting that requires no complex floral mechanics. The reflective glass surface visually doubles the candlelight output, casting a warm, flattering glow across seated guests. This approach provides an efficient DIY solution that delivers a rich, luxurious look while streamlining post-event cleanup.
Begin by sourcing an authentic vintage picture or vanity mirror featuring an ornate gold-gilded, carved wood, or heavy brass frame, checking that the glass is free of structural cracks. Clean the mirror surface thoroughly with glass cleaner and apply soft felt pads to the four underside corners of the frame to prevent scratching banquet linens. Lay the mirror flat along the center of the table, orienting it parallel to the table edges. Arrange a diverse collection of ten to twelve clear crystal and silver mercury glass votive cups across the mirror surface, placing taller votives near the center and shorter tea-light cups along the inner frame edge. Insert unscented, four-hour wax votive candles or high-grade LED tea-lights into each glass holder. Fill the empty spaces around the outer frame by loosely weaving a flexible garland of fresh silver dollar eucalyptus and plumosa fern along the perimeter. Light the candles just before guest seating, letting the flickering reflections establish a warm, welcoming ambiance.
9. Antique Stoneware Crock with Meadow Wildflowers
How to Create
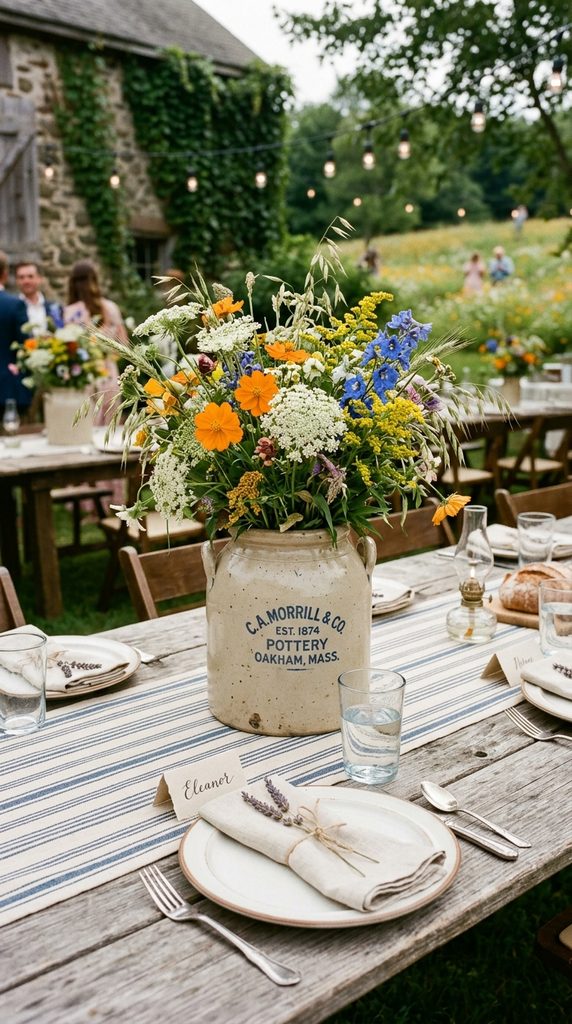
The antique stoneware crock centerpiece uses rustic early-twentieth-century ceramic pottery to introduce earthy, neutral textures to wedding tablescapes. Featuring muted oatmeal glaze tones, unglazed clay bases, and hand-stamped cobalt blue numbers, these durable ceramic jugs provide an understated base for unstructured floral arrangements. The heavy ceramic walls provide reliable physical stability, preventing accidental tipping on long tables or outdoor terraces. Filling the crock with loose meadow wildflowers, natural grasses, and sun-drenched blooms evokes the relaxed elegance of a countryside gathering. This style complements farmhouse gatherings, coastal meadow celebrations, and relaxed garden receptions, pairing easily with ticking-stripe linen runners and mismatched vintage ironstone dinner plates. The straightforward, single-vessel approach simplifies day-of logistics while maintaining an authentic, handcrafted aesthetic.
Begin by inspecting the interior of the vintage stoneware crock for hairline fractures, washing it with warm water and soap to remove any storage dust. Place a weighted glass jar inside the crock to reduce the water volume needed and make the assembled centerpiece lighter to transport. Fill the internal jar three-quarters full with fresh water mixed with professional flower food. Build a structural tape grid across the crock mouth using clear half-inch floral tape, creating a checkerboard pattern that holds stems upright without requiring floral foam. Begin adding stems by placing airy branches of Queen Anne’s lace, blue delphinium, and tall field grasses around the perimeter to establish a loose, outward-spreading silhouette. Insert medium-sized blooms—such as cosmos, zinnias, and single-headed dahlias—into the center of the grid, varying the stem heights so the flowers sit at different levels. Step back to confirm the arrangement looks balanced and full from all sides, then place the finished crock atop a neutral linen table runner.
10. Distressed Metal Birdcage with Flowing Ivy
Step-by-Step Guide
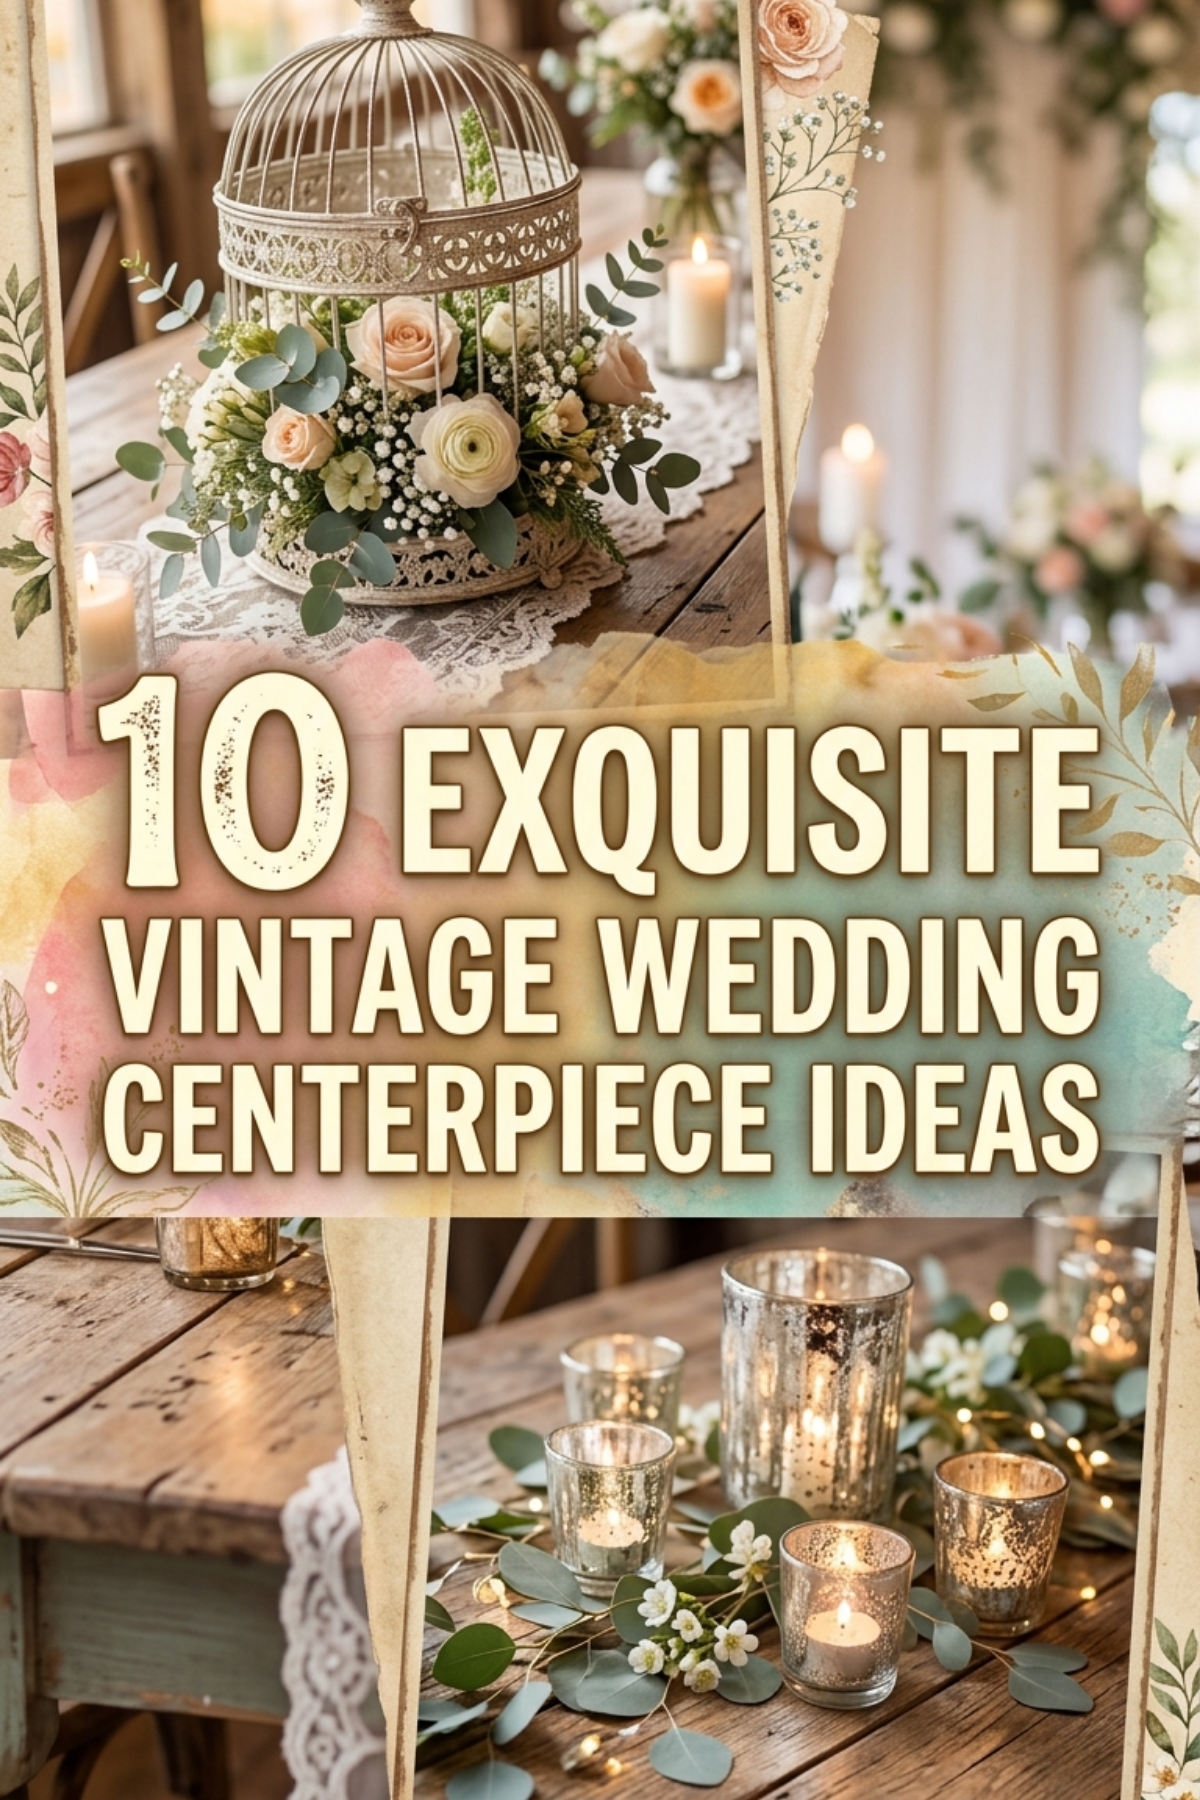
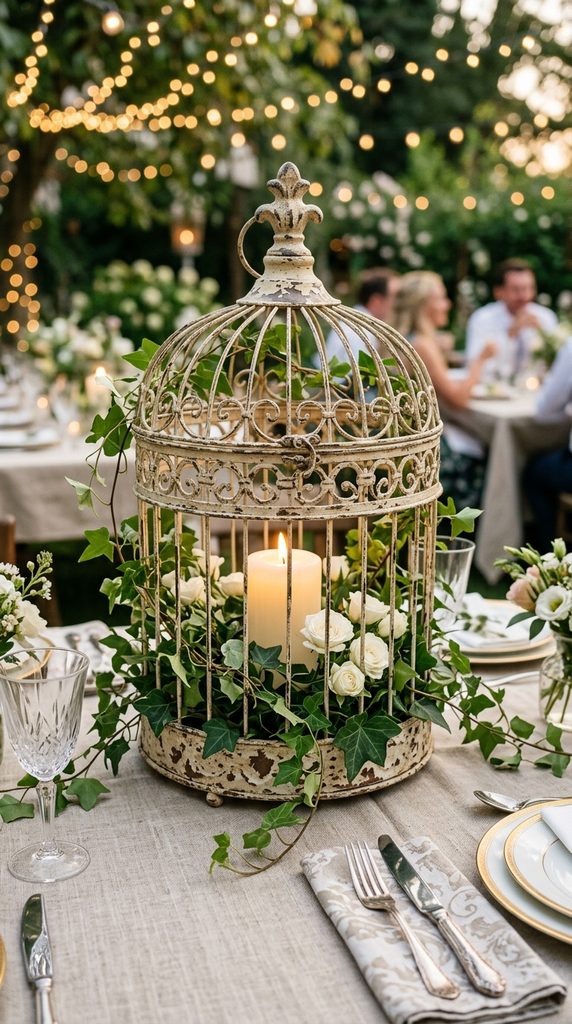
The distressed metal birdcage centerpiece brings whimsical architectural charm, historic contours, and romantic botanical layering to wedding dining spaces. An antique wrought-iron or wire birdcage features fine domed bars, ornate finials, and aged white or charcoal paint that creates visual height while maintaining an open, transparent profile. The interior housing can hold a large ivory pillar candle, an intricate floral arrangement, or a blend of both, while flexible greenery tendrils weave naturally through the exterior bars. This design is well suited for romantic garden weddings, vintage courtyard celebrations, and historic estate settings, evoking the charm of a Victorian conservatory. The sturdy wire construction protects internal candles from unexpected breezes, and the distinct dome shape creates a memorable silhouette that looks beautiful against both daylight and warm evening lighting.
Begin by choosing an authentic or antique-reproduction wire birdcage with a functional latching door and a solid base tray, wiping away loose dust or paint flakes with a damp cloth. Line the bottom tray with a shallow plastic dish to catch moisture, and place a small, saturated block of floral foam inside the dish, securing it with floral tape. Place a battery-powered, flickering LED pillar candle in the center of the tray, or use a dripless wax candle inside a protective clear glass chimney. Push short stems of English ivy, variegated creeping fig, and soft boxwood into the foam around the candle base, weaving several long ivy vines outward through the wire bars to create a natural, growing vine effect. Tuck small blooms of white spray roses, baby’s breath, and pale blue forget-me-nots into the foam between the greenery stems. Close the birdcage door securely, allowing a few leaf tendrils to spill through the latched opening, and place the finished cage centrally upon the reception table.
Common Sourcing and Assembly Pitfalls to Prevent
A frequent mistake when designing vintage wedding centerpieces is using unlined, porous antique vessels that leak water onto fine reception linens throughout the event. Historic metals, unglazed ceramics, and weathered wooden boxes often develop micro-fissures or oxidation holes that permit water seepage; to prevent this, always fit an internal leak-proof plastic tray or glass insert inside every antique vessel before adding water. Another common challenge is combining mismatched pieces without a unifying design element, resulting in a cluttered, chaotic tablescape rather than a curated vintage collection. Maintain visual harmony by sticking to a consistent floral color palette, a common metallic finish, or a unified vessel material like milk glass across every table. Additionally, decorators often overlook venue open-flame policies, styling authentic taper candles in antique brass holders only to find the site requires fully enclosed hurricane glass sleeves. Confirming venue regulations well in advance and keeping battery-powered LED alternatives on hand ensures smooth, stress-free table styling on the wedding day.
Practical Methods for Elevated Styling and Stability
Achieving a clean, professional finish with vintage centerpieces requires careful stem mechanics, proper vessel balance, and thoughtful finishing details. When arranging florals inside wide-mouthed antique containers, always construct a clear floral tape grid across the opening or use a heavy metal pin frog anchored with waterproof floral clay to keep stems from shifting during transport. Ensure taller vessels—like antique silver teapots, stoneware crocks, or brass candelabras—have sufficient base weight to withstand accidental bumps from seated guests or service staff. To protect delicate rented linens or polished wood tables from scratches caused by rough vintage bases, apply adhesive felt dots to the underside of every metal, ceramic, and glass vessel. For floral hydration, recut all flower stems at a sharp angle beneath cool running water and let them hydrate in clean, nutrient-treated water for several hours before arranging. These professional preparation steps keep your botanical elements crisp, vibrant, and stable from the opening toasts to the final reception dance.
Tablescape Organization and Visual Layering
Arranging vintage centerpieces effectively relies on balancing the central feature against supporting elements like glassware, ambient candles, and printed stationery. On long rectangular banquet tables, establish visual rhythm by alternating a primary focal piece—such as an antique brass compote—with secondary accents like small medicine bud vases, vintage book stacks, and glass votives down the center of the table. On round dining tables, center the primary vessel atop a circular wooden riser, vintage silver tray, or mirrored plate to define the centerpiece’s footprint, then arrange small votive cups symmetrically around the base to anchor the display. Coordinate the metallic finishes in your centerpieces with your place setting elements, echoing warm brass or cool silver in your cutlery, charger plates, and place-card holders. Spacing candles at varied heights creates a flattering, layered glow that softens shadows across the table, ensuring the entire dining space feels warm, welcoming, and visually connected.
Supply Management and Setup Timelines
Coordinating a vintage centerpiece project requires thoughtful sourcing timelines, organized storage, and an efficient assembly plan leading up to the wedding. Begin hunting for antique vessels at flea markets, estate sales, and thrift shops six to nine months in advance, keeping a running inventory of vessel dimensions and opening sizes to guide your floral purchasing. Thoroughly clean, line, and apply protective felt pads to all vessels several weeks before the event, storing them in sturdy, labeled plastic bins organized by table assignment. Fresh florals should be picked up or delivered two days before the wedding, allowing blooms time to open fully in a cool, dark room with fresh floral food. Assemble foam mechanics and tape grids forty-eight hours ahead, reserving final floral insertions for the day before the celebration. On the morning of the wedding, delivery teams simply place the pre-assembled vessels, top them off with fresh water, and light the candles, ensuring venue setup stays calm, organized, and on schedule.
Creative Expansions and Advanced Styling Directions
Once you have mastered the foundational assembly techniques, you can explore advanced variations to personalize your vintage centerpieces further. Try incorporating personalized historical paper ephemera, such as vintage botanical postcards, handwritten antique letters, or custom calligraphed table numbers printed on aged parchment paper tucked into floral stems. You can also mix contrasting eras, pairing mid-century milk glass pedestals with modern acrylic place cards or sleek matte black cutlery to create an eclectic, transitional aesthetic. For warm-weather celebrations, integrate fresh, seasonal fruit—such as halved pomegranates, green pears, or clusters of black grapes—along the base of brass compotes to evoke classical still-life art. You can also repurpose these arrangements after the reception, gifting individual vintage vessels filled with fresh flowers to wedding party members, family, and guests as meaningful, sustainable keepsakes of your celebration.