Lush botanical foliage offers an organic, sophisticated aesthetic that transforms dining tables, wedding banquets, and seasonal gatherings without requiring expensive cut flowers. Designing greenery-focused centerpieces allows decorators to highlight architectural leaf shapes, dynamic trailing vines, and varied forest textures to create a cohesive atmosphere. This comprehensive guide outlines ten structured DIY greenery centerpiece ideas, spanning dense eucalyptus table runners, submerged leaf cylinders, potted culinary herb boxes, and architectural geometric lanterns. Readers will learn the essential mechanical techniques of table proportion balance, stem hydration management, floral wire construction, water tube concealment, and fire-safe candlelight integration. Moving away from standard cut flowers gives creators total artistic control over the botanical palette while eliminating the high commercial markups and rapid wilting associated with fragile blooms. Beyond beautifying special event reception tables, mastering these foliage arranging systems provides foundational styling skills that transition seamlessly into everyday home decor, dining table vignettes, and holiday mantel displays. By applying accessible materials such as florist tape, chicken wire cages, water tubes, and foraged branches, makers of all skill levels can produce high-impact, professional-grade tablescapes.
Why This Idea Is Trending or Useful
Foliage-based arrangements continue to dominate modern event boards and Pinterest ideas because they deliver architectural longevity, sustainable styling, and timeless organic character. In contemporary interior design and event styling, decorators increasingly favor minimalist style palettes, where rich emerald, sage, and olive tones soften modern dining spaces without adding chaotic floral patterns. The functional value of fresh greenery lies in its exceptional durability; hearty foliage like Italian ruscus, salal, and silver dollar eucalyptus withstands fluctuating indoor venue temperatures and dry outdoor breezes without collapsing. As an engaging DIY creative project, assembling greenery centerpieces requires minimal dedicated florist equipment, functioning smoothly as an accessible, beginner friendly approach to botanical styling. Relying primarily on verdant foliage also generates practical budget ideas, as bulk-purchased grower bunches and foraged garden vines provide massive visual coverage at a fraction of the cost of cut roses or peonies. Furthermore, these long-lasting arrangements adapt effortlessly into home decor after the event, functioning as decorative kitchen accents, shelf runners, or outdoor patio displays that maintain their vibrant, fresh appearance for days.
Materials and Preparation
Thorough planning and disciplined supply acquisition form the essential foundation for producing durable, well-hydrated greenery centerpieces that retain their structure throughout long events. The primary botanical inventory focuses on durable foliage varieties: acquire Italian ruscus, silver dollar eucalyptus, seeded eucalyptus, baby blue eucalyptus, leatherleaf fern, plumosa fern, and broadleaf salal. Essential florist tools include sharp bypass pruning shears, dark green floral bind wire, green waterproof paper tape, rubber-capped water tubes, clear floral adhesive dots, and chicken wire netting. When incorporating lighting into your designs, source glass hurricane cylinders, vintage brass candlesticks, or dripless paraffin candles to comply with venue safety standards. Preparation begins by cutting stems at a sharp forty-five-degree angle and conditioning all foliage in buckets of lukewarm water treated with floral preservative for twenty-four hours prior to assembly. Measure table widths and lengths carefully to verify that finished arrangements preserve at least eight inches of clear perimeter space for place settings, stemware, and serving dishes.
1. Cascading Italian Ruscus and Silver Dollar Eucalyptus Table Runner
Step-by-Step Guide
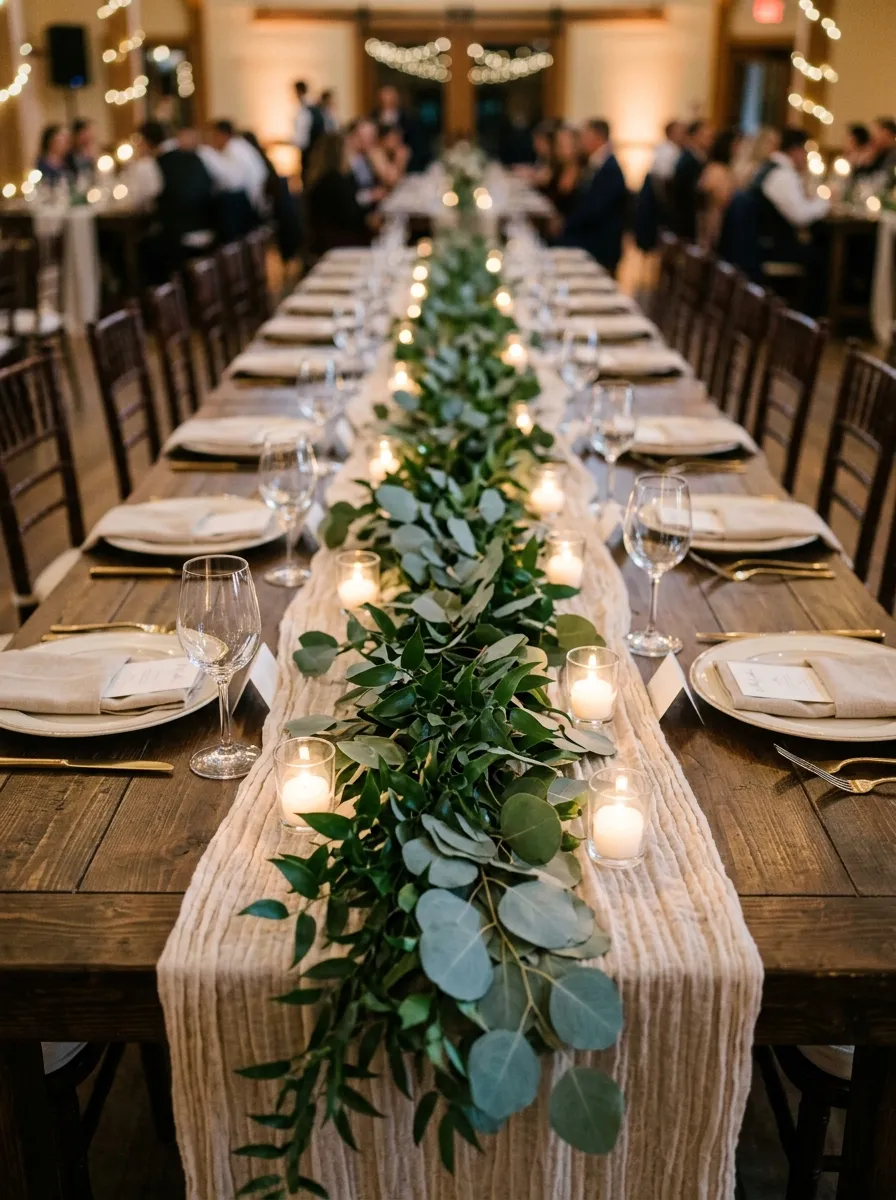
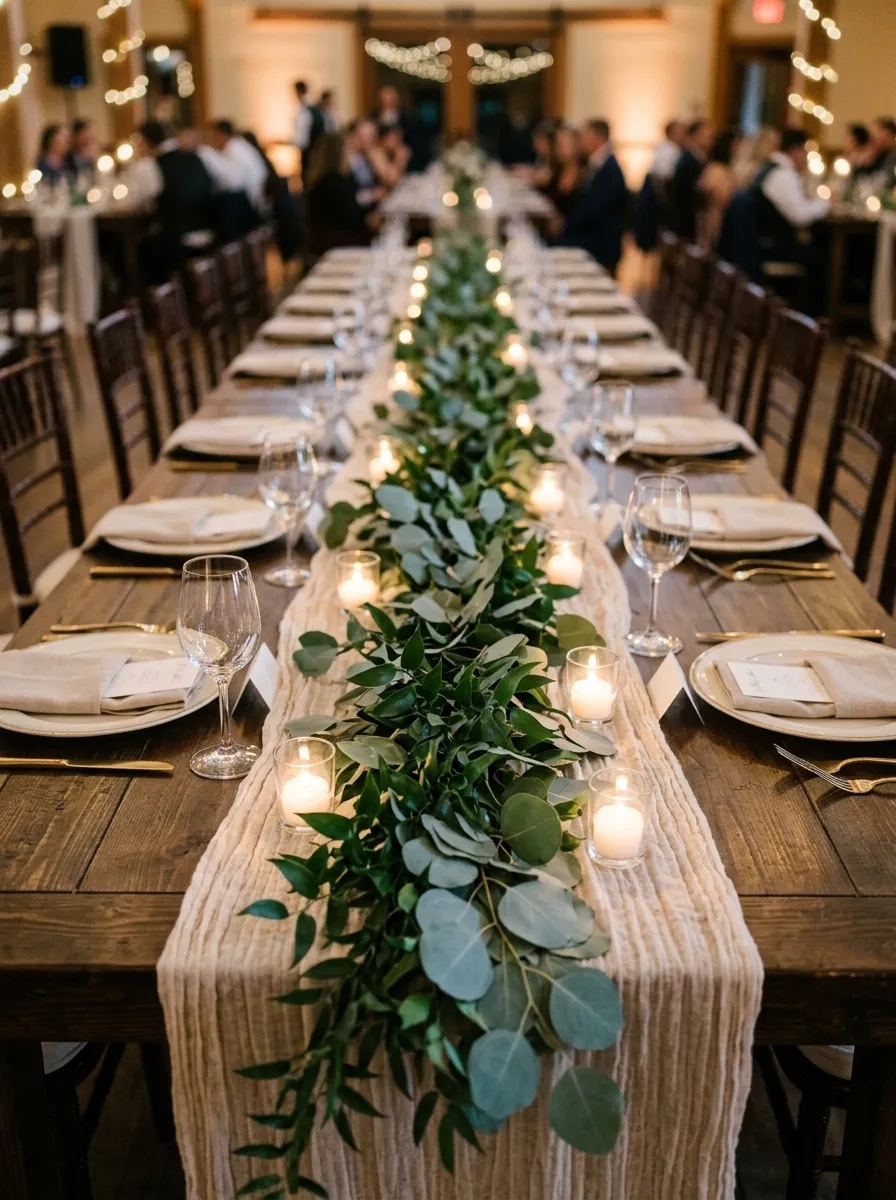
The cascading Italian ruscus and silver dollar eucalyptus table runner creates a continuous, low-profile botanical spine that stretches along the center of rectangular banquet tables. This design pairs the deep emerald structure of Italian ruscus branches with the broad, rounded, dusty-blue leaves of silver dollar eucalyptus to produce rich tonal depth. The interlocking foliage lies flat against the table linen, concealing water tubes and wiring while framing individual place settings with natural beauty. Keeping the arrangement low ensures completely clear sightlines across the dining table, allowing guests to converse naturally without peering around tall floral obstructions. The subtle textural contrast between the glossy ruscus leaves and the velvety, matte eucalyptus surfaces catches ambient light, introducing an organic rhythm that complements rustic barn venues, industrial lofts, and garden terraces.
To construct this lush botanical runner, start by laying an unbleached linen or open-weave gauze fabric runner down the center of an eight-foot table, gathering the textile into soft, irregular ripples. Lay five-foot stems of Italian ruscus end to end along the spine of the runner, overlapping the cut base of each branch beneath the leafy tip of the preceding stem by six inches. Secure the overlapping branch junctions using dark green floral bind wire, creating an unbroken central garland line. Weave shorter eight-inch sprigs of silver dollar eucalyptus outward at forty-five-degree angles, tucking the cut stems into water-filled floral tubes hidden beneath the dense upper foliage. Scatter clear glass votive holders containing eight-hour white tea lights every eighteen inches along the greenery border, keeping the glass rims two inches away from dry leaves to ensure safe illumination.
2. Floating Pillar Candles in Submerged Foliage Glass Cylinders
Execution Process
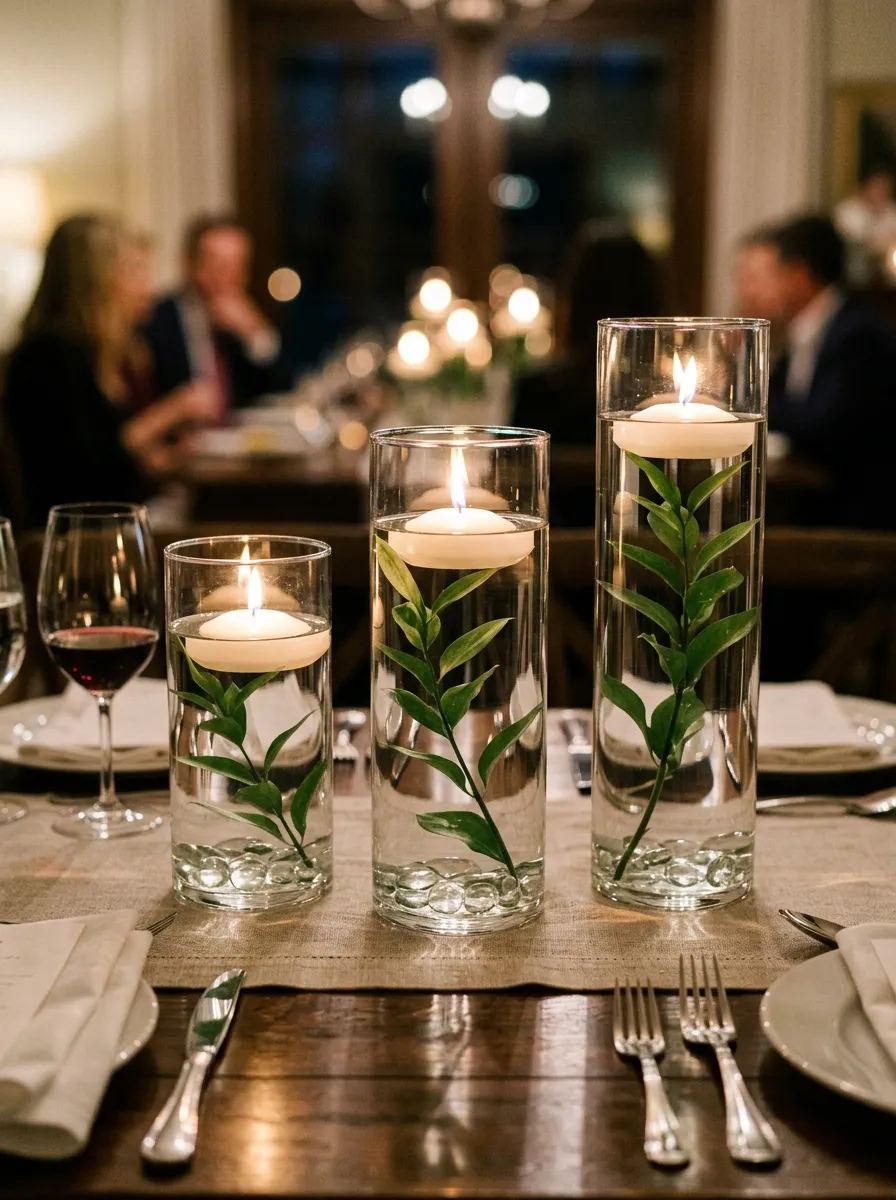
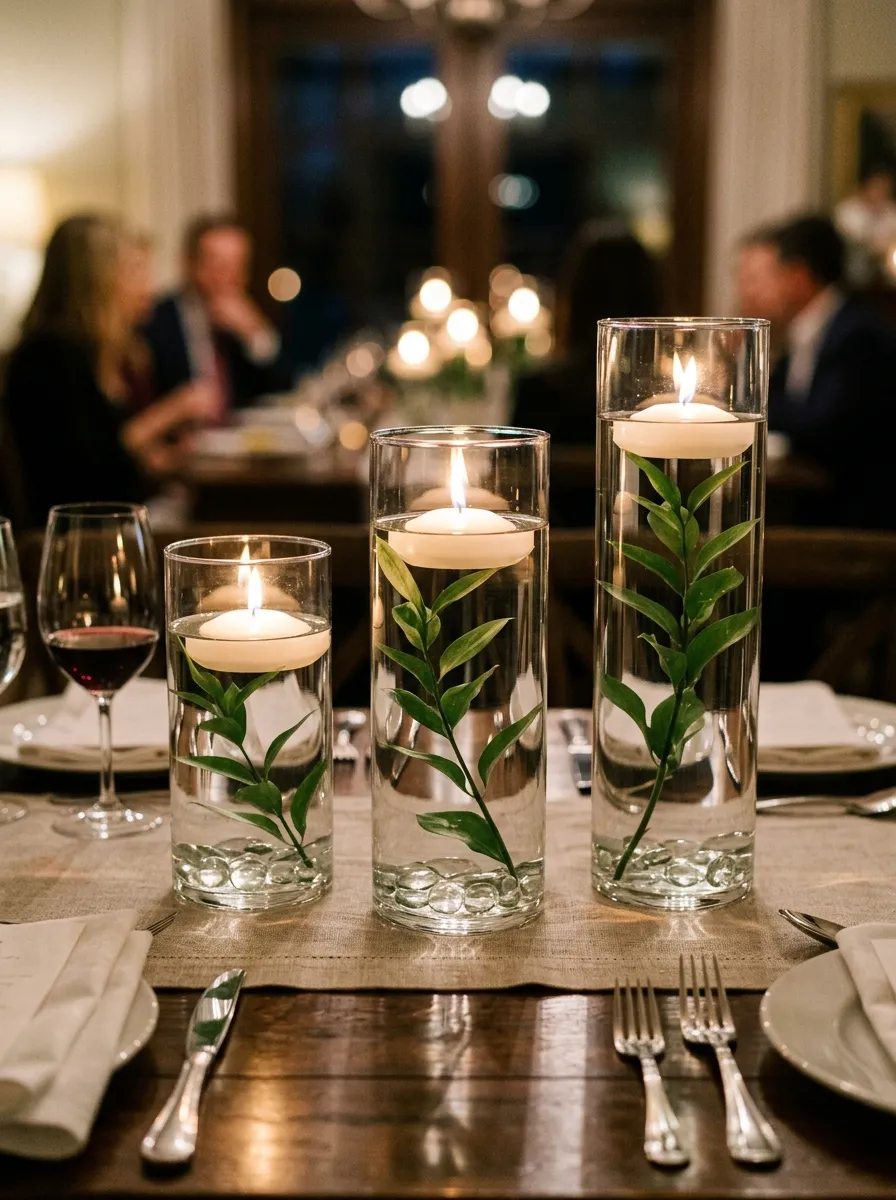
Clustering clear glass cylinders with submerged botanical foliage introduces clean vertical architecture, optical magnification, and luminous candlelight along the table center. This design utilizes graduated cylindrical glass vases filled with purified water, encasing single submerged stems of broadleaf monstera, curly willow twigs, or arched stems of Italian ruscus. The clear water acts as a natural lens, magnifying the organic veins and textures of the submerged leaves while casting rippling light reflections across surrounding chinaware and silverware. Topping each water-filled vase with a smooth white floating candle disc creates a warm, flickering light source that reflects downward through the water chamber. Because the open flame sits enclosed by water and glass walls, this centerpiece format is completely draft-proof, making it exceptionally dependable for breezy outdoor pavilions and venues with strict open-flame safety regulations.
Begin by arranging sets of three graduated glass cylinders measuring six, eight, and ten inches tall at regular three-foot intervals down the central axis of the dining table. Clean both the interior and exterior of each glass vase thoroughly with white vinegar and a lint-free microfiber cloth to eliminate dust, mineral spots, and fingerprints. Anchor a single stem of Italian ruscus or a curved aspidistra leaf into the bottom of each cylinder, securing the base with a heavy lead floral pin frog or clean river pebbles. Pour room-temperature distilled water slowly down the inside wall of the vase using a narrow-spout pitcher, filling the vessel until the water level rests two inches below the top glass rim. Gently place a three-inch circular white wax floating candle onto the water surface, blotting any water droplets off the wick before lighting fifteen minutes before guest arrival.
3. Tiered Weathered Wooden Box with Clustered Potted Herbs
How to Create
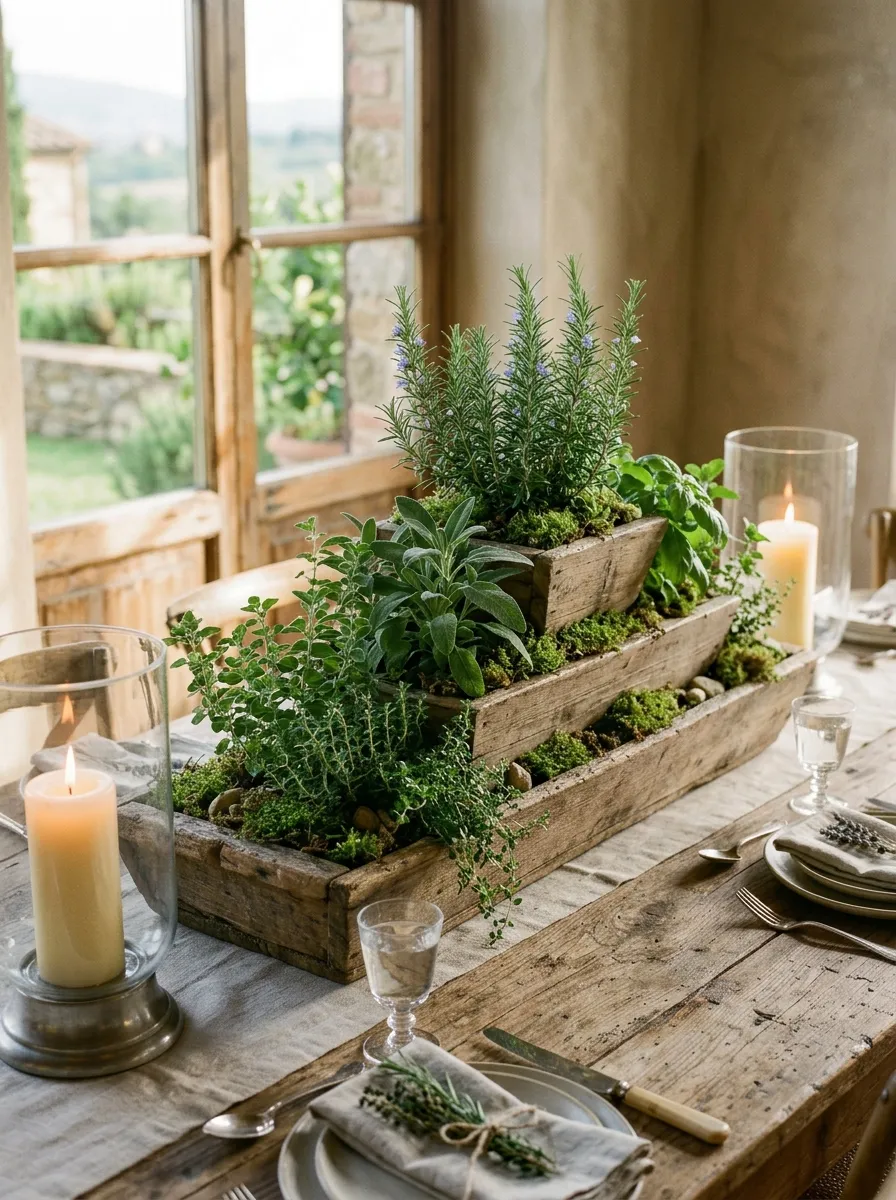
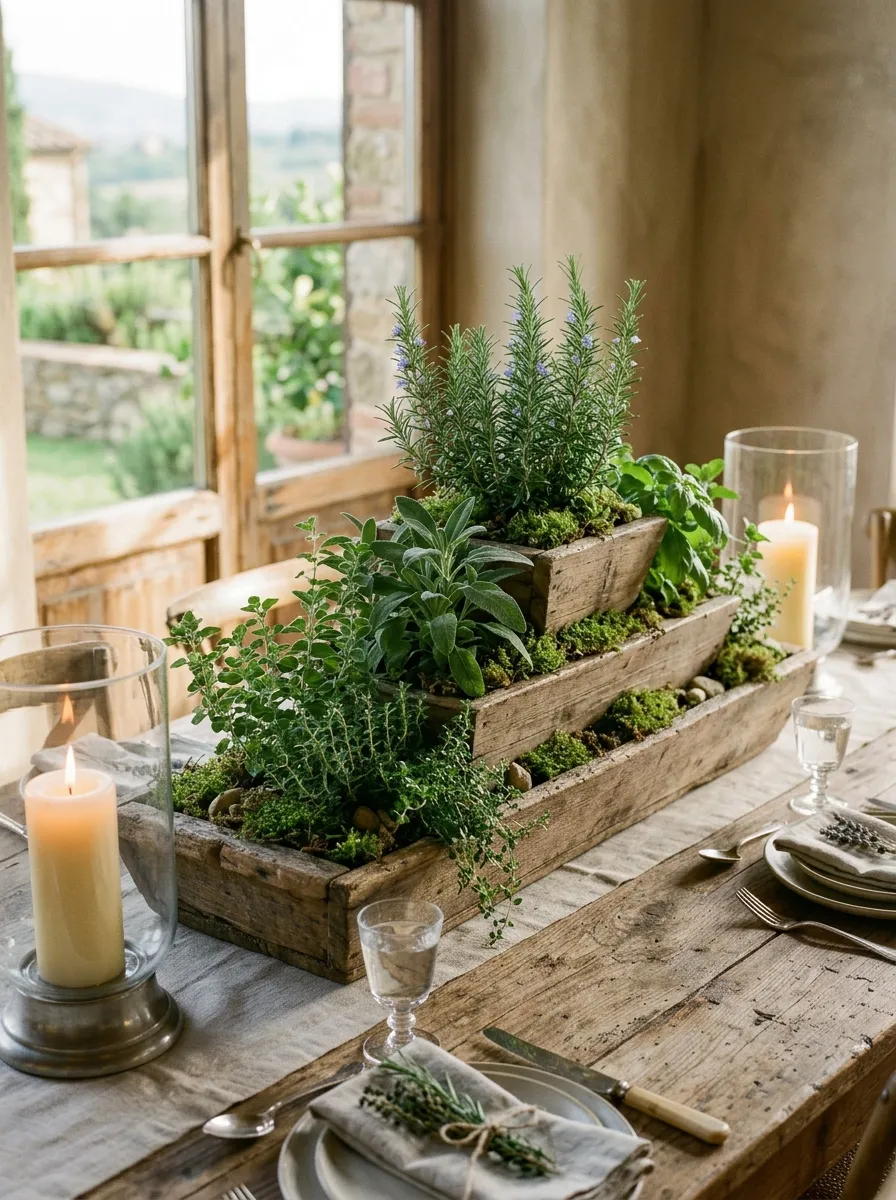
Integrating living potted culinary herbs into elongated, weathered timber trough boxes creates an earthy, sensory tablescape that combines rustic carpentry with culinary hospitality. This concept arranges shallow wooden planter boxes filled with living rosemary bushes, broadleaf sage, sweet basil, and cascading English ivy along long harvest tables. The natural herbal aromas drift across the dining area, enhancing the sensory experience of dinner service while evoking the warmth of Mediterranean family dining. The aged timber containers introduce warm, textural woodwork that balances smooth ceramic plates, polished flatware, and crisp cotton napkins. Because the herbs remain planted in their root balls, the foliage stays completely vibrant throughout multi-day events without wilting under venue lighting. This functional centerpiece doubles as a charming decorative accent and an interactive element, allowing guests to take the potted herbs home as living favors.
To construct this fragrant centerpiece, build or source a low-profile wooden planter box measuring four inches deep, five inches wide, and thirty inches long, lining the interior with heavy plastic sheeting to prevent water leaks onto table linens. Place four-inch nursery pots of living rosemary, culinary sage, and trailing thyme directly into the trough, alternating upright leafy branches with trailing vines that spill softly over the wooden edges. Fill the voids between the plastic pots with moist peat moss, covering the surface with clean, vibrant green sheet moss to completely conceal the nursery containers. Place the filled planter boxes along the table center, leaving eight-inch intervals between boxes for tall glass hurricane lamps holding ivory pillar candles. Mist the herb foliage lightly with clean water using a fine-mist spray bottle on the morning of the event to release the aromatic essential oils.
4. Vintage Brass Candlestick Runner with Wild Fern Sprigs
Step-by-Step Guide
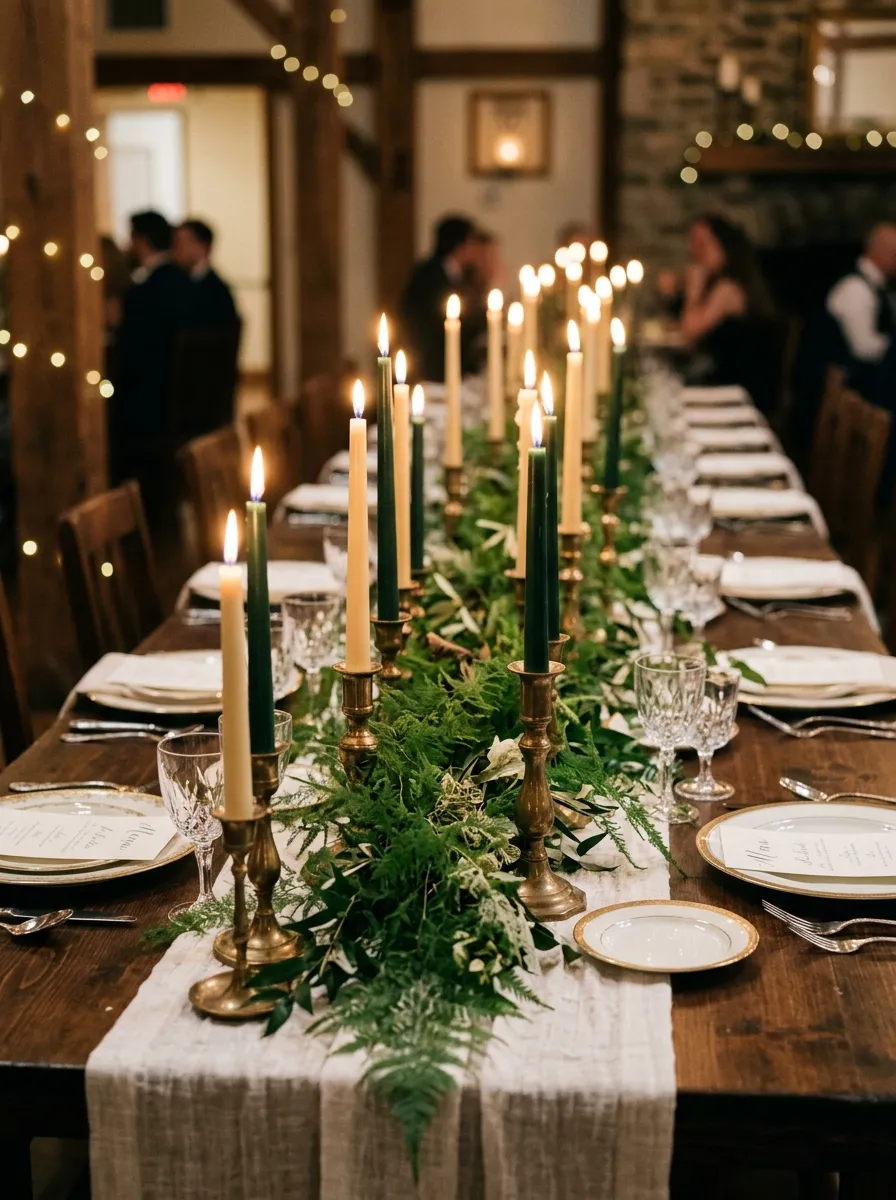
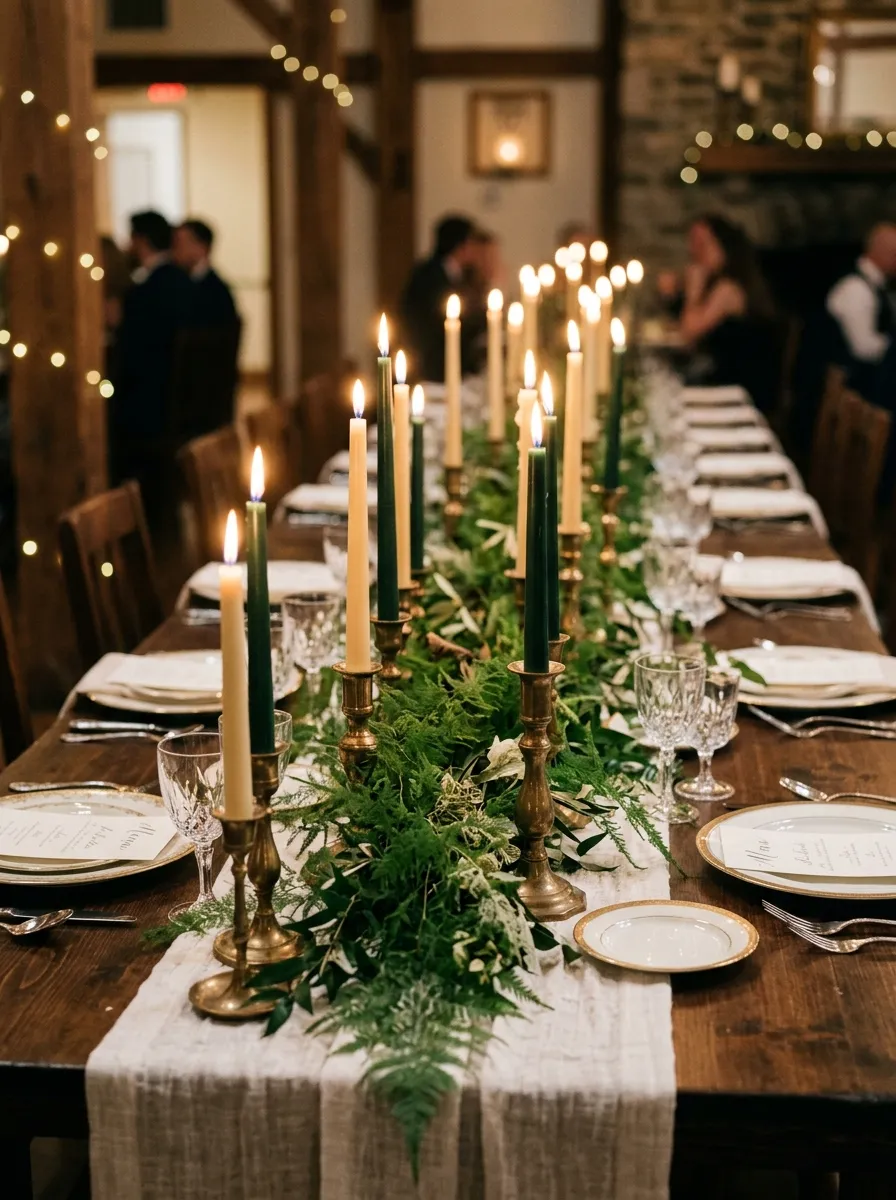
Pairing slender vintage brass candlesticks with loose, airy sprigs of wild forest ferns produces a romantic tablescape that balances warm metallic elegance with delicate woodland textures. This design scatters brass taper holders of varying heights along a table runner, weaving fine stems of leatherleaf fern, plumosa fern, and maidenhair frills directly around the metal bases. The slender vertical profiles of the brass candlesticks draw the eye upward, while the feathery fern frills create a soft, sprawling green cloud across the tabletop. The unpolished, aged patina of vintage brass reflects the flickering taper flames, casting warm golden illumination that softens ambient room lighting. The minimal footprint of the slender brass bases and airy foliage leaves ample space on the table for bread plates, wine carafes, and shared family-style serving platters.
To assemble this vintage tablescape, collect ten to twelve solid brass taper candlesticks of graduated heights between four and twelve inches for each eight-foot table section, cleaning the metal sockets to remove old wax residue. Position the candlesticks in a loose, staggered zigzag down the center of an ivory table runner, ensuring every base rests completely flat. Insert ten-inch dripless beeswax taper candles in ivory or forest green into the sockets, securing each taper with a pea-sized dot of museum wax putty to ensure they stand perfectly plumb. Weave long fronds of fresh leatherleaf fern and delicate plumosa fern around the brass bases, tucking the cut stem ends into hidden water tubes tucked beneath the overlapping leaves. Light the tapers fifteen minutes before guests are seated, ensuring overhead ventilation fans do not cause wax runs.
5. Architectural Geometric Gold Lanterns with Salal and Ruscus Collars
Execution Process
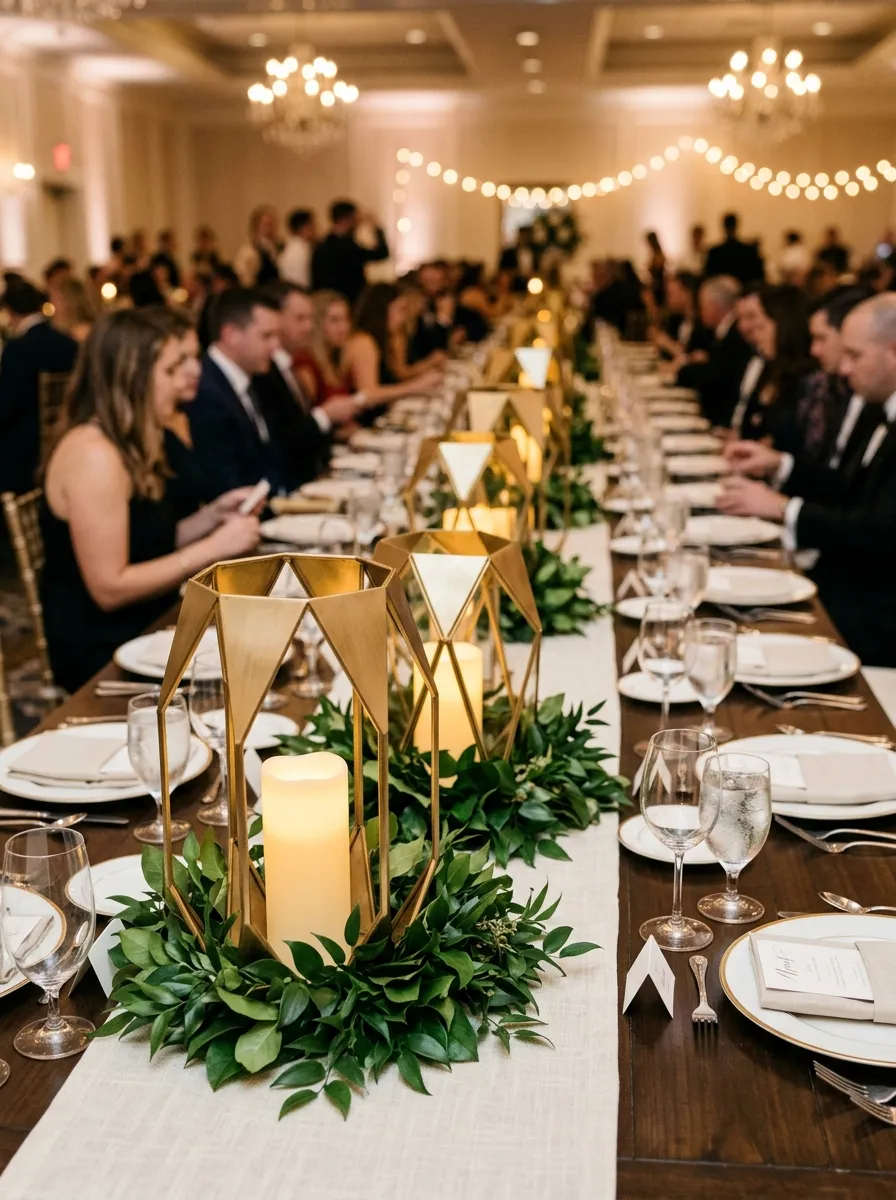
Open-sided geometric metal lanterns framed in brushed gold or matte brass offer an architectural centerpiece that introduces clean modern geometry, vertical structure, and fire-safe candlelight. This design positions faceted hexagonal or rectangular lanterns along the table center, surrounding their metal bases with a dense, tailored collar of broadleaf salal and Italian ruscus. Inside each open metal lantern, a battery-operated flameless wax pillar candle provides steady, flicker-free illumination that complies fully with strict venue fire safety regulations. The warm metallic framework introduces height and visual structure without obstructing sightlines across the dining space, thanks to the open, glass-free sides. The contrast between the rigid, manufactured metal angles and the soft, organic leaves establishes a balanced aesthetic that works across modern industrial lofts, chic hotel ballrooms, and outdoor garden terraces.
Begin by selecting three geometric gold metal lanterns measuring twelve, fourteen, and sixteen inches tall for each eight-foot table segment, wiping the metal surfaces with a dry microfiber cloth to remove dust. Place the tallest lantern in the center of the table, flanking it with the two smaller lanterns spaced two feet toward the outer table edges. Secure a four-inch-diameter ivory battery-operated LED wax pillar candle inside each lantern base, using double-sided foam tape to anchor the candle securely to the metal floor. Form circular greenery wreaths around the exterior base of each lantern by wiring curved stems of Italian ruscus and broad salal leaves together with dark floral bind wire. Set the automatic timers on the LED candles to turn on thirty minutes before guest arrival, ensuring consistent, warm golden illumination that lasts throughout the entire celebration.
6. Monochromatic Moss Mound with Twisting Kiwi Vine Branches
How to Create
Minimalist botanical mounds celebrate the sculptural texture of velvet woodland moss, undulating contours, and the wild, architectural curves of woody forest vines. This design positions a collection of raised, rounded mounds covered in living green pillow moss and sheet moss along a low-profile centerpiece tray, interwoven with twisted kiwi vines or curly willow branches. The varying green shades of the velvety moss mounds create a lush, rolling forest floor effect, while the bare woody vines introduce dynamic horizontal motion that leads the eye down the banquet table. The absence of traditional flowers directs attention to the rich organic textures, earthy fragrances, and tranquil green tones. This grounded, low-profile centerpiece remains well below guest sightlines, fostering an intimate, peaceful dining environment that pairs naturally with unvarnished timber harvest tables, linen napkins, and stoneware plates.
To construct this woodland centerpiece, line a shallow, narrow plastic tray measuring twenty-four inches long with a half-inch layer of moist floral foam or sheet moss. Build rounded topographic mounds of varying heights by packing dampened sphagnum moss into tight domes, covering the mounds with thick sections of living green pillow moss and flat sheet moss. Pin the moss firmly to the foam base using U-shaped green floral moss pins, spraying the surface with water until the moss is hydrated. Intertwine long, twisting stems of dried kiwi vine or curly willow through the moss mounds, allowing the curly tendrils to arch over the moss and trail onto the table runner. Nestle small glass votive cups holding unscented white wax tealights into the low valleys between the moss mounds, keeping flames two inches away from all dried plant fibers.
7. Clustered Ceramic Bud Vases with Single-Stem Foliage
Step-by-Step Guide
Arranging a rhythm of minimalist ceramic bud vases filled with individual sculptural foliage stems produces a modern, airy tablescape that celebrates negative space and diverse leaf anatomy. This concept scatters small ceramic bottles—finished in matte chalk-white, warm terracotta, or speckled stoneware—along the table center, with each vessel holding a single botanical cutting. Foliage selections include broad monstera leaves, fringed palm frills, delicate sprigs of asparagus fern, and glossy umbrella tree cuttings. The slender profile of individual bud vases preserves spaciousness across the dining table, leaving generous room for glassware, bread baskets, and dinner menus. The repetitive cadence of clean ceramic forms creates visual harmony down the table length, while the contrasting leaf silhouettes provide individual sculptural interest at every seat.
To assemble this contemporary tablescape, gather fifteen to twenty assorted ceramic bud vases ranging from four to seven inches in height for an eight-foot table, verifying that the bases are flat and stable. Arrange the vases along the center of a neutral gauze table runner in a loose, organic zigzag pattern, maintaining four to six inches of open space between vessels. Fill each bud vase halfway with clean water treated with commercial cut-flower food to maintain water clarity. Trim individual foliage stems—such as miniature monstera leaves, umbrella palm frills, and upright sprigs of boxwood—at sharp forty-five-degree angles, placing one singular stem into each vase opening. Intersperse clear ribbed glass tealight holders among the ceramic bottles, lighting the candles fifteen minutes before dinner service to cast delicate leaf shadows across the table linen.
8. Suspended Overhead Greenery Trellis with Trailing Smilax
Execution Process
Suspending an architectural greenery installation overhead introduces dramatic vertical scale, botanical luxury, and completely clear tabletop surfaces across banquet dining rooms. This aerial design elevates a wooden ladder or wire grid horizontally above the dining table using high-strength steel aircraft cables anchored securely to structural venue ceiling beams. Woven densely through the suspended frame are long branches of salal, silver dollar eucalyptus, and weeping smilax vines that cascade downward toward the dining area like an enchanted botanical canopy. By shifting the bulk of the greenery into the overhead vertical space, the dining table surface remains uncluttered for dinner plates, wine carafes, and intimate conversation. The elevated foliage catches ambient hall lighting, framing the dining space with an immersive garden ambiance that works across high-ceilinged barns, industrial lofts, and outdoor marquee tents.
Begin by selecting an eight-foot lightweight wooden trellis or wire mesh ladder frame, verifying that the structure contains secure anchor points and is free of structural defects. Attach heavy-duty steel eye bolts into the corners of the wooden frame, threading high-strength, clear-coated stainless steel aircraft cables through the eyelets and connecting them to verified venue overhead rigging points. Using a bubble level, adjust the cable lengths until the trellis hangs parallel to the banquet table below at a height of seven feet from the floor. Cover the top and sides of the frame with a base layer of salal and leatherleaf fern, securing the branches with green zip ties. Weave long, flexible strands of fresh southern smilax and weeping eucalyptus throughout the trellis, allowing the leafy vine tips to cascade eighteen inches downward toward the dining tables below.
9. Bleached Stone Troughs with Preserved Olive Foliage
How to Create
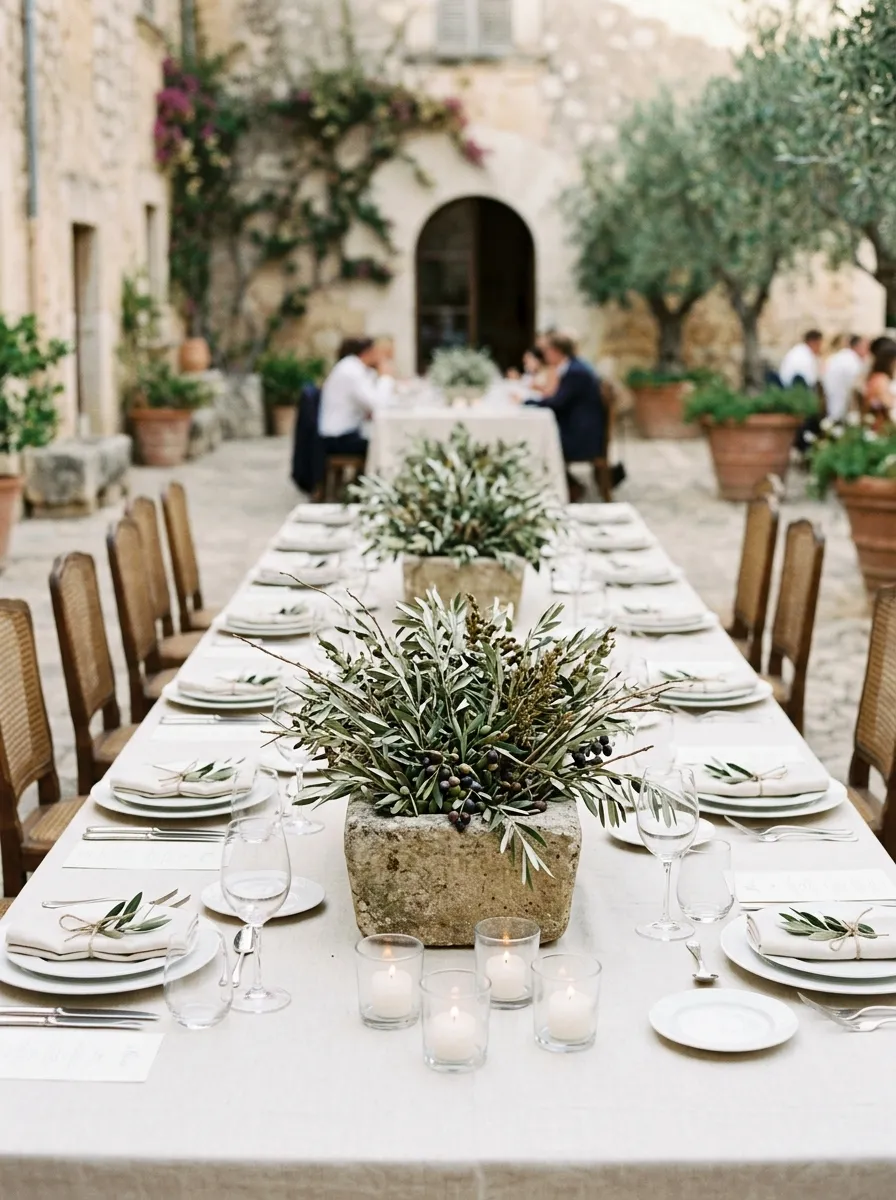
Combining cast stone planters with preserved Mediterranean olive foliage creates an understated, classical tablescape that brings ancient courtyard charm to modern celebrations. This design features low-profile, rectangular stone or concrete troughs with a weathered limestone finish, filled with silvery-green olive branches, whole green olive fruits, and dried myrtle stems. The dusty, sage-green tones of the olive leaves pair naturally with the chalky gray stone containers, establishing a cool, muted botanical palette that complements fine crystal glassware, white bone china, and unbleached cotton linens. Because preserved olive foliage retains its color and flexibility without water reservoirs, this centerpiece eliminates the risk of leaks, water rings, or midday wilting. The substantial physical weight of the stone troughs anchors the arrangement securely against table vibrations in busy reception spaces.
To build this classical centerpiece, source shallow rectangular concrete or cast-stone planter troughs measuring four inches high, five inches wide, and twenty inches long, wiping the surfaces clean of loose grit. Cut a block of dry floral foam to fit snugly inside the container basin, securing the foam block with waterproof green floral tape crossed in an X-pattern. Insert structural stems of preserved olive foliage into the foam, angling the branches outward to produce a relaxed, horizontal fan shape that extends six inches past the trough edges. Tuck smaller sprigs of dried myrtle and clusters of faux or cured green olives into the center core to completely conceal the foam mechanics. Position two stone troughs per eight-foot banquet table, flanking each trough with low glass votive cups containing white wax candles to illuminate the silvery-green leaf surfaces.
10. Low-Profile Circular Birch Slices with Coiled Magnolia Leaves
Step-by-Step Guide
Utilizing cross-cut natural birch tree slices as centerpiece foundations introduces authentic woodland weight, organic bark rims, and rich natural warmth to reception tables. This concept positions thick wooden rounds along the table center, topped with a dense circular wreath of glossy green and bronze magnolia leaves surrounding a trio of clear glass pillar hurricanes. The thick, leathery leaves of the magnolia tree display a rich two-tone coloration—glossy emerald green on top and warm, velvety copper on the reverse—adding rich seasonal depth to the tablescape. The rough, textured birch bark creates an organic pedestal that elevates the glass hurricanes slightly above the table linen, catching warm candlelight. This sturdy, contained centerpiece format is exceptionally stable, preventing accidental tipping on active family-style dining tables while celebrating natural forest textures.
To assemble this rustic centerpiece, source kiln-dried birch wood rounds measuring twelve to fourteen inches in diameter and two inches thick, verifying that the wood rests completely flat without rocking. Place three clear cylindrical glass hurricane sleeves measuring six, eight, and ten inches tall in an asymmetrical triangular cluster in the center of the wooden round. Secure a three-inch-wide ivory pillar candle into the bottom of each glass cylinder using a dot of clear museum wax putty to prevent movement during dinner service. Form a circular foliage wreath around the base of the glass cylinders using fresh magnolia branches, alternating the leaf faces to showcase both the glossy emerald fronts and velvety bronze undersides. Weave sprigs of seeded eucalyptus through the magnolia leaves, tucking cut stems into water tubes hidden beneath the foliage. Light the pillar candles fifteen minutes before guest arrival, verifying that wicks are trimmed to one-quarter inch.
Common Beginner Mistakes and How to Avoid Them
The most critical mistake when assembling greenery centerpieces is neglecting proper stem hydration, which causes delicate foliage like eucalyptus and ferns to dry out and curl before dinner service begins. Foliage gathered directly from gardens or unpacked from shipping boxes without conditioning quickly dehydrates under warm indoor venue lighting. Prevent this by re-cutting all botanical stems at a sharp angle and submerging them in deep buckets of cool water treated with commercial floral preservative for at least twenty-four hours before assembly. Another frequent error is ignoring centerpiece height guidelines; building dense greenery between fourteen and twenty-two inches directly across the table creates an impenetrable visual barrier that blocks cross-table conversation. Ensure your linear foliage either stays below twelve inches in height or rises above twenty-four inches on elevated stands to maintain clear, open sightlines. Decorators also frequently overlook tabletop space management, creating wide centerpieces that crowd dinner plates, glassware, and communal serving platters. Always preserve at least eight inches of clear perimeter space between the foliage border and the edge of place settings to ensure comfortable dining. Finally, never place open-flame taper candles directly against dry foliage without protective glass hurricane chimneys, as moving air currents can push flames toward dry leaves and create a severe fire hazard.
Practical Tips for Better Results
Achieving professional, boutique-quality greenery centerpieces relies on disciplined textural layering, consistent spacing, and careful lighting distribution. When designing arrangements without colorful flower petals, focus on contrasting diverse leaf textures—such as pairing smooth, rounded eucalyptus with feathery ferns, glossy ruscus, and velvety moss. Always incorporate an odd number of focal objects—such as three glass hurricanes, five taper candlesticks, or three herb pots—to create an organic, balanced composition that feels natural rather than rigidly manufactured. When working with continuous greenery runners, insert the cut stem ends into small water tubes or wrap the cut tips in moist paper towels sealed with floral tape; this keeps leaves hydrated without requiring heavy, water-filled vases. If incorporating real wax taper candles, chill them in a refrigerator for twelve hours before the event; cold wax burns significantly slower, stays straighter, and resists dripping down the brass holders. Always use a tape measure during setup to confirm that candle clusters and botanical modules align evenly along the central axis of the table, ensuring crisp symmetry down the room. Finally, test your completed centerpiece prototypes under actual venue lighting conditions weeks before the event; evaluating your arrangement in dim ambient light ensures the candlelight provides adequate illumination without casting harsh shadows across dinnerware.
Styling, Presentation, or Organization Ideas
Integrating greenery centerpieces into an overall reception design requires thoughtful coordination with table linens, ambient room lighting, and place setting textures. Pair rich foliage runners—such as Italian ruscus or magnolia leaves—with tactile natural textiles like washed Belgian linen, raw-edge cheesecloth, or crinkled cotton gauze runners that soften the table surface and catch subtle shadows. Maintain metallic consistency across the tablescape by matching brass candle holders with brushed gold cutlery, gold-rimmed glassware, and warm amber water goblets to create a unified design palette. When decorating long banquet tables, alternate between dense botanical clusters and open breathing spaces to establish an undulating, rhythmic visual flow down the room. Ensure that menus, place cards, and table numbers coordinate with the organic theme, utilizing deckled-edge cotton paper, calligraphy inks, or small wooden stands that mirror the centerpiece materials. Complete the tablescape by tucking a single botanical accent—such as an olive sprig, a rosemary stem, or a single eucalyptus leaf—into the fold of each guest’s dinner napkin, extending the organic greenery aesthetic directly to individual place settings.
Budget or Time Planning
Executing cohesive greenery centerpieces across ten to twenty banquet tables requires structured budgeting and disciplined production scheduling. Sourcing fresh foliage in wholesale grower bunches rather than through retail florists yields substantial savings, allowing decorators to achieve lush volume at a fraction of standard commercial floral costs. Procure reusable glass hurricanes, brass candlesticks, and wooden planter boxes gradually through estate sales, thrift stores, and wholesale event suppliers several months before the wedding. Organize your production schedule using a modular assembly-line workflow: dedicate the weeks prior to the event to cleaning glassware, polishing brass, and assembling non-perishable bases; use the day before the event to trim foliage, fill water tubes, and pack labeled transport containers; and reserve the morning of the event for unrolling runners, placing vessels, and lighting candles. Pack all delicate glass hurricanes, bud vases, and ceramic containers inside foam-lined plastic storage totes, labeling each bin by table assignment to streamline reception setup. Planning your decorative workflow systematically ensures a calm, enjoyable decorating experience, producing stunning, cost-effective tablescapes without the stress of rushed, last-minute floral conditioning.
Creative Expansion and Advanced Inspiration
Once you have mastered foundational greenery centerpiece styling, explore creative variations to expand your botanical aesthetic across the entire celebration space. Translate signature tabletop motifs onto peripheral displays, such as styling the welcome entrance table, guestbook station, and dessert display with matching greenery garlands, brass lanterns, and framed calligraphy signs. Transform ceremony spaces by lining the central aisle with matching hurricane cylinders and eucalyptus runners, connecting the ceremony and reception spaces into a seamless visual narrative. You can also craft personalized, nature-inspired guest favors that harmonize with your centerpiece style, such as gifting miniature potted succulents, artisanal herb-infused olive oil bottles, or wrapped bundles of dried lavender tied with silk ribbon. Experiment with incorporating personal family heirlooms into your reception displays, such as utilizing antique silver goblets, vintage cut-glass carafes, or hand-woven family textiles as unique table runners beneath the foliage. Following the wedding celebration, these durable greenery components can be integrated into your home decor, serving as beautiful mantelpiece accents, entryway displays, and festive holiday tablescapes that preserve cherished memories for years to come.