Table presentation plays a central role in interior styling, making curated focal arrangements a primary subject of discovery across modern design platforms. A well-designed dining or coffee table centerpiece establishes intentional visual balance, anchors communal gathering zones, and introduces architectural sophistication without cluttering usable surface space. This comprehensive guide outlines ten distinct DIY minimalist centerpiece ideas designed to help homemakers, event hosts, and craft enthusiasts build refined focal accents for contemporary living spaces. Readers will discover clear fabrication routines, balanced placement principles, structural material pairings, and negative space management techniques that transform modest household elements into high-impact sculptural displays. Incorporating purposeful styling into table layouts bridges the gap between everyday living and thoughtful curation, ensuring decorative elements never interfere with seated sightlines or meal service. Mastering fundamental construction steps prevents common errors, such as unbalanced visual mass, excessive ornamentation, or unstable component arrangements that fail under daily use. Each featured design provides accessible instructions, manageable assembly stages, and straightforward components suitable for beginner and experienced makers alike. Following these disciplined craft methods ensures functional, durable, and visually pleasing results that enhance room layouts year-round.
Why This Idea Is Trending or Useful
Restrained table accents continue to gain momentum across home decor communities because they prioritize deliberate proportion, physical functionality, and uncluttered spatial flow. Traditional floral centerpieces often crowd dining surfaces, obstruct conversation across table planes, and demand frequent maintenance or high floral replacement costs. In contrast, modern design favors clean silhouettes, organic textures, and muted tonal palettes that introduce subtle interest without sensory overload. The practical value of stripped-back styling lies in its adaptability; a single thoughtfully constructed vessel, carved timber block, or stone riser transitions effortlessly between daily family meals, focused remote work, and festive seasonal gatherings. The DIY appeal of simple construction allows decorators to replicate high-end gallery pieces using basic raw materials such as plaster, structural wire, unglazed stoneware, and dried botanicals. For beginners, minimal arrangements provide a forgiving creative outlet with minimal financial risk, requiring only a few carefully selected components rather than dense collections of matching decor. This restrained aesthetic creates serene living environments, harmonizing naturally with Scandinavian, Japandi, and contemporary architectural spaces.
Materials and Preparation
Producing cohesive, durable table accents requires disciplined workspace organization and careful material preparation. Essential supplies for these assemblies include mineral powder plaster, untreated wooden blocks, natural terracotta vessels, heavy-gauge wire, floral frog pin holders, silicone casting molds, fine-grit sandpaper, matte acrylic sealers, and dried botanical cuttings. Preparation begins by thoroughly cleaning your assembly area, covering workbenches with protective silicone mats or heavy kraft paper to catch plaster dust, paint drips, or botanical debris. Examine all base components for level structural footing; sand the undersides of ceramic vessels, stone offcuts, or timber boards flat to protect delicate furniture surfaces from scratches. Careful planning also requires measuring your target tabletop dimensions beforehand to calculate the maximum decorative envelope, ensuring finished centerpieces do not exceed one-third of the table’s total width or rise above seated eye level. Gather all required measuring rules, utility knives, and mixing bowls within arm’s reach so casting mixtures, structural adhesives, or floral stems can be placed quickly before bonding agents begin setting.
Idea 1: Architectural Plaster Arch Taper Stand
How to Create
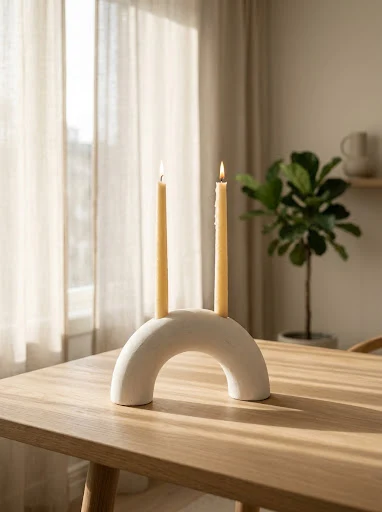
A structural plaster arch candleholder brings timeless geometry and subtle texture to dining tables, sideboards, or console tops. This concept utilizes an inverted curved arch cast from dense mineral plaster, featuring two symmetrical recesses designed to hold slender beeswax or soy taper candles. The design draws its impact from understated monolithic volume, replacing ornate metal candelabras with a single seamless block of chalky white stone. Its rounded bridge profile creates visual lightness by framing the negative space beneath the curve, allowing ambient light to travel uninterrupted across the tabletop. The velvety matte finish of cast plaster softens harsh overhead illumination, casting delicate, graded shadows along its smooth radius during evening hours. Because the piece has a low center of gravity, it provides exceptional physical stability, preventing tall taper candles from tilting or wobbling during active meal service. This piece serves as a reliable architectural anchor, pairing effortlessly with natural linen table runners, raw oak surfaces, and modern matte dishware.
Begin by fabricating a flexible casting mold using a curved silicone arch mold or clean high-density foam insulation carved into a six-inch-wide by five-inch-tall arch form. Mix two parts casting plaster powder with one part cool water in a flexible silicone mixing cup, stirring slowly for three minutes to release trapped air bubbles. Pour the liquid plaster into the prepared mold until it reaches a depth of two inches, tapping the mold against your workbench to bring residual micro-bubbles to the surface. Coat the metal bases of two standard seven-eighths-inch candleholder cups with a light release spray, pressing them one inch deep into the plaster near each curved base shoulder before it stiffens. Allow the plaster to cure undisturbed for ninety minutes until the chemical heat dissipates, then gently demold the solid arch. Let the casting dry for forty-eight hours, smooth the flat bottom with four-hundred-grit sandpaper, and seal the entire surface with two thin coats of matte water-based stone sealer.
Idea 2: Raw Travertine and Single Botanical Stem Frog
Setup Method
Pairing natural raw-edge stone with a traditional brass kenzan pin frog establishes a sculptural botanical display inspired by traditional Japanese flower arrangement principles. This design relies on a single fractured piece of porous travertine or honed limestone paired with one striking, sculptural plant stem, such as an arching magnolia branch, dried allium pod, or bare winter twig. The visual balance stems from the tension between the dense, rugged stone slab and the delicate, organic line of the botanical stem. By stripping away dense foliage, filler flowers, and oversized glass vases, this arrangement invites viewers to observe the natural curves, nodes, and textures of a single plant clipping. The low, horizontal stone base keeps dining sightlines completely open, ensuring unobstructed sightlines across the table. This understated arrangement functions as living sculpture, bringing a serene, contemplative atmosphere to minimalist dining rooms and coffee table trays.
Source an untreated offcut of unfilled beige or silver travertine tile measuring roughly eight inches by five inches, selecting a piece with naturally broken, textured outer perimeter edges. Thoroughly wash the stone with warm water and a stiff nylon brush to remove loose mineral dust, letting it dry completely in open air. Affix a small, heavy one-inch brass kenzan pin frog to the upper stone surface, securing the metal base with a pea-sized ball of water-resistant floral adhesive clay or museum mounting wax. Apply four small, self-adhesive silicone bumper pads to the underside corners of the stone slab to prevent it from scratching your wooden tabletop. Select a fresh or dried architectural branch, cutting the stem base cleanly at a forty-five-degree angle with sharp bypass pruners. Press the stem firmly into the brass pins at a slight diagonal angle, adjusting its orientation until the branch balances securely without wobbling.
Idea 3: Turned Hardwood Low Disc Pedestal
Step-by-Step Guide
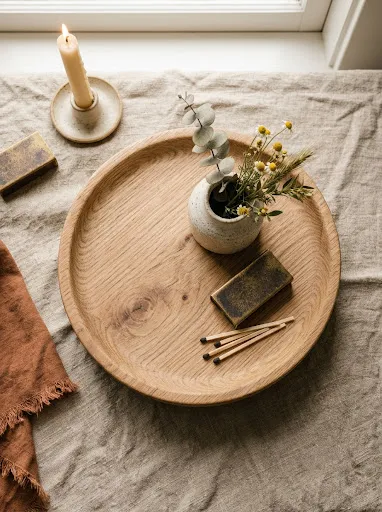
A low-profile circular wooden disc pedestal introduces organic warmth, subtle height, and disciplined organization to modern tabletop surfaces. This design uses a solid, flat-topped disc of kiln-dried white oak, walnut, or ash mounted onto three low, hidden wooden feet, lifting decorative items just one inch off the table. The styling focus centers on visual framing; rather than scattering multiple individual items across the table, the wooden platform unifies a curated trio of functional objects, such as a match striker, a ceramic vessel, and a small branch. The circular shape breaks up the repetitive rectangular lines of long dining tables, establishing a defined focal center without consuming usable dining space. Highlighting natural wood grain patterns through matte conditioning oils delivers tactile warmth that balances industrial materials like polished concrete, metal cutlery, and smooth glassware. This functional platform keeps decorative elements organized, making it easy to lift and clear the table in a single motion when dining space is needed.
Acquire a ten-inch round hardwood disc measuring one inch in thickness, ensuring the faces are cut level and sanded completely flat. Smooth the top face and curved outer perimeter using two-hundred-twenty-grit sandpaper, working along the direction of the natural wood grain until the timber feels silky to the touch. On the underside, mark three equidistant points located one inch inward from the outer edge to form an equilateral triangular base. Fasten three one-inch-tall wooden hemisphere furniture buttons or turned wooden pegs onto these markings using wood glue and recessed screws, clamping the feet firmly until the adhesive sets. Wipe the entire wooden pedestal clean with a dry microfiber cloth to remove residual sanding dust. Apply a generous coat of food-safe mineral oil or natural beeswax paste with a cotton rag, allowing the oil to soak into the wood fibers for thirty minutes before buffing away excess oil to achieve a soft satin sheen.
Idea 4: Floating Monolithic Trough with Wax Pillars
Execution Process
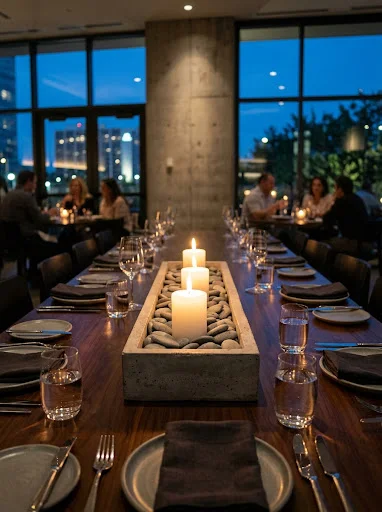
An elongated, shallow rectangular concrete trough filled with low, wide pillar candles provides a dramatic, linear light source tailored for long banquet tables. This design uses a thin-walled, fiber-reinforced cement container holding three evenly spaced, unscented white pillar candles surrounded by smooth tumbled river stones. The visual appeal comes from strong horizontal lines; the low rectangular geometry mirrors the long edges of the table, creating continuous visual flow down the center of the space. During evening dinners, the aligned candle flames produce an unbroken ribbon of ambient warmth that reflects off glassware and silverware without creating visual glare. Because the container walls rise only two inches from the tabletop, it keeps views open while catching any stray wax drips within its sealed masonry cavity. This centerpiece delivers a tailored, architectural presence that grounds expansive dining rooms and modern outdoor patio tables.
Build a two-part rectangular casting mold using melamine-faced particle board, constructing an outer box measuring twenty inches long by four inches wide by two inches deep, alongside an inner core that leaves three-eighths-inch wall thicknesses. Mix rapid-setting hydraulic cement with water according to package ratios, incorporating alkali-resistant glass fibers to increase tensile strength across the long, slender frame. Pour the wet cement slurry into the outer mold, insert the weighted inner core centrally, and tap the outer form with a rubber mallet to consolidate the material and eliminate air voids. Demold the concrete trough after four hours of curing, then submerge it in a water bath for twenty-four hours to ensure complete, crack-free hydration of the cement matrix. Once dry, coat the interior and exterior surfaces with a penetrating siloxane matte masonry sealer. Arrange three three-inch-wide pillar candles along the base of the trough, backfilling the surrounding channel with flat grey beach pebbles to hold the candles upright.
Idea 5: Sculptural Matte Earthenware Donut Vase
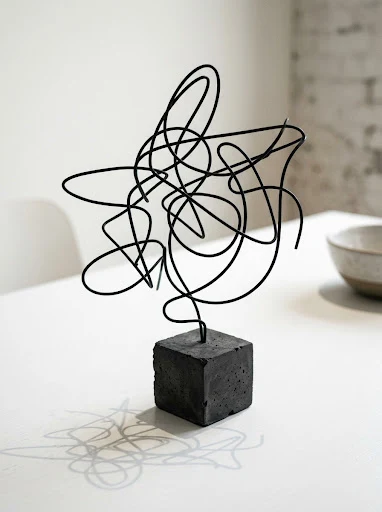
How to Make
A hollow circular earthenware donut vase introduces bold geometric volume, gentle curved shadows, and graphic modern styling to tabletop displays. This design features a toroidal clay shape with a central negative opening, topped with a narrow, off-center neck that accommodates one or two dried floral stems. The design appeal lies in its graphic silhouette; the central hole lets light and background views pass straight through, keeping the vessel feeling visually light despite its wide profile. Finished in an unglazed, coarse sand or off-white ceramic slip, the vase acts as an abstract art object that looks striking whether holding botanicals or standing completely empty. Its wide circular footprint provides excellent stability against accidental table bumps. This design is particularly well-suited for round dining tables, square coffee tables, or open kitchen islands, offering an artistic focal point that looks balanced from every viewing angle around the room.
Roll out conditioned earthenware or high-fire white stoneware clay into an even five-millimeter-thick slab using an acrylic rolling pin with matched thickness guide rings. Form two identical hollow hemispherical rings by pressing the clay slab into matched toroidal plaster slump molds, trimming the rim flush with a needle tool. Score the mating edges of both leather-hard clay rings with a wire scoring comb, apply a thin coat of liquid clay slip, and join the halves together to form a sealed hollow donut form. Pierce a half-inch hole through the top outer perimeter, smoothing a small hand-rolled clay cylinder over the opening to establish a vertical bottle neck. Allow the assembled vessel to dry slowly under plastic sheeting for four days to prevent shrinkage cracks before bisque firing in a kiln to cone zero-four. Apply a fine silica sand slurry wash over the bisque surface and fire to final maturity, producing a rough, light-absorbing ceramic finish that requires no further gloss glazing.
Idea 6: Minimalist Iron Wire Line Silhouette
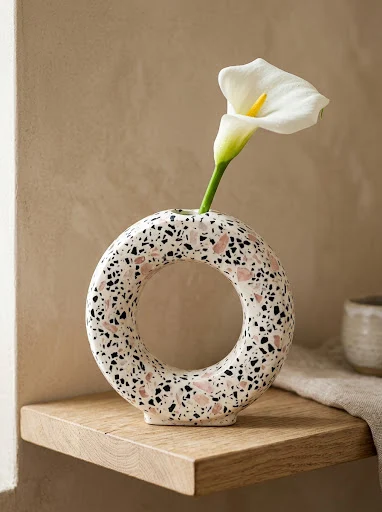
Setup Method
A freestanding geometric wire structure paired with a weighted metal base brings airy, three-dimensional line art directly to your table setting. This project uses rigid three-millimeter black steel or brass wire bent into abstract intersecting contours, held upright by an inset cube of blackened steel or cast concrete. The aesthetic appeal centers on absolute transparency; the thin metal outlines define sculptural space without creating an opaque physical barrier between diners. Drawing inspiration from modern contour drawings and mid-century kinetic art, this design casts shifting, graphic shadows across light-colored tablecloths as interior lighting angles shift. The lightweight, open structure makes it easy to move, pack, or adjust around seasonal dishes and serving platters during large gatherings. This concept is an ideal gift or personal project for fans of industrial design, urban lofts, and brutalist decor, offering an artistic statement that occupies minimal visual and physical space.
Source a thirty-six-inch piece of three-millimeter-thick malleable round mild steel or brass armature rod, straightening any bends by rolling the rod firmly beneath a flat wooden board. Sketch a simple continuous line design—such as an abstract leaf silhouette, an elongated loop, or an asymmetrical arch—onto a sheet of paper at actual scale to serve as your bending template. Using heavy needle-nose pliers and a round wooden dowel as bending mandrels, shape the metal rod along your drawn template lines, working slowly to keep bends crisp and within a single flat plane. Cut the ends of the wire cleanly using a hardened wire cutter, leaving two straight downward-pointing mounting tails spaced one inch apart. Cast a three-inch square concrete cube base with two vertical one-inch-deep pilot holes set into its top face, or drill matching holes into a solid blackened steel block. Insert the wire tails into the base holes with a drop of two-part epoxy adhesive, letting the bond cure fully before placing the finished sculpture on your table.
Idea 7: Tiered Raw Timber Column Ensemble
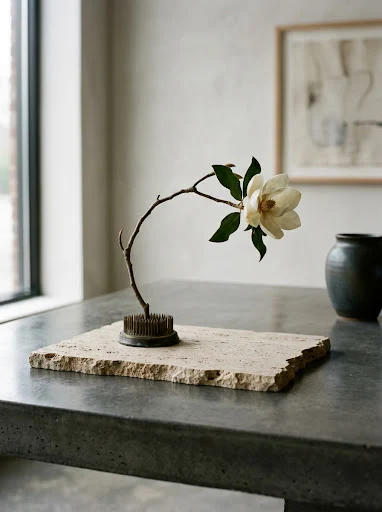
Step-by-Step Guide
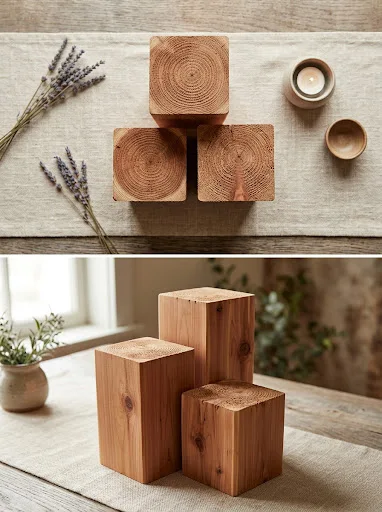
A trio of solid, square-cut timber columns cut to staggered heights introduces natural wood grain, architectural geometry, and warm organic textures to communal tables. This design uses three square wood posts cut at graduated heights—such as four, six, and eight inches—arranged in a tight cluster or spaced along a table runner. The visual interest comes from contrasting smooth, fine-sanded column faces against the raw, split end-grain tops, which highlight the tree’s natural growth rings. The varying heights create a dynamic, stepped skyline that guides the eye naturally across the center of the table without blocking cross-table conversation. Because solid wood posts have substantial weight, these sturdy pillars resist tipping and can serve as individual risers for small ceramic tea light cups or tiny brass trinket bowls. This design is an excellent match for rustic modern dining rooms, mountain modern interiors, and casual family spaces that celebrate honest, unadorned materials.
Procure a straight, untreated four-by-four-inch cedar, Douglas fir, or white pine post, checking that the timber is dry and free of deep structural cracks. Measure and mark three lengths along the timber at four, six, and eight inches, using a carpenter’s square to carry straight cutting guidelines across all four faces. Cut the pieces using a fine-tooth miter saw to guarantee clean, flat bottom surfaces that sit perfectly level on table planes. Sand the four vertical faces of each column through eighty, one-hundred-twenty, and two-hundred-twenty-grit sandpapers, keeping the corner edges crisp while smoothing out tool marks. Leave the top saw-cut surfaces slightly textured to showcase the natural wood grain, brushing away loose sawdust with a dry bench brush. Finish the wood surfaces with an invisible matte penetrating wood wax, which shields the timber from dining spills and fingerprints without darkening the pale natural tone of the wood.
Idea 8: Suspended Botanical Glass Cylinder Trio
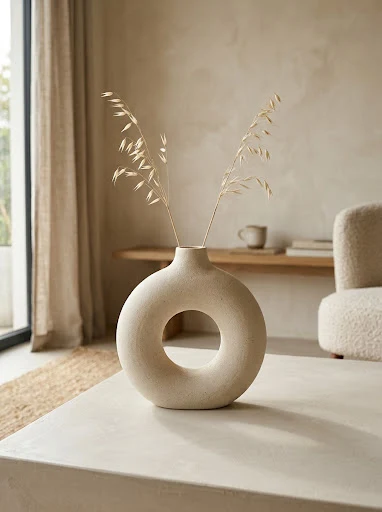
Execution Process
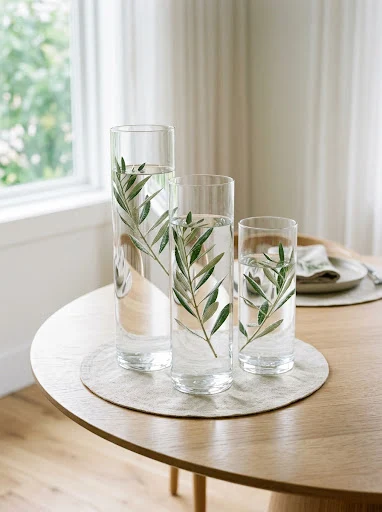
Suspending delicate single botanical stems within tall, straight-sided clear glass cylinders creates an airy, protected biological display that feels clean and modern. This design uses three narrow borosilicate glass laboratory cylinders or glass vases filled with pristine water, each holding a single submerged or floating botanical cutting like an olive sprig, eucalyptus stem, or calla lily bloom. The appeal lies in refraction and clarity; the clear water magnifies fine botanical details while the glass cylinders introduce subtle vertical reflections along the table. Grouping the cylinders together or running them down the center of the table creates an uncluttered, modern display where stems remain hydrated and fresh throughout long events without drooping. The transparent glass containers preserve an open, spacious feeling across the table, making this design a smart choice for compact apartment dining sets and intimate cafe tables where visual lightness is essential.
Select three clear, rimless borosilicate glass cylinders of matching three-inch diameters with staggered heights of eight, ten, and twelve inches. Clean the glass inside and out using a mixture of equal parts white vinegar and distilled water, drying with lint-free microfiber cloths to eliminate water spots and streaks. Fill each cylinder with distilled water to approximately three-quarters of its capacity, adding a tiny drop of clear liquid floral nutrient to keep the water clear and free of cloudy bacteria. Trim the stems of three fresh olive sprigs or eucalyptus stems using a sharp floral knife, stripping away all lower foliage that would rest submerged in the lower third of the cylinder. Carefully slide one stem into each glass vase, allowing the natural stem curvature to rest gently against the inner glass walls so the leaves fan out in suspended water. Arrange the three cylinders in a tight asymmetrical cluster in the center of the table, turning each vase so the stems branch naturally outward.
Idea 9: Asymmetrical Terracotta Disc and Dried Frond
How to Create
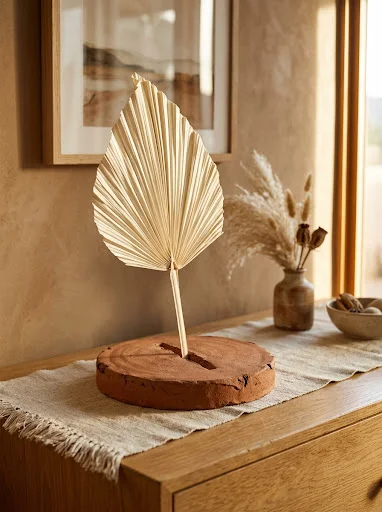
An asymmetrical, low-profile terracotta disc paired with a single preserved fan palm frond produces a striking sculptural centerpiece with an earthy, bohemian edge. This design uses a wide, shallow handmade clay saucer with an off-center mounting slot that holds an oversized dried sun palm, bleached spear, or preserved fan leaf upright. The visual drama comes from balanced scale; a wide, low, heavy clay disc anchors the composition, providing the counterweight needed to support an expansive dried botanical fan. Because dried botanicals need no water or maintenance, this arrangement serves as a permanent, fuss-free centerpiece that stays pristine across all seasons without wilting or shedding petals. The warm terracotta base grounds the pale, papery tones of the dried leaf, creating an earthy two-tone palette that pairs beautifully with woven jute runners, matte ceramic tableware, and warm neutral linens.
Roll a lump of terracotta clay into a thick circular slab measuring nine inches in diameter and one inch in thickness on a clean plaster bat. Smooth the upper face with a damp rubber rib tool, leaving the outer edge slightly irregular and hand-shaped to celebrate its artisanal character. Using a craft knife, carve a narrow, deep slot measuring one-quarter inch wide by two inches long into the leather-hard clay, positioning the slot two inches inward from the outer edge at a seventy-degree angle. Pierce two small hidden drainage pinholes through the slot to relieve air pressure during firing, and allow the heavy clay disc to dry slowly beneath plastic film for one week. Fire the disc in a ceramic kiln to cone zero-six, leaving the baked earthenware unglazed to preserve its earthy terracotta color. Trim the stiff stem of a preserved bleached sun palm frond with floral shears, sliding the stem base firmly into the clay slot so the leaf fans outward over the center of the table.
Idea 10: Cast Terrazzo Mineral Block Ring Vessel
How to Make
A cast mineral composite ring vessel with subtle stone speckles combines bold circular geometry with the timeless, speckled pattern of polished architectural terrazzo. This design features a flat, upright circular ring cast from mineral resin composite, embedded with small chips of natural marble, granite, or basalt and hollowed out at the top to hold a petite glass flower vial. The visual appeal comes from its clean, modern silhouette and detailed aggregate patterns, serving as both an abstract art object and a functional vase. The circular ring frames the view behind it, keeping the piece feeling light and airy rather than heavy and solid. The polished stone terrazzo finish catches shifting natural light, offering a rich, tactile surface that elevates casual dining tables into design-focused spaces. This sturdy piece works well as an artistic anchor for coffee tables, entryway consoles, and dining tables, delivering enduring elegance with minimal visual clutter.
Prepare an eight-inch circular silicone donut mold, wiping the interior clean with a dry microfiber cloth to remove dust. Mix two parts mineral acrylic composite powder with one part liquid polymer base, blending until smooth before folding in fine crushed black granite and pink marble terrazzo chips. Pour the aggregate slurry into the mold, tapping the flexible frame firmly against your table for two minutes to release air bubbles and settle the stones against the bottom face. Allow the composite to cure for forty minutes until the chemical heat dissipates, then carefully demold the solid cast ring. Submerge the cured ring in water and sand the outer face with two-hundred-twenty, four-hundred, and eight-hundred-grit wet-and-dry sandpaper, grinding through the surface matrix to reveal the embedded stone chips underneath. Wipe away slurry residue, let the ring dry completely, and apply a coat of natural mineral sealing wax to bring out the aggregate colors and seal the surface against water stains.
Common Beginner Mistakes and How to Avoid Them
Creating restrained, minimal centerpieces requires a disciplined eye, as stripped-back designs readily expose construction flaws, poor materials, and compositional imbalance. The most frequent beginner mistake is over-accessorizing, adding too many competing decorative items around a simple focal vessel until the clean lines disappear under clutter. Avoid this by choosing a single design concept per table and leaving at least two-thirds of the tabletop surface completely clear. Another common problem is ignoring table proportions; placing a small, delicate bud vase in the center of an expansive ten-person dining table makes the arrangement look lost and visually disconnected. Conversely, building a centerpiece that rises above eye level obstructs conversation and frustrates seated guests during meals. Measure your table before building to ensure your finished design remains within a comfortable fourteen-inch height profile. Finally, failing to protect tabletops from rough stone or leaking water can lead to costly scratches and moisture rings. Always line the undersides of heavy decor pieces with soft felt dots or clear silicone bumpers, and double-check that all vessels holding fresh floral stems are completely watertight before placing them on fine furniture.
Practical Tips for Better Results
Elevating your handmade table centerpieces from basic craft projects to gallery-quality focal points requires close attention to surface finishes, tonal harmony, and negative space. Always invest time in thorough surface prep; sand cut wood edges silky-smooth, buff cast plaster until velvety, and polish cast mineral resins until aggregate stones shine clearly. Selecting a unified, monochromatic color palette—such as pairing cream plaster with unbleached linens and dried oat stems—creates a serene, upscale look that feels deliberate and cohesive. When working with natural botanical branches or single floral stems, pay attention to the natural gesture and curvature of the cutting. Position the branch so its dominant curve arcs gracefully toward the open space of the room rather than turning inward, creating a dynamic, welcoming line of sight. For evening dining, balance your centerpiece with functional illumination by incorporating slim taper candles, low tea lights, or small directional battery spotlights that cast gentle, sculptural shadows through open geometric structures without creating harsh glare across the dining plane.
Styling, Presentation, or Organization Ideas
Styling simple centerpieces effectively depends on thoughtful alignment, deliberate placement, and harmony with surrounding architectural finishes. On long rectangular dining tables, keep your focal piece centered squarely between opposite chairs, or balance an off-center sculptural vessel with a clean, low linen table runner that leads the eye down the length of the furniture. For round dining tables or square coffee tables, anchor your centerpiece dead-center, using circular trays or low pedestals to establish a stable structural core that looks balanced from every angle. Coordinate your centerpiece materials with the room’s permanent architectural hardware: pair raw terracotta with exposed brick and warm leather, or echo matte black window frames and chrome plumbing with blackened steel wire, dark slate slabs, or cast grey concrete troughs. When seasonal celebrations or holiday dinners call for a festive update, avoid packing the table with novelty decor. Instead, make subtle, organic adjustments—like swapping an olive branch for a bare winter berry twig or trading white tapers for deep charcoal beeswax candles—to celebrate the season while preserving an open, serene aesthetic.
Budget or Time Planning
Crafting refined, contemporary centerpieces at home is an economical and time-efficient way to achieve a luxury designer look on a modest budget. High-end lifestyle retailers often price monolithic cast stone and ceramic vessels at premium rates, yet the raw materials needed to cast plaster, mold concrete, or sand reclaimed wood columns cost only a fraction of those retail figures. Plan your project as an organized weekend workflow: dedicate Saturday morning to gathering supplies, building molds, and mixing casting slurries, letting plaster, cement, or composite resins cure undisturbed overnight. Use Sunday afternoon for demolding, wet-sanding stone surfaces, applying protective sealers, and testing botanical placements. To maximize your budget, source wood offcuts and broken stone pieces from local stone fabrication yards, lumber mills, or tile suppliers, where remnant bins often offer marble, travertine, and hardwood scraps for free or low costs. Collect dried botanicals by foraging architectural branches, wild grasses, and seed pods from your local neighborhood or home garden, eliminating ongoing floral expenses while sourcing distinctive organic shapes for your arrangements.
Creative Expansion and Advanced Inspiration
Once you feel comfortable building basic geometric centerpieces, experiment with advanced crafting techniques to broaden your creative design options. Try exploring mixed-media assemblies, such as setting a cast concrete candle base directly into a chiseled cavity in a fallen tree branch, or joining polished brass wire frames with raw, unfilled travertine stone tiles for an elevated material contrast. You can also explore Japanese charring techniques, using a handheld butane torch to char the exterior faces of pine or cedar columns before brushing the charred wood with a wire brush and natural tung oil to produce deep, light-absorbing ebony finishes. Beyond dining tables, these versatile sculptural pieces adapt effortlessly to other living areas, functioning as elegant mantle installations, minimalist bathroom tray accents, or focal art pieces for credenzas and open shelving units. Carrying these disciplined, minimalist principles into your broader home styling creates a cohesive, serene living environment that celebrates natural materials, clean architectural lines, and the calm beauty of open space.