Moss wedding centerpieces have established themselves as an essential design foundation for modern receptions, offering an organic aesthetic that brings natural woodland beauty directly to event tables. This detailed guide covers ten complete centerpiece concepts, providing practical instructions, structural techniques, and styling approaches suitable for weddings across every season. Readers will discover how to prepare botanical bases, layer contrasting textures, secure structural elements, and integrate ambient lighting safely around living or preserved moss. Incorporating moss into reception tables capes provides notable functional benefits, as it creates dense, low-profile ground cover that conceals mechanical supplies, holds moisture for fresh blooms, and leaves sightlines unobstructed for seated guests. Whether styling an industrial loft celebration, an intimate forest gathering, or a refined banquet hall, moss delivers an earthy, textural dimension that cut flowers alone cannot achieve. Following these clear methods allows couples, event designers, and planners to build professional, enduring decor that remains fresh throughout an entire day of celebration.
Why This Idea Is Trending or Useful
The surge in popularity of moss-centered tables on curated digital platforms stems from a broader cultural shift toward organic, biophilic event styling. Today’s couples frequently look for decor elements that feel grounded and tactile rather than rigid or artificial. Preserved and living mosses introduce vibrant emerald, forest, and chartreuse tones that serve as a versatile neutral backdrop against wood, linen, stone, and metallics. From a practical perspective, moss provides high visual volume with relatively low weight, making it simple to transport and assemble on site. It is remarkably beginner friendly, requiring no advanced floral design training to achieve an abundant, forest-floor look. Because preserved varieties require zero water and will not wilt under dry indoor air or warm sun, they can be fabricated weeks ahead of the wedding date, eliminating morning-of stress. Furthermore, moss is reusable; pieces used during the ceremony can easily transition into post-wedding home decor or future installations, making it an eco-conscious and budget-friendly design staple.
Materials and Preparation
Achieving a clean, long-lasting moss centerpiece requires intentional material selection and methodical workspace preparation before starting assembly. Essential supplies include varied moss types—such as sheet moss, cushion moss, reindeer lichen, and Spanish moss—which together establish natural tonal and textural variety. High-quality preserved moss is generally preferred over freshly harvested wild moss to prevent dampness, soil residue, and unwanted insects from reaching dining linens. For construction, assemble heavy-duty florist wire, green U-pins, floral foam blocks, clear plastic liners, hot glue or cold botanical adhesive, pruning shears, and protective gloves to shield hands from dye absorption. Thorough planning involves measuring table lengths, banquet widths, and candle clearances to ensure the final pieces adhere to venue fire codes. Prepare all wooden bases, metal troughs, or ceramic vessels by lining them with waterproof plastic sheeting, ensuring moisture never contacts event tablecloths or bare wood surfaces during dinner service.
1. Preserved Pillow Moss and Driftwood Sculpture
Setup Method
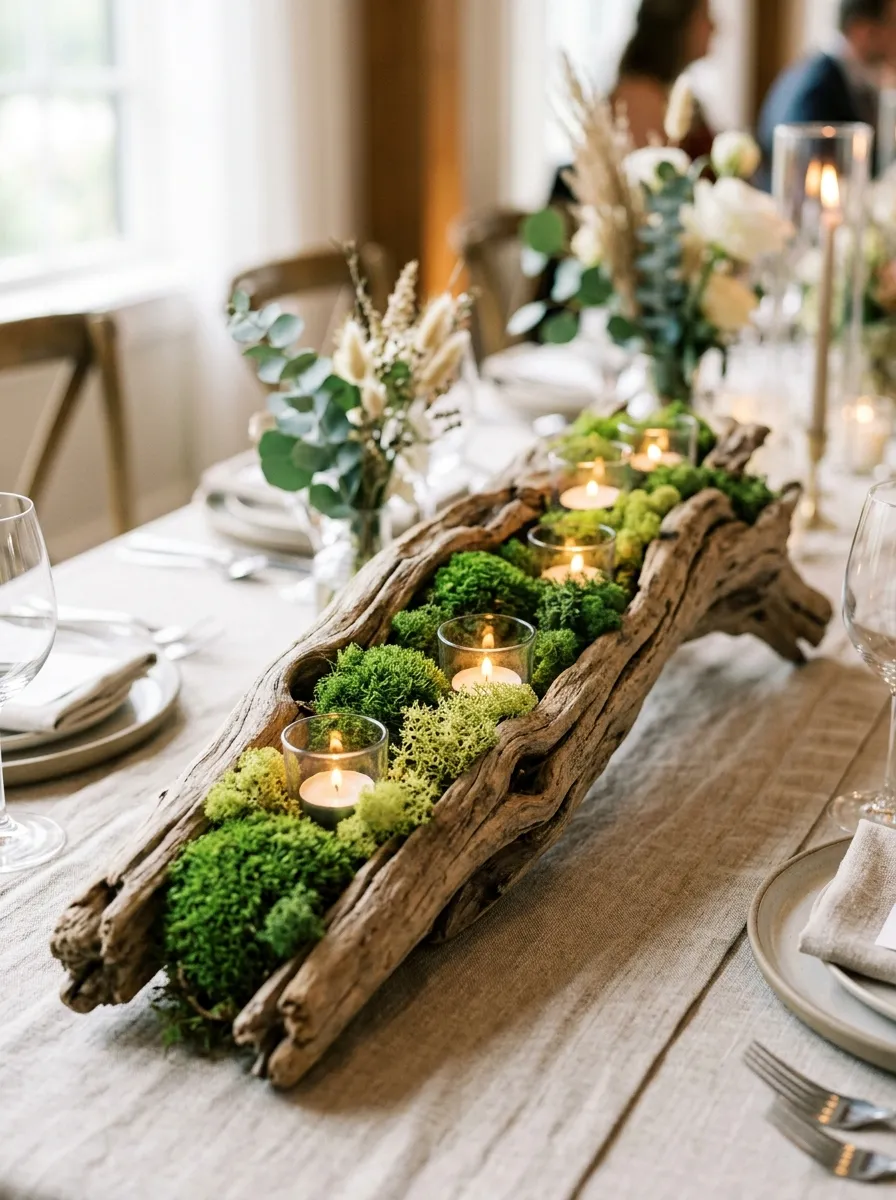
The preserved pillow moss and driftwood sculpture combines the architectural beauty of weathered coastal timber with the dense, rounded geometry of living forest cushion moss. This concept utilizes a central branch of bleached manzanita, ghostwood, or reclaimed grapevine as an elevated sculptural anchor, around which mounds of vibrant green pillow moss are nestled to mimic an ancient fallen log. The contrast between smooth, pale, weathered wood grain and deep emerald, sponge-like moss clusters creates an editorial focal point suitable for vineyard celebrations, coastal ceremonies, or fine-art garden receptions. By keeping the vertical profile low and irregular, this arrangement introduces organic movement along the table without impeding conversations across the dining space.
To create this centerpiece, select a cured, sandblasted driftwood branch measuring roughly eighteen to twenty-four inches in length with natural twists and hollows. Position the branch centrally upon a protective matte acrylic base plate or low slate slab to shield the dining table from direct wood contact. Apply dots of floral cold adhesive directly into the recessed contours, bark crevices, and lower base of the driftwood. Press distinct mounds of preserved green cushion moss firmly into these glued areas, holding each piece for ten seconds to ensure a secure bond. Fill the surrounding base perimeter with smaller clusters of light chartreuse reindeer moss to soften the transition from wood to tabletop, finishing the presentation by nesting miniature glass votives holding white beeswax candles into natural nooks along the timber spine.
2. Low-Profile Botanical Moss and Fern Forest Runner
Step-by-Step Guide
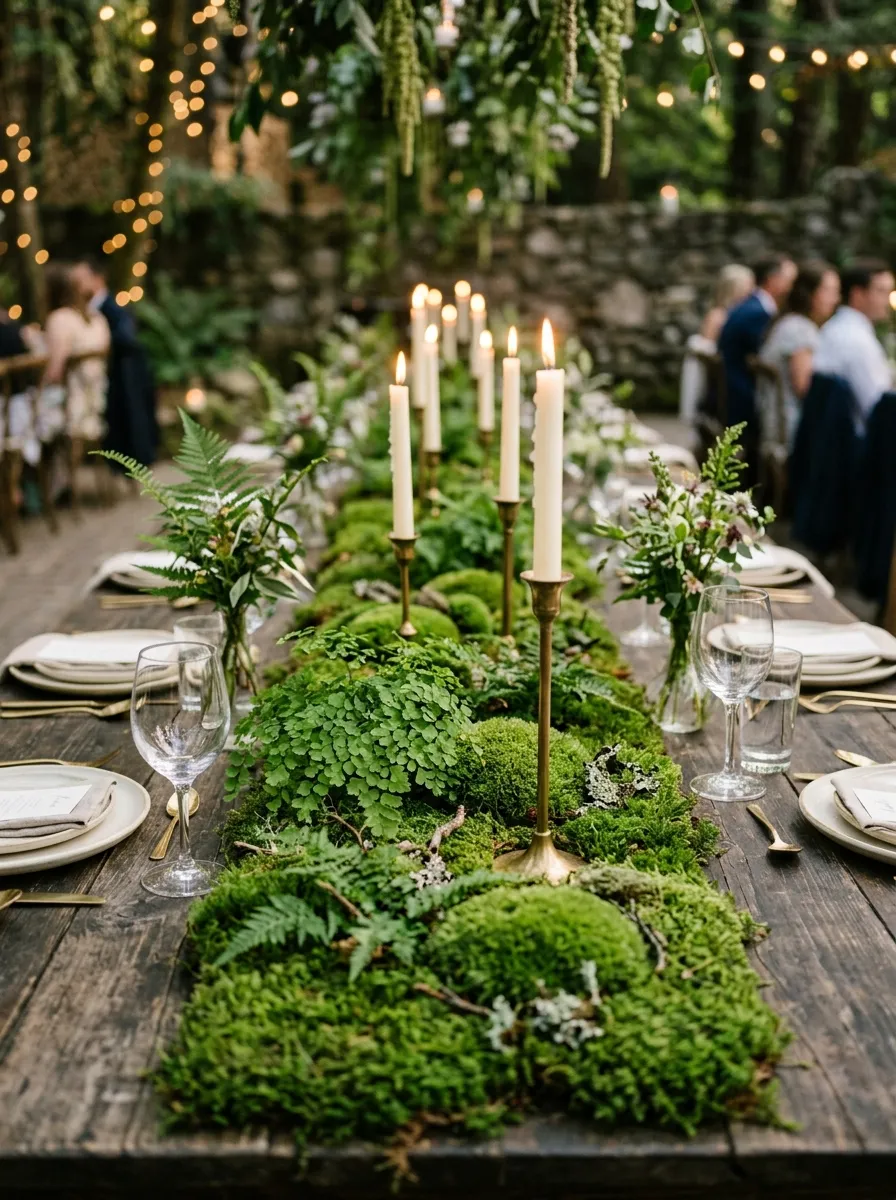
The low-profile botanical moss and fern forest runner provides a continuous, unbroken botanical garland that flows down the center of long rectangular harvest tables. This design creates the immersive optical illusion of a living forest floor running through the dining room, combining flat green sheet moss with delicate plumosus fern sprigs, maidenhair fronds, and mini succulent rosettes. The runner rests flush against the tabletop, establishing an earthy, sensory corridor that complements rustic timber banquet tables or neutral linen runners. Its dense, continuous coverage completely conceals mechanics and wiring while leaving ample room for shared dining platters, wine carafes, and place settings.
Begin construction by unrolling a strip of dark green felt or heavy-gauge floral paper cut to the exact length of your table minus twelve inches on each end, keeping the width to approximately eight inches. Lay pre-hydrated or preserved sheet moss flat over the backing fabric, securing the pieces using hot glue or floral pins until the foundation is completely covered without exposed gaps. Tuck small bunches of preserved cushion moss at randomized intervals along the center to create gentle rolling topography rather than a flat surface. Insert small clips of fresh or faux maidenhair fern into the moss mounds using U-pins, allowing the delicate frills to arch naturally outward toward the table edges. Distribute slender brass taper candle holders of varying heights directly along the spine of the runner, ensuring flame heights sit well above the surrounding foliage.
3. Tiered Terracotta Cloche Terrarium with Living Moss
Execution Process
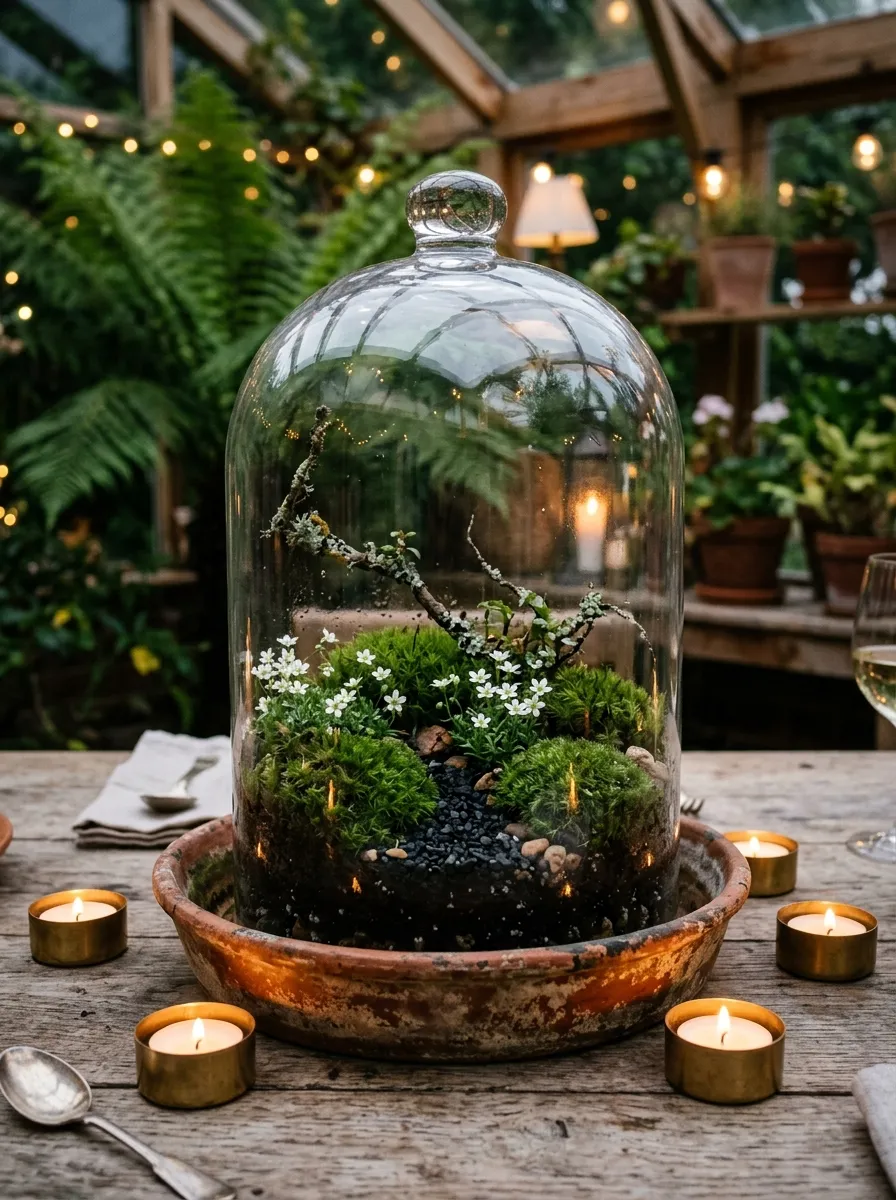
The tiered terracotta cloche terrarium transforms humble garden materials into an elevated, glass-enclosed botanical display that feels curatorial and romantic. This design utilizes shallow aged terracotta saucers topped with clear bell-shaped glass cloches, housing a self-contained miniature landscape of layered moss, polished river stones, and delicate woodland accents. The curved glass captures ambient candlelight and reflects interior greenery, creating a clean, dust-free tablescape that shields fragile plants from dry venue air. This concept works well for greenhouse weddings, historic estate dinners, and botanic garden celebrations where guests appreciate fine, intimate details.
To assemble this design, select an aged six-to-eight-inch terracotta plant saucer, coating the interior bottom with a clear waterproof sealant to prevent moisture sweating onto banquet linens. Fill the bottom with a half-inch drainage layer of fine black aquarium gravel and small pieces of activated charcoal. Layer living or well-conditioned sheet moss across the gravel, pressing it down lightly to form a level green carpet. Embed two or three larger dome-shaped pieces of deep green mood moss into the center, accenting the terrain with miniature slate shards, a spray of dried lichen, or small sprigs of white starflower. Carefully clean the inside of the glass cloche bell with an alcohol wipe to remove interior smudges, then lower the glass dome over the terracotta rim, ringing the outer base with delicate brass tea light cups.
4. Geometric Brass Lantern Filled with Moss and Pillar Candles
How to Create
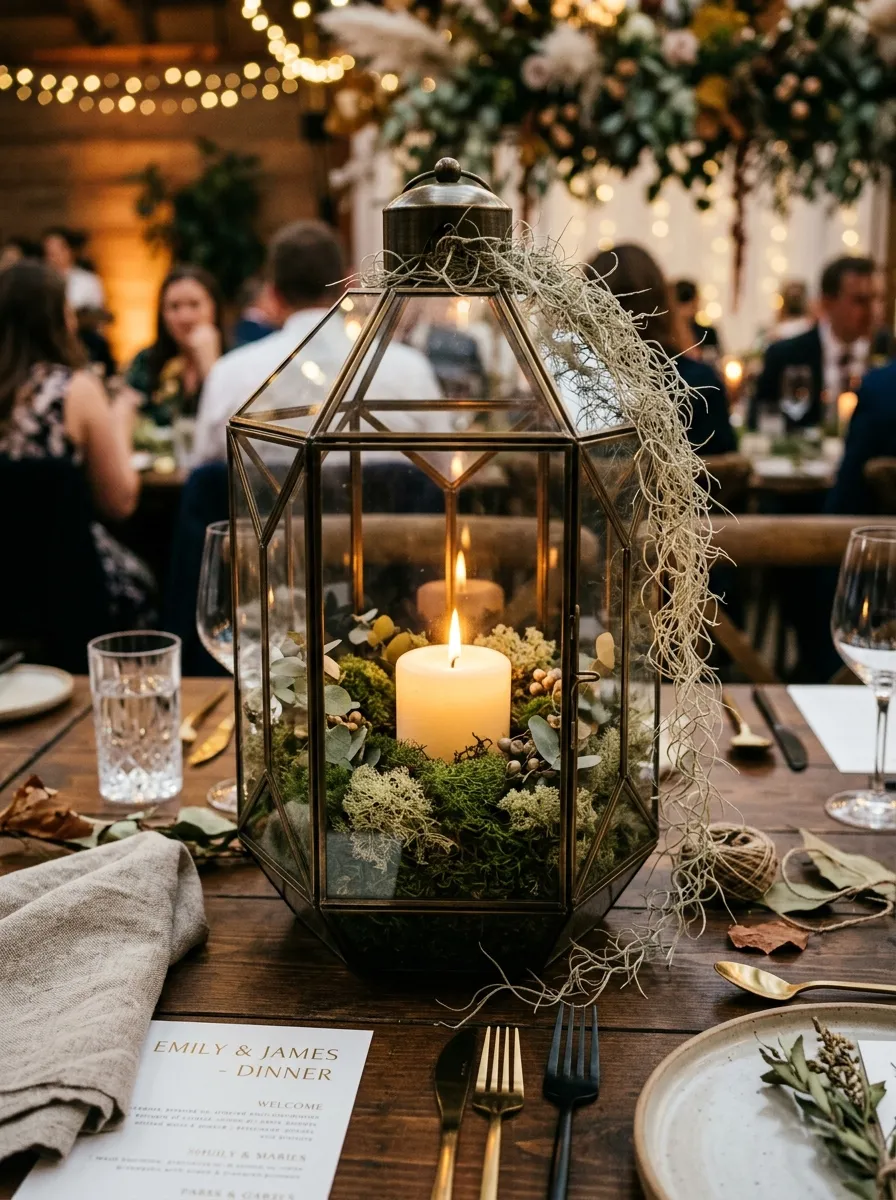
The geometric brass lantern centerpiece pairs modern industrial metalwork with soft, untamed organic undergrowth to produce a warm, radiant lighting feature. This design utilizes clean-lined glass and brass lanterns, filling the interior floor with a thick bed of preserved moss from which a solitary ivory pillar candle emerges safely. The reflective glass panels multiply the flickering candle flame while illuminating the subtle textural differences within the moss bedding. The contrast between sharp metallic right angles and the irregular, undulating textures of moss provides a balanced composition suitable for urban loft weddings, industrial warehouse celebrations, and contemporary fall gatherings.
Begin by sourcing an architectural brass lantern with clear glass panels measuring twelve to sixteen inches in height, ensuring the base is completely solid and level. Place a battery-operated wax LED pillar candle or an open-flame candle set inside a secondary protective glass hurricane sleeve into the exact center of the lantern base. Pack preserved forest sheet moss tightly around the candle container, using small handfuls to fill the corners and build a cushion two to three inches deep. Introduce textural contrast by pressing bright chartreuse reindeer moss and dried white lichen clumps into the top surface of the green moss. For an organic exterior transition, allow a few wisps of dried Spanish moss to trail outward through the lantern door opening, resting the completed lantern upon a circular wooden base or directly upon clean white table linens.
5. Elevated Moss-Wrapped Wreath on Vintage Pedestals
Setup Method
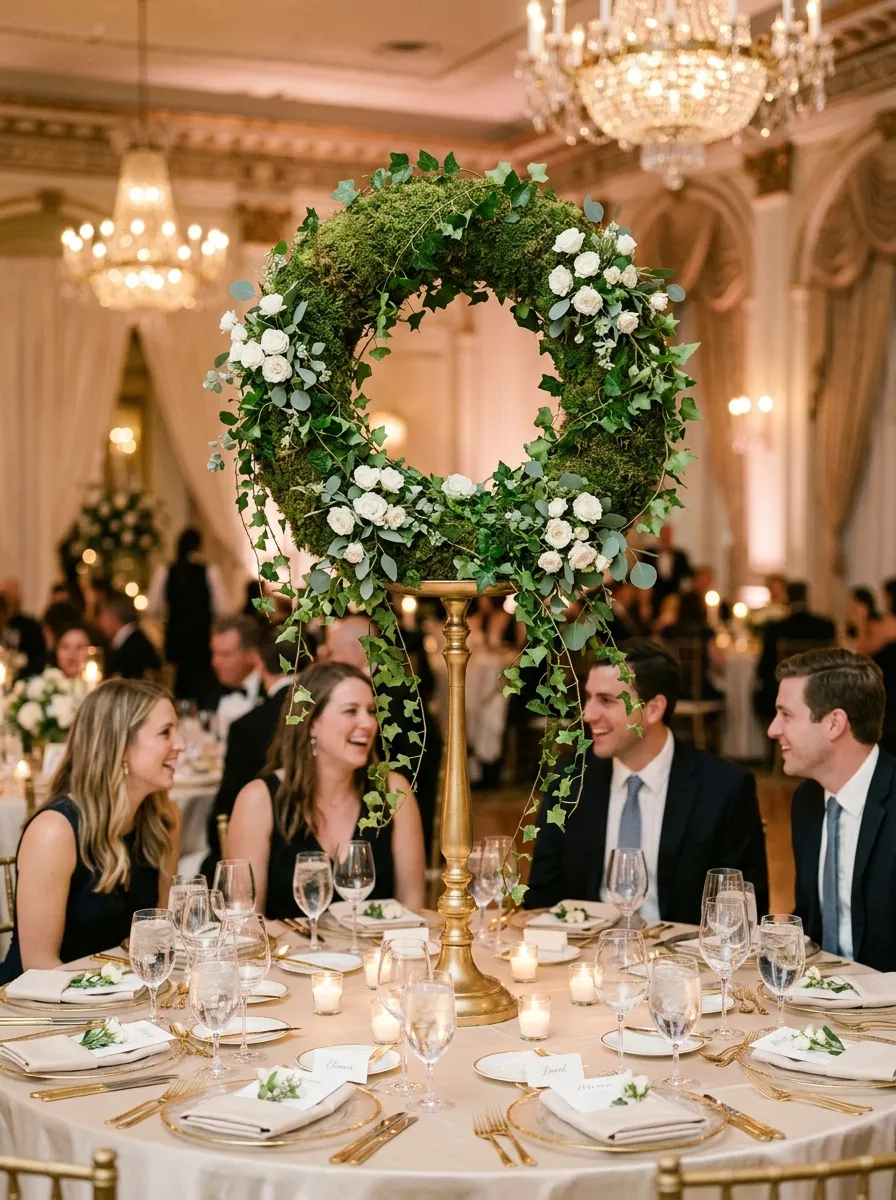
The elevated moss-wrapped wreath centerpiece raises botanical textures high above the tabletop on slender metal or vintage stone pedestals, maintaining open sightlines across the dining room while establishing dramatic vertical volume. This design features a hollow circular wreath frame completely sheathed in textured moss, embellished with trailing ivy, wild greenery, and clusters of delicate white blossoms. Elevating the arrangement allows guests to converse freely beneath the floral canopy, while the open center of the wreath allows ambient room light to filter down onto the place settings. This concept offers the visual grandeur of large elevated floral trees while maintaining a lighter, more organic botanical footprint.
Construct this piece by selecting a sixteen-inch extruded foam or wire wreath frame, wrapping it completely in damp sheet moss secured with spool wire wound tightly around the form in a spiral fashion. Mount the finished moss wreath securely onto the top plate of a twenty-four-inch matte black or antique gold riser stand, anchoring it with heavy-duty zip ties or strong florist wire. Pin clusters of preserved reindeer moss and Spanish moss into the inner and outer circumferences to disguise the mechanical framework and soften the circular edge. Weave sprigs of trailing English ivy, eucalyptus, and white spray roses into the moss base, using water tubes for fresh floral stems to ensure longevity. Position small, low-profile botanical elements or tea lights on the tabletop around the base of the riser to create visual continuity between the elevated canopy and the dining surface.
6. Weathered Stone Trough with Moss and Wildflowers
Step-by-Step Guide
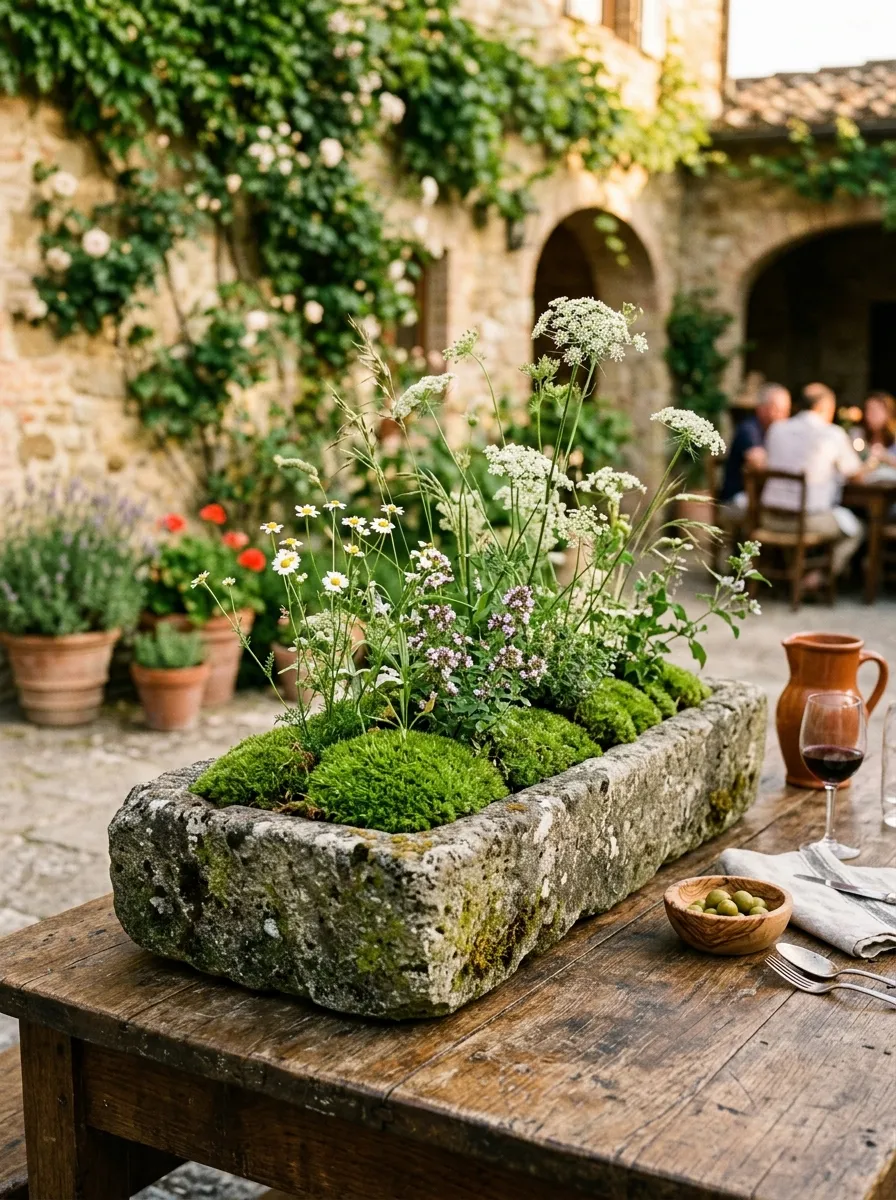
The weathered stone trough centerpiece evokes the timeless atmosphere of an ancient European garden wall, combining heavy, textured masonry with vibrant moss and delicate field blooms. This concept uses long, low troughs crafted from cast stone, concrete, or hypertufa, planted with an abundance of moss and punctuated by loose, organic wildflower stems like chamomile, hellebores, and Queen Anne’s lace. The visual weight and rough, porous surface of the stone anchor the table setting, while the soft, yielding moss cushions the colorful flowers, creating a balanced, gathered-from-the-meadow appearance ideal for outdoor courtyards, historical estates, and country farm weddings.
To prepare the arrangement, choose a rectangular stone or cast-concrete vessel roughly eighteen inches long, four inches wide, and three inches deep, verifying it is internally sealed against leaks. Insert a narrow strip of saturated bio-floral foam or a secure cage of coated chicken wire along the bottom of the trough. Pack the entire exposed upper rim and surface of the trough with dense mounds of preserved cushion moss and flat sheet moss, pinning them into the foam or wire to conceal all internal construction mechanics. Use a sharp floral knife to trim fresh botanical stems at a forty-five-degree angle, inserting them directly through the moss layer into the hydration foam below. Space flowers unevenly, pairing upright stems of white chamomile with arching sprigs of veronica and wild herbs to produce a natural, unstudied field silhouette across the table.
7. Floating Moss and Candle Water Basin
Execution Process
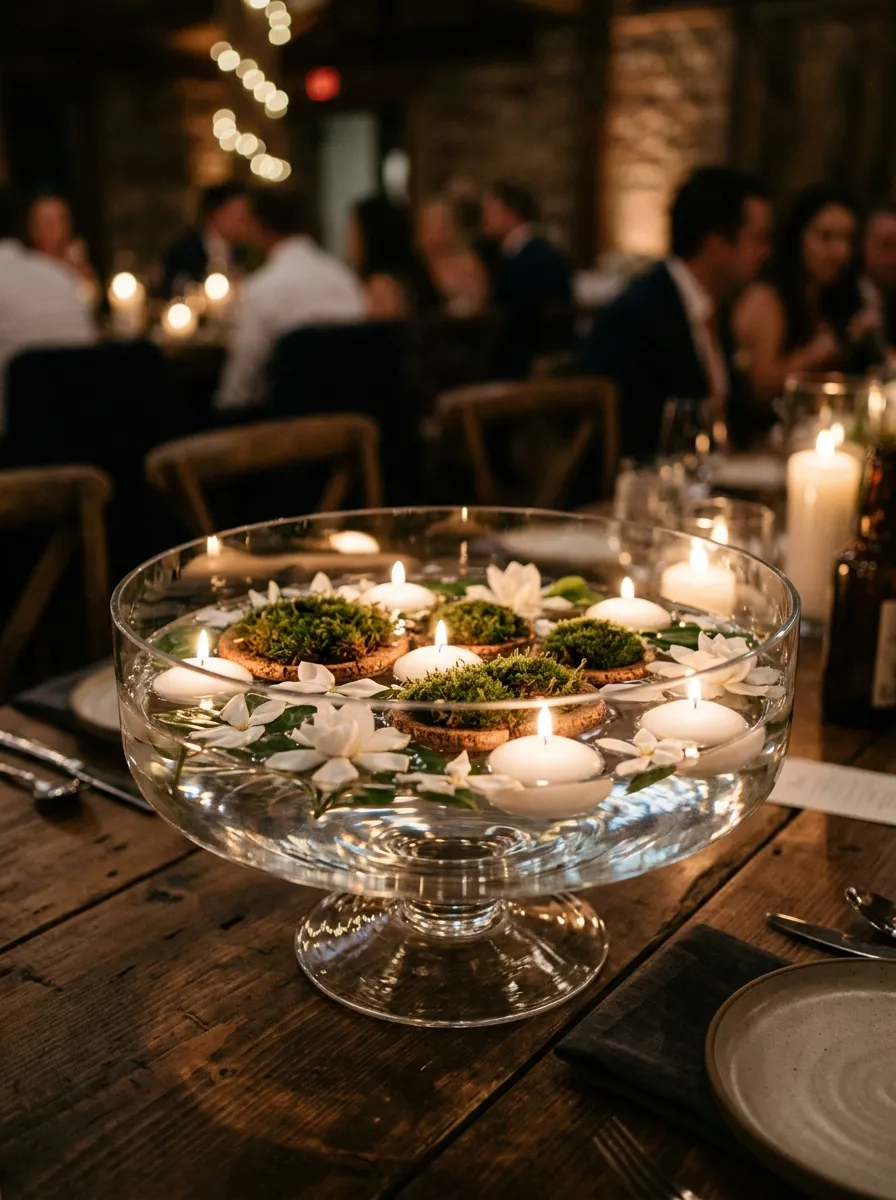
The floating moss and candle water basin offers a luminous, serene focal point that uses the reflective properties of water and the natural buoyancy of cork to create a floating botanical landscape. This design features a wide, shallow ceramic or glass bowl filled with water, upon which small islands of moss, floating wax candles, and delicate white blossom heads drift peacefully. The soft rippling of the water combined with warm, flickering reflections produces a calming sensory ambiance that captivates dining guests. This concept is particularly well-suited for warm summer evening receptions, modern outdoor terraces, and minimalist indoor spaces where understated elegance is preferred.
Begin assembly by securing a low, wide-rimmed bowl measuring twelve to fourteen inches in diameter, placing it centrally on the dining table before adding liquids to prevent spills. Cut two to three circular raft discs from natural thin cork sheets, measuring two to three inches across. Apply a water-resistant floral adhesive to the top surface of each cork disc, pressing small mounds of preserved green mood moss firmly onto the cork until it is completely concealed. Fill the bowl two-thirds full with room-temperature distilled water to ensure visual clarity. Gently float the moss-covered cork islands onto the water surface, alternating them with smooth white floating wax candles. Finish the composition by scattering a few loose white gardenia or ranunculus petals across the water surface, ensuring the floating elements drift freely without crowding the vessel edges.
8. Preserved Moss Monogram on Reclaimed Wood Slices
How to Make
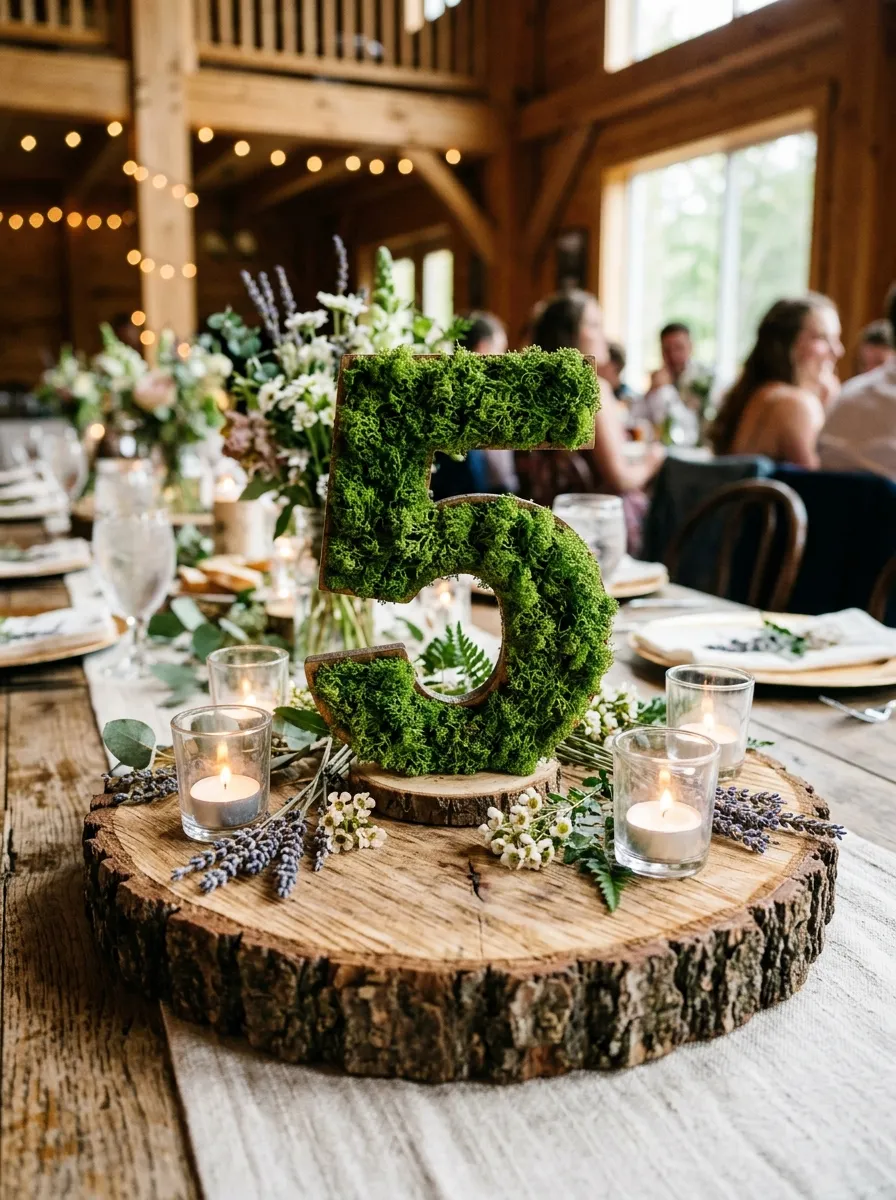
The preserved moss monogram centerpiece introduces personalized, rustic charm to wedding reception tables by combining natural timber rounds with custom-shaped botanical lettering. This design features a thick, cross-cut hardwood slab serving as a sturdy base plate, upon which a raised wooden or metal table number or couple’s initial—fully sheathed in textured green moss—stands upright. The rich wood bark ring frames the vibrant emerald lettering, providing a clear functional purpose as a table marker while serving as an organic artistic installation. This project suits barn weddings, woodland gatherings, and outdoor camp celebrations, delivering an accessible DIY accent that doubles as a cherished home keepsake after the wedding concludes.
Start by sourcing dried, level wood slices measuring ten to twelve inches in diameter with intact outer bark, sealing the wood with a clear matte polyurethane coat to prevent surface splintering. Purchase raw wooden numbers or letters corresponding to your reception tables, roughly six to eight inches in height. Apply tacky craft glue or hot glue across the face of each letter, pressing torn pieces of preserved sheet moss and Spanish moss firmly over the entire front and sides, trimming away excess overhang with craft scissors for a clean typographic outline. Fasten the moss-covered letter perpendicular to the wooden slab using small metal L-brackets and short screws hidden along the back edge. Complete the centerpiece by circling the base of the letter with miniature glass votive candles and sprigs of dried lavender or baby’s breath tucked directly against the wood surface.
9. Minimalist Concrete Sphere and Moss Nest
Setup Method
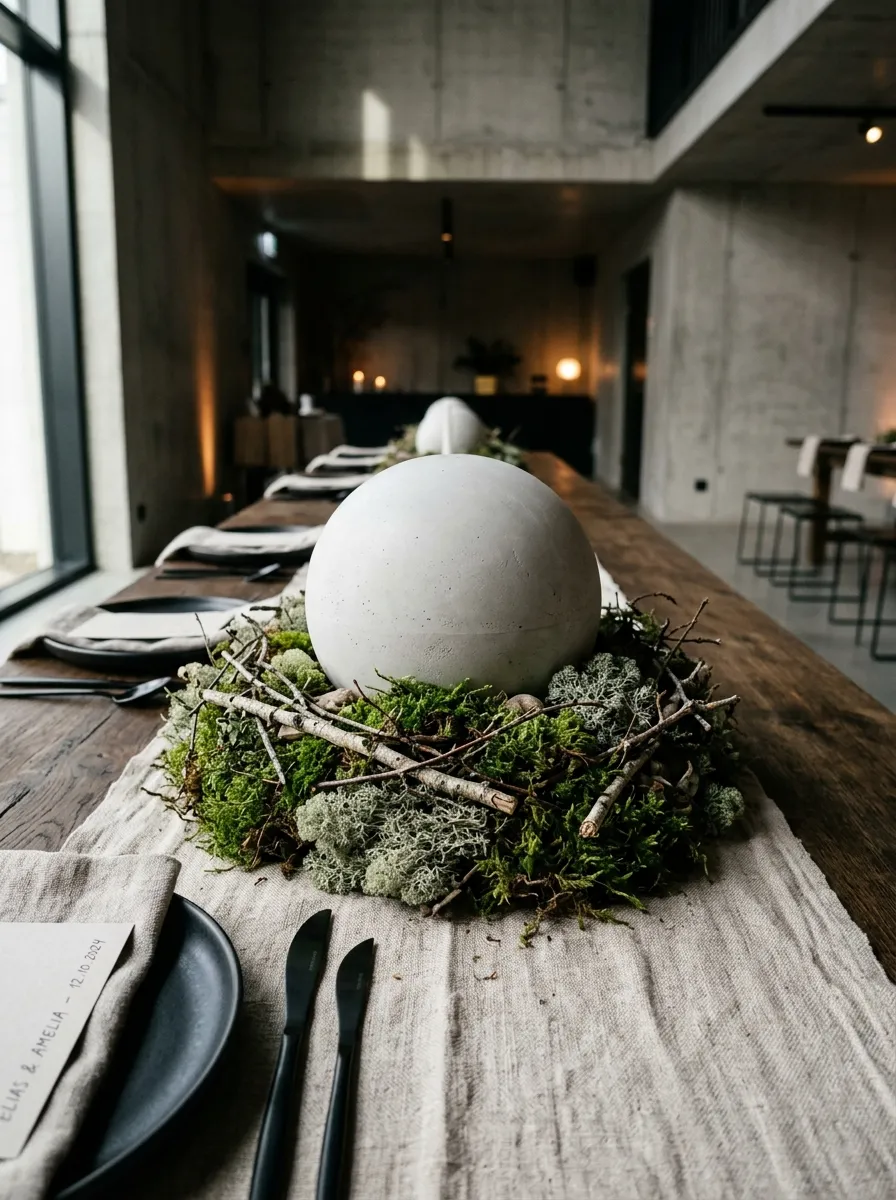
The minimalist concrete sphere and moss nest centerpiece merges modern architectural geometry with soft, organic textures to produce a striking sculptural accent for contemporary weddings. This concept features a smooth, pale gray cast-concrete sphere or hollow hemispherical bowl resting within an asymmetrical nest of deep forest moss and lichen-encrusted branches. The smooth, industrial surface of the concrete emphasizes the dense, complex cellular patterns of the surrounding moss, creating an uncluttered focal point that appeals to urban, modern tastes. This design is exceptionally durable, wind-resistant, and visually grounded, making it an outstanding selection for industrial loft spaces, rooftop ceremonies, and modernist art museum receptions.
Begin by selecting an eight-inch cast-concrete decorative sphere or a shallow half-sphere bowl with a silky, sealed finish, placing it slightly off-center upon a clean linen table runner. Form a protective floral wire wreath ring slightly larger than the concrete base to serve as the structural armature for the nest. Bind thick layers of dark green sheet moss and silvery-green reindeer lichen around the wire ring using thin green spool wire, building up variable height so the moss cradles the base of the heavy concrete vessel naturally. Weave short, twisted clippings of birch twigs or dried curly willow through the moss nest to create an organic, tangled woodland edge. If using a hollow half-sphere concrete bowl, fill the interior cavity with a thick bed of moss and a cluster of three smooth white ceramic tea light holders to cast a soft interior glow upward against the curved concrete walls.
10. Antiqued Mirror Tray with Reflective Moss Garden
Step-by-Step Guide
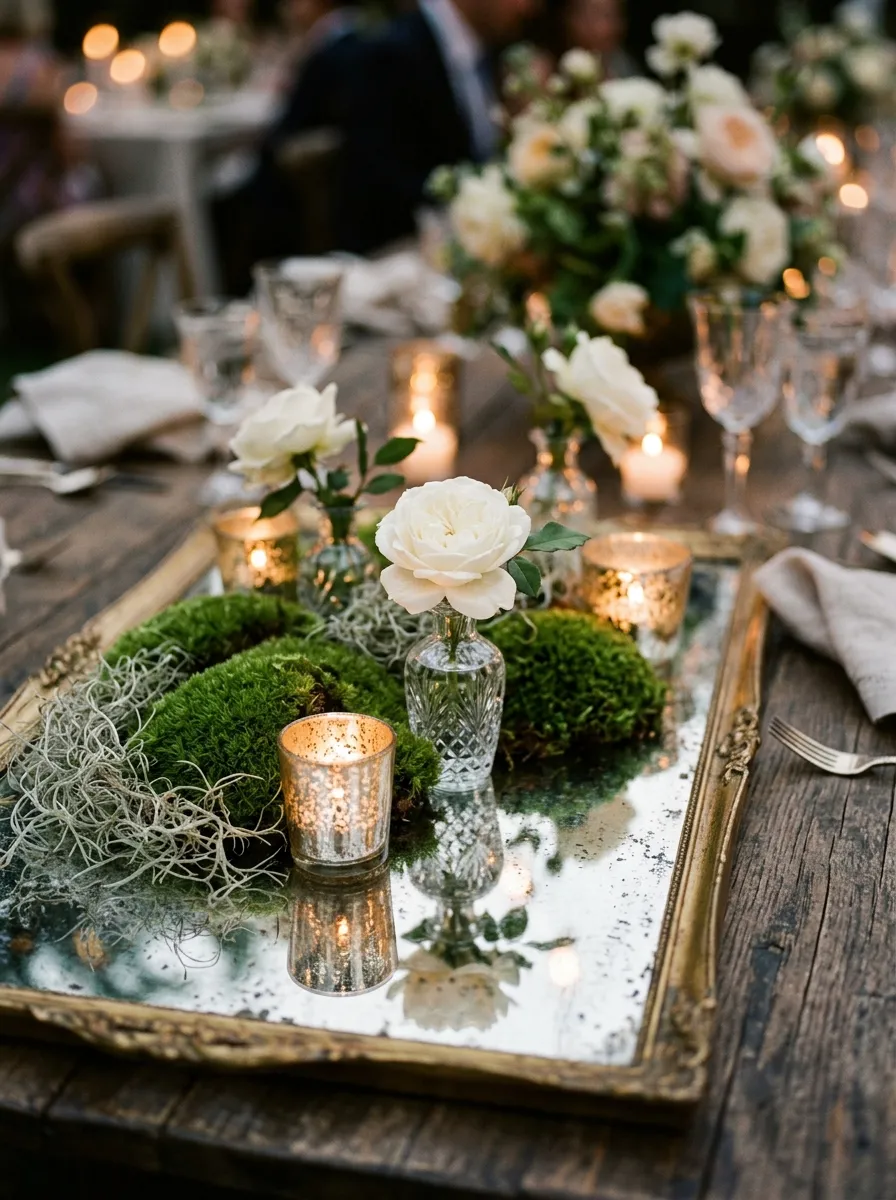
The antiqued mirror tray centerpiece uses optical reflection and vintage patina to double the visual depth and luminescence of an organic moss arrangement. This design gathers diverse moss varieties, miniature crystal vases, and glowing tea lights onto an aged, mercury-glass or antiqued silver mirror platter. The reflective base mirrors the underside of the textured moss cushions, creating the illusion of an expansive, deep botanical garden pool resting right upon the table. The warm, fractured reflections from the aged glass amplify candlelight, producing an enchanting, nostalgic ambiance well-suited for glamorous vintage ballroom weddings, historic mansion receptions, and evening celebrations.
To build this arrangement, select a framed circular or rectangular mirror tray measuring twelve to sixteen inches with intentional antiqued silvering or foxing along the perimeter. Clean the top glass surface thoroughly with a streak-free glass cleaner and dry with a microfiber cloth. Lay varied patches of preserved cushion moss, sheet moss, and pale Spanish moss directly across the mirror in a sweeping S-curve, leaving generous sections of the aged reflective glass exposed to catch overhead light. Position four to six clear cut-crystal bud vases of varying heights amidst the moss islands, filling each with an inch of water and a single bloom such as an ivory garden rose, white ranunculus, or sweet pea stem. Intersperse small ribbed mercury glass votive cups throughout the moss gaps, lighting the candles just before the reception begins to create a luminous, glowing tabletop landscape.
Common Beginner Mistakes and How to Avoid Them
The most critical mistake when constructing moss centerpieces is using raw, uncleaned wild moss gathered directly from outdoor forests without proper quarantine or processing. Fresh wild moss frequently harbors microscopic insects, damp soil, and fungal spores that can emerge onto dining tables, soil fine rental linens, or release unpleasant earthy odors within warm reception spaces. Avoid this by purchasing commercially preserved or heat-sterilized florists’ moss, which retains its pliable texture and vivid green coloration without requiring soil, water, or chemical pest treatments. Another frequent error is excessive watering; novice designers often mist preserved moss with water, unaware that artificial preservation dyes are water-soluble. Adding water to preserved moss causes colors to bleed into expensive tablecloths and can trigger mold development inside closed venues. Always keep preserved moss completely dry, and if living moss is required, install a reliable waterproof barrier—such as heavy vinyl sheeting or acrylic trays—between the damp greenery and the tabletop to prevent condensation and moisture damage.
Practical Tips for Better Results
To achieve a professional, florist-grade finish on moss centerpieces, focus on layering multiple moss species rather than relying on a single uniform variety. Combining flat sheet moss with rounded pillow moss, pale lichen, and stringy Spanish moss introduces natural depth, varied heights, and authentic tonal shifts that elevate the overall composition. When working with preserved moss, wear thin nitrile gloves during assembly to prevent non-toxic green vegetable dyes from temporarily staining your hands and fingernails. Use low-temperature hot glue or specialized cold botanical adhesive when bonding moss to wood, glass, or stone; high-temperature glues can burn natural fibers and create visible white glue strands that ruin the organic illusion. To ensure the finished tablescape looks intentional from all angles, check sightlines while seated at a dining chair; centerpieces should remain below fourteen inches or be elevated above twenty-four inches, ensuring unobstructed eye contact across the banquet table. Finally, use a soft, dry makeup brush or a gentle burst of canned air to sweep away stray moss fragments from glassware and linens before the reception begins.
Styling, Presentation, or Organization Ideas
Styling moss centerpieces successfully requires harmonizing rich botanical textures with the surrounding dinnerware, linens, and room illumination. Pair lush forest mosses with raw, unbleached linen napkins, rustic stoneware plates, and matte black flatware to create an organic, earth-inspired tablescape. For classical or glamorous settings, contrast deep emerald moss against polished brass candlesticks, crystal stemware, and high-gloss white tableware to establish high-end visual drama. When arranging long harvest tables, alternate moss runners with varied groupings of pillar candles and glass hurricane vases to create an undulating rhythm down the length of the dining room. Pay close attention to lighting color temperatures; warm white illumination between twenty-seven hundred and three thousand Kelvin accentuates the vibrant green undertones of the moss, whereas cool fluorescent lighting makes organic materials appear dull and lifeless. Maintain visual breathing room by leaving several inches of clear space between the outer edges of the centerpiece and the place settings, ensuring guests have comfortable space for dining essentials and stemware.
Budget or Time Planning
Designing wedding decor around moss offers major financial advantages over traditional floral concepts, provided you implement structured time management and smart purchasing strategies. Preserved moss can be purchased in bulk wholesale boxes, reducing decor costs significantly when compared to imported cut blooms that require cold-chain shipping and complex handling. Because preserved moss is shelf-stable and requires no water, centerpieces can be fabricated completely two to four weeks before the wedding date, eliminating the high-stress rush of morning-of assembly. Allocate your budget by investing in durable, reusable foundational items—such as wooden troughs, lanterns, and brass candlesticks—that can be repurposed or sold after the event. Plan an initial assembly session to cut bases, glue moss foundations, and install structural armatures, dedicating roughly forty-five minutes per centerpiece. On the wedding morning, venue tasks are limited to placing the pre-assembled centerpieces onto tables, inserting fresh accent blooms into hydration tubes if used, and lighting candles, allowing the setup team to complete the dining room quickly and efficiently.
Creative Expansion and Advanced Inspiration
Once you have mastered foundational moss assembly, explore advanced design variations that incorporate mixed media, kinetic elements, and living botanical features. Consider integrating unexpected natural materials into the moss terrain, such as raw geode clusters, sliced agate table markers, or preserved bracket shelf mushrooms mounted along the vertical faces of wooden stumps. For modern evening weddings, conceal micro-fairy lights or submersible LED wire strands beneath thin layers of sheet moss, creating a magical, luminous emerald underglow that turns your centerpieces into enchanted forest installations. You can also explore living botanical concepts by crafting Japanese kokedama—moss-wrapped soil spheres holding flowering plants or miniature bonsai trees—suspended at varying heights above banquet tables using fine monofilament line. Furthermore, connect table decor to the broader event design by carrying the moss motif onto escort card display boards, bar backdrops, and cake stands, establishing a cohesive, immersive botanical narrative that defines your celebration from the initial welcome to the final farewell.