Candlelight serves as one of the most transformative elements in wedding reception design, establishing an intimate, romantic atmosphere across any event venue. Event stylists and couples rely on candles to enhance textures, introduce dynamic illumination, and unify varied decorative elements without overwhelming dining tables. This comprehensive tutorial details ten unique wedding reception candle decor ideas that blend aesthetic balance, fire safety, and timeless elegance. Readers will discover how to calculate candle burning durations, build sturdy floral and water barriers, arrange varying heights for visual depth, and source cost-effective glassware. Learning these structured techniques enables event planners, couples, and DIY decorators to elevate basic tapers, pillars, and votives into breathtaking focal displays. A thoughtful lighting scheme does more than decorate; it guides the mood of the evening, frames photographs with flattering warmth, and defines spatial boundaries within large banquet halls or outdoor pavilions. By understanding proper wick preparation, draft mitigation, and foundational mechanics, you can craft captivating tablescapes that remain safely illuminated throughout the entire celebration.
Why This Idea Is Trending or Useful
The widespread surge of candle-centric wedding tablescapes on modern Pinterest inspiration boards stems from their versatility, budget-conscious nature, and strong visual impact. Fresh floral arrangements can be cost-prohibitive, often demanding intricate refrigeration and extensive professional labor. In contrast, candle arrangements offer high-end styling at a fraction of the cost, making them essential budget ideas for contemporary celebrations. The minimalist style appeal of clean glassware, dancing flames, and warm shadows complements a wide spectrum of themes, ranging from industrial loft modernism to rustic vineyard elegance. Furthermore, candle decor is inherently beginner friendly, requiring no specialized floristry credentials to assemble striking, cohesive centerpieces. Decorators can prepare non-perishable components weeks before the wedding date, eliminating morning-of event stress. Because living fire introduces movement and kinetic energy into dining spaces, it elevates standard table linens into immersive settings. Modern couples value this practical reliability, utilizing sustainable wax choices and reusable glass vessels that easily transition from the reception tables into functional home decor after the festivities conclude.
Materials and Preparation
Executing a safe and visually striking reception lighting display requires disciplined materials sourcing and rigorous environmental planning. Primary materials include unscented paraffin or soy pillar candles, smokeless dripless taper candles, tempered glass cylinder shields, pressed-glass votives, adhesive wax dots, and battery-operated safety matches. Essential utility tools consist of long-reach gas lighters, wick trimmers, microfiber glass-cleaning cloths, heat-resistant drop cloths, and sturdy transport containers with divided cell partitions. Preparation begins with inspecting the venue regulations regarding open flames, drafts, and required clearance from ceiling drapery. Calculate the total burning hours required, choosing wicks rated to burn two hours beyond the scheduled conclusion of the event to prevent premature burnouts. Clean all glass sleeves thoroughly with a mixture of warm water and isopropyl alcohol to eliminate cloudiness and greasy fingerprints. Store wax in a climate-controlled room away from direct solar radiation, as excess heat softens wax columns and causes tapers to bow before assembly.
Idea 1: Graduated Glass Cylinder Floating Candle Run
Step-by-Step Guide
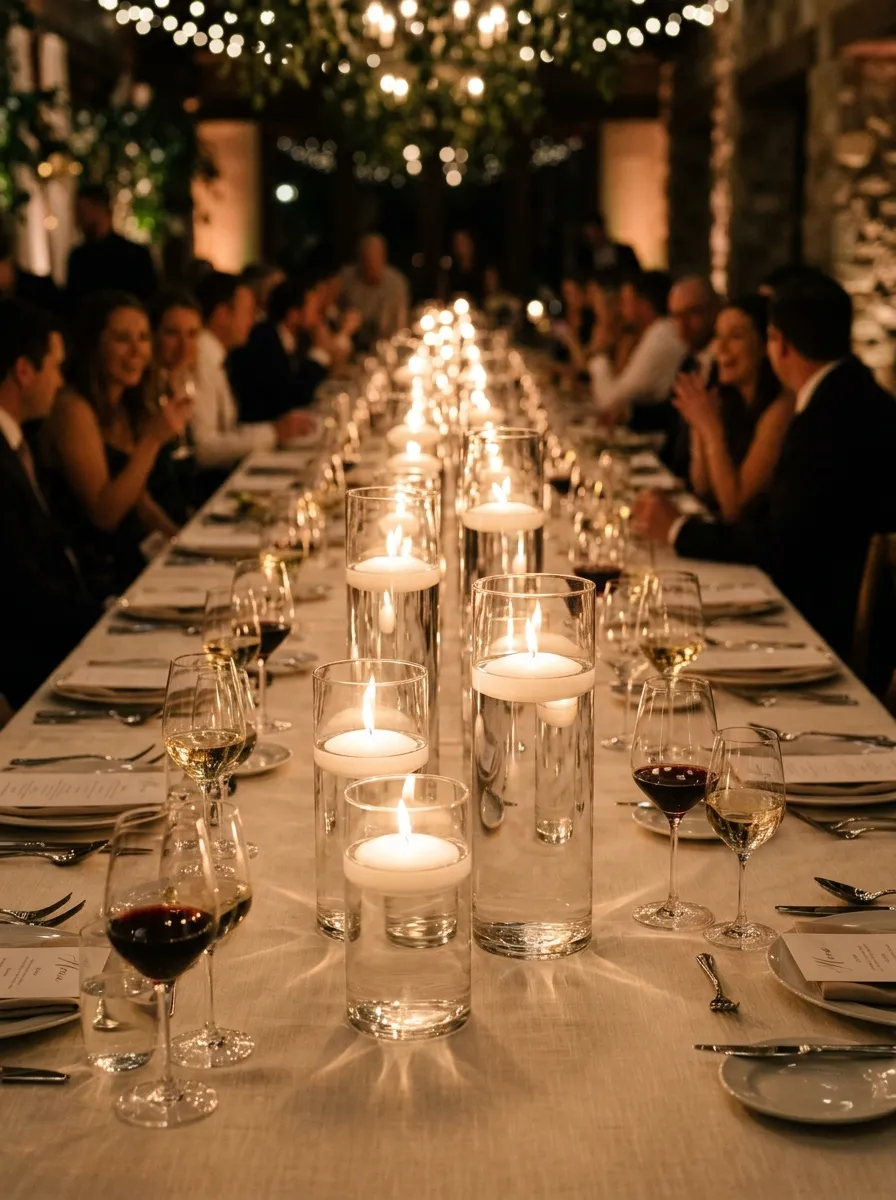
The graduated glass cylinder floating candle run transforms banquet tables into luminous, liquid light displays using clean vertical geometry and water reflection. This concept utilizes sets of three clear, straight-sided glass cylinder vases arranged in continuous central rows along rectangular tables. Filling each vessel with crystal-clear water to varying depths magnifies the flickering flame resting on the liquid surface. The floating wax discs cast rippling highlights across table runners, tableware, and glassware, creating a fluid, modern design aesthetic. Because the flame burns within the protective interior of tall glass walls, this arrangement offers complete resistance to indoor air-conditioning drafts or outdoor evening breezes. The simplicity of clear water, transparent glass, and white wax delivers an understated luxury that fits effortlessly into industrial warehouses, botanical glasshouses, or grand estate ballrooms. The clean lines keep sightlines completely unobstructed, allowing conversation across the table to flow naturally without visual barriers.
To construct this setup, position sets of three graduated glass cylinders measuring six, nine, and twelve inches in height down the table center, spacing clusters eight inches apart. Clean the interior walls thoroughly with a microfiber cloth to remove dust particles that might attract air bubbles. Slowly pour room-temperature distilled water into each cylinder, filling them to three inches below the top rim; using distilled water prevents the cloudy mineral buildup associated with hard tap water. Trim the cotton wick of each round floating candle to one-quarter inch to ensure a steady, smokeless flame. Gently lower the floating candle onto the water surface using a metal dessert spoon to avoid splashing the sides of the dry interior glass. Wipe the outer glass dry, check that the wicks remain dry during placement, and ignite the floating wicks forty-five minutes before guest entry using a slender extended lighter.
Idea 2: Vintage Brass Candlestick Taper Cluster
Execution Process
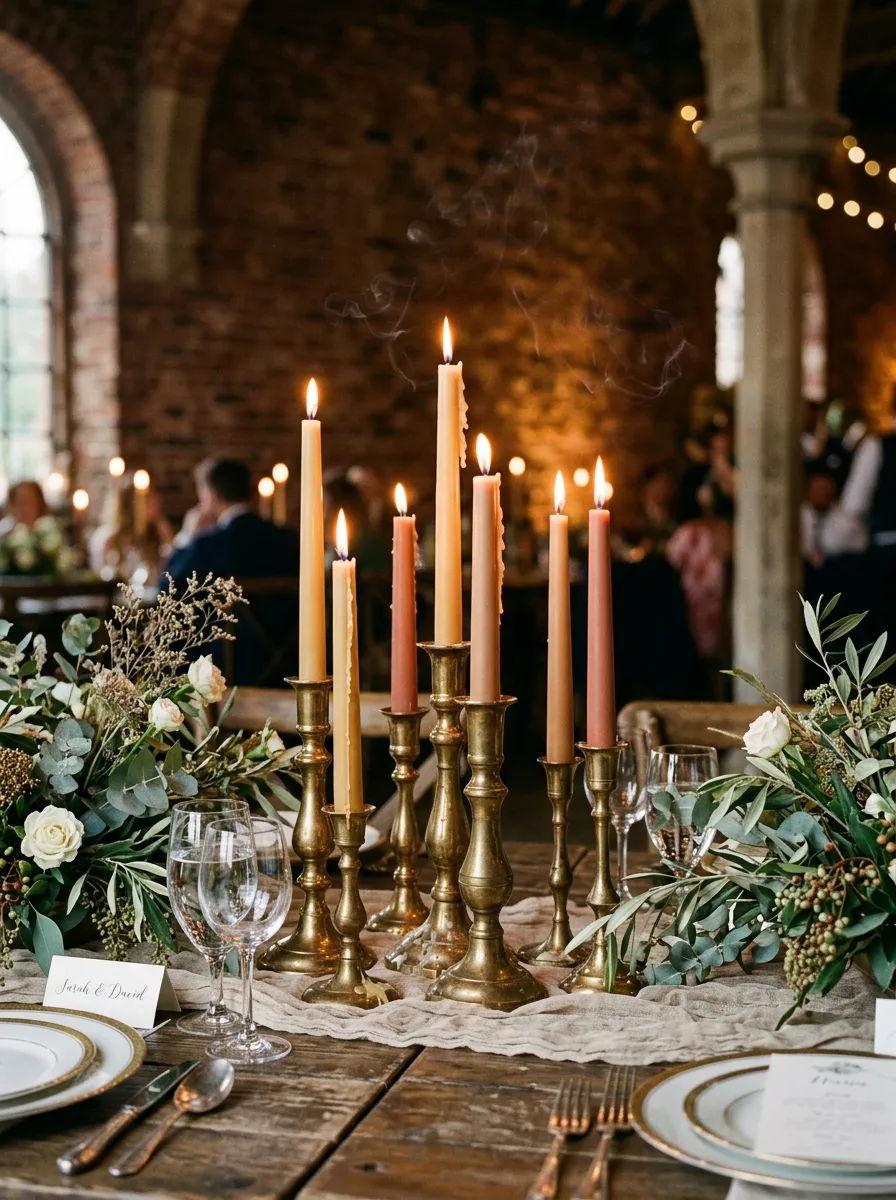
The vintage brass candlestick taper cluster merges heritage metallic warmth with dynamic vertical height, creating an intimate, historic ambiance along wedding dining tables. This arrangement gathers mismatched solid-brass holders of varied eras, finishes, and pedestal heights into tightly woven groupings. Long, slender taper candles in warm hues—such as natural beeswax, muted terracotta, dusty rose, or antique ivory—draw the eye upward, breaking the flat horizon of standard reception banquet tables. The patinated, reflective surface of real brass catches the candlelight, scattering warm metallic reflections across the linen textures below. This timeless style works wonderfully in historic estates, brick-walled lofts, and rustic vineyard settings. By varying the physical heights of both the metal bases and the wax tapers, decorators achieve a lush visual density that replaces costly floral installations while delivering genuine old-world romance and refined elegance.
Begin by sourcing five to seven solid-brass candlesticks per table grouping, selecting base heights that range from three to ten inches. Clean surface debris while preserving the natural metallic patina by wiping the brass with a soft, dry cotton cloth. Secure an adhesive wax positioning dot or a drop of melted wax into the interior cup of each candlestick socket. Press a standard twelve-inch dripless taper candle firmly into the socket, holding it upright for ten seconds until the adhesive bonds completely to prevent leaning. Stagger the candlesticks down the table runner in an asymmetrical zig-zag pattern, keeping three inches of clearance between individual tapers to stop adjacent flames from melting neighboring wax shafts. Ensure all wicks point straight up, trimming them to one-quarter inch to minimize smoking. Light the tapers only after all venue air circulation fans have been balanced to avoid uneven melting.
Idea 3: Submerged Botanical Candle Columns
How to Create
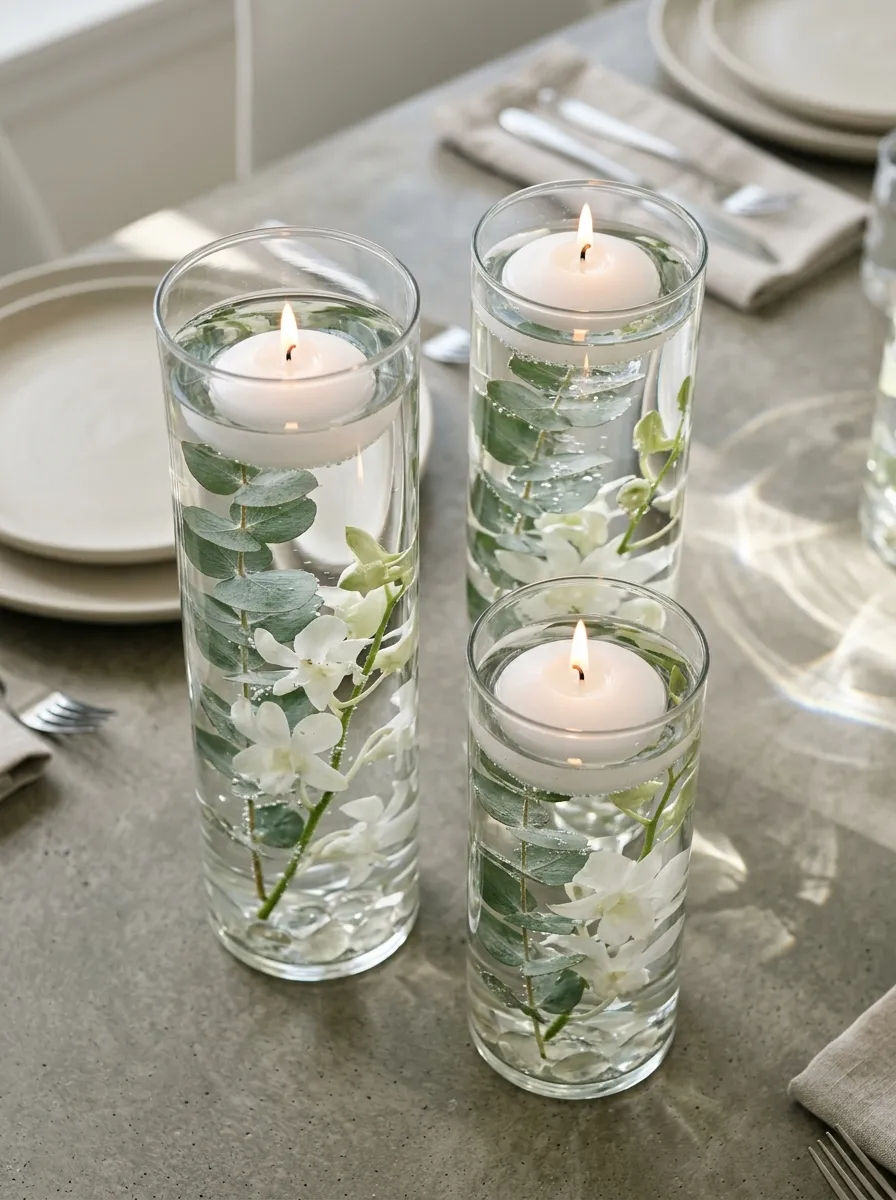
Submerged botanical candle columns incorporate organic greenery directly into the candle display, pairing botanical realism with underwater optical magnification. This design submerges hardy fresh flora—such as silver dollar eucalyptus, white dendrobium orchids, or curly willow branches—underwater beneath a floating candle. The water acts as a natural lens, enlarging the delicate veins, leaves, and petals while completely preventing the live foliage from drying out or catching fire. The submerged stems anchor the arrangement at the base of the glass, while the dancing flame floats cleanly above the aquatic greenery. This concept produces a refreshing, modern look that serves as a self-contained centerpiece, making it an exceptional option for summer, tropical, or botanical garden weddings. The weight of the filled water vessel provides stability against table vibrations, ensuring that centerpieces remain upright throughout energetic wedding celebrations.
Select a trio of heavy-base glass cylinders measuring eight, ten, and twelve inches tall with a minimum four-inch opening diameter. Wash the fresh botanicals under cool water to remove soil residue, trimming the bottom stems to match the interior vase heights. Secure a small lead fishing weight or clear glass floral marble to the base of each botanical branch using clear florist tape to stop the stems from floating. Lower the weighted stem into the dry vase, adjusting its orientation with long wooden tweezers so the foliage faces outward toward the glass perimeter. Slowly add distilled water along the inside edge of the glass until the water level rests two inches below the upper rim, allowing trapped air bubbles to rise and disperse. Float a white disc candle on top, taking care not to submerge the wick. Wipe the exterior glass clean, and light the candles just before guests enter the room.
Idea 4: Dramatic Floor-Standing Hurricane Lantern Trail
Setup Method
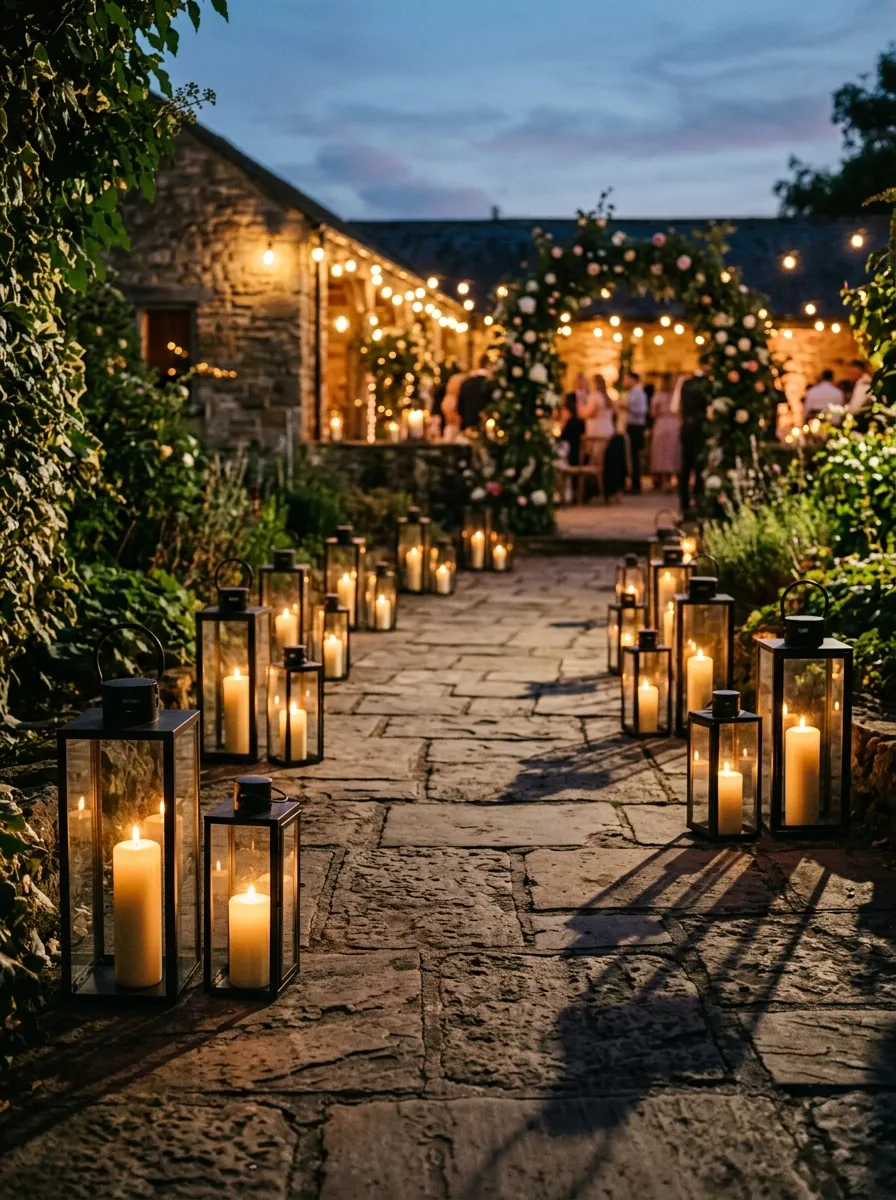
The dramatic floor-standing hurricane lantern trail extends the visual design downward, illuminating perimeter walkways, ceremony transitions, and the perimeter around the head table. This concept relies on robust, metal-framed glass lanterns arranged in graduating trios on the floor alongside table ends and architectural entryways. Utilizing durable outdoor hurricane lanterns shields candle flames from ground drafts, footsteps, and passing gowns, ensuring complete fire safety along high-traffic wedding paths. The lantern frames—finished in matte black iron, brushed brass, or polished copper—introduce sharp architectural structure to the venue space. Inside each lantern, thick, long-burning pillar candles cast long, dramatic shadows across parquet floors, stone terraces, or woven carpeting. This technique expands the reception illumination beyond dining table runners, visually enlarging the venue and creating an immersive, golden pathway that guides guests through the space.
Begin by selecting three matching lanterns of graduated heights, typically twelve, sixteen, and twenty inches tall, constructed with heavy metal frames and tempered glass side panes. Place the lanterns on flat floor surfaces outside primary walking paths, arranging them in a clustered triangle with the tallest lantern at the rear corner. Insert a thick, high-density paraffin pillar candle into each lantern base, keeping a two-inch gap between the wax sides and the glass walls to allow proper heat ventilation. Fix the pillar base directly to the lantern floor using heavy-duty double-sided wax tape to keep it centered and upright. Ensure the wicks are trimmed to one-quarter inch, cleaning the glass doors inside and out with a lint-free cloth to maintain optical clarity. Close and latch the access doors fully after lighting the pillars with a long-stem utility lighter, checking that top ventilation vents remain clear of decorative fabrics.
Idea 5: Minimalist Tonal Sand Candle Vessels
Step-by-Step Guide
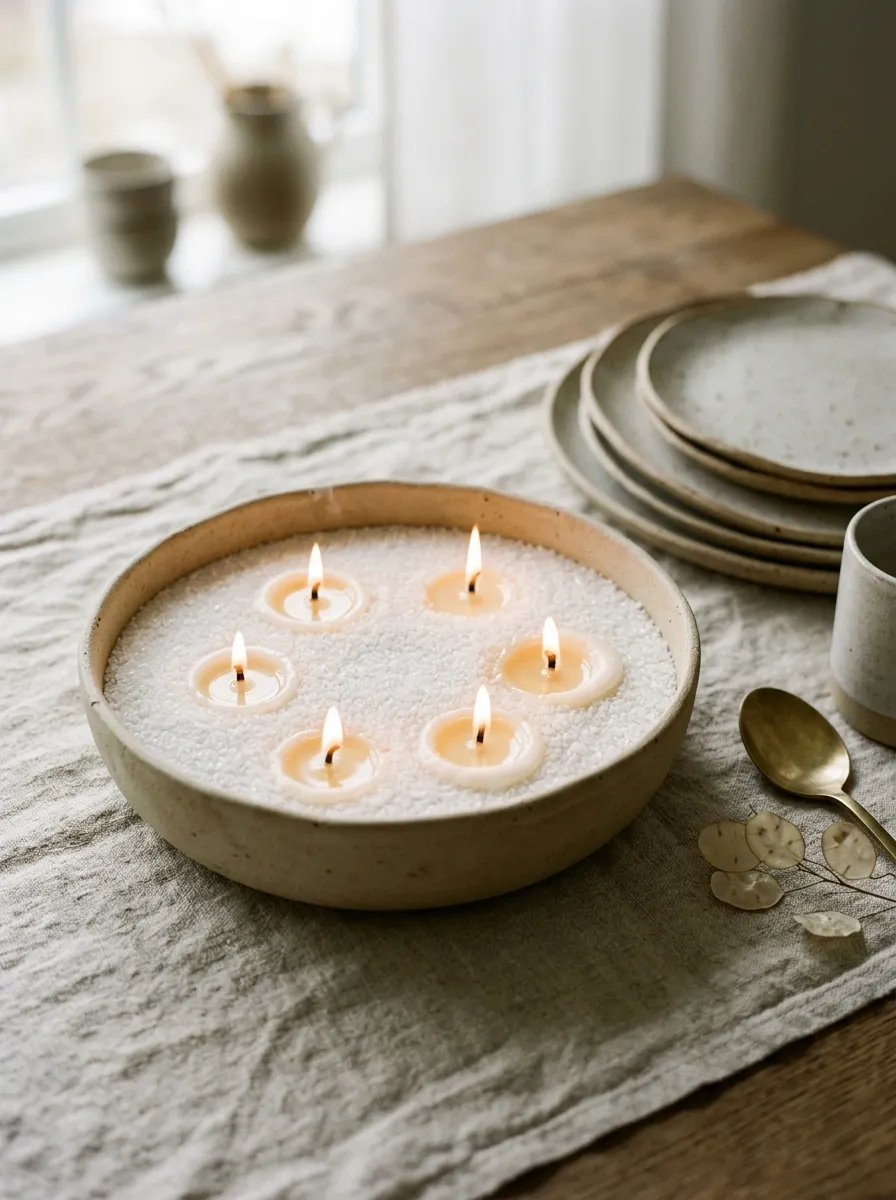
Minimalist tonal sand candle vessels embrace contemporary architectural textures by nesting raw wax wicks directly within beds of fine, natural crystalline sand wax. This approach uses wide ceramic bowls, raw stone vessels, or geometric glass troughs filled with granular wax powder that resembles soft beach sand or crushed marble. Multiple clean-burning cotton wicks are placed directly into the granular wax bed at calculated distances, turning the vessel into a multi-flame hearth centerpiece. The matte, granular texture of the sand wax absorbs excess light, contrasting against the bright glow of multiple flames. This low-profile design preserves sightlines across the dining space while introducing a tactile, earthy element that complements contemporary linen tablecloths and modern ceramic dinnerware. Sand wax burns cleanly by melting only the granules immediately surrounding the wick, leaving the surrounding bed pristine, reusable, and free from unsightly wax drips.
Choose a wide, shallow ceramic, concrete, or glass bowl with a diameter of at least eight to ten inches and a depth of three inches. Pour natural unscented pearled wax granules into the vessel until the level rests one inch below the container rim, leveling the surface with a straight plastic card. Cut pre-waxed cotton wicks to two-inch lengths, maintaining the metal support tabs attached to their bottoms. Insert three to four wicks vertically into the granular wax bed, spacing each wick at least three inches away from adjacent wicks and the vessel walls to avoid heat concentration. Gently pat the surrounding wax granules around each wick stem, leaving approximately one-quarter inch of wick exposed above the surface line. Ignite each wick carefully, observing that the melting pool forms a clean, circular disc within the loose sand bed. To refresh the centerpiece between events, simply lift out the cooled, hardened wax melt pool and replace the wick.
Idea 6: Mirrored Refraction Votive Tablescape
How to Make
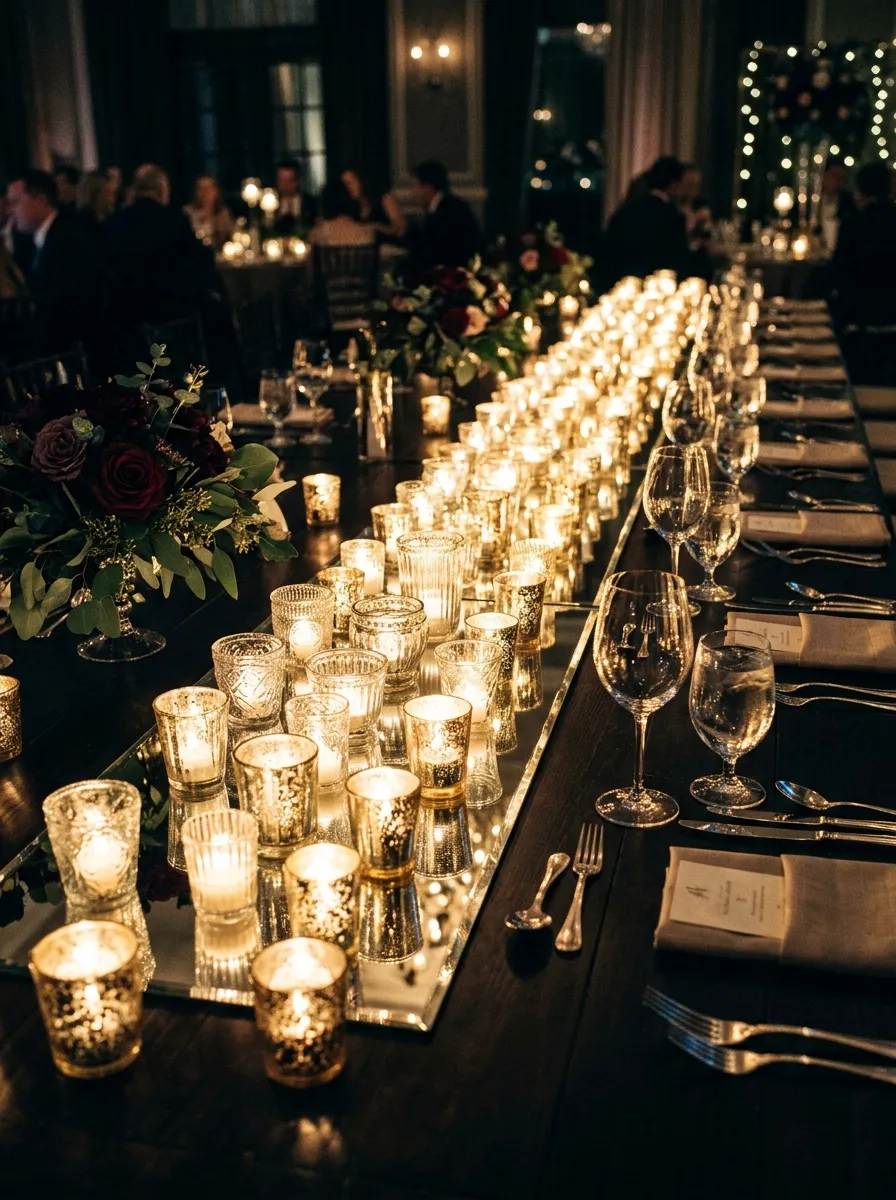
The mirrored refraction votive tablescape amplifies ambient light through optical multiplication, creating the visual impression of hundreds of flames dancing across the reception room. This design relies on long, narrow beveled mirror runners placed flat along the center of long banquet tables, layered with densely packed collections of pressed-glass, ribbed, and mercury-glass votive cups. The mirrored base reflects the downward light of the votive candles upward, doubling the perceived illumination without introducing extra heat or fire hazards. The varying textures of the glass cups—such as hobnail bumps, vertical fluting, and mottled silver foils—scatter the light into intricate, glittering patterns across the table linens and flatware. This installation functions exceptionally well in windowless reception ballrooms, historic basements, and evening marquee tents, turning simple votive candles into a luminous, sparkling carpet of light that serves as the visual anchor of the tablescape.
Start by placing long, beveled glass mirror plates down the middle of the table, wiping both sides with glass cleaner to eliminate streaks and adhesive residue. Gather twenty to thirty assorted clear, frosted, and metallic mercury-glass votive holders per eight-foot table section, ensuring their base rims are completely smooth to prevent scratching the mirrors. Insert a high-grade, metal-cupped or clear-cupped four-hour tea light into each holder, choosing clear cups over aluminum to maximize horizontal light output. Arrange the votives across the mirror surface in an alternating, organic cluster, grouping taller ribbed glasses toward the center and lower tea light glasses along the perimeter. Leave consistent half-inch air gaps between adjacent glasses to avoid trapped heat buildup across the mirror plate. Light the votive cups sequentially from the center outward using an extended gas lighter, creating an uninterrupted ribbon of candlelight down the table.
Idea 7: Terracotta and Beeswax Rustic Hearth
Execution Process
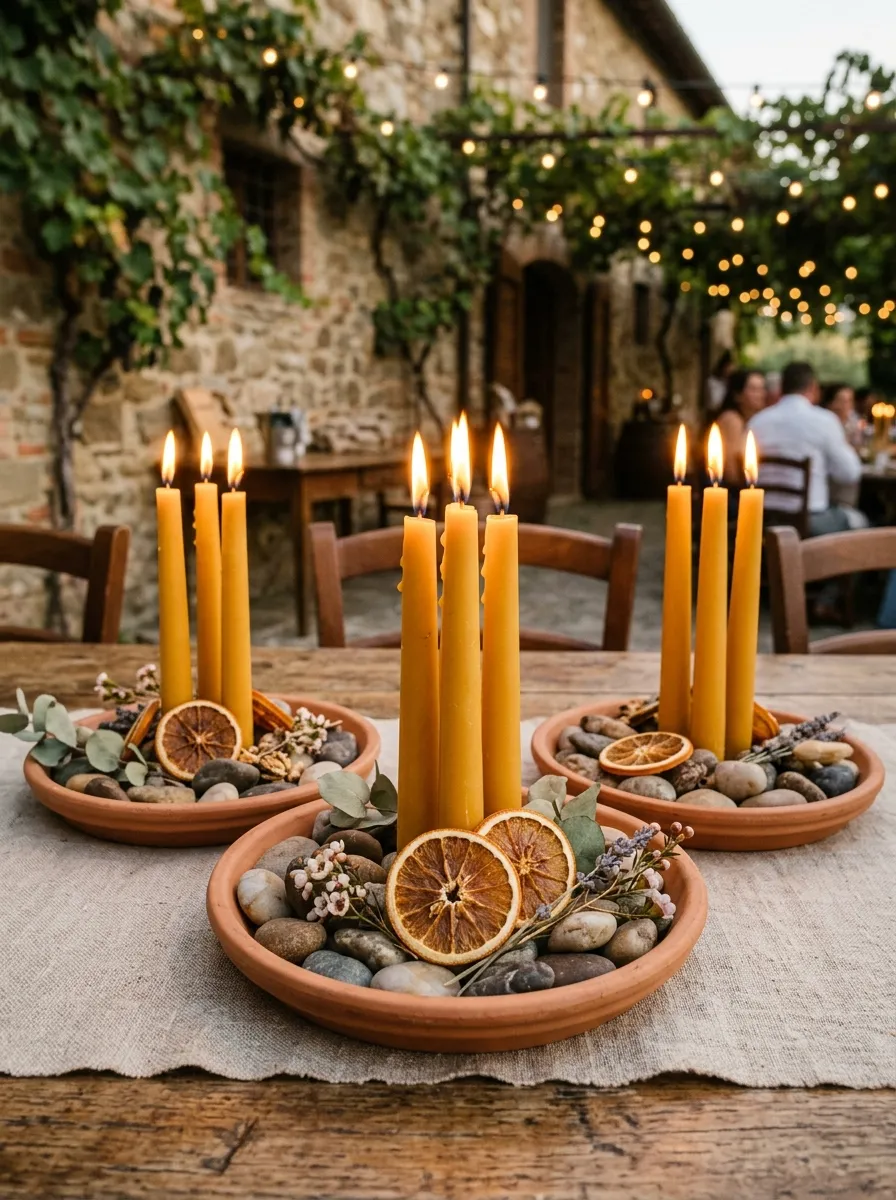
The terracotta and beeswax rustic hearth concept brings an organic, earthy feel to wedding receptions using natural clay vessels and pure golden beeswax tapers. This design pairs the warm orange and ochre tones of porous terracotta dishes with the rich honey-yellow shades of authentic rolled or dipped beeswax candles. Unlike stark white paraffin wax, natural beeswax produces a warmer, amber flame spectrum and emits a subtle honey aroma that enriches the dining atmosphere without clashing with the meal. Terracotta saucers and miniature pots act as sturdy bases, catching stray wax drips while grounding the tablescape in natural textures. This styling suits rustic farm venues, Tuscan-inspired outdoor celebrations, and autumn gatherings. The combination of matte fired earthenware, unbleached linens, and warm beeswax creates an inviting environment that feels relaxed, artistic, and deeply hospitable.
Gather clean, unglazed terracotta plant saucers measuring six inches in diameter to serve as heat-resistant candle bases along the table runner. Secure a heavy metal floral pin frog to the center of each saucer using waterproof floral adhesive putty, pressing down firmly to establish a watertight seal. Press the bases of three varying lengths of pure beeswax tapers onto the brass pins of the frog, ensuring each candle stands straight. Fill the surrounding saucer cavity with clean, dry pea gravel or tumbled river stones to conceal the metal frog and add structural weight to the base. Scatter dried botanical elements—such as whole cinnamon sticks, dried orange slices, and bay leaves—across the stone surface, keeping them two inches away from the candle wicks. Light the pure beeswax wicks using wooden safety matches, trimming away charred wick ends to preserve an even, amber flame.
Idea 8: Suspended Candle Halo Chandelier
Setup Method
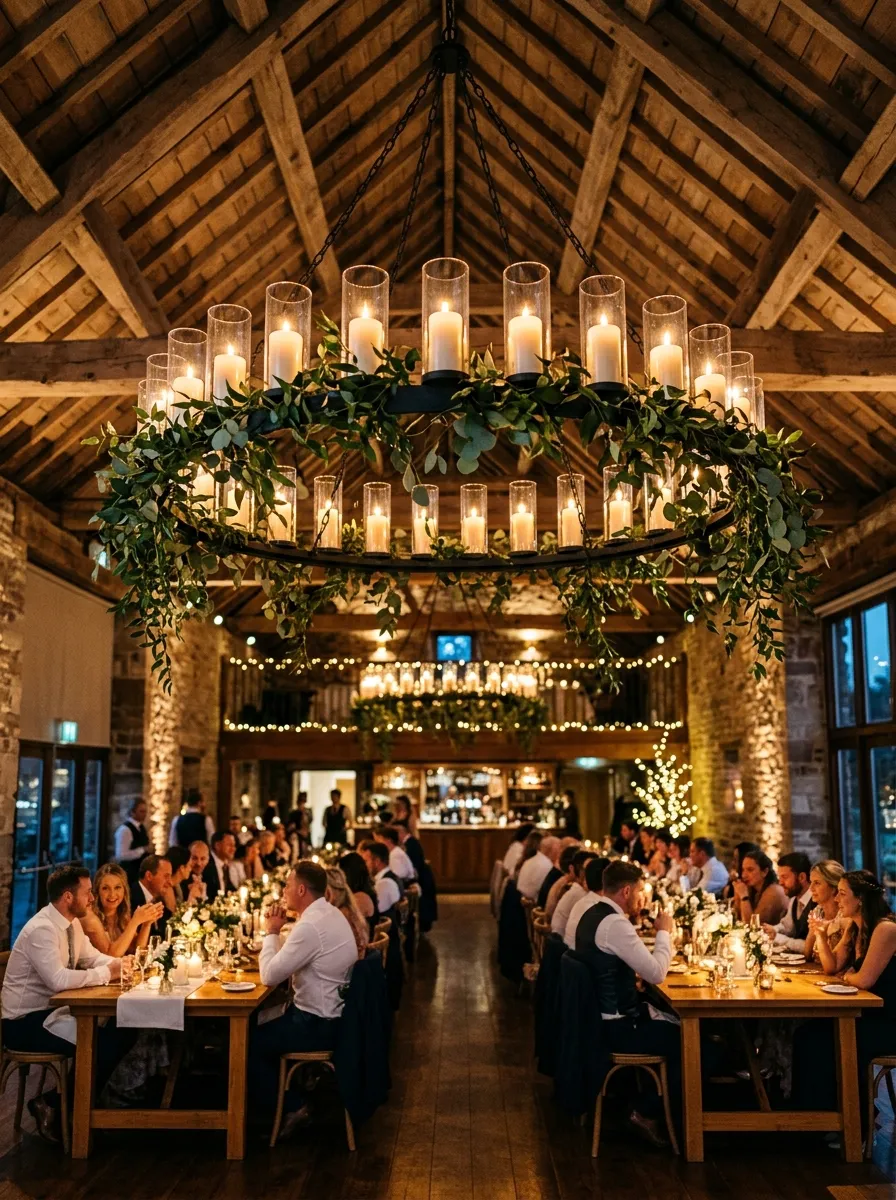
The suspended candle halo chandelier elevates the reception illumination into the overhead space, creating a dramatic canopy of floating light above the wedding party or dance floor. This aerial installation uses a lightweight circular metal or wooden hoop, securely hung from ceiling joists and fitted with safe, glass-enclosed pillar candles or enclosed glass tea light orbs. Lifting living light into the vertical architecture of the venue draws the eye upward, highlighting high ceilings, timber rafters, or sweeping tent fabrics. The overhead ring casts a soft, uniform pool of warm light downward over the dining tables, allowing the table surfaces below to remain open for family-style platters and guest place settings. This installation introduces an elevated sense of grandeur, transforming open event rooms into intimate dining halls reminiscent of historic European banquets.
Begin with a sturdy steel or heavy-gauge wire hoop measuring three to four feet in diameter, inspecting all welding points for structural integrity. Attach three steel hanging cables evenly around the hoop rim, connecting them to a heavy-duty central carabiner rated for overhead loads. Fasten six to eight metal candle platforms with raised safety lips around the perimeter of the hoop, securing each bracket with locking nuts. Place a four-inch glass hurricane sleeve onto each platform, locking the glass base into the metal rim. Insert a battery-powered LED wax-coated pillar candle or a secure tea light cup into each glass cylinder, avoiding open-wick real flames overhead where dripping wax or fire could pose risks to guests below. Weave lightweight greenery—such as preserved Italian ruscus or faux smilax—around the lower metal ring, securing all foliage away from the tops of the glass cylinders with zip ties. Hoist the halo to the ceiling beam using a certified winch, and lock it into place.
Idea 9: Monochromatic Sculptural Wax Table Accents
How to Create
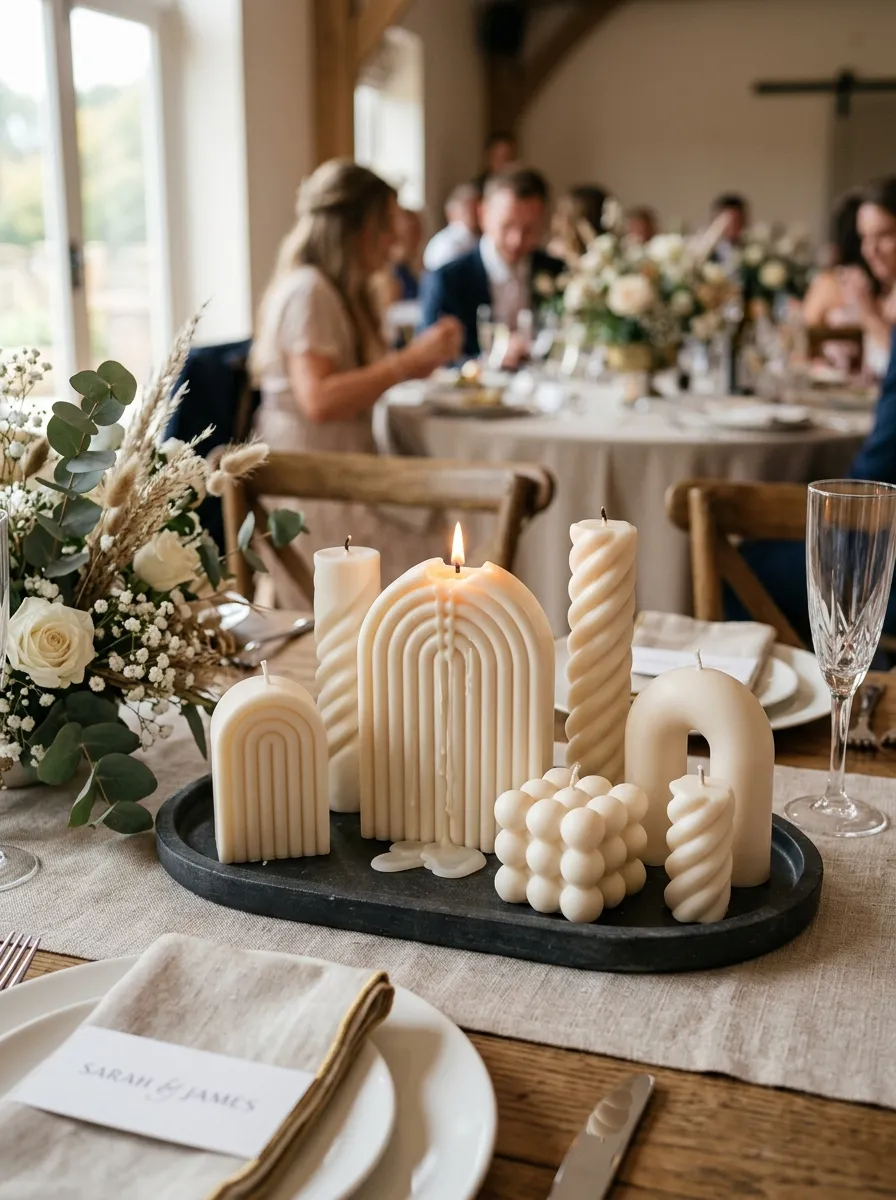
Monochromatic sculptural wax table accents treat the candles themselves as geometric works of art, blending modernist design with functional illumination. This concept moves away from traditional smooth cylinders, utilizing modern geometric candles shaped into twisted pillars, stacked spheres, arches, and ribbed pillars. By executing the entire arrangement in a single monochromatic color family—such as bone white, soft sage, or muted charcoal—the emphasis shifts entirely to shape, texture, and light interaction. Arranging varied sculptural forms down the table creates an artistic gallery feel that complements minimalist table linens, clean paper goods, and modern tableware. The varying shapes melt at different rates throughout the evening, creating an evolving, dynamic wax sculpture that captures the eye. This look appeals to design-focused couples seeking a reception aesthetic that feels contemporary, editorial, and visually distinctive.
Select an assortment of modern sculptural soy candles, including ribbed columns, bubble cubes, arch forms, and twisted tapers, all cast in matching monochromatic hues. Place smooth, low-profile matte ceramic trays down the center of the dining table to act as clean drip catches that protect the table linens. Group three sculptural candles of contrasting geometric shapes on each tray, positioning the tallest geometric form at the rear to maintain balanced visibility. Anchor each sculptural candle to the tray base with a small disc of clear museum putty to prevent slipping during the meal. Ensure a two-inch safety gap between adjacent candles so their asymmetrical forms do not melt into each other during burning. Light the cotton wicks with a long match, allowing the wax to melt naturally down the stepped edges and fluted curves of each candle.
Idea 10: Trough Planter Water Hearth Runner
Step-by-Step Guide
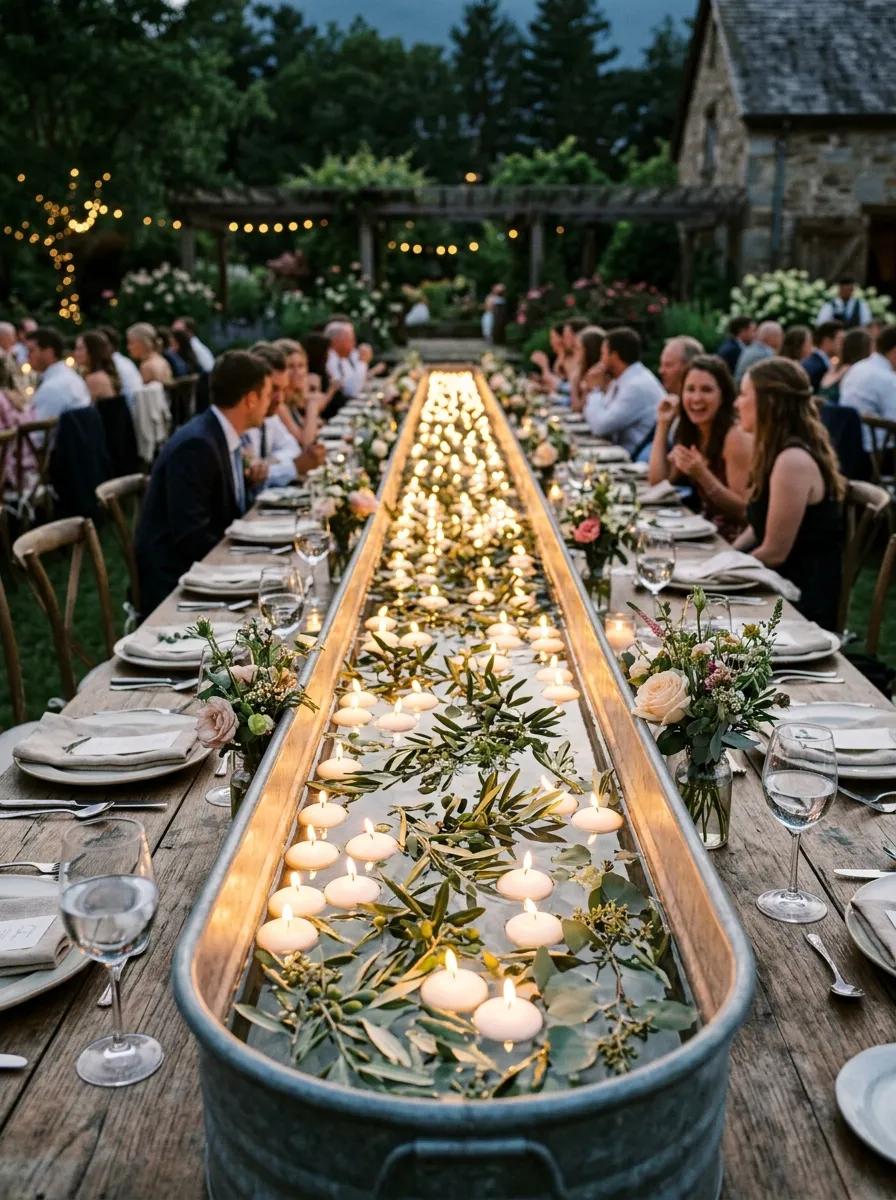
The trough planter water hearth runner creates a continuous, unbroken river of flame down the length of long banquet tables, combining reflective water and clustered floating candles within a single container. This design utilizes long, narrow zinc, galvanized metal, or acrylic trough planters filled with water to house dozens of floating candles alongside delicate floating botanicals. By containing the water and floating candles inside a single continuous vessel, the tablescape feels unified rather than broken into separate centerpieces. The water surface captures and reflects the light of every flame, creating a vibrant ribbon of movement that runs the length of the dining space. The low profile of the trough keeps lines of sight open across the table, making conversation easy for guests. This installation works wonderfully in industrial warehouse spaces, rustic garden venues, and outdoor receptions, providing a wind-resistant, safe lighting display with immense dramatic presence.
Source narrow rectangular metal, acrylic, or sealed wooden troughs measuring four to six inches wide and three to four feet long, ensuring every unit is completely watertight. Place the troughs end-to-end down the center of the table, wiping the interiors clean with a damp cloth to remove metal filings or dust. Fill each trough three-quarters full with clean water, using a portable water pitcher on-site to avoid lifting heavy, water-filled containers. Place single stems of flat floating foliage—such as rosemary sprigs, olive leaves, or camellia leaves—flat on the water surface, keeping the plant material spread out. Float round three-inch white floating candles along the length of the trough, leaving an inch of clear water between adjacent candles. Check that the wicks remain dry during placement, and ignite the floating candles twenty minutes before the reception doors open using an extended utility lighter.
Common Beginner Mistakes and How to Avoid Them
A frequent mistake in DIY wedding candle decoration is overlooking the impact of indoor air circulation from heating vents, open doors, and air-conditioning units. Uncontrolled airflow causes even high-grade dripless tapers to burn unevenly, resulting in messy wax drips that ruin expensive table linens and cause excessive smoke. Always encase open flames in glass hurricane sleeves, tall cylinders, or protective lanterns, especially in breezy venues or outdoor marquees. Another common error is using heavily scented candles within dining spaces; strong fragrances clash with the wedding dinner and can trigger allergic reactions among seated guests. Ensure that every candle, floating disc, and votive placed on dining tables is completely unscented. Decorators also frequently underestimate the required burning time, purchasing short-burn tea lights that burn out before speeches and dinner conclude. Always choose tea lights rated for six to eight hours of burn time, checking manufacturer specifications carefully before purchasing in bulk. Finally, avoid placing hot candle glassware directly onto bare wooden tables, as the radiant heat from melted wax pools can mark or damage natural wood finishes.
Practical Tips for Better Results
Achieving a clean, professional finish with reception candle decor relies on proper wick care, intentional temperature management, and disciplined safety protocols. Trim all candle wicks to one-quarter inch using sharp wick trimmers before lighting; long wicks create tall, unsteady flames that produce soot marks on the interior walls of glass hurricane cylinders. Keep a micro-cleaning kit on-site containing microfiber cloths, glass cleaner, and cotton swabs to quickly wipe away fingerprints and soot marks before guests enter the room. To remove stubborn wax drips from glass sleeves and brass holders after the wedding, submerge the items in warm, soapy water for twenty minutes; the softened wax slides off cleanly without scratching delicate glass or metal surfaces. When calculating candle quantities, plan for three to five points of light per linear foot on long tables, or five to seven candles per round table, ensuring a warm, continuous glow without crowding table settings. Finally, assign a dependable venue coordinator or friend to complete a lighting check thirty minutes prior to guest arrival, relighting extinguished wicks and replacing spent tea lights throughout the night.
Styling, Presentation, or Organization Ideas
Styling reception candle displays effectively requires balancing light sources with surrounding table textures, place settings, and floral elements. Pair warm candlelight with matte fabrics—such as crinkled linen table runners, woven cheesecloth, or brushed velvet ribbons—to soften the reflections and create an inviting, tactile table. When working with long banquet tables, arrange candles in a rhythmic wave, alternating clusters of tall glass cylinders with low votives to create visual movement down the length of the room. Match the tones of your candle wax and glass holders with the broader wedding color scheme; for example, pair amber glassware with warm autumn florals, or choose smoky gray glass to complement cool modern suiting. Integrate paper goods, such as menus and table numbers, by placing them beside low votives that illuminate calligraphed details during dinner. When documenting your reception tables, capture test photos during the golden hour just before dusk; this window balances natural fading daylight with the emerging glow of candlelight, producing rich, atmospheric imagery for your wedding archives.
Budget or Time Planning
Organizing a cost-effective and stress-free wedding candle installation relies on bulk sourcing, early purchasing, and structured assembly timelines. Purchasing candles and basic glassware in bulk from wholesale event suppliers lowers costs compared to buying retail pieces at home decor shops. Couples can also source mismatched brass candlesticks and vintage pressed-glass votives gradually from thrift stores, estate sales, and wedding buy-back forums over several months. In terms of event-day scheduling, assemble all non-perishable hardware—such as cleaning glass sleeves, attaching wax positioning dots to holders, and trimming wicks—two weeks before the wedding date. Pack prepared items into durable plastic storage bins organized by table number, cushioning glass pieces with bubble wrap or cardboard dividers to ensure safe transit. On the morning of the wedding, setup teams can quickly position the pre-assembled sets onto tables, leaving only the task of lighting the wicks before the reception begins. Having a clear plan and dedicated supplies ensures that setup proceeds smoothly, allowing couples to enjoy their celebration without logistical stress.
Creative Expansion and Advanced Inspiration
Once you master foundational candle tablescape techniques, you can explore advanced styling concepts that blend dynamic lighting effects, mixed materials, and architectural scales. Experiment with dipping white tapers into melted colored soy wax to create custom ombre finishes that match your wedding palette. You can also explore floating candles placed in shallow, blackened steel water basins along reception lounge areas, combining industrial metal textures with the warmth of reflective flames. Another creative direction involves using custom-cut clear acrylic risers beneath glass hurricane cylinders, elevating light sources above table greenery to create multi-tiered light displays that feel weightless. For outdoor evening celebrations, consider lining stone steps, garden pathways, and courtyard fountains with hundreds of glass-shielded votives, guiding guests between spaces with a trail of light. Combining structured candle displays with thoughtful venue lighting design transforms your reception space, turning an ordinary room into an unforgettable, atmospheric celebration filled with warmth, romance, and timeless elegance.