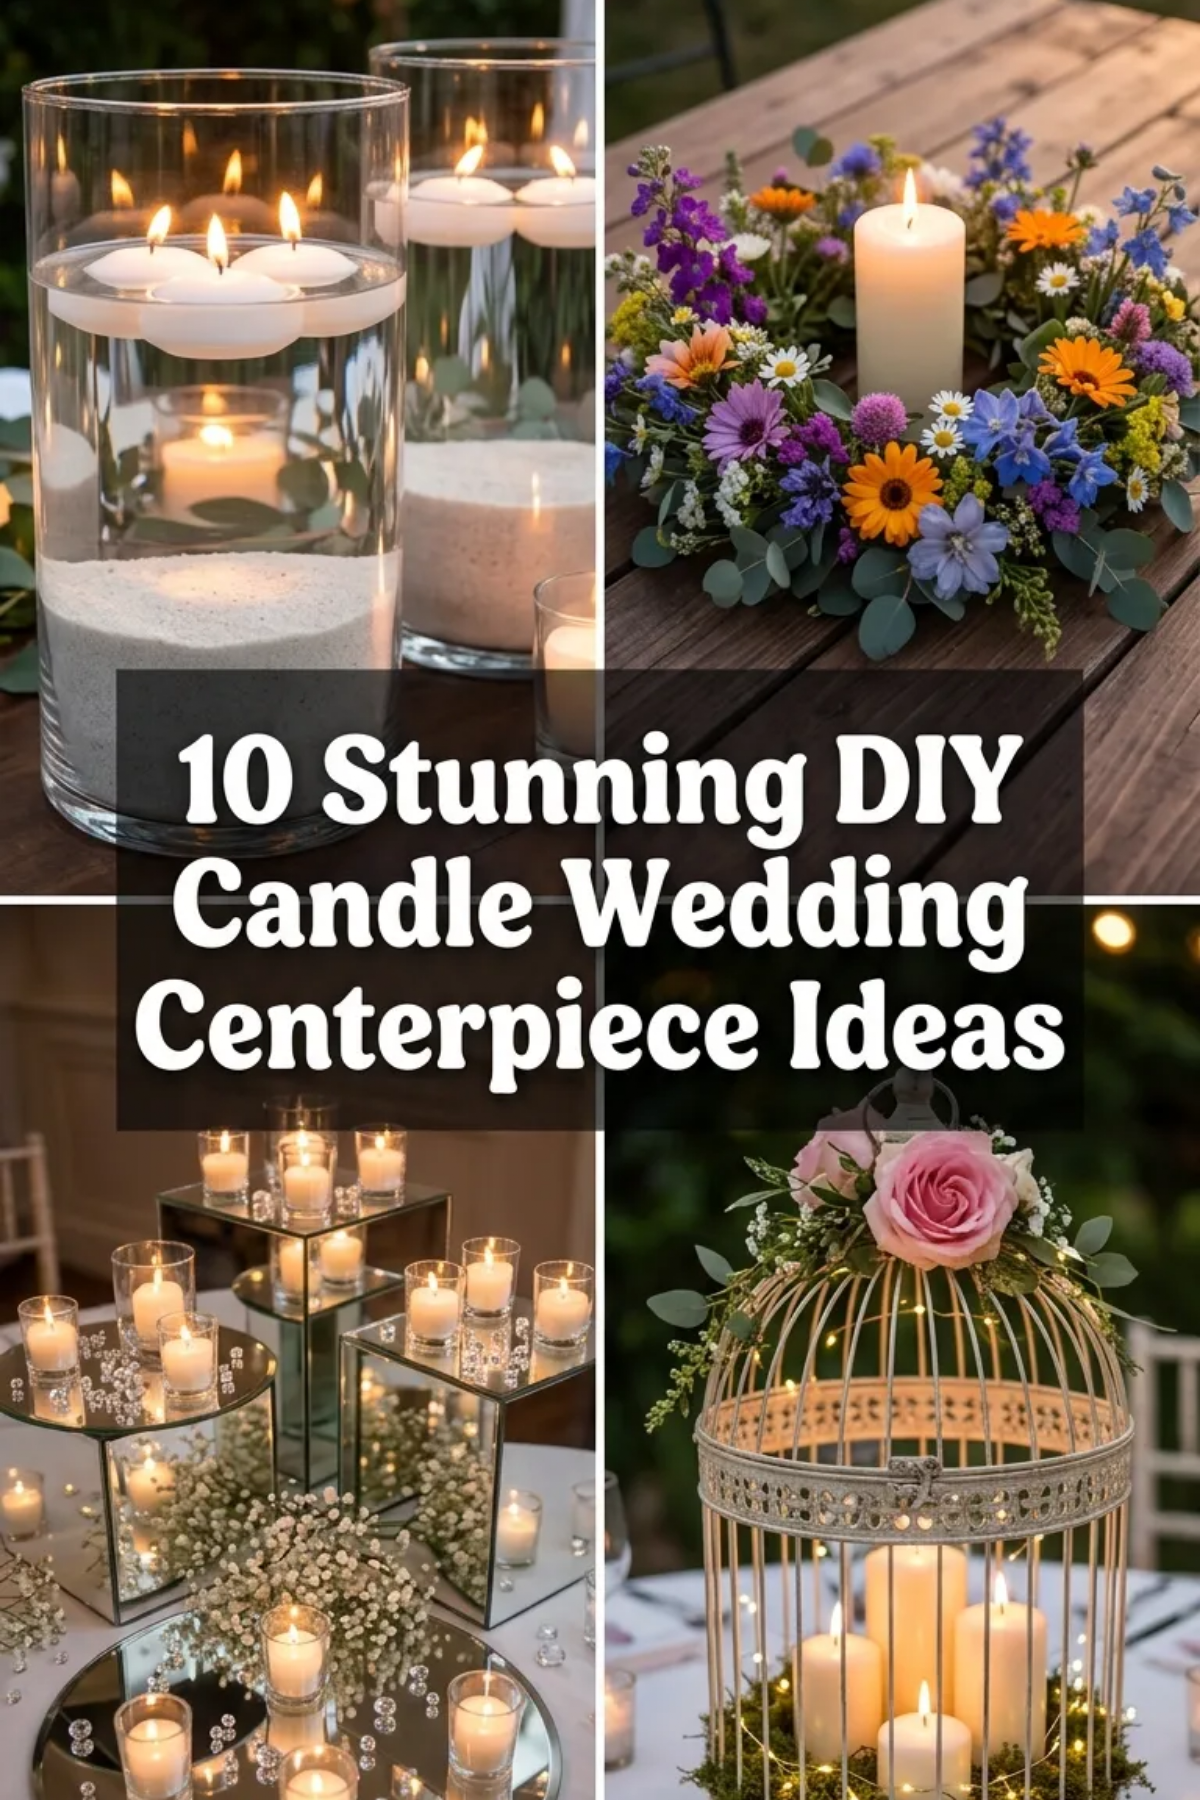
Candle wedding centerpieces remain among the most sought-after Pinterest ideas for event styling, wedding planning, and romantic reception design. Incorporating warm illumination onto reception tables elevates the entire…
Candle wedding centerpieces remain among the most sought-after Pinterest ideas for event styling, wedding planning, and romantic reception design. Incorporating warm illumination onto reception tables elevates the entire room, producing an inviting atmosphere that complements both rustic and contemporary aesthetics. This long-form tutorial details ten distinctive DIY candle centerpiece arrangements that balance visual beauty with functional event safety. Readers will learn how to choose appropriate wax materials, manage vessel dimensions, integrate fresh botanicals, and build multi-tiered displays with absolute confidence. Wedding decor often commands a substantial portion of an event budget, making handmade centerpiece construction a highly practical endeavor for couples and planners alike. Learning to construct your own tablescapes allows for total creative control over color palettes, textures, and vessel arrangements, ensuring that every detail aligns with your personal wedding vision. Each section in this guide focuses on reliable assembly methods, proper dimension balancing, and professional styling strategies. Whether you are assembling simple floating disc displays or crafting complex greenery garlands surrounded by glass pillars, this comprehensive resource provides the practical steps necessary to execute professional-grade tablescapes efficiently.
Why This Idea Is Trending or Useful
Candlelit tablescapes continue to dominate trending ideas across visual planning platforms due to their unmatched versatility, timeless elegance, and cost-effective nature. Modern design movements favor warm, atmospheric illumination over rigid, oversized floral installations that often obstruct guest sightlines across banquet tables. From a practical standpoint, candle centerpieces serve a dual purpose by delivering essential ambient lighting while functioning as primary decorative focal points. The DIY appeal of these projects is substantial, as wax pillars, floating candles, and glass hurricanes require no advanced floristry experience to look exceptional. Beginners can master basic compositional techniques quickly, assembling cohesive tablescapes with standard glass cylinders, water, and seasonal foliage. Furthermore, candles integrate seamlessly into varied aesthetic themes, bridging the gap between minimalist modern receptions and classic vintage gatherings. By utilizing candle-focused decor, couples significantly reduce their total floral expenditure without sacrificing texture, depth, or visual luxury. The approachable assembly, broad material availability, and reliable visual impact make candle centerpieces an indispensable asset in modern wedding planning.
Materials and Preparation
Thorough planning and proactive workspace preparation ensure a seamless, stress-free execution of handmade wedding centerpieces. Essential materials include clean glass hurricane sleeves, cylinder vases of varying heights, unscented pillar candles, floating wax discs, taper candles, and submersible floral accents. Basic tools should feature heavy-duty glass cleaning spray, microfiber cloths, utility lighters, floral shears, museum wax dots for candle stabilization, and shallow water pouring pitchers. Before assembling any components, review the fire safety guidelines and open-flame policies established by your wedding reception venue. Measure your designated banquet or round tables carefully to establish the proper ratio between decorative elements, place settings, and serving ware. Clean every glass surface thoroughly with an ammonia-based cleaner or rubbing alcohol twenty-four hours before the event to eliminate fingerprints, dust, and manufacturing residue. Trim all candle wicks to precisely one-quarter inch to prevent excessive smoke output and promote an even, controlled wax pool during the reception. Organizing all components by table number inside padded transport bins streamlines the on-site venue setup process considerably.
Floating Florals in Tiered Glass Cylinders
Step-by-Step Guide
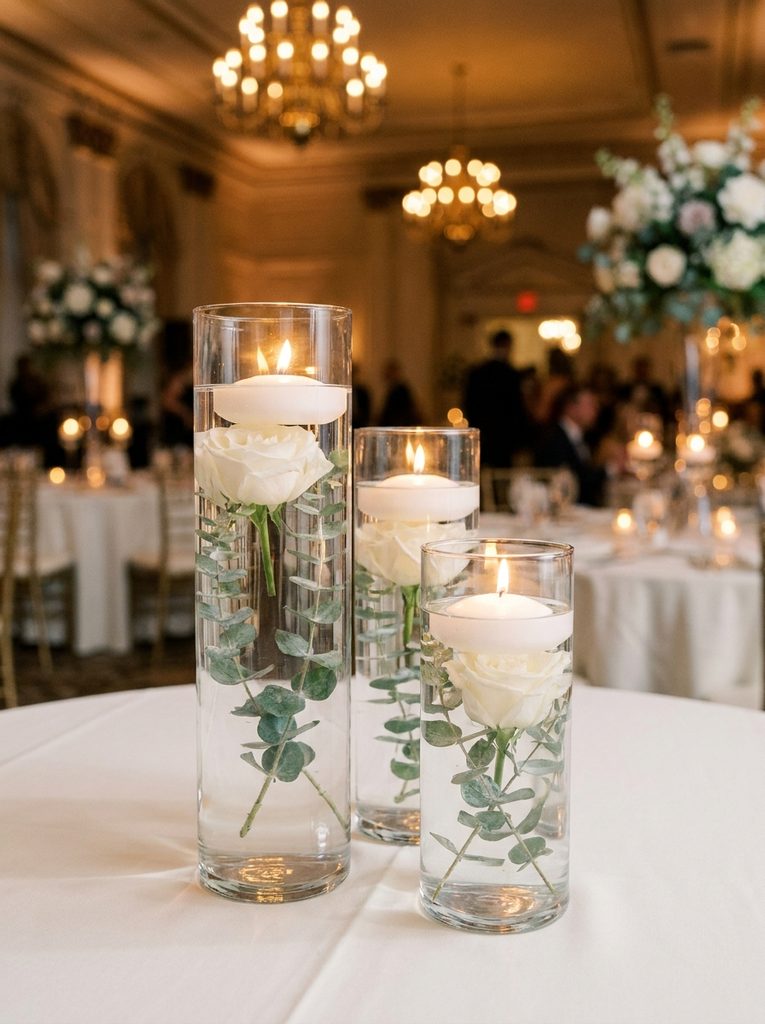
The floating floral concept uses three staggered glass cylinder vases filled with clear water, submerged botanical stems, and buoyant wax discs. This design relies on vertical variation, typically pairing fifteen, twenty, and twenty-five-centimeter heights to produce dynamic movement along long reception tables or central anchors for round settings. Submerged greenery, such as silver dollar eucalyptus, delicate fern fronds, or single white rose blooms, creates optical magnification beneath the water surface, amplifying visual richness. White floating candles resting on the water line introduce soft reflections that bounce through the transparent glass, enhancing the room’s ambient glow. Because the flame remains enclosed within the upper rim of the cylinder, this style conforms to strict venue safety rules while retaining a sophisticated, minimalist style. The look is exceptionally durable, maintaining crisp freshness throughout the duration of a long evening celebration without wilting.
Begin by arranging your three graduated glass cylinders closely together in the center of the table surface to determine their orientation. Select trimmed botanical stems, ensuring their height remains approximately three centimeters below the anticipated water line to prevent them from contacting the floating candle. Anchor the base of heavier stems beneath clean decorative river stones or transparent floral glass weights to ensure they stay submerged. Fill each cylinder with distilled room-temperature water using a narrow-spout pitcher, leaving at least four centimeters of clearance beneath the top rim. Tap the exterior of the glass gently with a wooden dowel to dislodge any air bubbles clinging to the submerged foliage. Carefully lower a three-inch circular floating wax disc onto the water surface, ensuring the wick remains completely dry during placement. Wipe the exterior glass walls with a dry microfiber towel to eliminate accidental water splashes, then light the wick just before guest arrival.
Clustered Pillar Candles on Mirror Trays
Execution Process
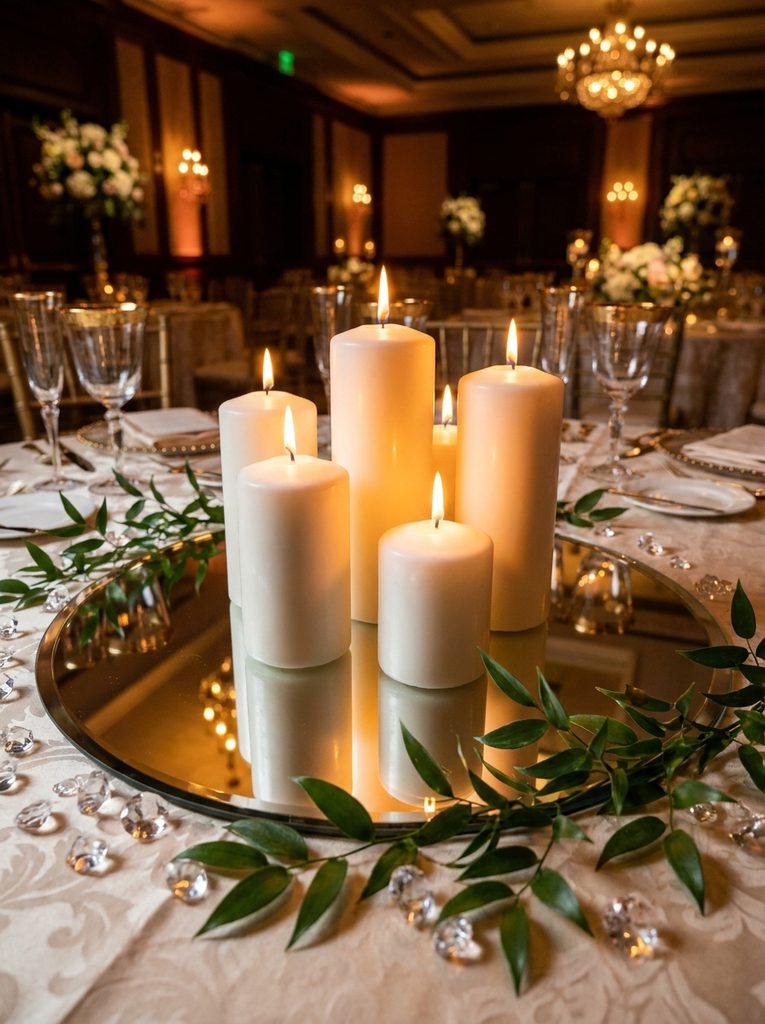
Clustering unscented white pillar candles atop beveled mirror trays creates an opulent, light-amplifying centerpiece that suits classic ballroom receptions and modern banquet halls. The reflective surface of the mirror plate doubles the visual impact of the burning flames, casting bright, dancing reflections across tableware and glassware. This setup uses five to seven pillar candles of differing heights and diameters, forming a dense, structured grouping that feels both architectural and warm. Surrounding the base of the candles with scattered pearl beads, clear acrylic crystals, or loose olive branches softens the hard edges of the mirror glass. The variation in candle dimensions ensures visual interest from every angle, preventing the arrangement from looking flat or repetitive to seated guests. This centerpiece style functions as an easy project that delivers substantial decorative presence with minimal physical labor on the day of the event.
Start by placing a round or octagonal beveled mirror tray measuring thirty centimeters in diameter directly in the center of the banquet linen. Wipe the mirror face with glass cleaner and a microfiber towel to remove all smudges, dust particles, and fingerprints before arranging candles. Select five pillar candles measuring five, ten, and fifteen centimeters in height, ensuring each candle shares an identical creamy white or ivory undertone. Apply a pea-sized dot of removable adhesive wax or museum putty to the base of each pillar candle before firmly pressing it onto the mirror. Position the tallest candles toward the center of the tray, arranging the medium and shorter pillars around the perimeter for balanced weight distribution. Maintain a consistent two-centimeter clearance between individual candles to prevent excessive heat buildup from warping neighboring wax pillars during burning. Trace the outer rim of the mirror plate with delicate sprigs of fresh Italian ruscus to finish the display.
Taper Candles with Lush Ruscus Garlands
Setup Method
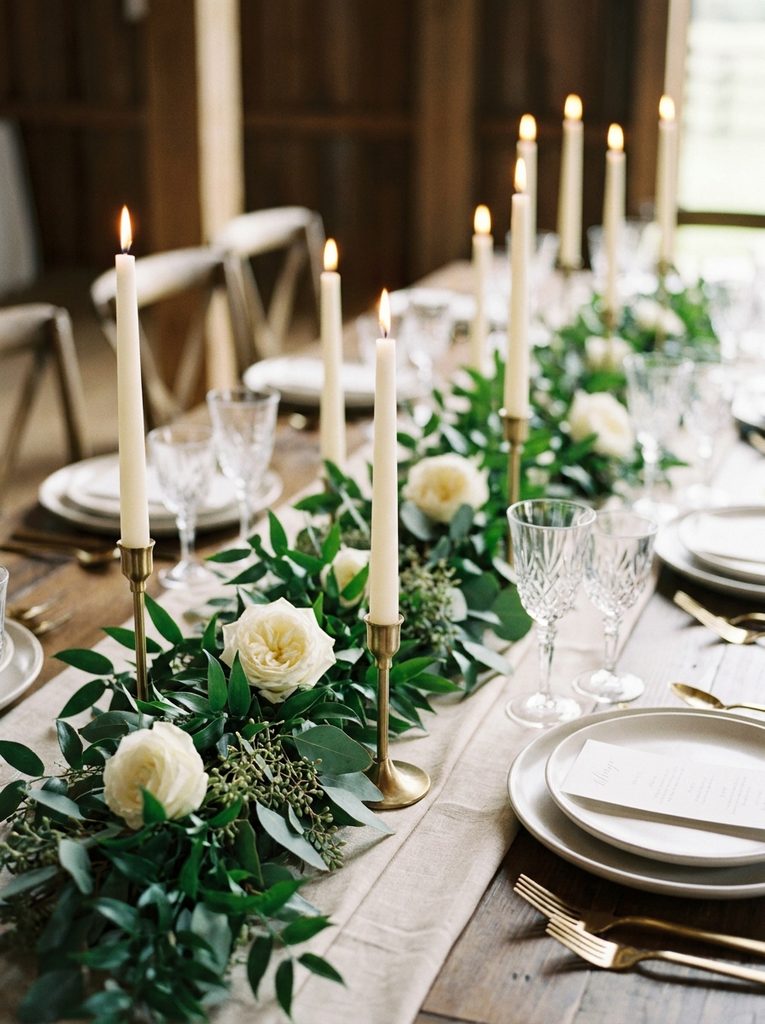
Slender taper candles nestled within continuous greenery garlands represent one of the most celebrated trending ideas for long, rustic banquet tables. This design uses tall, elegant paraffin or dripless beeswax tapers secured inside low-profile glass, brass, or ceramic holders spaced evenly along a table runner. A full, textured garland crafted from Italian ruscus, salal leaves, and seeded eucalyptus weaves between the candle bases, disguising the holders and grounding the tall vertical lines. The dynamic contrast between the fine verticality of the tapers and the horizontal sprawl of the foliage creates a breathtaking, garden-inspired atmosphere. Using tapers in varying shades, such as classic ivory, muted taupe, or dusty rose, allows planners to reflect specific seasonal wedding themes effortlessly. This arrangement fosters intimate dining by maintaining clear sightlines across the table while bathing the seated guests in soft, flattering light.
Lay a pre-assembled fresh greenery garland down the absolute center spine of the long banquet table, adjusting the branches to ensure uniform thickness throughout. Clear small circular openings within the foliage foliage every forty centimeters to establish secure, flat footprints for your individual taper candle holders. Place heavy-based brass or clear glass holders inside these designated gaps, ensuring each holder rests flat against the tabletop surface without rocking. Insert dripless taper candles measuring twenty-five to thirty centimeters in height firmly into each socket, using small wax adhesive rings if the fit feels loose. Check that every taper stands vertically straight from both front and side perspectives to guarantee an even burn rate and prevent hot wax runs. Lightly mist the surrounding ruscus foliage with clean water from a spray bottle to refresh the leaves without wetting the exposed candle wicks.
Geometric Terrariums with Embedded Votives
How to Make
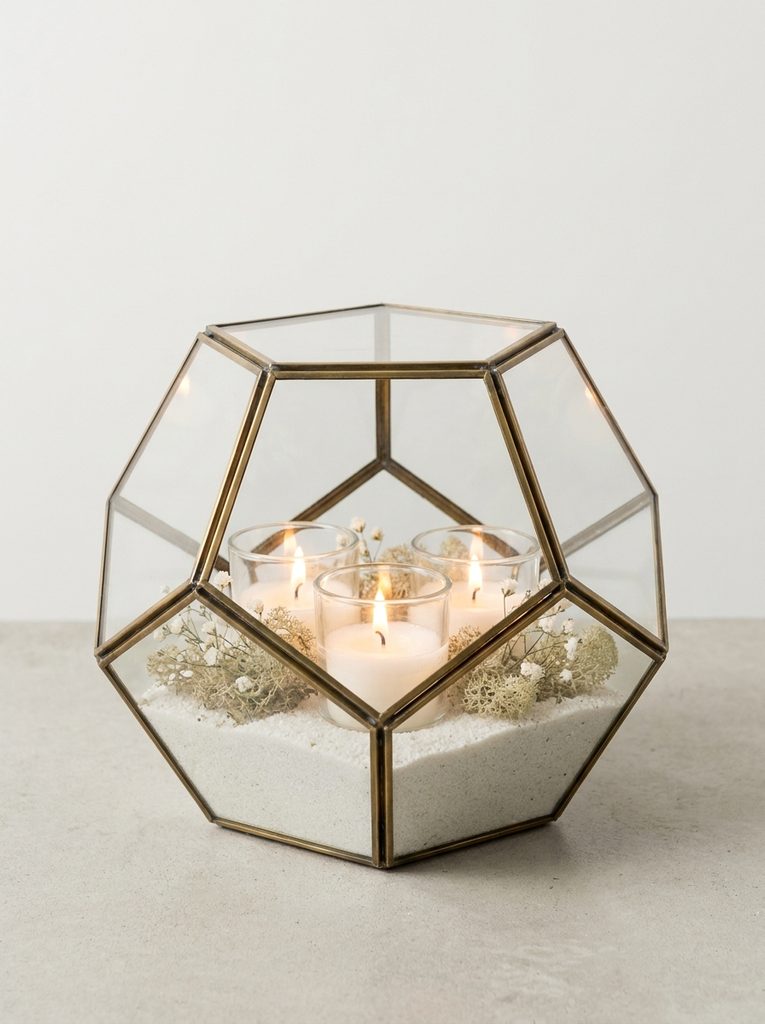
Geometric metal-framed terrariums housing interior votive candles bring a crisp, architectural presence to modern minimalist wedding tablescapes. Featuring faceted glass panes bonded by matte black, brushed brass, or antique copper metal seams, these vessels combine clean industrial lines with vintage charm. Placing three to four glass-encased votive candles inside a single geometric terrarium produces multiple angled reflections across the angled exterior facets. To ground the display, the base of each terrarium is lined with natural materials such as dry white sand, preserved moss, or polished river pebbles. This arrangement is especially practical for outdoor ceremonies and open-air receptions, as the tall geometric glass panels act as natural wind barriers that shelter the burning flames. The finished look provides an artistic, sculpted aesthetic that doubles as striking home decor following the conclusion of the wedding festivities.
Position a twenty-centimeter faceted geometric terrarium in the table center, orienting the primary open access panel toward the least busy direction of the tablescape. Pour a two-centimeter foundation layer of washed white quartz sand or fine river pebbles evenly across the bottom interior of the metal frame. Smooth the bedding material flat with a small spoon, ensuring an even foundation that prevents candle holders from tilting during the evening. Select three clear glass votive cups containing high-quality eight-hour wax candles and press them gently down into the sand base. The sand layer provides a firm foundation for the votives while catching any stray wax drips, keeping the metal vessel frame clean. Add small dried floral sprigs or preserved reindeer moss around the glass votive bases, ensuring all combustible elements remain several centimeters away from the wicks.
Submerged Greenery with Floating Disc Candles
Step-by-Step Guide
Submerged botanical centerpieces with floating disc candles offer a clean, hydro-botanical presentation that emphasizes organic geometry and serene aquatic reflections. By placing complete leafy branches, such as olive stems, boxwood trimmings, or weeping fig foliage, fully beneath the water line, the natural textures remain vividly preserved. A wide-diameter floating candle disc positioned on the water surface provides steady, gentle illumination that shines downward through the foliage, creating dramatic shadow patterns across the tablecloth. The simplicity of using a single statement cylinder on round tables or repeating matching units down long banquet setups provides a cohesive aesthetic without visual clutter. This concept is exceptionally budget-friendly because local, hearty foliage can be harvested or purchased in bulk at minimal cost compared to delicate focal flowers. The sealed aquatic environment also completely eliminates any risk of wilting foliage throughout hot summer or heated indoor celebrations.
Clean a wide-mouth glass cylinder vase measuring twelve centimeters in diameter and thirty centimeters in height using a lint-free cloth and glass cleaner. Select a fresh, hardy greenery stem, trimming its lower woody portion to fit cleanly inside the interior dimensions of the cylinder. Affix a small floral suction cup or clear waterproof anchor to the cut base of the stem, securing it firmly to the interior glass bottom. Pour cool distilled water slowly down the interior wall of the cylinder to reduce turbulence and keep the foliage securely anchored at the base. Continue filling until the water level rests approximately five centimeters below the upper rim, allowing ample room for the floating candle. Blot the water surface lightly with a paper towel to remove any floating leaf debris, then place a smooth white floating candle disc centrally.
Vintage Glass Chimneys on Natural Wood Slices
Execution Process
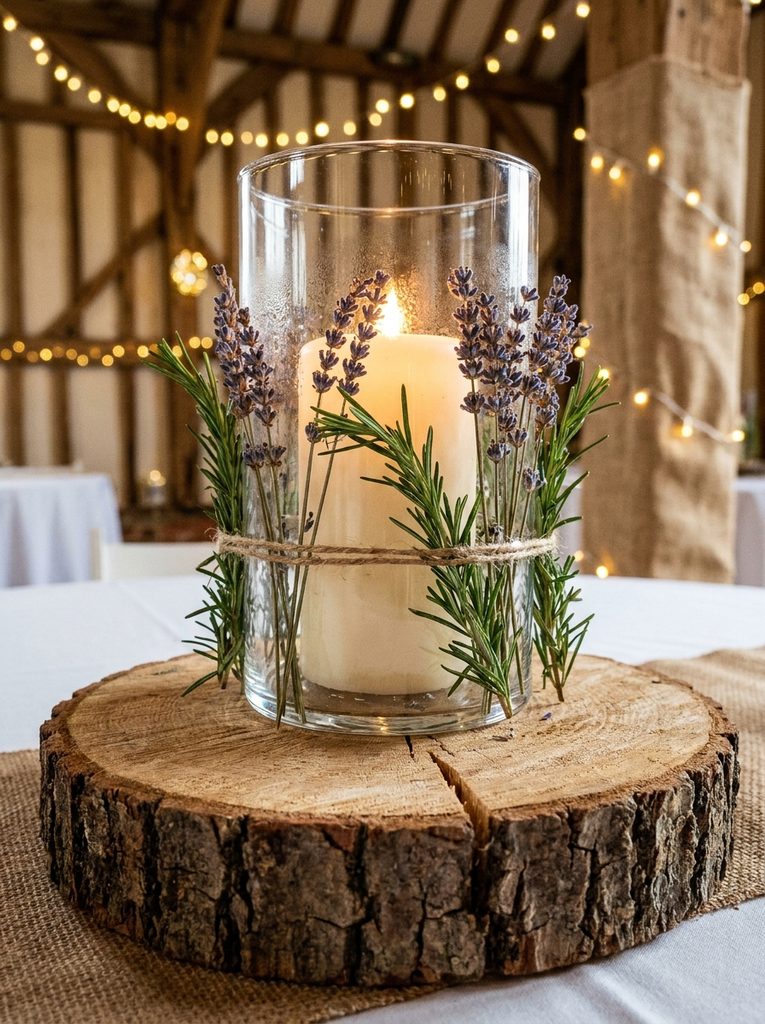
Pairing vintage glass hurricane chimneys with natural wood slices creates an authentic rustic centerpiece that introduces organic textures into barn or woodland celebrations. A thick cross-section of sanded kiln-dried wood, displaying raw bark along its perimeter, serves as the grounding architectural plate for the arrangement. A wide, traditional pillar candle is placed in the center, enclosed by a straight-sided or contoured glass chimney that extends well above the flame. Surrounding the perimeter of the wooden slice are small clusters of pine cones, dried lavender, or seasonal berries that accentuate the handcrafted appeal. The warm, earthy tones of the wood grain complement the soft glow of the candle, producing an inviting aesthetic that feels intentional and cozy. This setup protects table linens from potential heat damage while maintaining total stability across outdoor or uneven table surfaces.
Select a level, kiln-dried hardwood slice measuring approximately twenty-five to thirty centimeters in diameter and three centimeters in thickness to form your centerpiece base. Place the wood slice directly in the center of the table, testing its stability to confirm it rests flat without wobbling or shifting. Center a heavy glass hurricane chimney measuring twenty-five centimeters tall on the wood slice, tracing its footprint lightly with a pencil for positioning accuracy. Remove the glass and position an eight-centimeter diameter pillar candle directly within the marked center, securing it with an adhesive wax tab. Lower the glass chimney down over the candle, confirming that at least three centimeters of air space remains between the wax sides and the glass walls. Arrange dried botanicals, twine-wrapped cinnamon sticks, or fresh sprigs of rosemary around the outer glass perimeter along the wooden border.
Hurricane Lamps Encircled by Wreaths
Setup Method
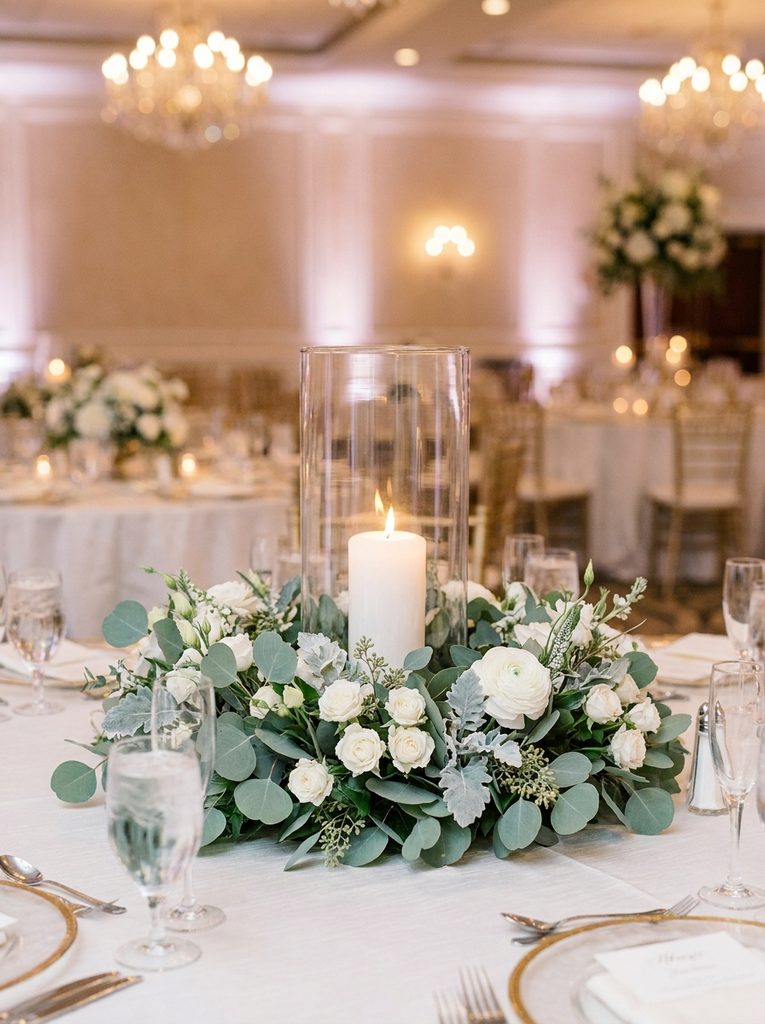
Enclosing a central glass hurricane lamp inside a tailored circular wreath yields a symmetrical, full-bodied centerpiece that works harmoniously on standard round banquet tables. A large cylindrical glass hurricane protects a substantial pillar candle, while a lush ring of greenery and focal blossoms wraps snugly around the base of the glass. The floral wreath softens the rigid vertical structure of the hurricane sleeve, creating a gentle transition from the tabletop surface to the illuminated glass column. Using a pre-formed floral foam wreath ring or an entwined grapevine base allows for rapid on-site assembly, as the floral element can be prepared fully in advance. This configuration concentrates floral investments into a dense, impactful footprint while letting the flickering flame provide vertical height and movement. The enclosed flame makes this design compliant with virtually all modern venue fire codes while delivering a luxurious, polished finish.
Select a heavy-bottomed glass hurricane cylinder measuring twenty-five centimeters in height and twelve centimeters in width to serve as the core decorative anchor. Prepare a matching circular wreath base measuring thirty centimeters in total exterior diameter, using wired grapevine or a saturated floral foam ring. Weave flexible branches of silver dollar eucalyptus, lemon leaf, and spray roses into the ring structure, creating a balanced, continuous garland circle. Place the finished botanical ring in the center of the table, then set the glass hurricane cylinder directly into the open central void. Lower a high-grade, unscented white pillar candle measuring fifteen centimeters tall into the cylinder, ensuring it sits squarely in the center. Verify that no leaves or decorative floral ribbons protrude over the top rim of the hurricane or touch the heated glass surfaces.
Multi-Stem Bud Vases with Taper Candles
How to Make
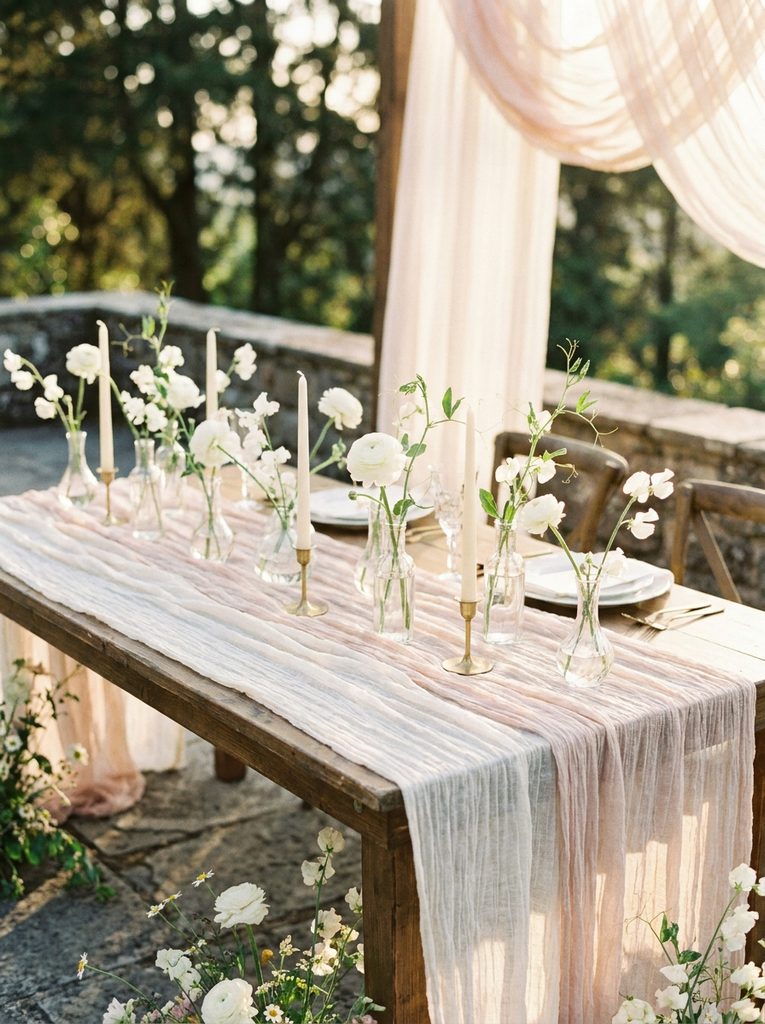
The multi-stem bud vase and taper candle tablescape utilizes rhythmic spacing and delicate scale to construct an airy, modern romantic presentation. Instead of concentrating flowers and candles into a single dense mass, this design scatters small glass bud vases and slim tapers across the central table runner. Each bud vase contains just one or two delicate blooms, such as ranunculus, sweet peas, or lisianthus, paired with minimalist glass or ceramic taper holders. Spreading these slender elements across varying heights creates an expansive, artistic tablescape that feels curated and effortless. The open spaces between vessels allow table linens, dinnerware, and ambient room light to interact naturally, producing an uncluttered modern aesthetic. This method proves exceptionally economical, as a modest quantity of loose flowers and standard taper packs can decorate a long table surface comprehensively.
Begin by setting a neutral fabric runner down the length of the table to establish a unified backdrop for your collection of small vessels. Arrange five assorted glass bud vases of varying heights in a loose, undulating zigzag formation down the central third of the runner. Intersperse four slender taper candle holders between the bud vases, maintaining an even distance of roughly twenty centimeters between each open flame. Fill the bud vases halfway with clean water, inserting a single trimmed focal bloom and a light sprig of greenery into each container. Mount twenty-centimeter dripless taper candles into the holders, ensuring they are firmly secured with wax adhesive rings so they remain perfectly straight. Step back from the table to assess the balance of heights, moving individual bud vases or tapers to ensure an organic distribution of color and flame.
Frosted Glass Luminary Clusters
Step-by-Step Guide
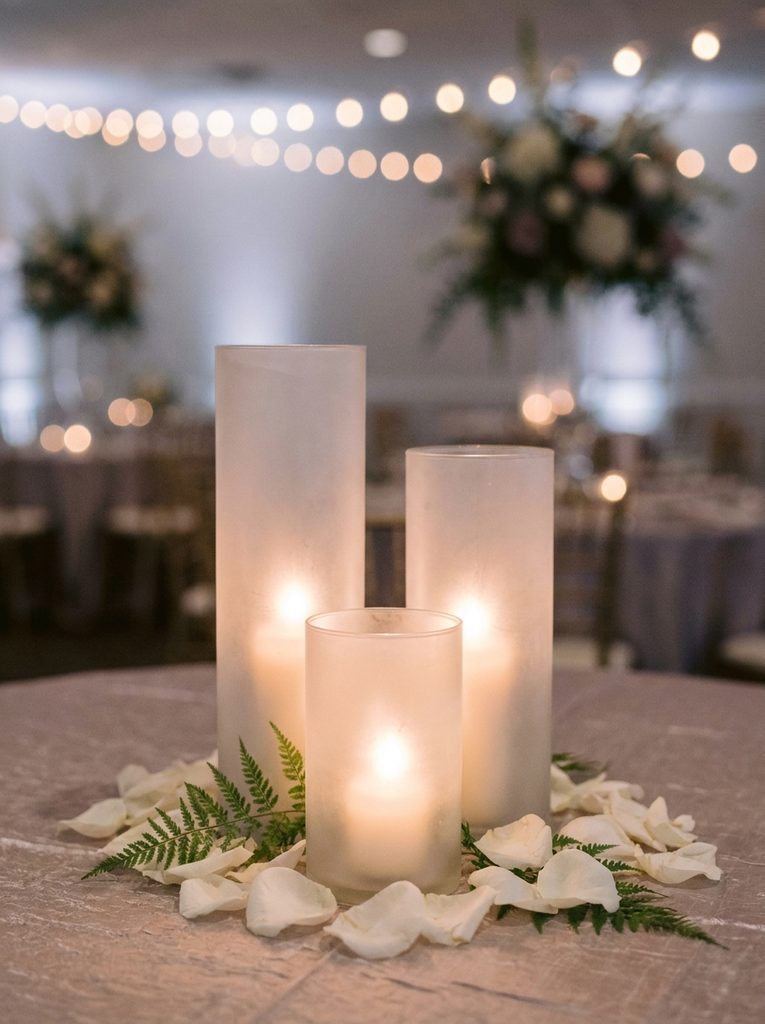
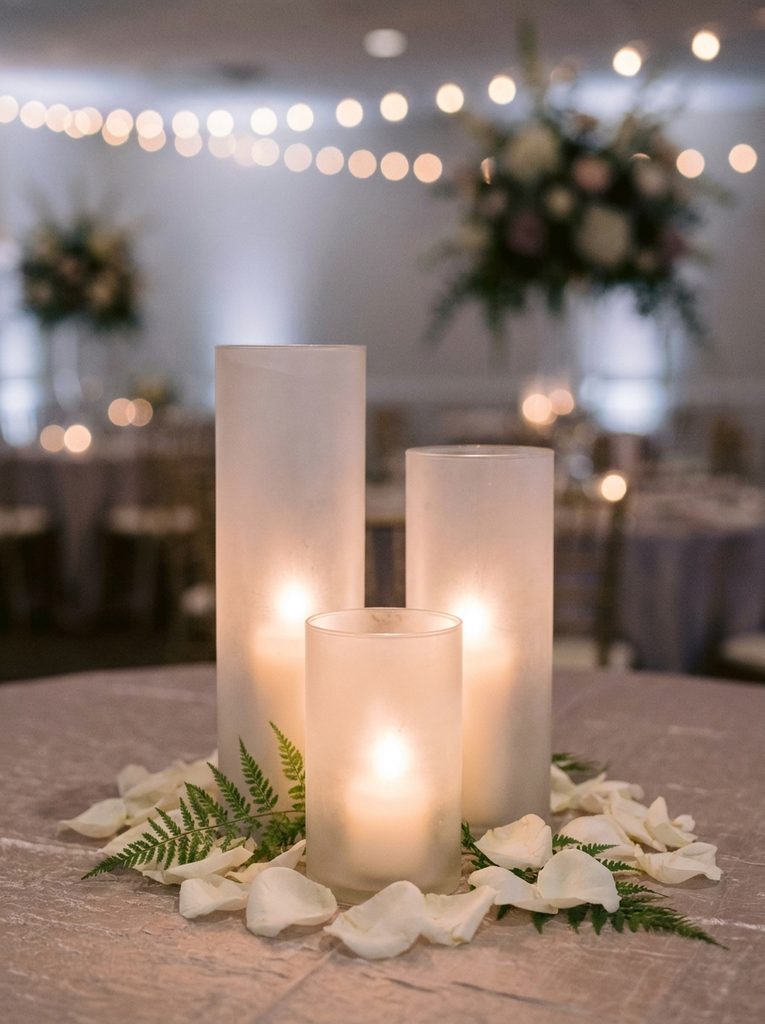
Clustered frosted glass luminaries deliver a soft, diffused candlelit glow that softens sharp table lines and creates an enchanting, dreamy ambiance. By using translucent or semi-opaque frosted glass vessels, the direct glare of the flame is transformed into a wide, uniform emission of warm light. This centerpiece consists of groupings of three to five frosted glass cylinders or jars of varying dimensions, housing steady-burning votive or small pillar candles. The frosted surface conceals melted wax pools and wick remnants, keeping the display neat throughout the entire evening. When accented with minimalist touches like a scattering of loose petals or a simple velvet ribbon around the base, this design achieves an understated, high-end feel. It represents an exceptionally accessible DIY project, as standard clear glassware can be converted into frosted vessels using specialized glass-frosting spray treatments.
Apply two thin, even coats of semi-translucent glass frosting spray to clean glass cylinder vases, allowing twenty minutes of drying time between applications. Once fully cured, bring the frosted cylinders to the venue and cluster them in sets of three at the center of each dining table. Place the largest cylinder in the rear-center position, flanked by the medium and small vessels to create a balanced triangular visual footprint. Drop a clear-cupped, unscented tea light or eight-hour votive candle into the bottom of each frosted cylinder using long craft tweezers. Ensure the candle sits completely flat on the interior base to promote a clean, even melt pool that distributes light symmetrically through the frosted walls. Surround the base cluster with a light dusting of white rose petals or preserved boxwood leaves to soften the connection with the table linen.
Monochromatic White Pillar and Petal Arrays
Execution Process
The monochromatic white pillar candle and floral petal array exemplifies timeless, high-impact elegance through disciplined color selection and dramatic candle repetition. This layout gathers nine to twelve white pillar candles of identical color but diverse heights into a dense, luminous island in the center of the table. Surrounding this sculptural wax core is an abundant, carefully placed border of fresh ivory rose petals that conceals the tabletop and softens the candle perimeters. The uniform color palette focuses attention entirely on the radiant glow and textural variations of the flickering flames. This grand installation style feels luxurious and custom-tailored, making it a standout choice for formal evening celebrations and winter weddings. By eliminating colored elements and complex floral mechanics, this arrangement remains straightforward to replicate across dozens of tables while maintaining consistent quality.
Map out a circular or oval boundary measuring thirty-five centimeters across the center of your table using light pencil marks or visual placement points. Select nine white pillar candles ranging in height from seven to twenty centimeters, grouping the tallest three units in the absolute center. Surround the core pillars with the medium and shorter candles, spacing them approximately two centimeters apart to permit adequate airflow and prevent wax dripping. Affix each candle base to the table surface or an underlying clear acrylic protector plate using heavy-duty floral adhesive dots to guarantee complete stability. Scatter three to four cups of fresh, crisp white rose petals around the perimeter of the candle cluster, building a dense floral border four centimeters wide. Inspect the arrangement to confirm that all flower petals remain securely away from the open wicks and candle edges before lighting.
Common Beginner Mistakes and How to Avoid Them
Amateur event decorators and couples often encounter preventable structural and functional challenges when designing their own candle wedding centerpieces. One common mistake is neglecting reception venue airflow, as open windows, overhead air conditioning vents, or oscillating fans can cause rapid, uneven wax melting and heavy soot production. Always test ambient airflow during your setup walkthrough, and use tall glass hurricane sleeves to shield flames whenever strong drafts are unavoidable. Another frequent error is purchasing scented candles, which can clash with the aroma of the meal and cause discomfort for fragrance-sensitive guests. Strictly utilize high-grade, unscented paraffin or soy candles across all dining tables. Additionally, failing to secure candles properly within their holders often leads to leaning tapers or drifting floating discs, which create fire hazards. Secure every taper with adhesive wax tabs, verify that pillar candles rest on completely flat foundations, and fill floating vessels to consistent levels. Finally, leaving candle assembly to the final hour creates unnecessary stress; assemble non-perishable components weeks in advance, reserving only water pouring and wick lighting for the event day.
Practical Tips for Better Results
Achieving a high-end, professional finish with DIY candle centerpieces requires meticulous attention to scale, reflection, and proper lighting execution. Maintain a strict height ceiling for central elements; tabletop arrangements should either stay below thirty centimeters or rise above sixty centimeters to preserve natural conversation lines across the table. Use long butane utility lighters or specialized lighting tapers to ignite your centerpieces systematically, beginning thirty minutes before reception doors open to ensure steady flame development. When incorporating glass cylinders, always use distilled water rather than standard mineral-heavy tap water to avoid cloudiness, scale lines, and unsightly micro-bubbles on the inner glass surfaces. If your design features exposed taper candles, freeze them in a sealed plastic bag for twelve hours prior to the event; this simple conditioning trick hardens the wax, significantly extending burn time and reducing drip formation. Finally, keep extra candles, replacement floating discs, and clean microfiber cloths organized in an emergency styling kit at the venue, allowing your event coordinator or bridal party to make quick adjustments throughout the reception.
Styling, Presentation, or Organization Ideas
Strategic styling and intentional presentation ensure that your handmade candle centerpieces integrate harmoniously into the broader decorative identity of the wedding reception. Consider the style and color of your table linens; dark navy, charcoal, or forest green tablecloths provide dramatic, high-contrast backdrops that make white wax and clear glass pop with intensity. For lighter, airy aesthetics, pair candle arrangements with textured gauze runners, raw-edge silk ribbons, or natural bleached wood tables. Introduce metallic accents that complement the warm glow of the flames, such as brushed gold cutlery, silver-rimmed charger plates, or delicate mercury glass votive accents clustered around the primary centerpiece. When planning long continuous banquet setups, alternate high and low candle formations to create an undulating rhythm down the length of the room rather than a monotonous straight line. For round tables, maintain radial symmetry by ensuring the centerpiece looks visually balanced from every seated vantage point. Use personalized cardstock table numbers set in minimal brass stands nestled within the greenery or candle groupings to blend functionality with decor.
Budget or Time Planning
Efficient budget allocation and methodical timeline management are critical components of successful do-it-yourself wedding centerpiece planning. Purchase glassware, hurricane sleeves, and basic wax pillars in bulk from wholesale event suppliers rather than retail specialty craft stores to reduce unit costs by up to fifty percent. Formulate a comprehensive master checklist detailing the exact quantities of candles, vessels, adhesive units, and botanical stems needed per table, adding an extra ten percent safety buffer for shipping breakage or assembly loss. Divide the project into distinct, manageable phases: source and clean all glassware three weeks before the event, pack hardware into labeled storage crates by table number fourteen days prior, and prepare fresh botanical elements thirty-six hours before the ceremony. On the morning of the wedding, delegate on-site placement to a designated decorating crew, providing them with a clear master styling photograph of a completed sample table for visual reference. This assembly-line strategy limits on-site labor to under two hours, prevents last-minute venue scrambling, and ensures total design consistency across every reception table.
Creative Expansion and Advanced Inspiration
Once you master the foundational principles of candle tablescapes, explore advanced creative variations that incorporate modern multimedia elements and rich sensory layers. Experiment with tinted translucent glass vessels in rich amber, smokey gray, or sea-glass green to cast colorful, atmospheric shadows across table surfaces. Incorporate subtle culinary herbs, such as fresh sprigs of rosemary, purple basil, or thyme, into the base greenery wreaths to release a delicate, natural herbal aroma when warmed by nearby candlelight. Consider suspended candle concepts, using hanging glass globes containing glowing tea lights suspended from low-hanging ceiling trusses or wooden beams above the dining tables to create an illuminated canopy effect. You can also repurpose these candle centerpieces after the reception concludes by gifting the complete assemblies to key family members, bridal party members, or vendors as lasting tokens of appreciation. Furthermore, high-quality hurricane sleeves, brass holders, and geometric terrariums transition effortlessly into permanent home decor, serving as beautiful, functional keepsakes that bring warmth to your living space for years to come.